Make your first quilt
This curriculum takes a complete beginner from zero quilting knowledge to confidently piecing, quilting, and binding a finished quilt. The three stages build deliberately: first establishing essential vocabulary, tools, and fabric intuition; then tackling the core technical skills of cutting, piecing, and assembling a quilt top; and finally mastering the finishing steps — layering, quilting, and binding — that turn a top into a real, durable quilt.
Foundations: Tools, Fabric & Quilting Literacy
BeginnerUnderstand the language of quilting, set up a functional workspace, choose and prepare fabric, and know what the full quilt-making process looks like before touching a needle.
▸ Study plan for this stage
Pace: 3–4 weeks, ~20–25 pages/day; read chapters sequentially, pausing after each major section (tools, fabric, technique) before moving on. Aim to finish the introductory/basics chapters in Week 1, work through fabric selection and preparation in Week 2, and spend Weeks 3–4 studying the 12 projects as il
- Quilting vocabulary and anatomy: understanding terms like quilt top, batting, backing, binding, seam allowance, selvage, grain line, and block
- Essential tools and their purposes: rotary cutter, self-healing cutting mat, acrylic rulers, sewing machine feet, and pressing equipment
- Fabric selection for beginners: understanding quilting cotton, fabric weight, print scale, color value (light vs. dark), and how to build a cohesive fabric palette
- Fabric preparation: pre-washing (or not), pressing, and squaring up yardage before cutting
- Accurate cutting techniques: using a rotary cutter and ruler to cut strips, squares, and rectangles with consistent seam allowances
- The anatomy of a quilt pattern: reading a pattern's materials list, cutting instructions, block diagrams, and assembly diagrams
- The full quilt-making workflow: design → fabric selection → cutting → piecing → pressing → quilt sandwich assembly → quilting → binding
- Seam allowance discipline: why a consistent ¼-inch seam is foundational to every block fitting together correctly
- What are the three layers of a quilt, and what is the role of each?
- Why does a consistent ¼-inch seam allowance matter, and how do you verify yours is accurate before starting a project?
- What is the difference between the straight grain and the bias of a fabric, and why does cutting on the correct grain matter?
- How do you read a quilt pattern in The Practical Guide to Patchwork — what information does each section (materials, cutting, assembly) give you, and in what order do you use it?
- What factors should a beginner consider when selecting fabrics for a first quilt project, according to Hartman's guidance?
- What does 'squaring up' fabric mean, and at what point(s) in the process do you do it?
- Tool inventory & setup: Gather or list every tool Hartman identifies as essential. Set up a dedicated cutting station with your mat, ruler, and rotary cutter, and practice making straight cuts on scrap fabric until your edges are clean and consistent.
- Seam allowance test: Sew three 2½-inch squares together into a strip, press, and measure. The finished strip should equal 6½ inches. Adjust your machine's needle position or foot until you achieve a true ¼-inch seam — repeat until consistent.
- Fabric pull exercise: Using Hartman's guidance on color value and print scale, pull 6–10 fabrics from a fabric store or your stash. Sort them into light, medium, and dark piles, then evaluate whether they would read as distinct in a quilt block.
- Pattern decoding drill: Choose any one of the 12 projects in the book and, before sewing a single stitch, write out in your own words: (a) the full materials list, (b) every cutting step, and (c) the block assembly sequence. This forces active reading of a real pattern.
- Pressing practice: Cut and sew a simple four-patch block, then practice pressing (not ironing) seams to the dark side as Hartman instructs. Compare a block pressed open vs. pressed to the side and note the difference in bulk at intersections.
- Quilt process map: Draw or write a one-page flowchart of the complete quilt-making process from start to finish, using the vocabulary and steps introduced in The Practical Guide to Patchwork. Pin it above your workspace as a reference for future stages.
Next up: Mastering Hartman's foundational vocabulary, accurate cutting, and the ¼-inch seam in this stage means the next stage — focused on block construction and design — can build directly on a reliable technical baseline, so the reader can concentrate on pattern logic rather than re-learning basic mechanics.
Hartman's clear, modern approach covers fabric selection, color, and the logic of cutting and piecing in a way that prepares beginners to read any pattern intelligently before they start sewing.
Core Skills: Cutting, Piecing & Building a Quilt Top
BeginnerAccurately rotary-cut fabric, sew precise quarter-inch seams, construct fundamental blocks (half-square triangles, nine-patches, etc.), and assemble a complete, flat quilt top.
▸ Study plan for this stage
Pace: 6–8 weeks, roughly 20–25 pages per session, 3–4 sessions per week — allowing extra time to pause, re-read technique sections, and practice each skill at the cutting mat or sewing machine before moving on to the next project chapter.
- Rotary cutting accuracy: using a rotary cutter, self-healing mat, and quilting ruler together to cut precise strips, squares, and shapes from fabric — the foundation of every project in Quilting From Little Things
- Quarter-inch seam allowance: understanding why a consistent ¼" seam is non-negotiable for blocks to fit together, and how Fielke's projects are drafted around this standard
- Fabric selection and pairing: Fielke's signature use of small-scale prints, scraps, and low-volume backgrounds — learning to read her fabric notes and replicate her aesthetic choices intentionally
- Half-square triangles (HSTs): constructing, pressing, and trimming HSTs to size, one of the most recurring units across Fielke's designs
- Nine-patch and simple block construction: sewing units into rows, rows into blocks, and understanding how pressing direction affects seam nesting and block flatness
- Quilt-top assembly: arranging blocks, sewing them into rows with consistent seam direction, and joining rows to produce a flat, square finished top
- Pressing vs. ironing: Fielke's emphasis on pressing seams (not dragging the iron) to preserve block shape and prevent distortion
- Reading a quilt pattern: decoding cutting charts, block diagrams, and assembly illustrations as presented throughout Quilting From Little Things
- After reading Fielke's introductory technique sections, can you explain in your own words why a true quarter-inch seam matters, and describe two ways to test and calibrate your machine's ¼" foot?
- Fielke's projects lean heavily on small scraps and charm-sized pieces — what cutting strategies does she recommend for getting the most usable pieces from irregular fabric remnants?
- How does Fielke instruct you to construct and trim a half-square triangle unit, and what pressing direction does she recommend to reduce bulk at block intersections?
- When assembling a nine-patch or similar block, how should you orient your seam allowances so that rows 'nest' together cleanly — and why does this matter for the finished quilt top lying flat?
- Choose any complete project from Quilting From Little Things: walk through its cutting chart, block construction sequence, and layout diagram — what is the logical order of steps, and where might a beginner make an error?
- Once all blocks are sewn, what checks does Fielke suggest (or demonstrate through her projects) for squaring up and joining rows so the finished top is flat and the corners are true?
- Calibration sample: before starting any project, sew a test ¼" seam on three fabric strips, press, and measure the sewn width. Adjust your needle position or seam guide until the result is exact, then keep this sample pinned to your machine as a reference.
- Rotary-cutting drill: using scraps, practice cutting a variety of shapes called for in Quilting From Little Things — 2½" strips, 2½" squares, and half-square triangle pairs — until your cuts are clean and your ruler placement is instinctive.
- HST mini-sampler: make at least 16 half-square triangle units using the two-at-a-time method Fielke demonstrates. Press and trim every unit to the same size, then lay them out in different orientations to see how the same unit creates different secondary patterns.
- Nine-patch block set: sew a set of four identical nine-patch blocks from coordinating scraps. Focus on pressing seams in alternating directions row-by-row, then check that all four blocks measure identically before moving on.
- Complete one beginner project end-to-end from Quilting From Little Things (a smaller throw or table piece is ideal). Document each stage with a photo — cut pieces, sewn blocks, laid-out top — to build a personal reference log.
- Quilt-top flatness check: after assembling your project top, lay it on a flat floor and check for waviness or 'bubbling.' If it isn't lying flat, identify which seams may be inconsistent and practice the fix (re-pressing or re-sewing) on a spare block.
Next up: Completing a flat, well-constructed quilt top through Quilting From Little Things gives you a finished object ready to be transformed — making the next stage, which covers sandwiching, quilting, and binding, a natural and immediately applicable continuation of the work already in your hands.
Fielke's projects scale up gradually in complexity, letting the learner apply cutting and piecing skills to real, satisfying blocks while reinforcing accuracy habits before moving to a full quilt top.
Finishing: Sandwiching, Quilting & Binding
IntermediateLayer and baste a quilt sandwich, quilt it by hand or machine (straight lines through to simple free-motion), and apply a clean, durable binding to complete a finished, heirloom-quality quilt.
▸ Study plan for this stage
Pace: 6–8 weeks total: Weeks 1–4 cover "Heirloom Machine Quilting" by Harriet Hargrave (~20–25 pages/day, reading chapters alongside machine practice sessions); Weeks 5–7 cover "Hand Quilting with Alex Anderson" by Alex Anderson (~15–20 pages/day, slower pace to allow hand-stitching practice between sessi
- The quilt sandwich: correctly layering and basting backing, batting, and quilt top to eliminate shifting, puckers, and tucks during quilting (foundational to both Hargrave and Anderson)
- Batting selection: understanding loft, fiber content (cotton, wool, polyester, blends), and how each choice affects drape, hand-quilting ease, and machine quilting behavior as detailed by Hargrave
- Machine quilting mechanics: needle, thread, and tension calibration; the role of a walking/even-feed foot for straight-line and stitch-in-the-ditch work, as taught by Hargrave
- Free-motion machine quilting: lowering the feed dogs, using a darning/hopping foot, controlling stitch length through consistent hand speed vs. machine speed, and building simple motifs (stippling, echoing) per Hargrave
- Hand quilting fundamentals per Anderson: the rocking stitch technique, loading multiple stitches on the needle, achieving consistent stitch length on both quilt top and backing
- Thimble use and hand protection: Anderson's guidance on thimble types, finger placement, and building the callus needed for sustained hand quilting
- Marking and design transfer: choosing markers that are visible yet removable, and transferring quilting lines or motifs accurately onto the quilt top before or after sandwiching
- Binding construction and application: cutting straight-grain vs. bias binding, joining strips, attaching by machine to the front, mitering corners, and finishing by hand to the back for a clean, durable edge (covered in Hargrave)
- After reading Hargrave, can you explain how batting loft and fiber content influence the choice between hand and machine quilting, and give two specific examples from the book?
- What are the critical steps Hargrave identifies for achieving a pucker-free quilt sandwich, and how does basting method (pin vs. thread vs. spray) affect the final result?
- How does Hargrave describe setting up a sewing machine — needle type, thread weight, tension, and presser foot — specifically for straight-line and stitch-in-the-ditch machine quilting?
- According to Anderson, what is the rocking stitch, and what physical mechanics (thimble hand, underneath finger, needle angle) must work in concert to produce even, small hand stitches?
- How do Anderson's recommendations for marking and design placement differ from or complement Hargrave's machine-quilting design approach, and when would you choose one over the other?
- What does Hargrave specify about cutting, joining, and attaching binding — including corner mitering — to produce a finish worthy of an heirloom-quality quilt?
- Sandwich & baste sampler (Week 1): Layer a 20"×20" practice sandwich using three different battings (e.g., 100% cotton, 80/20 blend, and polyester) and baste each with a different method (safety pins, thread basting, and basting spray). Compare how each behaves when handled and note findings in a quilting journal.
- Straight-line machine quilting drill (Weeks 2–3, Hargrave): On one of your practice sandwiches, quilt a grid of parallel lines spaced 1" apart using a walking foot, then quilt stitch-in-the-ditch along a simple seam. Evaluate tension, stitch consistency, and any backing puckers; adjust machine settings and repeat until results are clean.
- Free-motion stippling sampler (Week 3–4, Hargrave): Drop the feed dogs, attach a darning foot, and fill a 12"×12" sandwich with continuous stippling. Time yourself for 5-minute intervals, deliberately varying machine speed vs. hand speed to feel how stitch length changes — then find and lock in your ideal rhythm.
- Rocking stitch practice (Weeks 5–6, Anderson): Using a 15"×15" hand-quilting hoop, a pre-marked sandwich, and Anderson's recommended needle/thread/thimble setup, practice the rocking stitch daily for 15–20 minutes. Track your stitch count per inch at the start and end of each week to measure improvement.
- Binding finish exercise (Week 7, Hargrave): Cut and join enough 2.5" straight-grain binding strips to bind a practice sandwich. Attach by machine to the front, miter all four corners following Hargrave's method exactly, then hand-stitch to the back. Photograph both the front corners and the back for self-critique.
- Capstone finishing project (Week 8): Complete a 24"×24" mini quilt from sandwich to bound edge, choosing either hand or machine quilting (or one quadrant each) based on what you want to reinforce most. Use both Hargrave and Anderson as active references during the process, and write a one-page reflection on every decision made.
Next up: Mastering sandwiching, quilting, and binding transforms individual blocks and tops into fully realized quilts, giving the reader the technical confidence and finishing vocabulary needed to tackle more complex quilt designs, larger-scale projects, and advanced design planning in the next stage.
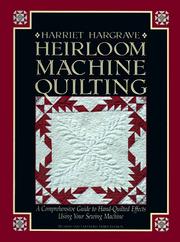
The definitive guide to machine quilting — covers thread tension, walking-foot straight-line quilting, and free-motion work, giving beginners a reliable technical foundation for the quilting step.
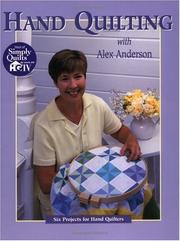
Provides a clear, step-by-step alternative path for those who want to hand-quilt, covering needles, thimbles, stitch length, and finishing — a natural companion to Hargrave's machine focus.
Discussion
Keep reading
Paths that share books, cover the same subject, or open a related topic.