Screen Printing: Best Books in Order
This curriculum takes a beginner from zero knowledge of screen printing all the way through professional-level DIY setups, ink chemistry, and stencil mastery. Each stage builds directly on the last — starting with core concepts and hand-pulled basics, moving into technical ink and emulsion work, and finally tackling business-ready production and advanced specialty techniques.
Foundations: Getting Your Hands Inky
BeginnerUnderstand what screen printing is, how the basic process works, and complete your first simple prints using low-cost DIY setups and basic stencils.
▸ Study plan for this stage
Pace: 4–5 weeks, ~20–25 pages/day with 2–3 printing practice sessions per week
- Screen printing fundamentals: how mesh, emulsion, and light exposure create stencils
- The complete screen printing workflow: design → screen preparation → ink application → curing
- DIY and low-cost setup options for home or studio printing
- Stencil creation methods (photo emulsion, hand-cut, and direct drawing)
- Ink properties, consistency, and how they interact with different fabrics
- Registration and alignment techniques for multi-color prints
- Hand-printing methods and their advantages for small-batch, artisanal work
- Troubleshooting common beginner mistakes (over-inking, poor registration, uneven pressure)
- What are the three essential components of a screen printing setup, and what role does each play?
- Walk through the complete process of creating a screen from a design to a finished print—what are the key steps?
- How do you prepare and expose a screen using photo emulsion, and what does proper exposure look like?
- What are at least three DIY or low-cost alternatives to professional screen printing equipment, and when would you use each?
- How do ink consistency, squeegee pressure, and screen angle affect the final print quality?
- Describe the difference between hand-printing and mechanical printing methods, and what advantages does hand-printing offer for small batches?
- Create a simple hand-cut stencil from paper or vinyl and test it on scrap fabric using a squeegee or card edge to apply ink
- Prepare and expose your first screen using photo emulsion and a basic light source (sunlight or desk lamp), then document the results
- Print a single-color design on at least 3–5 t-shirts or fabric pieces, adjusting pressure and ink consistency between prints to observe differences
- Experiment with two different DIY setups (e.g., a PVC frame vs. an embroidery hoop screen) and compare ease of use, print quality, and cost
- Create a multi-color print using registration marks and separate screens, documenting alignment challenges and solutions
- Keep a printing journal: record ink type, fabric, pressure, exposure time, and results for each print to identify patterns and improvements
Next up: Mastering these foundational techniques and understanding your own printing preferences prepares you to explore advanced methods—such as photo-realistic separations, specialty inks, and scaled production—in the next stage.
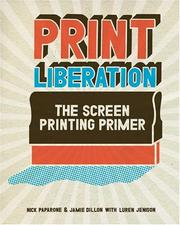
The single best entry point for absolute beginners — it demystifies the entire screen printing process with clear, friendly language, covering stencils, inks, and a bare-bones DIY setup from day one.

Broadens the beginner's eye by covering multiple hand-printing methods including screen printing, helping newcomers understand where screen printing sits among related techniques and building essential vocabulary.
DIY Production: Building Your Own Setup
IntermediateDesign and build a functional home or garage screen printing studio, understand press mechanics, and produce multi-color t-shirt runs efficiently.
▸ Study plan for this stage
Pace: 4–5 weeks, ~25–30 pages/day, with 2–3 hands-on lab sessions per week
- Screen mesh selection, tension, and preparation for different print types and fabric weights
- Emulsion coating, exposure, and washout techniques for creating durable, accurate screens
- Press setup, registration systems, and squeegee pressure/angle for consistent multi-color registration
- Ink chemistry: plastisol vs. water-based inks, cure temperatures, and color mixing for t-shirt applications
- Flash cure and final cure processes to ensure durability and prevent color bleeding in multi-color prints
- Workspace layout, ventilation, and safety protocols for a functional home or garage studio
- Production workflow optimization: setup time, print speed, and quality control for small runs
- Troubleshooting common defects: misregistration, ink bleeding, screen damage, and inconsistent coverage
- What mesh count should you use for different print styles (halftone, discharge, plastisol, water-based), and why does tension matter?
- Walk through the complete screen preparation process from blank mesh to exposure and washout—what are the critical steps and common mistakes?
- How do you set up a multi-color registration system on a manual press, and what tools or techniques ensure consistent alignment across a run?
- What are the key differences between plastisol and water-based inks for home production, and how do cure temperatures affect final print quality?
- Describe a complete production workflow for printing 50 t-shirts in three colors—including setup, flash cure timing, and quality checks.
- What safety and ventilation requirements are essential for a home or garage screen printing studio, and why?
- Build or assemble a simple manual screen printing press (or adapt an existing one) and calibrate registration using test prints on scrap fabric
- Prepare 3–4 screens with different mesh counts and emulsion types; expose and washout each one, documenting exposure times and results
- Design and print a 2-color test run (25–50 shirts) using proper flash cure and registration; measure and document registration accuracy and ink coverage
- Mix and test 2–3 custom ink colors using plastisol base; print samples on different fabric types and document cure results
- Create a workspace layout diagram for your home/garage studio, including ventilation, ink storage, curing area, and safety zones
- Troubleshoot a deliberately misregistered or poorly cured test print; identify the root cause and correct it in a follow-up print
Next up: This stage equips you with the hands-on ability to produce small multi-color runs reliably, setting the foundation for scaling production, managing inventory, and exploring advanced techniques like discharge printing, specialty inks, and design optimization in the next stage.

Fresener is one of the most respected names in the industry; this book is the go-to guide for setting up a real production workflow, covering equipment choices, press registration, and running small batches profitably.
Discussion
Keep reading
Paths that share books, cover the same subject, or open a related topic.