Learn printmaking: from lino to etching
This curriculum takes a complete beginner from the fundamental concepts and vocabulary of printmaking through hands-on mastery of relief, intaglio, and screen printing techniques. Each stage builds on the last — starting with broad orientation and safe, accessible methods, then deepening into more technical processes, and finally reaching professional-level practice and artistic vision.
Foundations: What Printmaking Is
BeginnerUnderstand the major printmaking families (relief, intaglio, screen, lithography), their histories, and the shared vocabulary of the craft — matrix, edition, registration, inking — before touching a tool.
▸ Study plan for this stage
Pace: 6–8 weeks total: Weeks 1–3 cover "Printmaking" by Bill Fick (~20–25 pages/day, reading all introductory and survey chapters carefully); Weeks 4–8 cover "The Complete Printmaker" by Ross & Romano (~25–30 pages/day, reading the historical overviews and process introductions for each family before divi
- The four major printmaking families — relief (woodcut, linocut), intaglio (etching, engraving, aquatint), screen/stencil (silkscreen/serigraphy), and planographic (lithography) — and the defining physical principle of each, as introduced by Fick and elaborated in Ross & Romano
- The matrix: what it is, the materials it can be made from (wood, metal plate, stone, screen), and why it is the conceptual heart of every printmaking process
- Edition vs. unique print: the meaning of a numbered edition (e.g., 3/20), the artist's proof (A/P), and why editioning matters for authenticity and value — covered in both books' introductory sections
- Registration: the method of aligning multiple passes of ink or multiple blocks/screens so that colors and layers land in the correct position relative to one another
- Inking and ink properties: the difference between relief inking (ink sits on raised surfaces), intaglio inking (ink sits in recessed grooves), and planographic inking (ink adheres by chemical affinity), as distinguished in Ross & Romano
- The vocabulary of impression and transfer: terms such as impression, pull, proof, state, and recto/verso as used throughout both books
- Historical lineage: how each printmaking family developed (woodcut in East Asia and medieval Europe, engraving in the Renaissance, lithography in the 19th century, screen printing in the 20th century) per the historical chapters in Ross & Romano
- The shared studio logic: why cleanliness, ink viscosity, paper dampness, and pressure are universal concerns regardless of which printmaking family is being used
- After reading Fick's survey chapters, can you name each of the four printmaking families and state in one sentence the physical principle that makes each one work (what part of the matrix carries the ink)?
- How do Ross & Romano define 'matrix,' and what examples of matrix materials do they give across the different printmaking families?
- What is the difference between an 'edition' and an 'artist's proof,' and why does numbering a print (e.g., 5/30) matter — as explained in either book?
- How does Fick describe registration, and what goes wrong in a print when registration fails? Can you find a visual example in either book that illustrates this?
- According to the historical overview in Ross & Romano, which printmaking process came first historically, and what social or technological conditions drove the development of each subsequent family?
- What vocabulary terms appear in BOTH Fick and Ross & Romano's introductory glossaries or opening chapters? Make a list of at least eight shared terms and write your own definition for each.
- Vocabulary flashcard deck: After finishing Fick, write one flashcard per key term (matrix, edition, state, proof, registration, impression, pull, planographic, intaglio, relief, stencil). On the back, write the definition in your own words AND note which printmaking family it most directly applies to. Review daily while reading Ross & Romano.
- Family comparison chart: Create a four-column table (one column per printmaking family). Using both books as sources, fill in rows for: ink placement on matrix, typical matrix material, approximate historical origin, and one famous artist associated with each. This forces active cross-referencing between Fick's accessible overview and Ross & Romano's deeper historical detail.
- Edition math exercise: Imagine you are editioning a print. Write out what markings you would put on prints numbered 1 through 10 of an edition of 25, plus 3 artist's proofs and 1 printer's proof. Then write two to three sentences explaining — in your own words drawn from the books — why this system exists.
- Visual identification drill: Find 8–10 reproductions of prints online (museum collection websites work well). Without reading the caption, use the visual clues described by Fick and Ross & Romano (line quality, texture, ink behavior) to guess which printmaking family each belongs to. Then check the caption. Record your score and note what visual cues misled you.
- Annotated timeline: Draw a horizontal timeline from 800 CE to 1970 CE. Using the historical chapters in Ross & Romano as your primary source and Fick for supplementary context, place each printmaking family's emergence, one landmark print or artist per family, and one key technological development (e.g., the lithographic stone, the photo-stencil screen) on the timeline.
- Studio observation journal (no tools required): Visit a museum print room, a university printmaking lab, or browse a virtual studio tour online. Using the vocabulary from both books, write one page describing what you observe — name every object you can identify using the correct term from your reading. This primes your eye before any hands-on work begins.
Next up: Mastering the shared vocabulary and the conceptual logic of each printmaking family — how the matrix holds ink and transfers it — gives you the precise mental framework needed to follow technical, step-by-step process instructions in the next stage without getting lost in unfamiliar terminology.

A comprehensive, clearly illustrated survey of every major printmaking technique written specifically for beginners. Reading it first gives you a mental map of the whole field so nothing in later books feels unfamiliar.
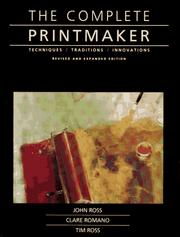
A classic reference that explains the history and logic behind each process in plain language. It reinforces the vocabulary from the first book and introduces the 'why' behind tool choices and studio setups.
Relief Printing: Woodcut & Linocut
BeginnerCut and print your first relief blocks — understand grain, gouge selection, inking rollers, and hand-printing — and produce a small finished edition.
▸ Study plan for this stage
Pace: 6–8 weeks total. Week 1–3: Read "Relief Printmaking" by Ann Westley cover to cover (~20–25 pages/day), pausing at each technique chapter to attempt the described process before moving on. Week 4–6: Read "Linocut for Artists and Designers" by Nick Morley (~15–20 pages/day), treating it as a deepening
- Relief printing logic: the raised surface carries ink, the recessed areas do not — understanding this positive/negative relationship is the foundation of every decision you make on the block
- Wood grain vs. linoleum surface: Westley's coverage of woodcut distinguishes plank grain (side grain) from end grain and explains how each resists or guides the gouge differently; lino offers a grain-free, isotropic surface that Morley exploits for fluid, designer-friendly mark-making
- Gouge and tool selection: matching the V-gouge, U-gouge, and flat chisel to the type of line or texture desired — Westley catalogs these systematically; Morley demonstrates their expressive range in finished design contexts
- Safe and efficient cutting technique: body posture, cutting away from yourself, bench hooks, and controlled pressure — both authors treat this as non-negotiable before any creative work begins
- Inking the block: roller (brayer) selection, ink consistency, and even ink distribution on the slab — Westley details the mechanics; Morley shows how ink film thickness affects tonal quality and edge crispness
- Registration and hand-printing: achieving consistent placement across multiple prints without a press — using kento marks, tape guides, or simple jigs as described in Westley, and the hand-burnishing (baren or spoon) technique covered in both books
- Editioning: numbering, signing, and proofing a small edition (e.g., 1/10 through 10/10) — understanding the difference between a working proof (WP), artist's proof (AP), and the edition proper, as Morley addresses in his professional practice sections
- Design translation: how to convert a sketch or photograph into a block-ready image — considering what will print (raised areas) vs. what will not, mirror/reversal, and tonal reduction, a workflow Morley develops extensively for designers
- After reading Westley, can you explain why cutting with the grain in woodcut produces a different line quality than cutting across it, and how you would plan your design around that behavior?
- What are the practical differences between cutting lino and cutting wood, and in what situations — based on Morley's guidance — would you choose lino over wood for a design project?
- How do you diagnose and fix an uneven ink film on your block before pulling a print? What does Westley say about roller size relative to block size, and why does it matter?
- Describe the step-by-step process of hand-printing a consistent edition of 10 prints without a press: how do you maintain registration, apply even pressure, and know when a print is 'good enough' to number?
- Morley discusses designing specifically for the linocut medium rather than simply copying a drawing onto the block. What are three design decisions he recommends making before you ever pick up a gouge?
- What is the difference between a working proof and a finished edition print, and what are your obligations — ethical and practical — when signing and numbering an edition?
- Tool familiarization sheet (Westley-guided): Before cutting any real design, take a scrap piece of lino and a scrap of soft wood and make a systematic grid of marks — one row per tool (V-gouge narrow, V-gouge wide, U-gouge, flat chisel) — cutting with grain, against grain, and at 45°. Label and keep this as a permanent reference card.
- Value-reduction sketch (Morley-guided): Take a simple photograph or detailed sketch and redraw it three times, each time reducing it to fewer tonal zones (3-tone, 2-tone, then pure black-and-white silhouette). Use the final version as your block design, practicing Morley's principle of designing for the medium rather than copying from it.
- First woodcut proof (Westley project): Using a small piece of plank-grain softwood (approx. 10×15 cm), design and cut a simple image of 2–3 shapes. Ink and hand-print 5 copies using a baren or wooden spoon. Annotate each proof with what changed between pulls.
- First linocut edition (Morley project): Design a bold, graphic image (a single object, letterform, or pattern) on a 15×15 cm lino block. Cut, proof, adjust, and print a finished edition of at least 8 prints. Number, sign, and store them correctly — this is your first real edition.
- Ink consistency test: Mix your relief ink to three different consistencies (stiff, medium, loose) and print the same block at each. Compare edge definition, fill in fine lines, and overall tonal quality. Write a one-paragraph note on what Westley's and Morley's guidance predicts vs. what you actually observed.
- Reduction or reductive experiment: Cut a second small lino block but print it in two passes — print the full block first, then cut away more material and overprint in a second color. This introduces the reduction/elimination concept and prepares you for multi-color work in later stages.
Next up: By completing a hand-printed edition and experimenting with a two-color reduction pass, you have experienced the core limitation of single-block relief printing — color and tonal complexity — which makes the logic and necessity of multi-block, multi-color, and intaglio methods immediately compelling and personally motivated.
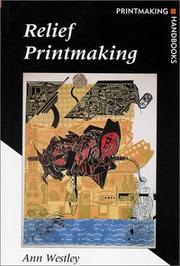
Focuses entirely on relief methods (linocut, woodcut, wood engraving) with step-by-step projects ideal for a first studio session. Its project-based structure means you are making prints from the very first chapter.

Goes deeper into design thinking, multi-block color registration, and reduction linocut — skills you are ready for after Westley's basics. It bridges beginner technique and more considered artistic output.
Artistic Synthesis: Developing Your Own Prints
ExpertMove beyond technique exercises to develop a personal artistic voice — combining processes, designing original imagery, editioning work, and understanding the printmaking tradition you are now part of.
▸ Study plan for this stage
Pace: 6–8 weeks, ~25–35 pages/day — read thematically rather than cover-to-cover: first survey the full book in Week 1 to map its processes, then revisit each major section in depth while working in the studio alongside the reading.
- Personal artistic voice: using The Printmaking Bible's broad survey of techniques (relief, intaglio, lithography, screen printing, collagraphy, monoprint, and digital) as a palette to consciously choose and combine processes that serve your own imagery and ideas
- Process synthesis: understanding how multiple printmaking methods can be layered or hybridized within a single edition — e.g., combining etching with chine-collé, or relief with screen printing — as documented across the technique chapters
- Editioning and proofing discipline: the professional workflow of pulling a consistent, numbered edition — from the artist's proof (AP) and bon à tirer (BAT) proof through to the final signed and numbered prints — as outlined in the book's sections on studio practice
- Original image design: moving from copying exercises to generating imagery that is conceived specifically for the chosen matrix (plate, block, screen, stone), exploiting the inherent qualities of each medium rather than fighting them
- The printmaking tradition and contemporary context: situating your own practice within the historical lineage and contemporary diversity of printmaking as surveyed in the book's introductory and contextual material
- Colour registration and reduction printing: advanced colour strategies — including reduction linocut, multi-block/multi-plate colour, and screen-printing colour separations — covered in the colour-focused sections of The Printmaking Bible
- Studio health, safety, and sustainability: responsible use of chemicals, solvents, and inks as detailed throughout the book's process chapters, now applied with the autonomy of an independent practitioner
- Critical self-evaluation: using the vocabulary and standards established in the book to assess your own proofs, make intentional revisions to the matrix, and know when an edition is ready to be pulled
- After surveying all the processes covered in The Printmaking Bible, which two or three techniques feel most aligned with the imagery and ideas you want to express, and why — what is it about those processes' inherent marks, textures, or surfaces that serves your vision?
- What is the difference between a working proof, an artist's proof (AP), and the bon à tirer (BAT) proof, and what professional and ethical responsibilities come with signing and numbering a limited edition?
- How does The Printmaking Bible describe the process of combining or layering different printmaking techniques, and what technical challenges (registration, ink compatibility, paper choice) must be solved when doing so?
- Drawing on the book's coverage of colour printing, explain at least two distinct strategies for achieving multi-colour results — what are the trade-offs between, for example, a reduction approach versus a multi-block/multi-plate approach?
- How does the historical and contemporary context provided in The Printmaking Bible change the way you think about your own work — what tradition are you entering, and how might your practice contribute something new to it?
- Using the safety and studio-practice guidance in the book, outline the key health and environmental responsibilities an independent printmaker must manage when working with etching acids, screen-printing chemicals, or solvent-based inks.
- Technique mapping exercise: After your Week 1 survey read, create a visual 'process map' — a large sheet listing every technique covered in The Printmaking Bible, annotated with the qualities (mark, texture, tone, colour potential, edition size) each one offers. Circle the two or three that excite you most and write a one-paragraph artistic rationale for each choice.
- Hybrid print project: Design and execute one print that deliberately combines at least two techniques from different chapters of the book (e.g., an etched plate overprinted with a screen-printed flat colour, or a relief block combined with monoprint). Document every decision in a process journal, referencing the relevant sections of The Printmaking Bible as you troubleshoot.
- Full editioning run: Choose one resolved image and pull a complete, professional edition of 10–15 prints — including a BAT proof, at least two APs, and the numbered edition — following the proofing and editioning workflow described in the book. Sign, number, and store them correctly, then critically compare the consistency of the prints.
- Colour strategy comparison: Using the same simple image or design, produce two separate colour prints using two different colour strategies described in The Printmaking Bible (e.g., reduction linocut vs. two-block relief). Write a short comparison of the results: what did each method allow or prevent, and which felt more natural to your artistic intentions?
- Artist statement draft: Write a 300–500 word artist statement that situates your printmaking practice within the historical and contemporary tradition outlined in The Printmaking Bible. Identify at least two printmakers from the book's contextual sections whose work resonates with yours, and articulate clearly what your own work adds or responds to.
- Studio safety audit: Using the health and safety guidance distributed throughout The Printmaking Bible, conduct a written audit of your own studio or workspace — identify every chemical, solvent, or hazardous process you use, confirm you have correct ventilation/PPE/disposal methods in place, and note any gaps to address before your next editioning session.
Next up: Completing this stage — with a finished, signed edition, a hybrid print, and a written artistic statement — gives the reader a coherent body of work and a critical vocabulary that is essential preparation for engaging with professional exhibition, portfolio development, publishing, or advanced community-based printmaking practice.

A thorough studio reference covering every process in one volume — invaluable at this stage as a lookup companion when combining techniques, troubleshooting editions, and refining your independent practice.
Discussion
Keep reading
Paths that share books, cover the same subject, or open a related topic.