Use power tools with confidence
This curriculum takes a complete beginner from zero shop experience to confident, safe, and skilled use of core power tools across four progressive stages. Each stage builds on the last — starting with shop safety and hand-tool literacy, moving through stationary and handheld power tools, then tackling project-based mastery and fine-tuning technique.
Foundations: Safety, Tools & Shop Literacy
BeginnerUnderstand shop safety principles, learn to identify and respect common tools, and build the foundational vocabulary needed to follow any power-tool instruction confidently.
▸ Study plan for this stage
Pace: 4–5 weeks, ~20–25 pages/day — read "The Complete Manual of Woodworking" front-to-back, prioritizing the opening chapters on tools, materials, and workshop setup before moving into techniques; revisit safety callouts and tool descriptions at the start of each session
- Workshop safety rules and personal protective equipment (PPE): eye, ear, and respiratory protection as non-negotiables
- Tool taxonomy: understanding the difference between hand tools and power tools, and how Jackson categorizes each family (saws, planes, chisels, drills, sanders, routers, etc.)
- Anatomy of a tool: learning the named parts of each major tool as presented in Jackson's detailed diagrams so instructions can be followed precisely
- Wood as a material: grain direction, moisture content, and how wood movement affects both safety and technique
- Reading a workshop layout: bench placement, lighting, dust extraction, and safe traffic flow around machinery
- Foundational woodworking vocabulary: kerf, fence, grain, dado, rabbet, mortise, tenon, bevel, chamfer — terms Jackson uses throughout the manual
- Blade and bit safety: guarding, kickback prevention, feed direction, and when to stop a cut
- Measuring and marking literacy: reading a tape measure, marking gauge, combination square, and understanding tolerances
- What PPE is required before operating each major category of power tool covered in The Complete Manual of Woodworking, and why does each piece matter?
- How does Albert Jackson distinguish between rip cuts and crosscuts, and which tool setups does he recommend for each?
- What is kickback, what conditions cause it, and what three actions does Jackson describe to prevent it?
- Name the major parts of a circular saw, router, and power drill as labeled in Jackson's diagrams — what does each part do?
- How does wood grain direction influence the safe feed direction when using a router or hand plane, according to the manual?
- What workshop layout principles does Jackson recommend to keep the work area safe and efficient?
- Tool identification walk-through: After reading each tool chapter, close the book and sketch the tool from memory, labeling every named part. Check your sketch against Jackson's diagrams and repeat until all parts are correctly named.
- Safety audit: Using Jackson's workshop-setup guidance as a checklist, evaluate a real or photographed workshop space — identify at least five safety hazards and write one corrective action for each.
- Vocabulary flashcards: Create a two-sided flashcard for every bolded or defined term encountered in The Complete Manual of Woodworking. Quiz yourself daily; retire a card only when you can define the term AND use it correctly in a sentence about a tool or technique.
- Dry-run tool handling: With tools unplugged/unloaded, practice the grip, stance, and guard-check routine Jackson describes for at least three power tools (e.g., circular saw, router, power drill). Narrate each step aloud to reinforce the sequence.
- Grain-direction exercise: Obtain three scrap boards with visible grain. Using only a hand plane or chisel (no power), practice cutting with and against the grain in each direction, then record what Jackson's manual predicts vs. what you observe.
- Reading-comprehension log: After each reading session, write 3–5 sentences summarizing what you read in your own words, plus one question the text raised that you will look up in a later chapter — this builds the habit of active reading that all subsequent stages require.
Next up: Mastering the safety principles, tool anatomy, and workshop vocabulary in this stage gives the reader the confident baseline language and risk awareness needed to follow step-by-step joinery and project-build instructions in more technique-focused stages without stopping to decode terminology or second-guess safe practice.

A comprehensive visual reference covering every hand and power tool with clear diagrams — perfect first read to build vocabulary and understand what each tool does before touching one.
Stationary Power Tools: Table Saw, Band Saw & More
IntermediateUnderstand the setup, adjustment, safe operation, and core techniques for stationary shop tools, especially the table saw — the most powerful and most dangerous tool in the shop.
▸ Study plan for this stage
Pace: 10–13 weeks total: ~3–4 weeks for "The Table Saw Book" (~25 pages/day), ~3 weeks for "The Bandsaw Book" (~20 pages/day), and ~3–4 weeks for "Router Magic" (~20–25 pages/day). Aim for 5 reading days per week, leaving 2 days for hands-on shop practice tied to each book.
- Table saw anatomy and blade mechanics: understanding arbor, fence, miter gauge, blade guards, riving knives, and anti-kickback pawls as covered in Mehler's 'The Table Saw Book'
- Kickback prevention and table saw safety: recognizing the conditions that cause kickback, proper body positioning, featherboards, push sticks, and blade height discipline (Mehler)
- Core table saw operations: ripping, crosscutting, dadoing, rabbeting, beveling, and tapering — setup procedures and technique for each (Mehler)
- Table saw tuning and alignment: squaring the blade to the table, aligning the fence parallel to the blade, and calibrating the miter gauge — the foundation of accurate, safe cuts (Mehler)
- Band saw anatomy, blade selection, and tensioning: understanding blade TPI, width, set, and how to properly tension and track a blade for different cuts (Bird's 'The Bandsaw Book')
- Band saw cutting techniques: resawing thick stock, cutting curves, pattern sawing, and making compound cuts — and how feed rate and blade choice affect each (Bird)
- Router fundamentals and bit geometry: understanding shank sizes, bearing-guided vs. non-bearing bits, climb cutting, and why router direction relative to grain matters (Hylton's 'Router Magic')
- Router jigs, fences, and templates: how Hylton's shop-made jigs unlock repeatable joinery — dadoes, rabbets, mortises, dovetails — that complement and extend table saw and band saw work
- According to Mehler, what are the three most common causes of table saw kickback, and what specific setup and technique choices does he recommend to eliminate each one?
- How does Mehler recommend setting up and verifying fence-to-blade parallelism, and why is even a small misalignment dangerous during a rip cut?
- Lonnie Bird identifies blade width as the single most important blade selection variable for band saw work — what does he say governs the minimum radius a given blade width can cut, and how should you use that information when planning a curved cut?
- What does Bird recommend as the correct procedure for tensioning and tracking a new band saw blade, and how do you know when tension is correct without a tension gauge?
- Hylton explains that a router bit must be fed in a specific direction relative to the workpiece to cut safely and cleanly — what is that rule, what happens when you violate it (climb cutting), and when, if ever, does Hylton say a controlled climb cut is acceptable?
- How does Hylton's approach to shop-made router jigs and templates change the precision ceiling of hand-held routing, and which joinery operations does he demonstrate that would otherwise require dedicated stationary machinery?
- Safety audit before cutting: Before making any table saw cut, run through Mehler's pre-cut checklist — blade height (1/8" above stock), fence alignment verified, guard/riving knife in place, push stick within reach. Do this as a ritual for every session until it is automatic.
- Rip and crosscut accuracy drill (Mehler): Mill four pieces of scrap to identical width by ripping with the fence, then crosscut all four to identical length using the miter gauge. Measure all pieces with calipers; target ±0.5 mm consistency. Adjust fence or miter gauge and repeat until you hit the target.
- Table saw tune-up session (Mehler): Using the alignment procedures in 'The Table Saw Book,' check and correct (1) blade-to-miter-slot parallelism, (2) fence-to-blade parallelism, and (3) blade square to table. Document your measurements before and after.
- Band saw blade change and resaw exercise (Bird): Install a fresh 3 TPI, 1/2" resaw blade following Bird's tensioning and tracking procedure. Resaw a 6"–8" wide board of at least 6/4 stock into two bookmatched panels. Evaluate the cut surface for drift, waviness, and blade marks — adjust fence angle if drift is present.
- Curved band saw pattern work (Bird): Draw a flowing S-curve template on 1/4" plywood, cut it on the band saw, then use it as a pattern to produce three identical curved parts from solid wood. Focus on consistent feed pressure and not forcing the blade through tight radii.
- Router dado and rabbet jig build (Hylton): Following Hylton's jig-making principles in 'Router Magic,' build a simple shop-made straightedge guide and use it with a straight bit to cut a series of stopped dadoes and rabbets in scrap. Test-fit a shelf or panel in each dado; aim for a snug slip fit with no slop.
Next up: Mastering stationary tool setup and technique — precise rips, resawn panels, and routed joinery — builds the dimensional accuracy and joinery vocabulary needed to move confidently into hand tools and bench work, where those same surfaces must be refined, fitted, and assembled.

The definitive beginner-to-intermediate guide on the table saw, covering blade selection, fence use, jigs, and safety — the table saw demands its own dedicated study before use.

Covers the band saw with the same depth Mehler gives the table saw, rounding out the learner's stationary-tool knowledge with a tool that complements and often safely replaces the table saw for curved cuts.

The router is the most versatile stationary/handheld hybrid tool; this book covers bits, fences, templates, and tables, completing the core stationary-tool picture.
Project-Based Mastery: Putting It All Together
IntermediateConsolidate all power-tool skills by working through real projects that require selecting, combining, and sequencing multiple tools — building true shop competence and problem-solving instinct.
▸ Study plan for this stage
Pace: 8–10 weeks total: Weeks 1–6 cover "The Complete Book of Woodworking" by Tom Carpenter (~25–30 pages/day, reading project chapters alongside active shop time); Weeks 7–10 cover "Measure Twice, Cut Once" by Jim Tolpin (~20 pages/day with a strong emphasis on pausing to apply measurement and layout tec
- Project sequencing: understanding the logical order of operations — milling, joinery, assembly, finishing — as demonstrated through Carpenter's full project walkthroughs
- Tool selection logic: choosing the right power tool for each stage of a project based on material, grain direction, tolerances, and desired outcome
- Combining tools in workflow: how the table saw, router, drill press, jigsaw, and sander work as a system rather than in isolation, as illustrated in Carpenter's multi-tool projects
- Reading and interpreting plans: using Carpenter's project drawings to translate 2D plans into a sequenced 3D build
- Precision measurement and layout: Tolpin's core principle that accuracy begins before any tool is switched on — mastering story poles, marking gauges, and reference surfaces
- The 'measure twice' mindset: Tolpin's framework for eliminating cumulative error by using direct comparison, part-to-part transfer, and avoiding reliance on tape-measure arithmetic
- Problem-solving instinct: diagnosing why a cut, joint, or fit is off and knowing which adjustment — tool setting, technique, or sequence — corrects it
- Shop safety as a project variable: integrating blade guards, push sticks, featherboards, and dust collection into project planning, not as afterthoughts
- After reading Carpenter's project chapters, can you write out the full sequence of power-tool operations for a given project before touching a single machine?
- How does Tolpin distinguish between 'measuring' and 'marking,' and why does he argue that reducing reliance on numbers improves accuracy?
- Given a project plan from Carpenter, which tool would you use at each stage and what setting or bit/blade would you select — and can you justify each choice?
- What are the most common sources of cumulative measurement error that Tolpin identifies, and what specific techniques does he prescribe to eliminate them?
- How do Carpenter's finishing sequences (sanding grits, grain raising, sealing) depend on the power tools used earlier in the build, and what happens if earlier steps are skipped or rushed?
- Using both books together: if a project joint doesn't fit, how would you use Tolpin's measurement principles to diagnose whether the error is in layout, tool setup, or sequence?
- Full project dry-run: Choose one complete project from Carpenter, write a step-by-step operation sheet listing every power tool, blade/bit, and setting before cutting anything — then build it and annotate where your plan needed revision.
- Story pole exercise (Tolpin): For the same Carpenter project, create a story pole instead of using a tape measure for all length transfers; compare your final part fit to a previous project where you used a tape measure.
- Tool-transition drill: Build a simple box or frame that deliberately requires at least four different power tools (e.g., table saw, router, drill press, random-orbit sander); focus on the handoff moment between each tool and document any fit or finish issues at each transition.
- Error diagnosis log: Intentionally make one slightly out-of-square cut, then use Tolpin's reference-surface and direct-comparison methods to find and measure the error without a tape measure — then correct your setup and recut.
- Measurement audit: Take a completed project and re-measure every part using Tolpin's part-to-part transfer method; record any discrepancies from your original dimensions and identify which step introduced the drift.
- Capstone build: Select a second, more complex project from Carpenter (one with joinery such as dadoes, rabbets, or mortise-and-tenon), apply Tolpin's full layout system from the start, and keep a build journal noting every tool decision, measurement method, and problem solved along the way.
Next up: Completing real projects with Carpenter's guidance while internalizing Tolpin's precision mindset transforms isolated tool skills into integrated shop judgment — the exact foundation needed to tackle advanced joinery, furniture-grade tolerances, or specialty power tools at the next level of the curriculum.

Presents a wide range of projects with explicit tool sequences and techniques, forcing the learner to make real decisions about which power tool to use and when — the best way to cement skill.
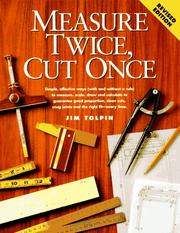
Focuses on precision layout and measurement — the cognitive skill that separates a competent power-tool user from a frustrated one — and pairs perfectly with project work at this stage.
Discussion
Keep reading
Paths that share books, cover the same subject, or open a related topic.