Best Books on Wire Wrapping Jewelry, in Order
This curriculum takes a beginner from zero knowledge of wire wrapping all the way to designing and finishing complex, stone-set jewelry pieces. Each stage builds directly on the last — starting with tools and fundamental technique vocabulary, moving through core wraps and coils, then advancing into stone-setting and full composition design.
Foundations: Tools, Wire & First Wraps
BeginnerUnderstand wire gauges, essential tools, and safely execute the most fundamental wire wrapping and coiling techniques.
▸ Study plan for this stage
Pace: 4–5 weeks, ~15–20 pages/day with daily practice sessions
- Wire gauge systems (AWG) and how gauge affects jewelry design and structural integrity
- Essential hand tools: wire cutters, pliers (chain-nose, round-nose, flat-nose), and their specific functions
- Wire material properties: hardness (dead soft, half-hard, hard), composition (copper, sterling, gold-filled), and how they behave when wrapped
- Basic coiling techniques: tight coils, loose coils, and spiral coils as foundational building blocks
- Fundamental wire wrapping: simple loops, wrapped loops, and eye pins for creating connections
- Safe handling and tool maintenance to prevent injury and extend tool life
- How to read and interpret wire wrapping diagrams and project instructions from Denise Peck's demonstrations
- What is wire gauge and how does the AWG system work? How do different gauges affect the strength and appearance of your finished pieces?
- What are the three essential pliers for wire wrapping, and what is the specific function of each?
- What is the difference between dead soft, half-hard, and hard wire, and when would you use each in a jewelry project?
- How do you execute a simple loop and a wrapped loop, and why is the wrapped loop more secure?
- What safety precautions should you take when cutting wire and using hand tools?
- How do you create a tight coil versus a loose coil, and what visual or structural effect does each produce?
- Practice cutting wire cleanly with wire cutters at different gauges; examine the cut ends and note how gauge affects the effort required
- Create 20 simple loops in succession using round-nose pliers with 20-gauge wire until your loops are consistent in size and shape
- Create 20 wrapped loops using 20-gauge wire, focusing on neat, even wraps around the stem
- Coil 18-gauge wire tightly around a dowel or mandrel, then practice loose coils with the same wire to compare the visual difference
- Make a practice sampler: one piece featuring 3–4 different wire gauges side by side so you can see and feel the tactile difference
- Follow one complete beginner project from Wire Style that uses simple loops and coils; photograph your work and compare it to the book's example
Next up: This stage equips you with tool proficiency and wire fundamentals so you can confidently move into creating multi-component designs that layer wraps, combine different gauges, and build more complex structural elements.

Builds directly on tool knowledge by walking beginners through 50 wire projects that reinforce coiling, looping, and wrapping fundamentals with clear step-by-step photography.
Core Techniques: Wraps, Coils & Connections
BeginnerMaster the essential wrapping and coiling repertoire — including wrapped loops, spiral coils, and wire weaving — that forms the backbone of all wire jewelry.
▸ Study plan for this stage
Pace: 4–5 weeks, ~20–25 pages/day with daily practice sessions
- Wrapped loop construction and variations (simple, double, and offset wraps)
- Spiral coil techniques and their applications in jewelry design
- Wire gauge selection and its impact on structural integrity and aesthetics
- Fundamental wire weaving patterns and their foundational role in complex designs
- Proper tool use and hand positioning for consistent, repeatable wraps
- Tension control and how it affects the quality and durability of connections
- Integration of wraps and coils into functional jewelry components (earrings, pendants, connectors)
- What are the key differences between a simple wrapped loop, a double wrapped loop, and an offset wrapped loop, and when would you use each?
- How does wire gauge affect both the difficulty of wrapping and the final appearance of your jewelry piece?
- Describe the step-by-step process for creating a tight, consistent spiral coil and explain why tension matters at each stage.
- What is the relationship between proper hand positioning and the ability to create repeatable, high-quality wraps?
- How do wrapped loops and coils function as connectors in a finished piece, and what makes a connection durable?
- What are at least three different wire weaving patterns introduced in McIntosh's work, and how do they differ in structure and application?
- Practice 50 simple wrapped loops in succession, focusing on consistency in size and tightness; photograph your best and worst to identify improvement areas
- Create a spiral coil sampler using 3–4 different wire gauges, noting how gauge affects coil tightness and appearance
- Construct a practice pendant using at least one wrapped loop connection and one spiral coil element; wear or gift it to reinforce the functional purpose
- Perform a tension-control drill: create 10 wrapped loops while deliberately varying tension (loose, medium, tight) to viscerally understand its impact
- Replicate at least two different wire weaving patterns from McIntosh's demonstrations on scrap wire before attempting them in a finished piece
- Design and execute a simple pair of earrings that incorporates both a wrapped loop and a coil element, applying all core techniques in one cohesive project
Next up: This stage equips you with the fundamental wrapping, coiling, and weaving skills that are the building blocks for more advanced techniques—such as wire-wrapped stone settings, complex multi-wire designs, and sculptural wire work—that you'll encounter in the next stage.
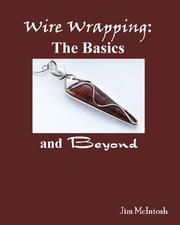
A highly regarded technique manual that methodically covers wrapped loops, coils, and wire connections in a logical order, making it the ideal second step after basic tool familiarity.
Setting Stones Without Solder
IntermediateLearn to select, seat, and securely set cabochons, tumbled stones, and faceted gems using wire alone — no torch or solder required.
▸ Study plan for this stage
Pace: 2–3 weeks, ~20–25 pages/day, with 2–3 practice sessions per week
- Selecting appropriate stone types (cabochons, tumbled stones, faceted gems) and understanding their properties for wire-wrapping suitability
- Measuring and calculating wire gauge, length, and coil dimensions needed to securely seat stones without solder
- Creating stable wire bases and bezels using techniques like coiling, spiraling, and wrapping to form stone seats
- Seating stones properly to ensure they sit flush and secure while allowing for natural stone movement
- Finishing and securing wrapped stones with wire techniques that prevent slipping or rotation
- Designing aesthetically pleasing settings that complement stone shape, color, and natural features
- Troubleshooting common issues: loose stones, uneven seating, wire breakage, and aesthetic imbalance
- What are the key differences between cabochons, tumbled stones, and faceted gems in terms of wire-wrapping requirements, and how do you select which type to use for a given project?
- How do you measure a stone and calculate the wire gauge and length needed to create a secure bezel or seat without using solder?
- Describe the step-by-step process for creating a wire base that will hold a cabochon or tumbled stone securely in place
- What finishing techniques does Heidi Boyd recommend to prevent a wrapped stone from rotating or slipping after completion?
- How do you adapt your wrapping technique when working with faceted gems versus smooth cabochons, and why does the stone shape matter?
- What are three common mistakes when setting stones without solder, and how do you prevent or fix each one?
- Select 3–5 stones of different types (at least one cabochon, one tumbled stone, one faceted gem) and measure each one; calculate the wire gauge and approximate length needed for each based on Boyd's guidelines
- Practice creating 5 simple wire coils and spirals on scrap wire, focusing on consistency and tightness; aim for coils that could serve as stable bases for stones
- Wrap and seat a cabochon using Boyd's recommended technique; photograph the result and assess whether the stone sits flush and secure without any visible gaps
- Wrap a tumbled stone and a faceted gem using the same base technique, then compare the results; note differences in how each stone type sits and what adjustments were needed
- Create a complete wrapped stone pendant or component following a specific project from 'Wired Beautiful'; focus on finishing techniques that prevent the stone from moving
- Intentionally create a loose or poorly seated stone, then practice the troubleshooting and re-wrapping techniques to fix it; document what went wrong and how you corrected it
Next up: Mastering solderless stone setting with wire alone builds the foundational skills and confidence needed to progress to more advanced techniques—such as combining wire-wrapped stones with mixed-media components, creating multi-stone assemblies, or exploring decorative wire-wrapping finishes that enhance and personalize each piece.

Focuses specifically on wire-wrapped stone settings and bezels, teaching the reader how to cage and secure stones of different shapes — a natural bridge from pure wire technique to stone work.
Designing Finished Pieces
ExpertSynthesize all prior skills into cohesive, finished jewelry designs — developing an eye for composition, proportion, and personal style in wire-wrapped pieces.
▸ Study plan for this stage
Pace: 4–5 weeks, ~25–30 pages/day with design sketching and prototype work integrated throughout
- Design principles for wire jewelry: balance, proportion, focal points, and visual hierarchy in finished pieces
- Color theory and metal selection: how wire gauge, finish, and patina choices affect overall composition
- Composition techniques: layering, asymmetry, and rhythm to create cohesive designs that showcase wire-wrapping skills
- Personal style development: identifying design preferences and creating a signature aesthetic across multiple pieces
- Translating sketches to finished pieces: bridging the gap between concept and execution with intentional design choices
- Finishing techniques: how polishing, oxidizing, and setting stones elevate wire-wrapped designs to professional quality
- How do you apply balance and proportion to create a visually compelling wire-wrapped pendant or brooch?
- What role does color theory and metal selection play in the overall impact of a finished wire jewelry piece?
- How can you develop and refine your personal design style through intentional composition choices?
- What finishing techniques transform a functional wire wrap into a polished, professional-quality piece?
- How do you translate a design sketch into a finished piece while maintaining compositional integrity?
- What strategies help you create cohesion across a collection of wire-wrapped designs?
- Complete 5–7 design sketches exploring different composition approaches (symmetrical, asymmetrical, focal-point-driven) before wrapping any wire
- Create three finished pieces using the same wire-wrapping technique but varying color, gauge, and metal finish to observe how material choices affect design impact
- Design and execute a small collection (4–6 pieces) with a unifying theme or aesthetic to develop and showcase your personal style
- Practice translating one detailed design sketch into a finished piece, documenting decisions about proportion, focal points, and finishing techniques
- Experiment with at least three different finishing methods (polishing, oxidizing, stone setting) on practice pieces to understand their visual effects
- Critique your own finished pieces using design principles (balance, proportion, hierarchy, rhythm) and revise one piece based on your analysis
Next up: Understanding how to synthesize composition, material choice, and finishing techniques into cohesive designs positions you to explore advanced topics like scaling designs for different markets, creating custom commissions, or developing a signature collection with professional presentation standards.

Sharilyn Miller is one of the most respected names in wire jewelry; this book teaches design thinking and compositional decisions that turn technique exercises into finished, sellable art.
Discussion
Keep reading
Paths that share books, cover the same subject, or open a related topic.