Make jewelry you'd actually wear
This curriculum takes a complete beginner from zero to confident in wirework, basic metalsmithing, and stone setting across three tightly sequenced stages. Each stage builds on the last — first establishing hand skills and tool literacy with wire, then introducing metal fabrication and bench techniques, and finally tackling the precision craft of setting stones securely and beautifully.
Foundations: Tools, Wire & First Techniques
BeginnerUnderstand jewelry-making tools and safety, develop hand coordination, and complete foundational wirework projects (loops, coils, wraps, simple links).
▸ Study plan for this stage
Pace: 6–8 weeks total: Weeks 1–3 cover "The Complete Metalsmith" by Tim McCreight (~20–25 pages/day, focusing on tool identification, safety, and metal properties chapters); Weeks 4–8 cover "The Art of Jewelry Making" by Alan Revere (~15–20 pages/day, working slowly through each demonstrated technique wit
- Tool identification and proper use: McCreight's categorized breakdown of hand tools (files, pliers, hammers, mandrels) and their specific jewelry-making roles
- Bench safety and studio habits: safe handling of sharp tools, proper posture, and workspace organization as introduced in McCreight
- Metal properties and wire gauges: understanding hardness (dead-soft, half-hard, full-hard), temper, and how gauge (AWG) affects workability, as covered in McCreight's materials sections
- The anatomy of a loop: forming consistent simple loops and wrapped loops using round-nose pliers, a core skill demonstrated step-by-step in Revere
- Coiling and wire wrapping: creating uniform coils on a mandrel and executing neat wire wraps as foundational decorative and structural techniques in Revere
- Simple link construction: making and connecting jump rings and basic chain links, bridging the gap between individual components and assembled pieces per Revere's projects
- Reading and following technical diagrams: both McCreight and Revere rely heavily on illustrated steps; learning to translate 2D diagrams into 3D bench actions is itself a key skill
- Developing hand coordination and muscle memory: understanding that consistency in loops, coils, and wraps comes from repetition, not just knowledge — a theme reinforced across both books
- After reading McCreight, can you name at least six essential bench tools, describe what each does, and explain when you would choose one over another?
- What do wire temper and gauge mean, and how would you select the right wire (temper and AWG) for a wrapped loop versus a structural jump ring, based on McCreight's materials guidance?
- Following Revere's step-by-step demonstrations, what is the difference in process and final appearance between a simple loop and a wrapped loop, and when is each appropriate?
- How do you form a consistent jump ring using a mandrel and wire, and what determines whether the ring is suitable for use in a chain link, as shown in Revere?
- What safety practices does McCreight emphasize for a beginner's studio, and how would you apply them when setting up a home bench for the projects in Revere?
- After completing Revere's foundational projects, can you describe the sequence of steps for a basic wire-wrapped link bracelet from raw wire to finished clasp?
- Tool familiarity drill (McCreight): Lay out every tool you own, match each to McCreight's descriptions, and write a one-sentence 'use case' card for each — keep these at your bench as a reference.
- Wire sampler board (McCreight + Revere): Cut 6-inch lengths of the same wire in dead-soft, half-hard, and full-hard (or in 3 different gauges: 20, 22, 26 AWG); attempt the same simple loop on each and glue them to cardstock, noting how temper and gauge changed the experience.
- Loop consistency challenge (Revere): Make 20 simple loops and 20 wrapped loops in 22-gauge copper wire; line them up and self-critique for uniform size and tight wraps — repeat until a full row looks visually identical.
- Jump ring production run (Revere): Coil wire around a 5mm mandrel to produce at least 50 jump rings, then practice opening and closing them with two pairs of pliers using only a lateral (not outward) motion until the join is seamless.
- First linked project (Revere): Following Revere's chain or bracelet project, build a 6-inch length of a simple wire-link chain using only the loops and jump rings made in the previous exercises — photograph each stage to track progress.
- Safety and setup audit: Using McCreight's safety guidelines as a checklist, audit your workspace and correct at least three setup issues (lighting, tool storage, seating height); document before-and-after photos to reinforce the habit.
Next up: Mastering the hand coordination, tool literacy, and wire vocabulary built across McCreight and Revere gives the reader a reliable technical foundation — consistent loops, coils, and links — that is the prerequisite "vocabulary" for moving into more complex metalsmithing operations such as sawing, soldering, and stone setting in the next stage.
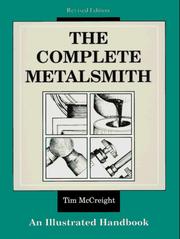
The single most trusted beginner reference in jewelry making — covers tools, materials, safety, and core bench vocabulary. Reading this first gives you the language and mental map for everything that follows.
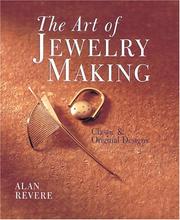
Revere's clear step-by-step photography and explanations bridge the gap between wire play and true bench work, reinforcing tool use and introducing forming techniques that prepare you for metalsmithing.
Metalsmithing Basics: Fabrication & Forming
BeginnerWork confidently with sheet metal and wire stock — sawing, filing, soldering, annealing, and forming simple bezels and findings at the bench.
▸ Study plan for this stage
Pace: 10–12 weeks total, reading roughly 20–25 pages per session, 4–5 sessions per week. Week 1–4: McCreight's "Jewelry" (read cover-to-cover as your foundational reference, revisiting tool and technique chapters at the bench). Week 5–7: Haab's "Metal Clay and Mixed Media Jewelry" (read alongside active b
- Bench setup and tool literacy: understanding the purpose of every core hand tool (saw frame, files, flex shaft, mandrels, burnishers) as introduced in McCreight's 'Jewelry'
- Metal properties and preparation: gauges, temper states (hard/half-hard/dead soft), and why annealing restores workability — covered foundationally in McCreight and deepened in Finegold's 'Silversmithing'
- Sawing and piercing: proper blade selection and tensioning, body mechanics, and cutting curves vs. straight lines per McCreight's technique chapters
- Filing and finishing progressions: moving through cut grades (bastard → second-cut → needle files) and abrasive grits to achieve clean, flat, or contoured surfaces as detailed in Finegold's 'Silversmithing'
- Soldering fundamentals: understanding solder flow grades (hard/medium/easy), flux application, heat control, and sweat vs. pick soldering — a core thread running through both McCreight and Finegold
- Bezel construction: fabricating a fine-silver or sterling bezel strip, fitting it to a stone, and setting with a burnisher or bezel pusher, as demonstrated in McCreight's 'Jewelry' and reinforced in Haab's mixed-media projects
- Forming and forging: using dapping blocks, mandrels, and hammers to shape flat sheet into domed or curved forms, as covered in Finegold's 'Silversmithing'
- Metal clay as a complementary fabrication path: understanding how PMC/Art Clay Silver behaves during drying, firing, and finishing, and how Haab's 'Metal Clay and Mixed Media Jewelry' integrates it with traditional findings and wire work
- After reading McCreight's 'Jewelry,' can you name the correct saw-blade size for 20-gauge sterling sheet and explain how to tension it properly in the frame?
- What is the difference between hard, medium, and easy solder, and in what order should they be used when making multiple solder joins on a single piece — as explained across McCreight and Finegold?
- How does Haab's 'Metal Clay and Mixed Media Jewelry' describe the shrinkage rate of metal clay during firing, and why does this matter when sizing a ring or fitting a bezel stone?
- According to Finegold's 'Silversmithing,' what visual and tactile cues tell you that a piece of sterling has been fully annealed, and what mistakes cause over-annealing or fire scale?
- How would you fabricate a simple tube-set or bezel-set pendant from start to finish using only the techniques described in McCreight's 'Jewelry' and Finegold's 'Silversmithing'?
- In what ways does Haab's mixed-media approach challenge or complement the purely fabricated metalsmithing workflow described by McCreight and Finegold — what are the trade-offs in strength, surface detail, and production time?
- Saw & file sampler (McCreight): Cut 6 shapes from 20-gauge copper sheet — 2 straight-edged, 2 curved, 2 with interior pierced voids — then file all edges to a smooth, burr-free finish using the progression McCreight describes. Evaluate each cut under a loupe.
- Solder ladder drill (McCreight + Finegold): On a strip of copper, practice 5 solder joins in a row using hard, medium, and easy solder in sequence. Inspect each join for gaps, pits, or cold solder, then pickle, rinse, and document what went wrong and right in a bench journal.
- Annealing & forming exercise (Finegold): Anneal a 2"×2" piece of 18-gauge sterling, then dome it over a dapping block in three progressive sizes. Re-anneal between each step. Compare the metal's feel before and after each anneal to internalize the concept of work-hardening.
- Simple bezel pendant (McCreight): Fabricate a complete fine-silver bezel for a small cabochon — cut and solder the bezel strip, solder it to a back plate, saw away excess, file flush, and set the stone with a burnisher. This single project exercises sawing, filing, soldering, and setting in one workflow.
- Metal clay mixed-media component (Haab): Following a project from Haab's 'Metal Clay and Mixed Media Jewelry,' create one metal clay element (e.g., a textured focal bead or pendant form), fire it, then attach it to a fabricated sterling wire frame or finding made using McCreight's wire techniques — bridging both books in one piece.
- Findings fabrication set (Finegold + McCreight): Fabricate three basic findings from wire and sheet: a jump ring set (10 consistent rings, sawn not pinched), a simple ear wire pair, and a toggle clasp. Measure each component with calipers and compare against the dimensions given in Finegold's 'Silversmithing' to develop dimensional accuracy.
Next up: Mastering flat fabrication, soldering, and basic forming with McCreight, Haab, and Finegold gives you the controlled hand-tool fluency and metal intuition needed to advance into more complex three-dimensional construction techniques — such as hollow forms, stone setting in harder metals, and surface embellishment — which build directly on every skill practiced here.
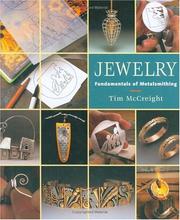
McCreight's dedicated metalsmithing primer goes deeper than his overview book, walking through sawing, soldering, forging, and finishing in a logical sequence perfectly suited to a beginner bench student.
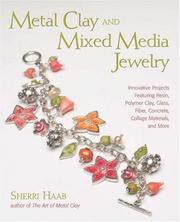
Introduces mixed-media thinking and alternative metal-forming methods that expand your toolkit and reinforce core fabrication concepts through varied, approachable projects.

A classic, thorough treatment of silver fabrication — covers raising, chasing, and construction techniques that solidify bench fundamentals and prepare you for the precision required in stone setting.
Stone Setting: Bezels, Prongs & Beyond
IntermediateUnderstand the principles of stone setting, cut and solder bezel settings, set cabochons and faceted stones safely, and troubleshoot common setting problems.
▸ Study plan for this stage
Pace: 4–5 weeks, ~20–25 pages/day; spend the first week surveying gemstone families and identification, weeks 2–3 on cut types and how each cut influences setting choice, and the final 1–2 weeks doing a deep review of stone properties (hardness, cleavage, heat sensitivity) with direct notes tied to your b
- Gemstone identification: key physical properties (hardness, refractive index, specific gravity, cleavage, fracture) and how they inform safe handling at the bench
- The Mohs hardness scale and its practical implications — which stones can tolerate burnishing pressure, heat from soldering, and ultrasonic cleaning
- Cabochon vs. faceted cuts: how dome height, girdle thickness, and table size dictate bezel wall height, prong placement, and overall setting design
- Stone families and their setting vulnerabilities — e.g., emerald's inclusions and brittleness, opal's sensitivity to heat and chemicals, pearl's organic nature
- Cleavage planes and fracture types: recognizing directional weaknesses that determine how much pressure a setter can safely apply
- Color, transparency, and brilliance: understanding how a setting style (open-back prong vs. closed-back bezel) affects light return and the visual impact of the finished piece
- Girdle anatomy: how a stone's girdle profile (thin, medium, thick, faceted, bruted) interacts with bezel walls and prong tips during setting
- Heat sensitivity and thermal shock: identifying which stones must never be set before soldering is complete and why
- According to The Jeweler's Directory of Gemstones, what physical properties should you assess before deciding whether to set a stone before or after soldering?
- How does the cut of a faceted stone — round brilliant vs. oval vs. cushion — change the engineering requirements of a bezel or prong setting?
- Which gemstone families described by Crowe are most vulnerable to heat, and what bench precautions does that vulnerability demand?
- What is cleavage, how does it differ from fracture, and why does a stone with perfect cleavage (e.g., topaz) require extra care when tightening prongs or burnishing a bezel?
- How does cabochon dome height influence the minimum bezel wall height needed to secure the stone without obscuring too much of its face?
- What role does a stone's transparency and refractive index play in choosing between an open-back and a closed-back setting design?
- Stone property chart: For at least 15 gemstones covered in The Jeweler's Directory of Gemstones, build a personal reference table listing hardness, cleavage, heat sensitivity, typical cuts, and recommended setting styles — keep this at your bench throughout the stage.
- Cut-to-setting mapping: Select 6 different stone cuts illustrated in the book (e.g., round brilliant, oval cabochon, marquise, pear, cushion, rose cut) and sketch a suitable setting for each, annotating why that setting suits the stone's girdle profile and proportions.
- Bezel sizing drill: Using inexpensive practice stones (glass cabochons or synthetic stones), measure dome height and girdle diameter, calculate the required fine-silver bezel strip length and height, cut and solder the bezel, then test-fit the stone — repeat until the fit is snug with no rocking.
- Prong setting simulation: Set a round faceted synthetic stone in a pre-made 4-prong and 6-prong head; compare how each distributes pressure around the girdle, referencing Crowe's girdle anatomy descriptions to ensure prong tips seat just above the girdle without chipping.
- Heat-sensitivity rehearsal: Before setting any heat-sensitive stone identified in the book (e.g., opal, turquoise, pearl simulant), practice the complete solder sequence on a dummy piece, confirming all joins are finished and polished before the stone ever touches the setting.
- Troubleshooting journal: After each setting attempt, write a short entry describing what went wrong (bezel too tall, prong slipped, stone rocked), cross-reference the relevant gemstone entry in Crowe for property clues, and document the corrective action taken — aim for at least 8 entries by the end of the stage.
Next up: A thorough command of gemstone properties, cut geometry, and setting vulnerabilities — built through The Jeweler's Directory of Gemstones — gives you the material intelligence needed to confidently advance into more complex fabrication and design stages, where stone choice actively drives metal construction decisions rather than being an afterthought.
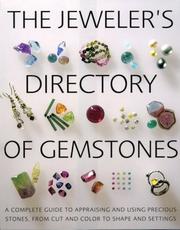
Before setting stones you must know them — this visual reference covers identification, properties, and handling of the most common gems, preventing costly mistakes at the bench.
Discussion
Keep reading
Paths that share books, cover the same subject, or open a related topic.