Silversmithing and jewelry: best books to start making metal pieces
This curriculum takes a complete beginner from zero metalworking knowledge to confident, multi-technique jewelry making across four progressive stages. Each stage builds on the last — first establishing core hand-skills and safety, then layering in soldering and forming, then stone setting and surface work, and finally finishing with a professional-level reference to consolidate everything into a lasting studio practice.
Foundations: Tools, Materials & First Moves
BeginnerUnderstand the essential tools, metals, and safety practices of a jewelry studio, and complete simple first projects to build confidence and muscle memory.
▸ Study plan for this stage
Pace: 4–5 weeks, ~25–30 pages/day, with 2–3 hands-on studio sessions per week
- Essential hand tools (files, saws, pliers, hammers) and their proper use and maintenance
- Properties and characteristics of jewelry metals (silver, copper, brass, gold) and how to select appropriate materials for projects
- Studio safety practices, including proper ventilation, chemical handling, and personal protective equipment
- Basic metal preparation: annealing, pickling, and cleaning techniques that enable metalworking
- Fundamental techniques: sawing, filing, bending, and forming metal by hand
- Design principles for jewelry: proportion, balance, and how to translate sketches into wearable pieces
- Finishing and polishing methods to achieve professional results on completed work
- What are the five most essential hand tools for a beginner jewelry studio, and what is each one used for?
- How do the properties of silver, copper, and brass differ, and when would you choose one metal over another for a project?
- What is annealing, why is it necessary, and what safety precautions must you take when annealing metal?
- Describe the proper steps for pickling metal and explain why this process is important in jewelry making.
- What are the key safety hazards in a jewelry studio, and what controls (ventilation, PPE, practices) should be in place to mitigate them?
- Walk through the process of sawing a straight line and a curve in sheet metal, including tool setup and technique.
- Set up a safe, organized jewelry studio workspace; identify and label all essential hand tools; practice proper grip and control with each tool on scrap metal.
- Source and compare three different jewelry metals (silver, copper, brass); document their visual appearance, weight, malleability, and cost; sketch design ideas suited to each.
- Practice annealing and pickling cycles on copper or silver scraps; observe color changes and metal behavior; maintain a log of temperatures and timing.
- Complete a simple sawing exercise: cut straight lines and gentle curves in 18-gauge sheet metal; refine technique to achieve clean, accurate cuts with minimal filing.
- Design and fabricate a simple wire-formed ring or pendant using hand tools only (no soldering); focus on proportion, symmetry, and smooth finishing.
- Polish and finish three small metal samples using different methods (files, sandpaper, polishing compounds); compare surface quality and document the time required for each approach.
- Sketch five jewelry design concepts on paper; for each, identify the metals, techniques, and tools required; discuss proportions and wearability with an experienced maker or mentor if possible.
Next up: This stage builds the tactile confidence, tool literacy, and material knowledge needed to progress to soldering and joining techniques, where you will combine multiple pieces of metal into more complex, durable jewelry forms.
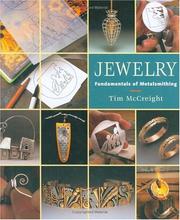
The single best starting point for beginners — McCreight covers tools, bench setup, basic techniques, and vocabulary in clear, illustrated language that makes everything that follows easier to absorb.
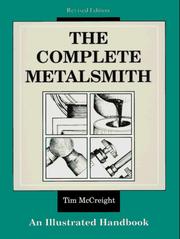
A compact, studio-ready reference companion to the first book; reading it second cements terminology and gives a reliable lookup guide to carry through every later stage.
Core Skills: Sawing, Forming & Soldering
BeginnerMaster the three fundamental bench skills — precise sawing and filing, cold-forming with hammers and mandrels, and silver soldering — well enough to fabricate rings and pendants from scratch.
▸ Study plan for this stage
Pace: 6–8 weeks, ~20–25 pages/day from Finegold, then 2–3 weeks on Silvera with daily soldering practice
- Proper saw technique: grip, stroke mechanics, and blade selection for different gauges of silver
- Filing and finishing: understanding file types, pressure control, and achieving smooth surfaces for jewelry-quality results
- Cold-forming fundamentals: using hammers, mandrels, and stakes to shape silver without heat while maintaining structural integrity
- Silver soldering basics: flux chemistry, heat control, solder flow, and joint preparation to create strong, invisible seams
- Bench setup and tool safety: organizing your workspace and handling sharp/hot tools to prevent injury and waste
- Metal properties: how silver behaves under stress, heat, and forming pressure to predict and prevent cracking or deformation
- Annealing and work-hardening: recognizing when metal needs softening and how to restore malleability during forming
- Quality control: inspecting joints, surfaces, and dimensions to ensure finished pieces meet professional standards
- What are the three main blade types discussed in Finegold, and when should you use each one for different silver gauges?
- Describe the proper grip and stroke mechanics for sawing a straight line without binding or breaking the blade.
- How do you determine when silver has become work-hardened, and what is the annealing process described in Finegold?
- What is the role of flux in soldering, and how does Silvera explain the relationship between flux, heat, and solder flow?
- Walk through the complete joint preparation process for a simple silver solder seam, from cleaning to cooling.
- How do you use a mandrel and hammer to form a ring to size without cracking the silver, according to Finegold's cold-forming section?
- Practice sawing: cut 10 straight lines and 5 curved cuts through 20-gauge silver sheet, focusing on consistent blade angle and smooth strokes.
- File finishing: take your sawed pieces and file all edges smooth, then progress to filing flat surfaces with zero waviness.
- Form a practice ring: use a mandrel and rawhide mallet to shape a silver strip into a ring, then file and fit it to size.
- Solder a simple butt joint: prepare two pieces of silver, apply flux, position solder, and execute a clean solder joint using Silvera's heat-control method.
- Solder a T-joint: create a pendant by soldering a small silver wire or sheet perpendicular to a base, inspecting for full flow and strength.
- Complete a ring-and-pendant project: fabricate a simple ring from sheet and a small pendant from wire or sheet, sawing, forming, filing, and soldering all joints.
Next up: Mastering these three core skills—sawing, forming, and soldering—gives you the mechanical confidence and hand control to move into more complex designs, such as stone setting, surface texturing, and multi-component assemblies that build on these foundational techniques.

A thorough, project-driven guide specifically to silver as a material; it walks through sawing, annealing, forming, and soldering in the logical order a beginner needs to internalize them.

Dedicated entirely to the skill most beginners fear most — soldering; reading it after a first forming project transforms vague anxiety into systematic, repeatable technique.
Going Deeper: Stone Setting & Surface Decoration
IntermediateSet cabochons and faceted stones using bezel and prong methods, and apply surface treatments — texturing, reticulation, and patinas — to give finished pieces professional character.
▸ Study plan for this stage
Pace: 4–5 weeks, ~25–30 pages/day, with 2–3 dedicated studio days per week for hands-on practice
- Bezel setting fundamentals: creating, fitting, and burnishing bezels for secure stone retention
- Prong setting techniques: calculating prong length, shaping, and seating faceted stones
- Stone anatomy and selection: understanding cabochons vs. faceted stones and their setting requirements
- Surface texturing methods: hammer textures, file patterns, and intentional surface variation
- Reticulation as a controlled oxidation technique: achieving granular surfaces through heat and metal composition
- Patina application and control: chemical patinas, oxidation, and protective finishing for aesthetic effect
- Professional finishing standards: polishing, protecting, and presenting work with refined surfaces
- What are the key differences between bezel and prong settings, and when would you choose one over the other?
- How do you measure and prepare a bezel to ensure a stone sits securely without movement?
- What is reticulation, and how does controlling heat and metal composition affect the final surface?
- Describe the process of applying a chemical patina and how to protect the finished surface.
- How do surface textures (hammering, filing, reticulation) contribute to the professional character of a finished piece?
- What are the critical steps in setting a faceted stone using prongs, and what can go wrong?
- Set a minimum of 3 cabochons using bezel settings in different metals (silver, copper), practicing proper burnishing technique
- Set 2–3 faceted stones using prong settings, focusing on even prong placement and secure seating
- Create 5 textured samples using different methods (hammer textures, file work, stamping) on practice sheet metal
- Execute a controlled reticulation on a small silver piece, documenting temperature and timing
- Apply 3 different chemical patinas to copper or silver samples, testing oxidation depth and protective finishes
- Complete a full finished piece (ring, pendant, or brooch) incorporating both stone setting and surface decoration, with professional finishing
- Practice polishing and protective coating techniques on textured and patinated samples to understand how finishing affects appearance
Next up: This stage equips you with the technical precision and aesthetic refinement needed to move into advanced design work, where you'll integrate these setting and decoration skills into complex, multi-stone compositions and specialized metalworking techniques.
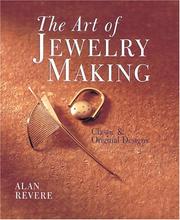
Broadens the intermediate learner's toolkit with forming, chasing, and surface decoration projects that directly complement the stone-setting skills just acquired.
Professional Practice: Design, Finishing & Mastery
ExpertDevelop a personal design process, apply professional finishing and polishing workflows, and use an authoritative encyclopedic reference to troubleshoot and grow independently as a silversmith.
▸ Study plan for this stage
Pace: 4–5 weeks, ~20–25 pages/day, with 2–3 days per week dedicated to hands-on gemstone identification and design application
- Gemstone properties (hardness, refractive index, specific gravity, optical characteristics) and how they affect design and setting choices
- Gemstone identification techniques: visual inspection, testing methods, and distinguishing natural from treated or synthetic stones
- How gemstone characteristics inform professional design decisions—durability for wearability, color stability, and setting compatibility
- The role of gemstone reference materials as an authoritative troubleshooting tool in professional silversmithing practice
- Gemstone care, treatment, and finishing considerations that impact the longevity and appearance of finished jewelry pieces
- Building a personal gemstone knowledge base to support independent design iteration and client consultation
- How do you use hardness, refractive index, and specific gravity to evaluate whether a gemstone is suitable for a particular jewelry design or setting technique?
- What are the key visual and physical tests you can perform to identify a gemstone and distinguish it from imitations or treated versions?
- How does understanding gemstone properties inform your finishing and polishing workflow—particularly regarding heat sensitivity and chemical exposure?
- When faced with an unfamiliar gemstone or a design challenge, how would you use 'The Jeweler's Directory of Gemstones' as a reference to troubleshoot and make professional decisions?
- What gemstone characteristics must you consider when designing a piece intended for daily wear versus occasional wear?
- How do you communicate gemstone properties and care requirements to clients to ensure they understand the durability and maintenance of their finished pieces?
- Create a personal gemstone reference card for 10–15 stones you commonly work with, noting hardness, refractive index, setting recommendations, and any heat or chemical sensitivities
- Practice gemstone identification on a mixed collection: use visual inspection, weight/density testing, and hardness testing, then verify against Crowe's directory to refine your eye
- Design three jewelry pieces around specific gemstones (e.g., opal, tourmaline, pearl), documenting how each stone's properties shaped your setting choice, metal selection, and finishing approach
- Conduct a finishing and polishing trial on silver pieces set with three different gemstones, noting any heat sensitivity or chemical reactions, and document your findings
- Write a one-page client care guide for a finished piece featuring a gemstone from the directory—explain the stone's properties, recommended cleaning methods, and any limitations
- Use Crowe's directory to troubleshoot a real or hypothetical design problem (e.g., 'I want to set an opal in a ring for daily wear—what challenges should I anticipate?') and document your solution process
Next up: Mastery of gemstone properties and reference-based troubleshooting establishes you as an independent, authoritative silversmith capable of designing and finishing pieces with confidence, setting the foundation for the next stage—whether that involves advanced metalworking techniques, business development, or specialized jewelry design specialization.
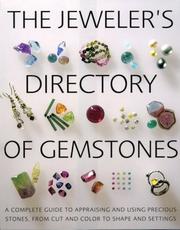
An essential finishing-stage reference: understanding the properties, hardness, and setting requirements of a wide range of stones elevates every design and setting decision going forward.
Discussion
Keep reading
Paths that share books, cover the same subject, or open a related topic.