The Best Books to Learn Taxidermy
This curriculum is designed for the intermediate learner who already has some hands-on curiosity or basic exposure to taxidermy, and wants to master skinning, mounting, and preservation from the ground up to advanced artistry. The path moves from foundational technique and anatomy through species-specific mounting methods, then into professional finishing, sculpture, and the fine-art level of the craft — each stage building the vocabulary, tools, and muscle memory needed for the next.
Core Techniques & Foundations
BeginnerEstablish a solid working knowledge of skinning, basic preservation chemistry, and the standard mounting process across common specimen types before specializing.
▸ Study plan for this stage
Pace: 6–8 weeks, ~25–35 pages/day, with 2–3 days per week dedicated to hands-on practice and review
- Proper skinning techniques for different specimen types (mammals, birds, fish) and the anatomical landmarks that guide incisions
- Basic preservation chemistry: role of salt, borax, alum, and other tanning agents in preventing decay and maintaining skin integrity
- Eye-setting, ear-butt insertion, and nostril packing as essential finishing details that determine realism
- Standard mounting forms: understanding body form selection, sizing, and fitting techniques for common species
- Wiring and positioning methods to achieve natural postures and balance in mounted specimens
- Safety protocols and workspace setup for handling chemicals and sharp tools
- Species-specific adaptations: how techniques vary for mammals versus birds versus fish
- Quality assessment: recognizing common mistakes (slippage, hair loss, poor seam closure) and how to prevent them
- What are the primary anatomical landmarks and incision lines for skinning a mammal, and how do they differ from bird skinning?
- Explain the role of salt, borax, and alum in taxidermy preservation. Why is proper chemical application critical to preventing specimen deterioration?
- Walk through the complete mounting process for a common mammal (e.g., squirrel or rabbit): from form selection through final positioning.
- What are the key finishing details (eyes, ears, nostrils) and why does their placement have such a large impact on the realism of a mount?
- How do you assess whether a mount is properly balanced and positioned, and what are the most common positioning errors beginners make?
- Describe the wiring techniques used to secure limbs and tail, and explain how to achieve a natural posture without visible wire.
- Study and sketch the anatomical incision lines for at least three different specimen types (one mammal, one bird, one fish) from the books' diagrams; label all key landmarks.
- Prepare a preservation chemistry reference sheet: list each chemical used in Tinsley and Grantz, its purpose, proper dosage, and safety handling requirements.
- Practice eye-setting and ear-butt insertion on a practice form or clay model; repeat until you can do it cleanly and symmetrically without reference materials.
- Source or create a simple mounting form (or work with a pre-made form) and practice fitting and securing it to a practice skin or substitute material, focusing on seam alignment.
- Document a complete mock mounting process (using reference photos or diagrams from the books) by creating a step-by-step photo or written guide of each phase.
- Visit a natural history museum or taxidermy studio (if possible) and compare live mounts to the techniques described in the books; note what details make certain mounts appear more realistic.
Next up: Mastery of these foundational techniques and preservation principles will enable you to move into specialized methods—such as advanced sculpting, custom form-making, and species-specific refinements—while maintaining the safety and structural integrity that separates professional work from amateur results.
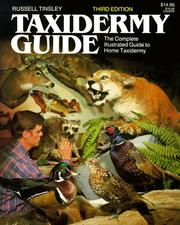
A widely used, practical primer that walks through the full workflow — skinning, fleshing, preserving, and mounting birds, fish, and mammals — giving the intermediate learner a clean, unified vocabulary before diving deeper.

Covers tanning and preservation chemistry alongside mounting, filling in the 'why' behind each step so the learner understands material science, not just procedure.
Birds & Fish: Specialty Mounting
IntermediateDevelop species-specific skills for bird and fish taxidermy, including feather grooming, wire armatures, skin-mount vs. reproduction decisions, and realistic paint finishing.
▸ Study plan for this stage
Pace: 4–5 weeks, ~25–30 pages/day, with 2–3 days per week dedicated to hands-on practice and specimen prep
- Fish anatomy and skeletal structure as the foundation for accurate armature design and body positioning
- Skin-mount vs. reproduction casting decisions based on specimen condition, species characteristics, and client goals
- Wire armature construction techniques for creating realistic fish posture and movement in the finished mount
- Fin preparation, grooming, and positioning to achieve natural spread and anatomical accuracy
- Paint finishing and color restoration for realistic gill covers, eye rings, and scale detail
- Mold-making and reproduction techniques for damaged or delicate fish species
- Sealing, epoxy work, and preservation methods to ensure long-term durability of mounted fish
- What are the key anatomical landmarks in fish that determine proper body curvature and posture in a mount?
- How do you decide whether to skin-mount a fish specimen or create a reproduction cast, and what factors influence that decision?
- Describe the process of constructing a wire armature for a fish mount, including material selection and joint techniques
- What are the critical steps in fin preparation and grooming, and how do you achieve natural-looking fin spread?
- How do you restore realistic coloration and detail to a mounted fish, particularly in gill covers, eye rings, and scale patterns?
- What preservation and sealing methods extend the lifespan of a finished fish mount?
- Study and sketch the skeletal anatomy of 2–3 different fish species (e.g., trout, bass, pike), identifying key articulation points and natural posture lines
- Practice constructing a basic wire armature for a medium-sized fish using aluminum or stainless steel wire, focusing on joint stability and realistic body curves
- Prepare and groom fins from a practice specimen or reference material, documenting the steps and photographing the results for comparison
- Create a mold and reproduction cast of a small fish or fish part using the techniques from the manual, then compare the cast to the original for accuracy
- Paint a practice fish mount (or reproduction) using color-matching techniques, paying special attention to gill covers, eye rings, and scale detail
- Complete a full skin-mount or reproduction mount of a fish specimen from start to finish, applying all techniques learned: armature, fin grooming, painting, and sealing
Next up: Mastery of fish-specific techniques—armatures, fin work, and paint finishing—prepares you to apply these same precision skills to bird mounting, where feather grooming, wing positioning, and eye detail demand equally meticulous attention to anatomical realism.

Addresses both skin mounts and reproductions, painting techniques, and the unique preservation challenges of fish — a necessary complement after mastering mammal and bird work.
Anatomy, Sculpture & Lifelike Realism
ExpertUnderstand animal anatomy deeply enough to sculpt, alter, or correct commercial forms, and apply competition-level finishing — eyes, habitat bases, and anatomical accuracy — to elevate mounts from craft to art.

A classic artist's anatomy reference covering musculature and surface form of common taxidermy subjects; reading this transforms how a taxidermist evaluates and corrects a form's underlying structure.
Discussion
Keep reading
Paths that share books, cover the same subject, or open a related topic.