The Best Books to Learn Beadwork and Beading
This curriculum takes a complete beginner from their very first bead and needle all the way through advanced stitchwork, pattern design, and artistic expression. Each stage builds directly on the last — starting with essential tools and foundational stitches, moving into core beading techniques and jewelry construction, and finally arriving at complex patterns, mixed-media art, and design mastery.
Foundations: First Stitches & Essential Skills
BeginnerUnderstand beading tools, materials, and terminology; successfully execute the most fundamental stitches (peyote, brick, ladder) and complete simple beginner projects with confidence.
▸ Study plan for this stage
Pace: 4–5 weeks, ~20–25 pages/day with 2–3 days per week dedicated to hands-on practice
- Beading tools and their proper use (needles, thread, scissors, beading mats, magnifiers)
- Bead types, sizes, and materials (seed beads, glass, metal, finishes) and how they affect projects
- Thread selection, conditioning, and tension management for different stitches
- Peyote stitch fundamentals: circular and tubular construction, increasing and decreasing
- Brick stitch basics: offset rows, tension, and structural integrity
- Ladder stitch as a foundation technique and its role in building other stitches
- Reading and interpreting beading patterns and diagrams
- Finishing techniques: securing thread, weaving in ends, and creating secure closures
- What are the essential beading tools and what is the specific purpose of each?
- How do you select appropriate thread and beads for a given project, and why does this choice matter?
- Explain the mechanics of peyote stitch and describe the difference between circular and tubular variations
- What is the ladder stitch and why is it considered a foundational technique in beadwork?
- How do you read a beading pattern or diagram, and what symbols or notations should you expect to encounter?
- Describe the brick stitch structure and explain how offset rows create the characteristic pattern
- What are common tension problems in beadwork and how do you prevent or correct them?
- How do you properly finish a beadwork project to ensure durability and a professional appearance?
- Complete a full read-through of 'The Beader's Bible' chapters on tools and materials, taking annotated notes on each tool's function and when to use it
- Practice threading a needle and conditioning thread using the methods described in the book; repeat 5 times to build muscle memory
- Bead a simple peyote stitch sample (at least 4 inches long) in a single color, focusing on consistent tension and even bead placement
- Create a brick stitch sample strip (at least 3 inches × 2 inches) and practice both increasing and decreasing within the same piece
- Execute a ladder stitch foundation strip (at least 4 inches long) and use it to transition into a second stitch (peyote or brick) to understand how ladder stitch serves as a base
- Complete one beginner project from 'The Beader's Bible' (such as a simple beaded bracelet or pendant) following the pattern exactly, documenting any challenges and solutions
- Create a personal reference guide with sketches and written descriptions of the three fundamental stitches (peyote, brick, ladder), including common mistakes and how to fix them
- Practice finishing techniques on scrap pieces: weave in thread ends, tie off securely, and attach closures (clasps, jump rings) as described in the book
Next up: Mastery of these foundational stitches and techniques provides the technical foundation and confidence needed to explore more complex stitch variations, multi-stitch projects, and advanced pattern reading in the next stage.

A comprehensive visual reference covering every type of bead, thread, tool, and foundational technique — the perfect first book to build vocabulary and intuition before picking up a needle.
Core Techniques: Mastering the Classic Stitches
BeginnerAchieve solid, repeatable proficiency in the core off-loom stitches — peyote, brick, herringbone, square stitch, and right-angle weave — that underpin the vast majority of beaded jewelry and art.
▸ Study plan for this stage
Pace: 4–5 weeks, ~20–25 pages/day, with 2–3 dedicated practice days per week for stitch samples
- Peyote stitch fundamentals: circular, tubular, and flat variations, including tension control and step-ups
- Brick stitch construction: offset rows, decreasing/increasing, and structural stability
- Herringbone stitch mechanics: tubular and flat applications, bead orientation, and spacing
- Square stitch precision: alignment, thread paths, and creating even grids
- Right-angle weave (RAW) structure: unit construction, directional weaving, and 3D applications
- Thread management and tension consistency across all stitches to ensure professional-quality results
- Bead embroidery foundations from Kummli: attaching beads to fabric surfaces and integrating embroidery with off-loom stitches
- Finishing techniques: securing threads, hiding knots, and creating seamless transitions between stitch types
- What is a step-up in peyote stitch, and why is it essential for maintaining consistent tension in circular and tubular work?
- How does brick stitch's offset row structure differ from square stitch, and what are the practical advantages of each?
- Explain the bead orientation and directional flow in herringbone stitch—how does this affect the final appearance and drape of a piece?
- What are the core differences between right-angle weave units, and how do you transition between directions when building larger RAW structures?
- How do the bead embroidery techniques in Kummli's work complement or enhance the off-loom stitches from Stone's book?
- Describe a situation where you would choose peyote over brick stitch, and vice versa, based on the desired outcome and bead type
- Create a flat peyote swatch (at least 4×4 inches) using size 11/0 seed beads, practicing consistent tension and even step-ups; photograph the progression
- Stitch a small circular peyote medallion (2–3 inches diameter) starting from the center and working outward, documenting where tension issues arise
- Build a brick stitch sample with deliberate increases and decreases, creating a simple geometric pattern to understand structural mechanics
- Construct a tubular herringbone rope (at least 4 inches long) using 2–3 bead colors, paying attention to bead orientation and consistent spacing
- Complete a right-angle weave bracelet or small panel using the unit-by-unit method, then experiment with directional changes to solidify understanding
- Practice bead embroidery on fabric (following Kummli's techniques): attach seed beads to a small fabric square, then integrate a simple off-loom stitch border to connect embroidery with structural beadwork
Next up: Mastery of these five core stitches and bead embroidery fundamentals provides the technical foundation and muscle memory needed to tackle advanced design variations, color theory, and complex multi-stitch compositions in the next stage.
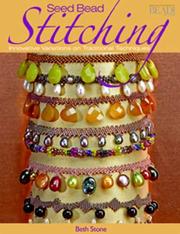
Focuses exclusively on seed bead stitches with clear, isolated tutorials for each one, making it the ideal dedicated practice guide at this stage.
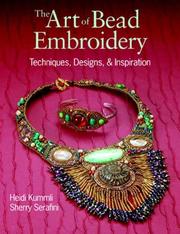
Introduces bead embroidery as a natural complement to off-loom stitching, expanding the learner's repertoire and showing how stitches translate onto fabric and backing.
Jewelry Construction: Patterns, Design & Finishing
IntermediateDesign and construct complete, wearable beaded jewelry pieces — necklaces, bracelets, earrings — with professional finishing, closures, and an understanding of color and pattern.
▸ Study plan for this stage
Pace: 6–8 weeks, ~20–25 pages/day with 3–4 beading practice sessions per week
- Peyote stitch fundamentals: odd-count and even-count variations, tension control, and increasing/decreasing techniques
- Pattern reading and adaptation: interpreting bead charts, scaling designs, and customizing patterns for different jewelry pieces
- Color theory applied to beadwork: understanding hue, value, saturation, and how colors interact in three-dimensional beaded forms
- Designing cohesive color palettes: selecting complementary, analogous, and contrasting color schemes for finished jewelry
- Professional finishing techniques: securing threads, attaching closures, and creating polished edges on necklaces, bracelets, and earrings
- Structural design for wearability: weight distribution, flexibility, and durability considerations for functional jewelry
- Translating design concepts into construction: moving from color palette planning to actual bead selection and peyote stitch execution
- How do odd-count and even-count peyote stitches differ, and when would you use each for different jewelry designs?
- What are the key elements of a bead chart, and how do you adapt a published pattern to create a custom necklace or bracelet?
- How do hue, value, and saturation influence the visual impact of a beaded piece, and how can you use these principles to create harmony or contrast?
- What strategies would you use to select a color palette for a specific beaded jewelry project, and how do you test colors before committing to a full design?
- What finishing techniques ensure that a peyote-stitched necklace or bracelet is durable, comfortable, and professional-looking?
- How do you balance aesthetic design with practical considerations like weight, flexibility, and closure security in wearable beaded jewelry?
- Complete at least two small peyote stitch swatches (odd-count and even-count) to master tension and rhythm before starting a full project
- Bead a complete necklace or bracelet using a published pattern from 'Beading with Peyote Stitch,' following the chart precisely and practicing thread management
- Create a color palette study: select three different color schemes (complementary, analogous, and contrasting) using beads and document them with photos or sketches
- Redesign a simple peyote pattern by changing the color arrangement; bead a sample to see how color choices transform the visual impact
- Construct a finished piece (necklace, bracelet, or pair of earrings) with professional closures and secure thread endings; practice at least two finishing methods
- Design an original small peyote project: create a bead chart, select a color palette using principles from 'The Beader's Color Palette,' and complete the piece from start to finish
Next up: This stage equips you with the technical peyote skills, color literacy, and finishing expertise needed to move into advanced topics like complex multi-stitch combinations, sculptural forms, and custom design development for a professional-level beading practice.

Peyote is the workhorse stitch of beaded jewelry; this book goes deep on flat, tubular, and circular peyote with pattern charts, making it essential for jewelry construction.

Teaches color theory specifically for beaders, giving the learner the design language needed to move from copying patterns to creating original, visually harmonious pieces.
Advanced Mastery: Complex Patterns & Beaded Art
ExpertCreate sophisticated, gallery-worthy beadwork — intricate loom pieces, sculptural forms, and mixed-media art — while developing a personal artistic voice and the ability to design original patterns.
▸ Study plan for this stage
Pace: 4–5 weeks, ~25–30 pages/day, with 2–3 days per week dedicated to hands-on project work
- 3D bead embroidery techniques: building depth, dimension, and sculptural form on fabric foundations
- Advanced stitching methods for dimensional work: peyote variations, right-angle weave, and hybrid approaches for creating volume
- Designing original patterns that translate 2D concepts into 3D sculptural beadwork
- Color theory and composition in dimensional bead embroidery: creating visual movement and focal points in three-dimensional space
- Material selection and surface preparation for dimensional work: choosing fabrics, backing, and embellishment techniques
- Finishing and mounting techniques: creating professional, gallery-ready presentations for sculptural beadwork
- Developing a personal artistic voice through experimentation with form, texture, and mixed-media integration
- What are the key structural differences between flat bead embroidery and dimensional bead embroidery, and how do you build and maintain 3D form?
- How do you design an original pattern that successfully translates from concept to a three-dimensional sculptural beadwork piece?
- What stitching techniques does Eakin recommend for creating volume and dimension, and when would you choose one over another?
- How do you apply color theory and composition principles to create visual impact in dimensional beadwork that reads well from multiple angles?
- What finishing and mounting methods ensure that your dimensional beadwork is durable, professional, and gallery-ready?
- How can you develop and express a personal artistic voice through dimensional bead embroidery?
- Complete 2–3 small dimensional bead embroidery samples (2–4 inches) using different stitching techniques from the book to understand how each creates volume and form
- Design and execute an original sculptural beadwork piece (4–6 inches) that incorporates at least two different dimensional techniques and demonstrates intentional color composition
- Create a pattern design document for a dimensional piece: sketch the concept, plan the 3D structure, map color placement, and annotate stitch choices
- Experiment with mixed-media integration: combine dimensional bead embroidery with other materials (wire, fabric, resin, etc.) in a small exploratory piece
- Build a gallery-ready presentation: finish and mount a completed dimensional beadwork piece using professional backing, framing, or display methods
- Develop a personal design series: create 3–4 related dimensional pieces that explore a consistent theme, color palette, or structural approach to establish your artistic voice
Next up: This stage equips you with the technical mastery and artistic confidence to design and execute sophisticated, original beadwork that stands as fine art, preparing you to either specialize further in a particular dimensional technique, explore advanced mixed-media integration, or develop a cohesive body of work for exhibition or sale.

Pushes beadwork into three-dimensional sculptural territory, combining multiple techniques into complex art pieces that challenge and stretch advanced skills.
Discussion
Keep reading
Paths that share books, cover the same subject, or open a related topic.