Sewing and dressmaking: top books to make your own clothes
This curriculum takes a complete beginner from their very first stitch to confidently constructing a full handmade wardrobe. Each stage builds on the last — starting with foundational tools and vocabulary, moving through pattern reading and garment fitting, then advancing into professional construction techniques and finally independent, creative dressmaking.
Foundations: Tools, Stitches & the Machine
BeginnerUnderstand your sewing machine, master basic hand and machine stitches, learn essential sewing vocabulary, and complete your first simple projects with confidence.
▸ Study plan for this stage
Pace: 4–5 weeks, ~20–25 pages/day with 2–3 days per week dedicated to hands-on practice
- Sewing machine anatomy: identifying and understanding the function of key parts (needle, presser foot, bobbin, tension dials, feed dogs, throat plate)
- Threading and bobbin winding: proper procedures to prevent tension issues and thread breakage
- Essential hand stitches: running stitch, backstitch, whip stitch, and slip stitch—when and why to use each
- Machine stitch fundamentals: straight stitch, zigzag stitch, and stitch length/width adjustment for different fabrics
- Sewing vocabulary and terminology: seam allowance, grain line, selvage, bias, presser foot pressure, and needle size selection
- Fabric preparation: cutting accurately, marking, and understanding fabric grain and nap
- Basic seam construction: sewing straight seams, finishing edges, and pressing techniques
- First projects: simple garments or accessories (pillows, simple skirts, aprons) that reinforce core skills
- Can you identify the major parts of a sewing machine and explain the function of each?
- What are the steps to properly thread your machine and wind a bobbin, and what problems can occur if done incorrectly?
- When would you use a hand stitch versus a machine stitch, and what are the key differences between running stitch, backstitch, and whip stitch?
- How do you adjust stitch length and width on your machine, and why would you change these settings for different fabrics?
- What is seam allowance, and how does understanding grain line and bias help you cut and sew fabric accurately?
- What are the steps to prepare fabric before cutting (including pressing and marking), and why is this important?
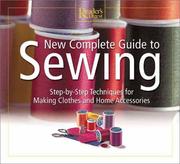
- Machine familiarization: locate and label every part of your sewing machine using the diagrams in Reader's Digest Complete Guide; practice threading and bobbin winding at least 5 times until it becomes automatic
- Hand stitch sampler: on scrap fabric, practice running stitch, backstitch, whip stitch, and slip stitch; aim for even, consistent stitches and label each one
- Tension and stitch adjustment practice: sew straight lines on scrap fabric while adjusting stitch length (short, medium, long) and width; observe how the fabric feeds and stitches change
- Seam construction drill: sew multiple straight seams on cotton scrap fabric using a ¼-inch and ½-inch seam allowance; measure and verify accuracy
- First simple project (pillow or simple apron): cut fabric using grain line and seam allowance guidelines from The Complete Photo Guide; sew seams, press, and finish edges following step-by-step instructions
- Fabric grain and bias exploration: cut strips on grain, bias, and crosswise grain; observe how each behaves when stretched and sewn to understand why grain matters
Next up: Mastering these foundational tools, stitches, and machine skills gives you the confidence and technical competence to move into pattern reading, garment construction, and more complex sewing techniques in the next stage.
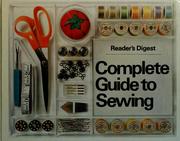
The single most comprehensive beginner reference in print — covers tools, fabric, stitches, and techniques with clear diagrams. Read this first to build a complete foundational vocabulary before anything else.
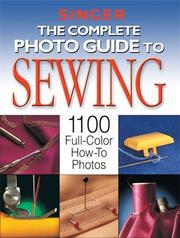
A highly visual, step-by-step companion that reinforces machine operation and basic techniques through photography. Reading it after the Reader's Digest guide cements concepts with a second, image-driven perspective.
Understanding Patterns & Fabric
BeginnerRead and follow commercial sewing patterns, understand fabric grain and preparation, and successfully cut and assemble your first garments from a pattern envelope.
▸ Study plan for this stage
Pace: 4–5 weeks, ~20–25 pages/day, with 2–3 days per week dedicated to hands-on practice
- Pattern envelope anatomy: how to read and interpret commercial pattern markings, grading, and layout instructions
- Fabric grain, nap, and directional prints: understanding how grain affects drape and fit, and why nap matters for pattern placement
- Fabric preparation: pre-washing, pressing, and straightening grain before cutting
- Pattern layout and cutting: translating pattern pieces onto fabric using grain lines, seam allowances, and layout diagrams
- Notches, markings, and construction symbols: identifying and transferring pattern markings onto fabric pieces
- Seam allowances and their role in garment assembly: understanding standard widths and how they affect final fit
- Basic garment assembly sequence: how pattern instructions guide you through sewing in the correct order
- Fitting adjustments at the pattern stage: recognizing when and how to adjust patterns for your body before cutting
- What information does a commercial pattern envelope provide, and how do you use the back of the envelope to select the right size and view?
- Explain the difference between fabric grain, bias, and nap, and why each matters when laying out pattern pieces.
- What are the steps for preparing fabric before cutting, and why is straightening the grain important?
- How do you read a pattern layout diagram, and what do the symbols (grain lines, fold lines, notches) tell you?
- What are pattern markings and construction symbols, and how do you transfer them to your fabric pieces?
- Walk through the process of cutting out a simple garment piece while respecting grain line and seam allowances.
- Obtain a commercial pattern envelope and spend 30 minutes studying the front, back, and instruction sheet; identify the size range, views available, and all information on the back cover.
- Purchase a small piece of cotton fabric and practice straightening the grain using the pull-thread or fold method; press and measure to confirm it's square.
- Lay out and cut a simple pattern piece (such as a basic rectangle or simple sleeve) on scrap fabric, paying attention to grain line alignment and seam allowance boundaries.
- Transfer pattern markings (notches, darts, grain lines) onto a cut fabric piece using tailor's chalk or a fabric pen, then verify the markings are clear and accurate.
- Compare two different pattern layouts for the same garment (e.g., with and without nap) and explain why the yardage or layout differs.
- Cut out all pieces for a beginner garment project (such as a simple skirt, apron, or pillowcase) using a commercial pattern, checking grain line and seam allowances as you go.
Next up: Mastering pattern reading and fabric preparation equips you with the foundational skills to move into the next stage—executing seams, closures, and finishing techniques—so you can confidently sew your cut pieces together into a complete, wearable garment.
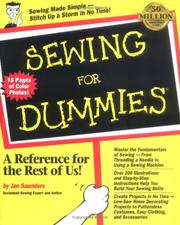
Bridges the gap between raw technique and actual garment-making by walking through the full pattern-to-finished-garment workflow in plain language — the ideal next step after learning the machine.

Teaches pattern reading and garment construction through five complete projects of increasing complexity, making it a perfect structured practice book at this stage.
Fitting & Garment Construction
IntermediateAlter commercial patterns to fit your unique body, understand ease and proportion, and construct well-fitted garments including bodices, skirts, trousers, and simple dresses.
▸ Study plan for this stage
Pace: 8–10 weeks, ~25–30 pages/day, with 2–3 days per week dedicated to pattern alterations and garment construction practice
- Body measurement and analysis: taking accurate measurements and understanding your unique proportions relative to standard sizing
- Pattern grading and alteration: lengthening, shortening, widening, and narrowing patterns to accommodate individual fit needs
- Ease and wearing ease: the difference between design ease and wearing ease, and how to evaluate whether a pattern has appropriate ease for its intended garment type
- Bodice fitting: identifying and correcting common fit issues (shoulder seams, armholes, bust darts, neckline) through pattern adjustments
- Skirt and trouser fitting: understanding grain line, waistband placement, inseam length, and hip/thigh proportions for lower-body garments
- Construction techniques: proper seaming, pressing, and finishing methods that support good fit and garment longevity
- Muslin testing and fitting: making test garments to evaluate pattern alterations before cutting into fashion fabric
- How do you take body measurements accurately, and what measurements are essential for altering patterns for bodices, skirts, and trousers?
- What is the difference between design ease and wearing ease, and how do you determine if a commercial pattern has the right amount of ease for a specific garment type?
- How do you identify and correct common fit problems such as shoulder seams that sit too far forward or back, armhole issues, or dart placement problems?
- What are the step-by-step alterations needed to grade a pattern up or down for length, width, and circumference, and how do you maintain proper proportions when making these changes?
- Why is making a muslin test garment important, and what fit adjustments should you evaluate before cutting into your final fabric?
- How do you construct a well-fitted bodice, skirt, and simple dress using proper seaming, pressing, and finishing techniques?
- Take your own body measurements using Pati Palmer's guidelines; compare them to standard sizing charts and identify where you differ from typical commercial patterns
- Select a commercial pattern for a simple bodice or shirt; make a muslin test garment and identify at least three fit issues, then practice the corresponding pattern alterations
- Practice lengthening and shortening a pattern piece at the designated alteration lines; grade a pattern up and down by 1–2 sizes to understand how proportions shift
- Construct a fitted bodice from an altered pattern, paying attention to dart placement, seam allowances, and pressing techniques; fit it on yourself or a dress form and note any remaining adjustments
- Make a simple skirt with an altered waistband and inseam length; practice grain line placement and evaluate how the skirt hangs and moves on your body
- Construct a pair of trousers or simple pants, focusing on inseam length, rise, and hip/thigh fit; use a muslin first to test your alterations before cutting fashion fabric
Next up: This stage equips you with the skills to fit and construct basic garment types accurately, preparing you to move into more advanced pattern drafting, complex garment construction (jackets, sleeves, collars), and design customization in the next stage.
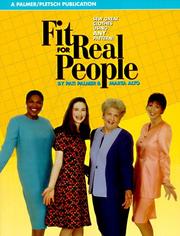
The definitive guide to fitting commercial patterns to a real body — introduces the concept of fitting adjustments systematically. This is the book that transforms 'it's close enough' into 'it fits perfectly.'

The industry-standard intermediate construction reference — covers couture finishing, interfacing, darts, and complex closures in rigorous detail, preparing the learner for advanced dressmaking.
Dressmaking Mastery & Couture Techniques
ExpertApply professional and couture construction methods — hand finishing, underlining, tailoring, and draping — to create polished, wardrobe-quality garments entirely from scratch.
▸ Study plan for this stage
Pace: 8–10 weeks, ~40–50 pages/day (mix of dense technical content and hands-on practice). Allocate 2–3 weeks per book, with overlapping practice projects running throughout.
- Fabric selection, grain line, and preparation techniques for couture-quality results
- Hand-finishing methods (pad stitching, pick stitching, French seams, bound seams) and when to apply each
- Underlining and interfacing strategies to stabilize and enhance garment structure
- Tailoring fundamentals: collar construction, lapel shaping, and buttonhole placement for professional fit
- Draping principles and their application to pattern modification and custom garment fitting
- Pattern grading, seam allowances, and notching for precision construction
- Couture pressing and blocking techniques to achieve polished, professional finishes
- Integration of patternmaking theory with construction practice to design and execute custom garments
- How do you select and prepare fabric (grain line, shrinkage, nap) to ensure a couture-quality garment?
- What are the differences between pad stitching, pick stitching, and machine stitching, and when is each technique appropriate?
- How do underlining and interfacing differ in purpose, and how do you choose the right weight and fiber content for a specific garment?
- What are the key steps in constructing a professional collar and lapel, and how does tailoring technique affect the final appearance?
- How do you use draping to modify a pattern for a custom fit, and what measurements or adjustments does draping reveal?
- Describe the process of grading a pattern and explain how seam allowances and notching contribute to accurate construction.
- Complete a fabric swatch study: select 5–6 different fabrics (silk, wool, linen, cotton blends), test grain line, shrinkage, and nap direction; document findings in a reference notebook.
- Practice hand-finishing techniques on muslin samples: execute French seams, bound seams, pad stitching, and pick stitching; evaluate each for durability and appearance.
- Construct a simple garment (e.g., a basic blouse or skirt) using underlining throughout; compare the finished garment to an identical version without underlining to observe structural benefits.
- Draft and construct a tailored jacket or coat, focusing on collar and lapel construction; use techniques from Shaeffer's guides to achieve professional shaping and pressing.
- Drape a simple bodice or skirt on a dress form using muslin; transfer the draped design to paper, create a pattern, and construct the garment to validate the draping process.
- Grade a simple pattern (e.g., a basic block) up and down one size using Armstrong's methods; construct both sizes to verify accuracy and fit consistency.
Next up: Mastery of these couture techniques and patternmaking principles equips you to tackle specialized garment categories—bridal wear, evening gowns, or structured outerwear—where precision construction, advanced fitting, and design innovation converge.

An encyclopedic, professional-level guide to sewing every fabric type correctly — essential reading before tackling advanced garments in silk, wool, or stretch fabrics.
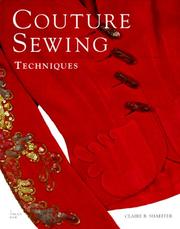
Reveals the hand-finishing, underlining, and construction secrets used in haute couture houses — the techniques that separate a truly polished garment from a merely competent one.

The definitive college-level patternmaking textbook — teaches the learner to draft original patterns from measurements, achieving full creative independence from commercial patterns.
Discussion
Keep reading
Paths that share books, cover the same subject, or open a related topic.