Woodturning for beginners: the best books to master the lathe
This curriculum takes a complete beginner from their very first encounter with a lathe all the way through confident, creative woodturning across multiple project types. Each stage builds directly on the last — starting with safety, tool handling, and core technique, then moving into spindle and bowl work, and finally into specialty projects like pens and decorative forms. Read the books within each stage in order, as earlier titles establish the vocabulary and muscle memory that later ones assume you already have.
Foundations: Lathe, Tools & Safety
BeginnerUnderstand how a lathe works, learn to identify and safely use core turning tools, and develop the fundamental hand positions and cutting techniques that underpin all woodturning.
▸ Study plan for this stage
Pace: 4–5 weeks, ~25–30 pages/day, with 2–3 practice sessions per week at the lathe
- Lathe anatomy and how spindle/faceplate rotation creates the cutting action
- The four primary turning tools (gouge, chisel, parting tool, skew) and their specific cutting edges and purposes
- Safe hand positioning: the fulcrum grip and how to maintain control during cuts
- The relationship between tool angle, bevel contact, and clean cutting versus tearout
- Personal protective equipment (PPE) requirements and workshop safety protocols for turning
- How grain direction affects cutting quality and the importance of reading wood grain before turning
- Basic spindle turning setup and faceplate turning setup differences
- Fundamental cuts: roughing, shaping, and finishing cuts with proper technique
- Explain how the lathe's rotation and the tool's cutting edge work together to remove wood, and why bevel contact is essential for a clean cut
- Describe the correct hand position and fulcrum grip for each of the four primary turning tools, and explain why this grip prevents catches and loss of control
- What are the key safety hazards in woodturning, and what PPE and workshop practices protect against them?
- How do you identify grain direction in a turning blank, and why does grain direction matter for the quality of your cuts?
- What is the difference between spindle turning and faceplate turning in terms of setup, tool angles, and the types of cuts you make?
- Walk through the sequence of cuts needed to rough a spindle blank from square to round, explaining the tool and technique for each step
- Set up the lathe correctly (check alignment, secure the workpiece, adjust tool rest height and distance), then practice rotating the spindle by hand to understand the cutting geometry before powering on
- Practice the fulcrum grip with each of the four primary tools (gouge, chisel, parting tool, skew) on a practice blank at low speed, focusing on hand position and stability without making cuts
- Rough a spindle blank from square to round using a roughing gouge, concentrating on maintaining bevel contact and a smooth, controlled feed rate
- Make a series of shaping cuts on a spindle (coves, beads, tapers) using the gouge and chisel, deliberately varying grain direction to observe how it affects tearout and surface quality
- Practice parting tool cuts to create a shoulder or reduce diameter, maintaining consistent depth and angle
- Turn a simple faceplate project (e.g., a shallow bowl blank or platter) to understand the differences in tool angles, hand positions, and safety considerations compared to spindle turning
- Inspect and sharpen (or have sharpened) each of the four primary tools, learning to recognize a sharp edge and understanding how tool condition affects cut quality
Next up: This stage builds the mechanical competence and safety foundation needed to progress to intermediate spindle and faceplate projects, where you will apply these core techniques to create finished pieces with more complex profiles, decorative details, and refined surface finishes.

Universally regarded as the single best starting point for beginners — Rowley covers lathe setup, tool selection, sharpening, and safe technique in a logical, confidence-building sequence. Read this first to build your entire mental framework.

Darlow's rigorous, well-illustrated treatment of cutting mechanics and tool geometry deepens the intuition built by Rowley, ensuring you understand *why* cuts work — not just how to copy them.
Sharpening & Tool Mastery
BeginnerMaster the sharpening of gouges, skews, scrapers, and parting tools so that every cut is clean and controlled — the single skill that separates frustrating turning from enjoyable turning.
▸ Study plan for this stage
Pace: 4–5 weeks, ~20–25 pages/day, with 2–3 dedicated sharpening practice sessions per week
- Understanding the geometry of turning tool edges (rake angle, clearance angle, bevel angle) and why each matters for clean cuts
- Mastering freehand sharpening techniques on whetstones and oilstones as taught by Kingshott, including the correct hand position and stroke mechanics
- Recognizing and correcting common sharpening mistakes (dubbing the edge, inconsistent bevel angle, over-grinding) that lead to poor turning performance
- Sharpening gouges, skews, scrapers, and parting tools using Kingshott's specific methods and tool-holding approaches
- Achieving and maintaining a wire edge (burr) as the indicator of a properly sharpened tool ready for turning
- Developing the tactile feedback and muscle memory needed to sharpen freehand without jigs or guides
- Understanding stropping and honing as maintenance techniques to extend the life of a sharp edge between major sharpenings
- What are the three key angles in turning tool geometry, and how does each one affect the quality of a cut on the lathe?
- Describe Kingshott's freehand sharpening technique: hand position, stone angle, and stroke direction for a gouge.
- How do you know when a tool is properly sharpened, and what role does the wire edge play in that assessment?
- What are the most common sharpening mistakes that lead to frustration at the lathe, and how do you avoid them?
- How does sharpening technique differ between gouges, skews, scrapers, and parting tools, and why are those differences necessary?
- When should you strop a tool versus when should you re-sharpen it, and what is the practical difference in your turning workflow?
- Sharpen a single gouge 5–10 times using Kingshott's freehand method, focusing on consistent bevel angle and a clean wire edge each time
- Sharpen a skew chisel and a parting tool, comparing the hand position and stroke mechanics required for each tool type
- Practice stropping on leather with honing compound; compare the cutting performance of a stropped edge versus a freshly sharpened edge on scrap wood
- Sharpen a scraper and test it on the lathe; deliberately create a dull edge and re-sharpen it to understand the tactile difference
- Set up a simple sharpening station with your stones and tools; time yourself sharpening a gouge from dull to sharp, then repeat weekly to track improvement in speed and consistency
- Turn a series of test cuts (beads, coves, straight edges) with freshly sharpened tools, then again with deliberately dulled tools, and document the difference in cut quality and control
Next up: This mastery of sharpening and tool geometry provides the foundation for the next stage—confident tool control and cut execution—because a sharp, properly angled tool is the prerequisite for every technique you will learn.

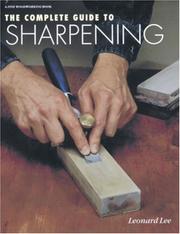
A thorough, practical guide to sharpening all woodworking tools including turning tools; reading this after the foundation stage means you can immediately apply correct angles and grinding techniques to the tools you've just learned to hold.
Spindle Work & Between-Centers Turning
BeginnerTurn confident, smooth cylinders, tapers, coves, beads, and decorative profiles between centers — the core of furniture legs, tool handles, and spindle projects.
▸ Study plan for this stage
Pace: 4–5 weeks, ~25–30 pages/day with daily turning practice (1–2 hours minimum)
- Proper tool grip and body positioning for spindle work between centers
- Understanding bevel-rubbing contact and how it controls cut quality and safety
- Executing smooth, flowing cylinders as the foundation for all spindle profiles
- Turning tapers, coves, and beads with consistent technique and clean transitions
- Reading grain direction and adjusting approach angle to minimize tearout
- Shaping decorative profiles and combining basic elements into complex spindle designs
- Achieving surface finish quality that requires minimal sanding
- What is bevel-rubbing contact and why is it essential for safe, controlled spindle turning?
- How do you turn a smooth cylinder between centers, and what are the most common mistakes beginners make?
- Describe the technique for turning a cove: tool selection, approach angle, and how to avoid catches.
- What is the difference between turning 'with the grain' and 'against the grain' in spindle work, and how do you adapt your technique?
- How do you transition smoothly between different profile elements (e.g., from a cylinder to a bead to a cove)?
- What finishing techniques does Raffan recommend for spindle work, and why does surface quality matter before sanding?
- Turn 5–10 practice cylinders of varying diameters (1–3 inches) between centers, focusing on achieving a consistent diameter and smooth surface with minimal tearout
- Practice the cove-turning technique on scrap wood for 20–30 minutes, working on smooth entry and exit without catches or catches
- Turn a complete spindle project from 'Woodturning Projects' (e.g., a simple table leg or tool handle), applying cylinder, taper, and bead techniques in sequence
- Deliberately turn grain 'downhill' and 'uphill' on the same piece to experience the difference; adjust your approach angle and tool presentation each time
- Create a practice piece combining at least four different profile elements: cylinder, taper, cove, and bead—focus on smooth transitions between sections
- Turn a spindle with the goal of achieving 80% surface finish quality straight from the tool, minimizing reliance on sanding; evaluate and repeat until consistent
Next up: This stage builds the muscle memory, tool control, and design intuition needed to advance to face-plate turning and hollow forms, where you'll apply these same principles of bevel contact and profile work to larger, more complex shapes.

Raffan is one of the world's most respected turning teachers; this book focuses on spindle and general turning with exceptional clarity on tool control and reading the wood grain — a perfect next step after Rowley.

Baker's project-based approach reinforces spindle skills through real objects (handles, boxes, lids), giving you structured practice with immediate, satisfying results.
Bowl Turning
IntermediateSafely and confidently turn bowls from green and seasoned wood — understanding grain orientation, wall thickness, tool presentation, and finishing the inside and outside of a bowl.
▸ Study plan for this stage
Pace: 6–8 weeks, ~40–50 pages/day with 2–3 turning sessions per week
- Grain orientation and wood movement in bowl blanks, including radial vs. tangential shrinkage and how it affects wall thickness and shape stability
- Safe tool presentation and cutting angles for roughing, shaping, and finishing bowl profiles on both inside and outside surfaces
- Wall thickness management and measurement techniques to achieve balanced, durable bowls that won't crack or warp
- Green wood vs. seasoned wood turning: differences in approach, drying strategies, and finishing techniques for each
- Chucking and holding methods specific to bowl work, including jam chucks, expanding collets, and reversing the bowl for inside work
- Surface finishing techniques including sanding progression, sealing, and final polishing for both interior and exterior bowl surfaces
- Artistic design principles for bowl forms: proportion, balance, and visual weight in relation to wall thickness and profile
- How does grain orientation affect wood movement in a bowl blank, and what wall thickness should you target to minimize cracking and warping?
- What are the key differences in approach when turning green wood versus seasoned wood, and how do drying and finishing strategies differ?
- Describe the correct tool presentation and cutting angle for roughing the outside of a bowl, and explain why this matters for safety and surface quality.
- How do you safely reverse a bowl to turn the inside, and what chucking methods does Raffan recommend for different bowl sizes and wood types?
- What sanding and finishing sequence does Raffan recommend for achieving a professional surface on both the inside and outside of a bowl?
- How do you measure and maintain consistent wall thickness while turning the inside of a bowl, and what thickness range is appropriate for different wood types?
- Turn 3–4 small practice bowls (3–5 inches diameter) from seasoned wood, focusing on consistent wall thickness and smooth profiles; measure walls with calipers after each attempt
- Practice grain orientation: select 5–6 bowl blanks with different grain patterns, sketch the grain direction, predict how each will move, then turn and monitor them over 2–3 weeks
- Set up and practice at least 3 different chucking methods (jam chuck, expanding collet, and one alternative) on scrap wood to build confidence before committing to finished pieces
- Turn one green wood bowl and one seasoned wood bowl of similar size side by side; document the turning experience, drying behavior, and final finish for each
- Complete a full sanding and finishing sequence on a finished bowl: progress through grits (80–220), apply sealer, and final polish; photograph and compare surface quality to Raffan's examples
- Design and turn a bowl with intentional artistic proportions (e.g., wide and shallow vs. tall and narrow); sketch the design first, turn it, and evaluate how wall thickness and profile affect the visual result
Next up: This stage builds the foundational skills and confidence needed to tackle more advanced forms—such as hollow vessels, lidded boxes, or sculptural work—where precision wall thickness, grain management, and complex chucking strategies become even more critical.

Raffan's dedicated bowl-turning volume is the natural companion to his spindle book and is widely considered the definitive beginner-to-intermediate bowl reference, covering grain, chucking, wall thickness, and form.

After mastering technique, this book expands your eye for form and proportion — Raffan analyzes what makes a bowl beautiful, bridging the gap between technical competence and artistic intention.
Specialty Projects: Pens, Boxes & Decorative Objects
IntermediateApply your turning skills to a wide range of finished objects — pens, lidded boxes, and decorative hollow forms — while learning finishing, sanding, and presentation techniques.
▸ Study plan for this stage
Pace: 4–5 weeks, ~25–30 pages/day with 2–3 turning sessions per week
- Pen blank preparation, drilling, and assembly techniques for functional turned objects
- Lidded box design principles: grain orientation, wall thickness, and fit between body and lid
- Hollow form turning methods and wall thickness management for decorative vessels
- Finishing techniques: sanding progressions, surface treatments, and protective finishes for small objects
- Material selection and properties: how wood species, grain, and stability affect specialty projects
- Tool control and precision turning for small-diameter work and detail work
- Presentation and assembly: final fitting, gluing, hardware installation, and display considerations
- What are the critical steps in preparing and drilling pen blanks, and how do you ensure alignment and prevent tearout?
- How do you design and turn a lidded box so the lid fits properly without binding or excessive play?
- What techniques allow you to turn hollow forms with consistent wall thickness, and why is wall thickness critical?
- Describe a complete sanding progression for a small turned object and explain why each grit matters.
- How do wood species and grain direction influence your approach to pens, boxes, and hollow forms?
- What are the main finishing options for specialty projects, and when would you choose one over another?
- Turn and assemble 3–5 complete pens using different blank materials and hardware styles, focusing on consistent diameters and smooth transitions.
- Design and turn a lidded box with a fitted lid; test the fit multiple times during turning and document how you achieved the final tolerance.
- Turn a hollow form (small vessel or decorative box) using calipers to maintain consistent wall thickness; measure wall thickness at multiple points.
- Execute a full sanding progression (80 to 220+ grit) on a completed project and compare the final surface quality to rushed sanding.
- Finish two identical turned blanks using different methods (e.g., oil vs. lacquer vs. wax) and compare durability, appearance, and feel over 2–3 weeks.
- Turn a small decorative object that showcases grain and color; photograph and present it as a finished piece ready for sale or gift.
- Practice precision detail work: turn a small finial, bead, or cove on a pen blank or box lid to develop control at small scales.
Next up: This stage equips you with the discipline of precision turning, finishing mastery, and the confidence to execute complete projects from blank to finished object—skills that transfer directly to larger sculptural forms, advanced hollow turning, and artistic vessel design in the next level.

The go-to reference for pen turning, covering mandrels, blanks, kits, and finishing; pen turning is an ideal skill-builder because the small scale demands precision and rewards clean tool technique.

A beautifully illustrated survey of forms, materials, and finishing approaches from leading turners worldwide — reading this last broadens your creative vocabulary and inspires your own design direction after you have solid technical grounding.
Discussion
Keep reading
Paths that share books, cover the same subject, or open a related topic.