Tailor your clothes to fit perfectly
This curriculum takes a complete beginner from zero sewing knowledge to confidently altering ready-to-wear garments for a precise personal fit. Each stage builds on the last: first you learn to handle fabric and a machine, then you master the core alteration techniques, and finally you develop the fitting eye and tailoring judgment needed to tackle complex structural changes.
Foundations: Tools, Fabric & the Machine
BeginnerUnderstand sewing tools, fabric behavior, and how to operate a sewing machine confidently enough to sew and unpick a straight seam.
▸ Study plan for this stage
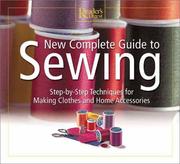
Pace: 6–8 weeks total. Week 1–3: Read the relevant foundational chapters of "Reader's Digest Complete Guide to Sewing" (tools & equipment, fabric selection & preparation, and the sewing machine chapter) at roughly 20–25 pages per sitting, 3–4 sittings per week. Week 4–6: Move into "The Complete Photo Guid
- Sewing tool identification and purpose: distinguishing between cutting tools (shears, rotary cutters, seam rippers), measuring tools (tape measure, seam gauge), marking tools (tailor's chalk, tracing wheel), and pressing tools (iron, pressing cloth) as catalogued in both the Reader's Digest guide an
- Fabric grain, bias, and grain lines: understanding lengthwise grain, crosswise grain, and true bias, and why cutting or sewing off-grain distorts a finished garment — a concept given detailed treatment in the Reader's Digest Complete Guide to Sewing
- Fabric preparation: pre-washing, pressing, and straightening fabric before cutting, as outlined in Reader's Digest, to prevent shrinkage and distortion after alterations
- Sewing machine anatomy and threading: correctly identifying presser feet, feed dogs, bobbin assembly, tension dial, stitch selector, and throat plate using the illustrated machine diagrams in both books
- Machine tension and stitch length: understanding how upper and bobbin thread tension interact to form a balanced stitch, and how stitch length is adjusted for different fabric weights — covered with photographic close-ups in The Complete Photo Guide to Sewing
- Sewing and unpicking a straight seam: executing a consistent 5/8-inch seam allowance, backstitching at start and finish, and removing stitches cleanly with a seam ripper without damaging fabric — a foundational skill demonstrated step-by-step in both references
- Pressing as you sew: the principle that every seam must be pressed before crossing it with another seam, introduced in the Reader's Digest Complete Guide to Sewing and reinforced visually in The Complete Photo Guide to Sewing
- Fabric types and their behavior: an introductory survey of wovens vs. knits, natural vs. synthetic fibers, and how each affects needle choice, stitch type, and handling — covered in the fabric chapters of both books
- Can you name and describe the function of at least eight sewing tools introduced across the Reader's Digest Complete Guide to Sewing and The Complete Photo Guide to Sewing, and explain when you would reach for each one?
- What is fabric grain, and what happens to a sewn seam if fabric is cut on the bias unintentionally? How does the Reader's Digest guide recommend you straighten fabric before cutting?
- Walk through the complete threading sequence for a sewing machine — upper thread path and bobbin — as illustrated in The Complete Photo Guide to Sewing. What happens to stitch quality if tension is too tight or too loose on either thread?
- How do you sew a straight seam with a consistent 5/8-inch seam allowance, and what does backstitching accomplish at the beginning and end of a seam?
- Why must a seam be pressed before it is crossed by another seam, and what tools and techniques do both books recommend for pressing without damaging fabric?
- What is the difference between a woven and a knit fabric in terms of stretch and behavior under the presser foot, and how does needle and stitch selection differ between the two according to The Complete Photo Guide to Sewing?
- Tool handling drill: Gather every tool listed in the opening chapters of both books that you own or can source. Pick up each one, state its name aloud, and perform its intended action (e.g., measure a 5/8-inch seam allowance with the seam gauge, make a chalk mark and erase it, cut a scrap of fabric with shears vs. a rotary cutter). Cross-reference the tool lists in both books to ensure nothing is
- Fabric grain exercise: Take three fabric scraps (one woven cotton, one woven linen or polyester, one knit jersey). Pull a thread to find the true crosswise grain on each woven piece, then tear or cut along the grain. Hold each piece on the bias and observe the stretch. Label each scrap with grain direction using tailor's chalk, following the guidance in the Reader's Digest Complete Guide to Sewing
- Machine threading & tension test: Thread your machine from scratch three times without looking at the manual — upper thread and bobbin — using the diagrams in The Complete Photo Guide to Sewing as your only reference. Sew a 6-inch line of stitches on a folded cotton scrap, then deliberately over-tighten and over-loosen the upper tension and observe the stitch on both sides of the fabric. Photograp
- Straight-seam sampler: Cut six pairs of 4×10-inch fabric strips in different fabric types (cotton, polyester, a light knit if available). Sew each pair together with a straight seam at exactly 5/8 inch, backstitching at both ends. Press each seam open. Measure the seam allowance at three points along each seam and record any deviation — aim for less than 1/8-inch variance.
- Seam-ripping practice: Take two of the sewn samples from the straight-seam exercise and unpick them completely using a seam ripper, following the technique shown in both books. Practice both the 'every-third-stitch' method and the 'run-the-ripper-along-the-seam' method. Inspect the fabric afterward for pulls, holes, or damage and note which method was safer for each fabric type.
- Pressing sequence drill: Sew three straight seams on cotton fabric, then practice the full press sequence from the Reader's Digest Complete Guide to Sewing — press flat to set the stitches, press the seam open over a seam roll or rolled towel, then press from the right side with a pressing cloth. Time yourself and repeat until the sequence feels automatic before moving to the next stage.
Next up: ">Mastering straight seams, fabric grain, and machine control here gives you the physical vocabulary and muscle memory needed to confidently move into hand-stitching techniques and seam finishing — the skills that transform a raw sewn edge into a clean, durable alteration.
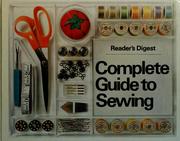
The single most comprehensive beginner reference in print — covers every tool, stitch type, seam finish, and fabric category with clear diagrams. Reading it first gives you the shared vocabulary every later book assumes you already have.
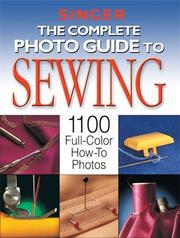
Step-by-step photography fills in the visual gaps that diagrams alone can leave; reinforces machine setup, tension, and basic seam techniques before you touch a garment you care about.
Fitting Principles: Understanding the Body & the Garment
IntermediateRead a garment on a body, diagnose why it pulls or sags, and understand how darts, ease, and grain lines create or destroy fit.
▸ Study plan for this stage
Pace: 8–10 weeks total. Weeks 1–6: "Fit for Real People" (~25–30 pages/day, 4–5 days/week), focusing on one fitting problem category per session. Weeks 7–10: "The Complete Book of Tailoring" (~20–25 pages/day, 4–5 days/week), reading the fitting and construction-logic chapters alongside a hands-on muslin
- Reading a garment on a live body: identifying the direction of pull, drag lines, and excess fabric as diagnostic signals (Fit for Real People)
- The nine common fitting problems Palmer categorizes — swayback, full tummy, broad/narrow shoulders, full bust, etc. — and their root causes in body-to-pattern mismatch
- Ease: the difference between wearing ease and design ease, and how collapsing or adding ease changes both fit and silhouette
- Dart logic: how darts rotate, pivot, and can be converted without losing their fitting function, as introduced in Fit for Real People and reinforced structurally in Margolis
- Grain line integrity: how off-grain cutting or wearing distorts hang, pulls fabric diagonally, and creates fitting problems that cannot be solved by seam adjustments alone
- The muslin/toile as a diagnostic tool: Palmer's tissue-fitting method as a pre-cutting checkpoint versus Margolis's emphasis on fitting at each construction stage
- Tailoring's structural approach to fit: how interfacing, pad-stitching, and underlining in Margolis create shape from within rather than relying solely on seam shaping
- The relationship between body landmarks (bust apex, shoulder slope, waist, hip curve) and their corresponding pattern landmarks as the foundation of all fitting decisions
- Given a garment with diagonal drag lines pulling from the shoulder toward the bust, what does Palmer's framework tell you about the likely cause, and what is the first alteration to attempt?
- What is the difference between wearing ease and design ease, and how would you determine whether a too-tight bodice needs a seam let-out or a dart adjustment?
- How does grain line deviation — for example, the side seam swinging toward the front — indicate a fitting imbalance, and which body measurement discrepancy typically causes it?
- According to Margolis, how does the internal structure of a tailored jacket (interfacing and pad-stitching) compensate for or interact with fitting adjustments made at the seams?
- Walk through Palmer's tissue-fitting method: what are you checking at each body landmark, and what adjustments can be made before cutting into fashion fabric?
- How does the pivot-and-slide dart manipulation method preserve the original dart intake while moving the dart to a new position, and when would you choose this over slashing and spreading?
- Fitting diagnosis drill (Fit for Real People): Borrow or photograph 3–4 ready-to-wear garments on a body (yourself or a fitting partner). Using Palmer's problem categories as a checklist, write a one-paragraph diagnosis for each — identify every drag line, note its direction, name the probable cause, and prescribe one alteration.
- Tissue-fitting session: Pull a basic bodice or trouser pattern in your size, tissue-fit it following Palmer's step-by-step method, mark every adjustment directly on the tissue, then cut and sew a muslin to verify whether your tissue diagnosis was accurate.
- Dart rotation exercise: Take a basic bodice sloper with a single waist dart. Using the pivot method described in Fit for Real People, rotate the dart to at least three new positions (side seam, armhole, neckline). Sew a quick muslin of each version and compare how the fabric hangs differently even though the fit is theoretically identical.
- Grain line experiment: Cut two identical rectangles of a medium-weight woven fabric — one perfectly on grain, one 15° off grain. Hang both from a shoulder seam and sketch or photograph how each drapes. Then repeat with a simple skirt front cut on and off grain to see how the hem swings.
- Ease mapping: Measure yourself (or your dress form) at bust, waist, and hip. Pull three patterns in the same nominal size from different sources. Chart the actual pattern measurements at each point, subtract your body measurements, and categorize the remainder as wearing ease vs. design ease. Note which patterns would fit before any alteration.
- Tailoring structure vs. seam-fit comparison (The Complete Book of Tailoring): Following Margolis, interface and pad-stitch two jacket fronts — one with full canvas, one with fusible only. Fit both over the same body and document in writing how the internal structure changes what fitting adjustments feel necessary at the side and shoulder seams.
Next up: Mastering how to diagnose fit and understand why darts, ease, and grain work the way they do gives you the diagnostic vocabulary and structural intuition you need to move confidently into pattern alteration techniques — where you will learn to systematically redraw and grade pattern pieces to encode those fitting corrections permanently before cutting.
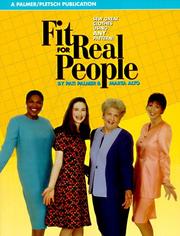
The definitive modern fitting manual — teaches you to analyze fit problems by their visual symptoms (drag lines, pulls, wrinkles) and trace them to their structural cause, which is the core skill for all alteration work.
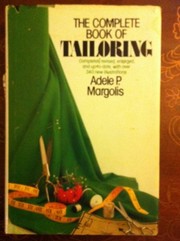
A classic that explains how a garment is constructed from the inside out; understanding construction logic tells you exactly where and how to intervene when altering darts, sleeves, and bodice shapes.
Advanced Fit & Tailoring Judgment
ExpertDevelop a tailor's eye — make judgment calls on complex multi-point fit issues, understand bespoke construction methods, and refine garments to a truly custom standard.
▸ Study plan for this stage
Pace: 6–8 weeks, ~20–25 pages/day, with dedicated workshop sessions 2–3 times per week for hands-on draping and pattern manipulation alongside the reading
- Bespoke pattern drafting from body measurements — understanding how Knowles's block/sloper system translates raw measurements into a foundational pattern unique to an individual figure
- Multi-point fit analysis — identifying how a single fitting problem (e.g., a diagonal drag line) can have multiple simultaneous root causes across the bodice, sleeve, and torso
- Dart manipulation and equivalence — rotating, combining, and suppressing darts to achieve design lines without losing fit integrity, as detailed in Knowles's dart-transfer methods
- Ease allowances and their intentional control — distinguishing wearing ease from design ease and making deliberate, documented ease decisions for different fabric weights and garment purposes
- Grading and size scaling logic — understanding how proportional grading preserves fit relationships across sizes rather than simply enlarging or reducing a pattern uniformly
- Sleeve-to-bodice relationship — mastering the interplay of sleeve cap height, armscye shape, and pitch so that set-in sleeves hang and move correctly on a specific body
- Trouser and skirt crotch/hip fitting — applying Knowles's lower-body drafting principles to resolve complex fit issues such as crotch length, seat curve, and thigh width simultaneously
- Pattern correction as a design decision — understanding that every alteration changes the silhouette and learning to evaluate corrections against the intended design aesthetic, not just technical correctness
- Given a set of body measurements that deviate significantly from standard (e.g., a high hip larger than the full hip, or a forward-thrust shoulder), how would you draft a Knowles-method sloper that accounts for these deviations from the outset, rather than correcting them after the fact?
- A muslin shows a horizontal pull across the upper back and a diagonal drag from the front shoulder toward the bust point simultaneously — using Knowles's fit principles, what are the two or three most likely structural causes, and in what order would you address them?
- How does Knowles distinguish between a dart that should be rotated into a seam and one that should be suppressed entirely, and what are the fit consequences of choosing incorrectly?
- When grading a pattern up two sizes using Knowles's grading logic, which measurement points receive the largest increments and why — and how does this differ between a bodice and a trouser?
- Explain the relationship between sleeve cap height and sleeve cap ease in Knowles's drafting system: what happens to mobility and silhouette at the extremes of each variable?
- After completing a second muslin with corrections applied, you still see a residual fit issue. How do you determine whether the remaining problem is a pattern issue, a cutting issue, or a sewing/construction issue?
- Draft a complete set of personal slopers (bodice front/back, sleeve, skirt, and trouser) using Knowles's measurement and drafting instructions, then sew a full muslin and document every fit deviation with annotated photographs before making any corrections
- Choose one complex fitting problem (e.g., a swayback combined with a prominent seat) and work through it using only Knowles's pattern-correction methods — make the correction on the pattern, cut a new muslin, and compare the before/after fit in writing
- Practice dart manipulation: take a single basic bodice block and create five different design variations (French dart, waist dart only, yoke seam absorption, side-seam dart, no-dart with ease) using Knowles's rotation techniques, sewing a quick toile for each to verify the fit is preserved
- Perform a two-size grade on your personal bodice sloper using Knowles's grading increments, then compare the graded pattern to a second person's measurements — document where the grade succeeds and where individual adjustment is still required
- Reconstruct a ready-to-wear garment that fits poorly: trace its existing pattern pieces, identify the structural fit problems using Knowles's diagnostic framework, redraft the problem pieces, and sew a corrected version in fashion fabric
- Keep a 'tailor's judgment journal' throughout the stage — after every fitting session, write a one-page entry identifying the fit issues observed, the cause hypothesized, the correction chosen, and the result, building a personal reference of recurring fit patterns
Next up: Mastering Knowles's drafting and multi-point fit correction logic gives the reader a precise, measurement-grounded language for garment structure, which is the essential foundation for any subsequent study of couture finishing, advanced tailoring (pad-stitching, canvas construction, bespoke suiting), or specialized category work such as bridal or menswear — where the expectation is not just correc
Understanding how patterns are drafted from scratch gives you the deepest possible insight into why a garment fits or doesn't — at this stage, knowing the origin of every seam and dart lets you alter with complete confidence and creativity.
Discussion
Keep reading
Paths that share books, cover the same subject, or open a related topic.