Modern calligraphy and brush lettering: the best books to start
This curriculum takes a complete beginner from understanding the very basics of brush lettering and calligraphy tools all the way through developing a personal, expressive style suitable for cards, art, and gifts. Each stage builds directly on the last — you'll first learn how to hold a brush and form strokes, then master full alphabets and compositions, and finally refine your artistry with advanced techniques and creative projects.
Foundations: Tools, Strokes & First Letters
BeginnerUnderstand the essential tools (brush pens, ink, paper), learn the foundational strokes that underpin every letterform, and write your first complete brush lettering alphabet with confidence.
▸ Study plan for this stage
Pace: 4–5 weeks, ~20–25 pages/day with daily practice sessions (30–45 minutes of hands-on lettering)
- Brush pen anatomy and how nib angle, flexibility, and tip size affect letterforms
- Paper selection and texture's impact on ink flow and letter quality
- The foundational strokes (downstrokes, upstrokes, curves, and pressure control) that form the basis of all letterforms
- Proper grip, posture, and hand positioning for consistent letterform control
- Stroke variation and contrast—how pressure creates thick and thin lines in brush lettering
- Basic letterform construction and spacing principles for readability
- Ink consistency and how to prepare materials for optimal writing conditions
- Building muscle memory through repetitive, mindful practice of individual strokes and letter families
- What are the key differences between brush pens, pointed pens, and traditional brushes, and when would you use each for modern calligraphy?
- How does nib angle affect the appearance of your letterforms, and what is the standard angle recommended for modern calligraphy?
- Describe the four foundational strokes and explain how they combine to form complete letters.
- What paper qualities matter most for brush lettering, and why do texture and weight affect your results?
- How do you maintain consistent pressure and stroke variation to create the characteristic thick-and-thin contrast in brush lettering?
- What is proper hand positioning and posture, and how does it prevent fatigue and improve letterform consistency?
- Complete Molly Suber Thorpe's tool inventory exercise: gather and test at least 3 different brush pens on 2–3 paper types, documenting how each pen performs on each surface
- Practice the foundational strokes (downstrokes, upstrokes, curves, and pressure transitions) for 15 minutes daily for 2 weeks, filling at least one page per session
- Work through Peggy Dean's stroke-building drills systematically, focusing on consistency and muscle memory before moving to letter combinations
- Write out the lowercase alphabet 5 times using the techniques from both books, comparing your first and fifth attempts to identify improvement
- Create a personal reference sheet documenting your preferred brush pen, paper, and ink combination with annotated examples of successful strokes
- Practice letter families (similar-structure letters like n, h, m or o, a, d, g) in isolation for 3–4 sessions each, then combine them into simple words
Next up: Mastering foundational strokes and letterform construction here equips you to tackle more complex letterforms, flourishes, and composition techniques in the next stage, where you'll learn to design complete pieces and develop your personal style.

The single best starting point for absolute beginners — Thorpe demystifies tools, explains pressure-and-release technique, and walks through a full pointed-pen alphabet step by step, giving you the vocabulary every later book assumes.

After Thorpe introduces concepts, Dean's workbook-style guide drills the basic strokes and transitions into letters with structured practice pages, cementing muscle memory before you move on.
Building the Alphabet: Letters, Words & Consistency
BeginnerForm every uppercase and lowercase letter reliably, connect letters into words, and develop the consistency and rhythm needed for legible, attractive lettering.
▸ Study plan for this stage
Pace: 4–5 weeks, ~25–30 pages/day with daily practice sessions (30–45 minutes of lettering drills)
- Proper pen grip, angle, and posture for consistent letterforms
- Fundamental strokes (downstrokes, upstrokes, curves, loops) that form the foundation of all letters
- Uppercase and lowercase letter construction for both print and connected styles
- Letter spacing, baseline alignment, and rhythm to create visually balanced words
- Consistency through repetition: muscle memory and hand control development
- Connecting letters smoothly to form words without losing letterform integrity
- What are the key differences between downstrokes and upstrokes, and how do they affect letter weight and appearance?
- How do you maintain consistent letter height, spacing, and baseline alignment when forming words?
- What is the relationship between pen angle and the visual character of letterforms, and how do you adjust it for different styles?
- Describe the process for connecting two specific letters (e.g., 'a' to 'e') while maintaining the integrity of both letterforms
- What are the most common consistency errors beginners make, and how do you identify and correct them in your own work?
- How does repetitive practice of individual letters and strokes build the muscle memory needed for fluid, reliable lettering?
- Daily stroke drills: spend 10–15 minutes practicing downstrokes, upstrokes, curves, and loops on grid paper to build muscle memory
- Letter-by-letter formation: write each uppercase letter 10 times, then each lowercase letter 10 times, focusing on consistency and proper pen angle
- Word building practice: take 5–10 common words and write them repeatedly, paying attention to letter spacing and baseline alignment
- Alphabet review: write out the complete alphabet (uppercase and lowercase) daily, comparing each letter to the reference in your book and noting inconsistencies
- Connected lettering drills: practice connecting specific letter pairs (e.g., 'th', 'er', 'ing') to develop smooth transitions between letterforms
- Timed consistency challenge: write a short phrase (e.g., 'The quick brown fox') multiple times in succession and compare the consistency of letterforms across repetitions
- Posture and grip check: record yourself lettering or have someone observe your hand position, pen angle, and posture to ensure proper technique
Next up: This stage establishes the mechanical foundation and muscle memory needed to form reliable, consistent letterforms—essential preparation for the next stage, where you'll explore stylistic variation, decorative flourishes, and creative composition with confidence.

Focuses tightly on letter construction and common problem areas, bridging the gap between isolated stroke drills and writing full words — exactly what you need at this stage.

Provides additional alphabet styles and guided tracing sheets that reinforce consistency across both print and script styles, expanding your repertoire before moving to intermediate work.
Intermediate Skills: Composition, Flourishes & Styles
IntermediateCompose multi-line layouts, add elegant flourishes and embellishments, and begin exploring different modern calligraphy styles beyond a single foundational hand.
▸ Study plan for this stage
Pace: 4–5 weeks, ~40–50 pages/day with daily practice sessions (30–45 minutes of hands-on lettering)
- Multi-line composition principles: spacing, alignment, hierarchy, and visual balance in layouts with multiple lines of text
- Flourish anatomy and construction: understanding stroke direction, pressure, and extension techniques to create elegant embellishments
- Integrating flourishes with letterforms: knowing when and where to add flourishes without compromising legibility or composition
- Exploring modern calligraphy styles beyond foundational hands: recognizing characteristics of contemporary styles and how they differ from traditional scripts
- Style adaptation and mixing: combining elements from different hands to develop a personal aesthetic while maintaining readability
- Compositional hierarchy and emphasis: using size, weight, color, and placement to guide the reader's eye through multi-line pieces
- Practical application to real projects: designing quotations, invitations, and personal pieces that showcase intermediate skills
- How do you balance spacing and alignment when composing a multi-line layout, and what role does hierarchy play in guiding the reader's eye?
- What are the key anatomical principles of flourishes, and how do you determine appropriate flourish placement without compromising letterform clarity?
- How do modern calligraphy styles differ from traditional foundational hands, and what characteristics define contemporary approaches?
- How can you successfully mix elements from different calligraphy styles to create a cohesive, personal aesthetic?
- What techniques can you use to create visual emphasis and hierarchy in a multi-line composition using size, weight, color, and placement?
- How do you adapt your composition and flourish choices based on the intended purpose and audience of a piece?
- Complete 5–7 multi-line compositions (short quotes, 2–4 lines each) focusing on spacing, alignment, and visual balance; experiment with different arrangements of the same text
- Practice flourish construction drills: create 50+ individual flourishes in isolation, focusing on pressure control, stroke direction, and consistency; then integrate them into letterforms
- Recreate at least 3 different modern calligraphy styles from 'The Calligrapher's Bible' and 'Creative Lettering and Beyond'; analyze their distinguishing features and practice each for 2–3 sessions
- Design a full-page invitation or announcement that incorporates multi-line text, flourishes, and intentional hierarchy; create 2–3 rough drafts before final execution
- Create a style-mixing study: take two different calligraphy hands and deliberately blend their characteristics in a short composition; document what works and what doesn't
- Complete a personal project (e.g., framed quote, greeting card, or journal entry) that applies all intermediate skills: composition, flourishes, style exploration, and hierarchy
Next up: This stage equips you with the compositional confidence, flourish mastery, and stylistic flexibility needed to move into advanced territory—whether that's specialized scripts, mixed-media integration, or developing a distinctive personal hand that can be applied to professional or artistic projects.
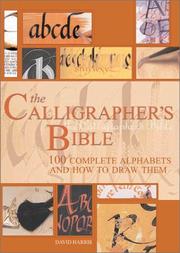
A comprehensive reference covering multiple historical and modern scripts; at this stage it gives you the broader stylistic context and letter-structure knowledge needed to consciously vary your style.

Introduces layout, composition principles, and decorative embellishments — the skills that turn individual letters into finished, gift-worthy pieces — making it the perfect bridge to advanced creative work.
Advanced Artistry: Personal Style, Projects & Mixed Media
ExpertDevelop a distinctive personal lettering style, execute polished real-world projects (cards, prints, gifts), and integrate calligraphy with illustration and mixed-media techniques.
▸ Study plan for this stage
Pace: 4–5 weeks, ~20–25 pages/day with daily practice sessions
- Chalk lettering fundamentals: tools, surfaces, and grip techniques for chalk media
- Developing personal style through letterform variation, spacing, and compositional choices
- Creating polished finished pieces: cards, signage, and gift projects with chalk
- Mixed-media integration: combining chalk lettering with illustration, backgrounds, and embellishments
- Surface preparation and material selection for different chalk applications (chalkboard, paper, etc.)
- Color theory and layering techniques specific to chalk media
- What are the essential tools and surfaces for chalk lettering, and how do you prepare them for optimal results?
- How can you develop and refine your personal lettering style using chalk, and what role do letterform variations and spacing play?
- What techniques does McKeehan recommend for creating polished, gallery-ready chalk lettering projects?
- How do you effectively combine chalk lettering with illustration and mixed-media elements in a single composition?
- What are the key differences in approach when working with chalk on chalkboards versus paper or other surfaces?
- How can you use color layering and blending in chalk to enhance the visual impact of your lettering?
- Complete at least 3 full practice pages of letterforms using different chalk types and surfaces, focusing on consistency and personal flourish
- Design and execute 2 finished chalk lettering cards (birthday, congratulations, or custom message) suitable for gifting
- Create a mixed-media piece combining chalk lettering with watercolor, ink illustration, or collage elements
- Practice color layering and blending techniques on a 12×18 surface, experimenting with complementary and analogous color schemes
- Design a chalk lettering project for a real-world application (menu board, event signage, or home décor piece) and execute it on the intended surface
- Photograph and document 5 of your best finished pieces, then reflect in writing on what makes each one successful and how it reflects your personal style
Next up: This stage equips you with the technical mastery and creative confidence to blend calligraphy with contemporary design, positioning you to explore how these skills apply to digital design, commercial projects, or teaching others the art form.

Expands your toolkit into a new medium and surface, teaching adaptation of your existing skills to chalkboard and mixed-media projects — ideal for creating standout cards, home décor, and gifts.
Discussion
Keep reading
Paths that share books, cover the same subject, or open a related topic.