Sew and mend your own clothes
This curriculum takes a complete beginner from their very first stitch to confidently constructing simple garments, moving through four stages: core hand and machine skills, repairs and alterations, pattern reading and garment construction, and finally fitting and finishing for polished results. Each stage builds directly on the vocabulary, muscle memory, and confidence developed in the one before it.
Foundations: Tools, Stitches & the Machine
BeginnerUnderstand essential sewing tools, set up and operate a sewing machine safely, and execute basic hand stitches with confidence.
▸ Study plan for this stage
Pace: 6–8 weeks total. Week 1–4: Reader's Digest Complete Guide to Sewing — focus on the opening chapters covering tools, the sewing machine, and hand stitches (~20–25 pages/day, 4–5 days/week). Week 5–8: The Complete Photo Guide to Sewing — use the photo-driven format to visually reinforce and expand on
- Identifying and selecting essential sewing tools (scissors/shears, seam rippers, pins, needles, measuring tools) and understanding the purpose of each, as introduced in the Reader's Digest Complete Guide to Sewing
- Sewing machine anatomy: naming every major part (presser foot, feed dogs, bobbin, tension dial, throat plate) and understanding what each does, covered in depth in both books
- Threading the machine correctly — upper thread path and bobbin winding/loading — and drawing up the bobbin thread, a step-by-step process illustrated in The Complete Photo Guide to Sewing
- Machine settings: stitch length, stitch width, and thread tension, and how to adjust them for different fabrics and tasks
- Safe and confident machine operation: starting, stopping, pivoting at corners, and sewing a straight seam with consistent seam allowance
- Core hand stitches: running stitch, backstitch, slip stitch, basting stitch, and whip stitch — their correct form, appropriate uses, and when to choose hand over machine sewing, as detailed in the Reader's Digest Complete Guide to Sewing
- Fabric grain, selvage, and the importance of cutting on-grain as a prerequisite for accurate sewing
- Pressing as a sewing step: why the iron is considered a second sewing machine, and basic pressing technique introduced in the Reader's Digest Complete Guide to Sewing
- Can you name every part of a sewing machine and explain the function of each, as outlined in both the Reader's Digest Complete Guide to Sewing and The Complete Photo Guide to Sewing?
- What is the correct upper-threading path and bobbin-loading procedure for a standard sewing machine, and what happens to your stitches if either is done incorrectly?
- How do you diagnose and fix the three most common machine problems — skipped stitches, thread bunching, and uneven tension — using the troubleshooting guidance in The Complete Photo Guide to Sewing?
- What are the key differences between a running stitch, backstitch, and slip stitch, and in what real-world repair or construction scenario would you choose each one?
- Why does fabric grain matter, and how do you identify the straight grain, cross grain, and bias on a woven fabric as described in the Reader's Digest Complete Guide to Sewing?
- What role does pressing play at each stage of construction, and how does it differ from ordinary ironing?
- Tool identification drill: lay out every tool you own (or can acquire) and, using the Reader's Digest Complete Guide to Sewing as your reference, write a one-sentence purpose statement for each — then quiz yourself without the book
- Machine familiarization: with the machine unthreaded and unplugged, physically locate and name every part covered in both books; then thread the machine from scratch three times in a row until you can do it smoothly without consulting the diagrams
- Straight-seam sampler: cut 10 strips of scrap fabric and sew them together with a consistent 5/8" seam allowance, adjusting stitch length and tension between strips to observe the effect — compare your results to the photo examples in The Complete Photo Guide to Sewing
- Hand-stitch practice card: using a folded piece of muslin as a 'card', work a 3-inch row of each core hand stitch (running, backstitch, basting, slip stitch, whip stitch) labeled with a fabric marker — keep it as a permanent reference
- Tension and troubleshooting exercise: deliberately mis-set your upper tension to both extremes, sew a seam, photograph the results, then correct the setting and document what changed — guided by the troubleshooting section of The Complete Photo Guide to Sewing
- Press-as-you-go drill: sew a simple four-patch square from scrap fabric, stopping to press every single seam before joining the next piece, to build the habit of treating pressing as an integral sewing step rather than a finishing touch
Next up: Mastering tools, machine operation, and basic stitches in this stage gives the reader the mechanical confidence and vocabulary needed to tackle the next stage's focus on fabric selection, pattern reading, and garment construction — where those foundational skills become the building blocks for completing real projects.
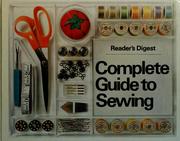
The single most comprehensive beginner reference in print — covers tools, fabric, hand stitches, and machine operation in plain language. Read it first to build a complete foundational vocabulary before touching a project.
Dense with step-by-step photographs of machine techniques, seams, and finishes. Read immediately after the Reader's Digest guide to reinforce machine-specific skills with highly visual instruction.
Repairs & Alterations: Fixing What You Own
BeginnerConfidently mend tears, replace buttons and zippers, take in or let out seams, and hem garments by hand and machine.
▸ Study plan for this stage
Pace: 6–8 weeks, ~20–25 pages/day, 5 days/week — focus on the repair, alteration, and hand/machine sewing chapters in "Complete Guide to Sewing"; skim reference sections as needed and return to them when a specific technique comes up in practice
- Hand-sewing stitches used in repairs: running stitch, backstitch, slip stitch, and whipstitch — their differences and when each is appropriate
- Mending tears and holes: reinforcing fabric before patching, choosing matching thread and fabric, and invisible vs. decorative mending approaches
- Button replacement: identifying button types (shank vs. flat), anchoring thread correctly, creating a thread shank for thicker fabrics, and sewing on hooks and snaps
- Zipper repair and replacement: distinguishing coil, invisible, and separating zippers, removing a failed zipper cleanly, and installing a new one by hand or machine
- Seam alterations — taking in and letting out: reading existing seam allowances, marking new seamlines accurately, pressing seams open or to the side, and maintaining garment balance
- Hemming techniques: measuring and marking an even hem, choosing the right hem finish (pinked, serged, turned-and-stitched) for the fabric, and executing blind hem stitch by hand and machine
- Pressing as a repair tool: how an iron and seam roll/clapper restore shape, set stitches, and make alterations look professional
- Fabric grain and pattern matching: why staying on-grain matters when patching or re-seaming so repairs are invisible and structurally sound
- What is the difference between a backstitch and a slip stitch, and which would you choose to mend a split seam on a pair of trousers versus closing a hem on a silk blouse?
- How do you determine how much seam allowance is available before letting out a seam, and what do you do if there is not enough?
- Walk through the step-by-step process of replacing a coil zipper in a skirt side seam using the Complete Guide to Sewing method — what are the critical steps where beginners most often go wrong?
- Why is pressing at each stage of a repair or alteration as important as the stitching itself, and what tools does the Complete Guide to Sewing recommend for pressing curved seams?
- How do you calculate and mark a perfectly even hem on a garment that has an uneven original hem, and which hemming stitch would you use for a heavy denim hem versus a lightweight chiffon hem?
- What preparation steps should you take on the fabric before applying a patch to a torn area, and how do you match grain and pattern so the patch is as invisible as possible?
- Seam repair drill: Deliberately rip a 4-inch seam on an old garment and re-sew it three ways — backstitch by hand, straight stitch by machine, and reinforced with a second row of stitching — then compare durability and appearance
- Button station: Collect five different button types from old clothes; practice sewing each onto a fabric scrap using the correct thread-shank method from the Complete Guide to Sewing, then stress-test each by tugging firmly
- Zipper swap: Purchase an inexpensive zipper and remove the existing zipper from a thrifted garment or pillowcase; install the new zipper following the book's instructions, pressing at every stage and checking that the pull runs smoothly before finishing
- Hem sampler: Cut four 12-inch fabric strips in different weights (denim, cotton, knit, chiffon); hem each using a different technique from the book (hand blind stitch, machine blind hem, topstitched, and slip-stitched) and label them for future reference
- Take-in alteration: Find a too-large thrifted shirt; mark, pin, and sew new side seams to take it in one full size, press the seams, and try it on — adjust if needed and document what you learned about fitting as you go
- Pressing practice: Take a previously completed repair or alteration and re-press every seam using the iron, seam roll, and tailor's ham as described in the Complete Guide to Sewing; photograph the before-and-after to internalize how much pressing changes the final look
Next up: Mastering repairs and alterations builds the hand control, machine confidence, and garment-reading skills that make constructing a simple garment from scratch — the natural next stage — feel like a logical extension rather than a leap.
The updated edition adds a dedicated alterations and repairs section that pairs perfectly with hands-on mending practice, bridging repair work toward garment construction.
Pattern Reading & First Garments
IntermediateRead and cut a commercial sewing pattern, understand grain lines and seam allowances, and sew a first complete simple garment.
▸ Study plan for this stage
Pace: 10–12 weeks total. Week 1–4: "Sewing for Dummies" (~25–30 pages/day, focusing on pattern-reading chapters and construction basics). Week 5–8: "The Colette Sewing Handbook" (~15–20 pages/day, reading slowly and pausing to study each illustrated technique). Week 9–12: "Fabric-by-Fabric One-Yard Wonder
- Understanding commercial pattern anatomy: envelope front/back, instruction sheets, size charts, and pattern symbols (notches, grainlines, fold lines, dots)
- Grain lines: lengthwise, crosswise, and bias grain — how each affects drape, stretch, and garment behavior, and why aligning them to the fabric correctly is non-negotiable
- Seam allowances: what they are, standard widths (5/8" in commercial patterns vs. Colette's metric equivalents), and how to sew and press them consistently
- Pattern sizing and ease: the difference between body measurements and finished garment measurements, and how to choose or blend between sizes
- Fabric preparation: pre-washing, pressing, and squaring fabric before cutting to prevent post-construction shrinkage and distortion
- Cutting layout and pattern placement: pinning or weighing pattern pieces, cutting with grain, and transferring markings (tailor's tacks, chalk, tracing wheel)
- Construction sequence: the logic of sewing a garment in order — stay-stitching, assembling major pieces, adding closures, then finishing hems and edges
- The one-yard project mindset from Fabric-by-Fabric: selecting the right fabric type for a given simple pattern, and adapting small-yardage constraints to build real finished garments
- After reading 'Sewing for Dummies,' can you identify every symbol on a commercial pattern instruction sheet and explain what each one instructs you to do before and during cutting?
- How does 'The Colette Sewing Handbook' define ease, and how would you decide whether to cut a size 12 or blend a 12-to-14 for a specific body measurement?
- What does cutting 'on the bias' mean, and in which of the Fabric-by-Fabric projects would bias grain be a deliberate design choice versus a mistake to avoid?
- What steps does 'Sewing for Dummies' recommend for preparing fabric before laying out a pattern, and why does skipping any of those steps risk ruining a finished garment?
- How does 'The Colette Sewing Handbook' approach pressing at each construction stage, and how does that differ from pressing only at the end?
- Looking at the fabric-specific chapters in 'Fabric-by-Fabric One-Yard Wonders,' what are two key differences in how you would cut and handle a woven cotton versus a knit jersey for a first garment project?
- Pattern prep drill (Week 1–2, using 'Sewing for Dummies'): Pull out any commercial pattern you own or buy inexpensively. Before sewing a single stitch, trace every piece onto pattern paper, label grain lines, mark all notches and dots, and write out the full cutting layout plan — then have someone check it against the instruction sheet.
- Grain-line sampler (Week 3–4): Cut three identical rectangles of a medium-weight cotton — one on the straight grain, one on the cross grain, one on the true bias. Observe and record how each hangs, stretches, and frays differently. Pin your notes to the swatches and keep them as a reference card.
- Seam allowance accuracy exercise (Week 5–6, alongside 'The Colette Sewing Handbook'): Sew ten 6-inch seams at exactly 5/8" using only your presser foot as a guide (no tape). Measure each seam allowance afterward. Aim for all ten to be within 1/16" of the target — repeat until you hit that consistency.
- Fitting mockup / toile (Week 6–8, using Colette's fitting chapters): Choose the simplest Colette-style bodice or skirt block. Cut it in cheap muslin, sew it up, put it on (or a dress form), and mark every adjustment needed. Document each change with a photo and a written note before transferring corrections to your pattern pieces.
- First complete one-yard garment (Week 9–11, using 'Fabric-by-Fabric One-Yard Wonders'): Select one project from the book that matches a fabric you already have or can buy for under $10. Follow every step in sequence — prep, layout, cut, mark, construct, press, finish. Time yourself and keep a sewing journal noting what went smoothly and what you would do differently.
- Post-project self-critique (Week 12): Lay your finished one-yard garment flat and photograph it. Compare seam straightness, hem evenness, and overall grain alignment against the book's finished photo. Write a one-page reflection citing specific techniques from all three books — what 'Sewing for Dummies' told you to do, how 'The Colette Sewing Handbook' refined it, and how 'Fabric-by-Fabric' tested
Next up: Completing a full pattern-to-garment cycle in this stage — reading symbols, cutting accurately, and finishing a real wearable piece — builds the foundational confidence and muscle memory needed to tackle more complex garment construction, fitting adjustments, and specialty fabrics in the next stage.
Demystifies commercial pattern symbols, layout, and cutting in a friendly, structured way — exactly the bridge needed between repair skills and building something from scratch.

Teaches garment construction through five beginner-friendly patterns with detailed technique instruction. The project-based format makes first garments feel achievable and the results genuinely wearable.

Short, focused projects using single yards of fabric reinforce pattern and construction skills without overwhelming commitment — ideal for building speed and confidence after the first full garment.
Fit, Finish & Going Further
IntermediateAdjust patterns to fit a real body, apply professional finishes, and develop the judgment to tackle more complex garments independently.
▸ Study plan for this stage
Pace: 10–12 weeks total. Weeks 1–7: "Fit for Real People" (~20–25 pages/day, 4–5 days/week), working slowly through the fitting chapters and pausing to apply each adjustment to a muslin. Weeks 8–12: "Reader's Digest Complete Guide to Needlework" (~15–20 pages/day), reading thematically by finish/technique
- Body measurement vs. pattern measurement: understanding ease (wearing vs. design) and how Palmer's fitting system uses tissue-fitting before cutting fabric
- The 'Big 4' fitting adjustments from Fit for Real People: full/small bust, sway back, broad/narrow shoulders, and hip/thigh alterations — and how to identify which you need from a fitting muslin
- Pivot-and-slide vs. slash-and-spread alteration methods, and when each is appropriate for a given adjustment
- Fitting order of operations: always fitting from the top of the garment downward and resolving length before width
- Professional seam finishes from the Reader's Digest guide: bound, Hong Kong, flat-felled, French seams — matching finish to fabric weight and garment use
- Interfacing, underlining, and lining as finishing systems: how the Reader's Digest guide distinguishes their purposes and application methods
- Hand-sewing techniques covered in the Reader's Digest guide (slip stitch, catch stitch, bar tack, pick stitch) and their role in couture-level finishing
- Developing independent judgment: using both books together to diagnose a fitting problem, choose an alteration, and select the appropriate finish for the corrected garment
- Given your own measurements and a commercial pattern, can you identify at least three adjustments needed before cutting, using the tissue-fitting method described in Fit for Real People?
- What is the difference between a full-bust adjustment (FBA) and a simple width addition at the side seam, and why does Palmer argue the FBA produces a better fit?
- How do you determine the correct seam finish for a given fabric and garment type, drawing on the finish options catalogued in the Reader's Digest guide?
- When would you choose to underline a garment rather than line it, and what does the Reader's Digest guide say about how underlining affects drape and construction sequence?
- In what order should you address a garment that needs both a swayback adjustment and a hip adjustment, and why does sequence matter?
- How do the hand-finishing techniques in the Reader's Digest guide (e.g., catch stitch vs. slip stitch) differ in their visible result and structural role?
- Tissue-fit a commercial pattern to your own body using the Palmer method: mark every needed adjustment on the tissue before cutting a single piece of fabric, then compare your list to the finished muslin to see how accurately you predicted the changes.
- Make a full-bust adjustment (FBA) on a bodice block or simple blouse pattern, sew a muslin, and photograph the before/after to document how the dart rotation and side seam changed.
- Sew four 6-inch sample swatches — one each with a French seam, flat-felled seam, Hong Kong finish, and bound finish — using the Reader's Digest instructions, labeling each with the fabric type it suits best.
- Take a thrifted or previously sewn garment with at least one obvious fit flaw (pulling, gaping, drag lines), diagnose the cause using Fit for Real People's visual guide, and alter the finished garment to correct it.
- Construct a lined patch pocket and an unlined welt pocket on scrap fabric, following the Reader's Digest finishing instructions, focusing on clean corners and invisible hand-stitching.
- Plan and sew a simple intermediate project (e.g., a fitted skirt or tailored blouse) that deliberately requires you to apply at least two pattern adjustments from Fit for Real People AND at least two professional finishes from the Reader's Digest guide — document each decision in a sewing journal.
Next up: Mastering fit diagnosis and professional finishing builds the precise, analytical eye needed to tackle structured garments like tailored jackets and coats, where interfacing systems, pad-stitching, and complex multi-piece fitting converge in the next stage.
The definitive guide to fitting commercial patterns to an actual body rather than a dress form — essential once you are sewing real garments and want them to look polished.

Broadens finishing skills — embroidery, decorative hand stitching, and embellishment — giving the learner a complete toolkit for personalizing and elevating finished garments.
Discussion
Keep reading
Paths that share books, cover the same subject, or open a related topic.