Rug tufting and punch needle: the best books to make your first rug
This curriculum takes you from your very first loop of yarn through to completing polished, gallery-worthy tufted rugs and punch-needle art. Each stage builds on the last — starting with hand tools and foundational fiber knowledge, moving into tufting-gun technique and design, and finally tackling the professional finishing and business skills that separate hobbyists from serious makers.
Foundations: Hand Tools & First Loops
BeginnerUnderstand the core vocabulary of punch needle and rug hooking — how loops are formed, what backing and yarn to choose, and how to complete a small finished piece with hand tools.
▸ Study plan for this stage
Pace: 2–3 weeks, ~15–20 pages/day, with hands-on practice sessions interspersed
- The anatomy of a punch needle tool and how the needle, thread, and backing work together to form loops
- Fiber selection: yarn weights, fiber content, and how different materials affect loop height and texture
- Backing fabric types (linen, cotton, monk's cloth) and their role in supporting and stabilizing loops
- The mechanics of forming a loop: entry and exit points, rhythm, and tension control
- Design transfer methods and how to prepare your backing before punching
- Finishing techniques: binding edges, backing your piece, and securing loops to create a durable finished textile
- The difference between pile (looped) and cut pile effects and when to use each
- Troubleshooting common issues: uneven loops, dropped stitches, and tension problems
- What are the key components of a punch needle tool and how does each part contribute to loop formation?
- How do you choose the right yarn weight and fiber type for a specific punch needle project, and what happens if you use the wrong one?
- What is the purpose of backing fabric, and how do different backing types (linen, cotton, monk's cloth) affect your work?
- Walk through the step-by-step process of forming a single loop, from needle entry to exit, and explain how tension impacts the result
- What are the main methods for transferring a design onto backing fabric, and which is most suitable for beginners?
- Describe the finishing process for a punch needle piece, including edge binding and backing, and why each step matters for durability
- Practice threading and holding the punch needle correctly; punch 10–15 consecutive loops on scrap backing to develop muscle memory and consistent tension
- Create a yarn swatch sampler using 3–4 different yarn weights and fiber types on the same backing; observe and document how loop height and texture vary
- Transfer a simple geometric design (circles, lines, or a small motif) onto backing fabric using at least two different transfer methods (tracing, carbon paper, or printable transfer); compare ease and accuracy
- Complete a small practice piece (4×4 inches) using a single yarn color and simple design; focus on maintaining even loop height and consistent spacing throughout
- Intentionally create both looped and cut pile effects on the same small sample; examine the visual and textural differences and note when you'd choose each
- Finish a completed practice piece by binding the edges and adding a backing; practice neat, secure stitching to ensure durability
Next up: Mastering these foundational hand-tool techniques and understanding how materials work together prepares you to move into more complex designs, color work, and exploring how punch needle can be combined with other fiber arts techniques.

The clearest modern introduction to punch needle as both craft and art. It covers tool setup, transferring designs, yarn weight, and finishing — exactly the vocabulary a beginner needs before anything else.
Yarn & Materials Literacy
BeginnerDevelop a confident understanding of fiber types, yarn weights, dye lots, and backing materials so every future project starts with the right supplies.
▸ Study plan for this stage
Pace: 4–5 weeks, ~20–25 pages/day (approximately 140–175 pages total). Allocate extra time for the fiber sample section and dye lot comparisons.
- Fiber content and how different animal and plant fibers behave (wool, cotton, silk, acrylic, blends)
- Yarn weight categories and how they affect project drape, durability, and texture in tufting and punch needle
- Understanding dye lots and color consistency across batches to prevent visible mismatches in large projects
- Yarn construction methods (plied, twisted, spun) and how they impact the final appearance and performance of tufted or punched pieces
- Backing materials and their role in supporting yarn during the tufting/punching process and in finished durability
- How to read yarn labels and identify key information (fiber %, weight, yardage, care instructions) for project planning
- The relationship between fiber properties and suitability for different rug styles and wear conditions
- What are the main differences between animal fibers (wool, silk) and plant fibers (cotton, linen) in terms of durability and feel, and which would you choose for a high-traffic rug?
- How do yarn weights affect the visual texture and structural integrity of a tufted or punch needle piece?
- Why is dye lot consistency critical when purchasing yarn for a large project, and what steps can you take to minimize color variation?
- What information should you always extract from a yarn label before starting a project, and why does each piece matter?
- How does yarn construction (ply, twist) influence how yarn behaves when you're tufting or punching, and what should you look for?
- What role does backing material play in the success of a tufted or punch needle rug, and how do you choose the right one?
- Create a fiber comparison chart: Select 5–6 different yarn samples from the book's descriptions (or source them yourself). Document fiber content, feel, weight, elasticity, and estimated durability for rug use.
- Build a dye lot reference collection: Purchase 3–4 skeins of the same yarn in the same color from different dye lots. Compare them side-by-side under natural and artificial light; photograph and document visible differences.
- Label-reading practice: Collect 10–12 yarn labels (from your stash or local yarn shops). For each, extract and record fiber %, weight, yardage, care instructions, and dye lot number. Identify which would work best for a tufting project.
- Yarn weight swatch project: Obtain samples of yarn in at least 4 different weight categories. Tuft or punch needle small swatches with each weight on identical backing. Compare how the final texture, density, and durability differ.
- Backing material test: Source 3–4 different backing materials mentioned in the book (e.g., linen, cotton, synthetic blends). Tuft or punch small samples on each and evaluate how the backing supports the yarn and affects the finished piece's stability.
- Fiber property journal: As you read, keep a running journal documenting the properties of each fiber type discussed—elasticity, moisture-wicking, heat retention, stain resistance, and suitability for rugs. Reference this before every future project.
Next up: This stage equips you with the knowledge to make informed material choices, ensuring that when you move into design and project planning, you're selecting fibers and backings that will actually perform well for your specific rug's intended use and aesthetic.
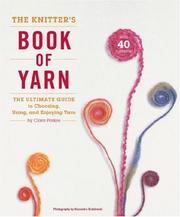
The definitive guide to understanding yarn fiber, twist, weight, and durability — knowledge that is essential when selecting yarn for rugs that must withstand foot traffic and washing.
Tufting Gun Technique & Design
IntermediateOperate a cut-pile and loop-pile tufting gun safely and confidently, plan grid-based and freehand rug designs, and understand how pile direction affects the final look.
▸ Study plan for this stage
Pace: 4–5 weeks, ~20–25 pages/day, with 2–3 design practice sessions per week
- Grid systems and modular design as foundations for rug layout planning
- Composition principles (balance, contrast, hierarchy, repetition) applied to textile design
- Color theory and how color relationships create visual impact in tufted pieces
- Typography and visual communication concepts that translate to pattern and motif design
- Gestalt principles (proximity, continuation, closure) for creating cohesive rug compositions
- Negative space and figure-ground relationships in designing tufted patterns
- Scale and proportion in translating 2D designs to large-format rugs
- How can grid systems help you plan a symmetrical or asymmetrical rug design before tufting?
- What composition principles (balance, contrast, hierarchy) should guide your rug design choices?
- How do color relationships and contrast affect the visual impact of a tufted rug?
- How can you use negative space effectively in a rug design to avoid visual clutter?
- What is the relationship between scale, proportion, and how a design reads from different distances?
- How do Gestalt principles help viewers perceive your rug design as a unified whole?
- Create 3 small grid-based rug designs (8×10 inch mockups) using different symmetry approaches (radial, bilateral, asymmetrical)
- Sketch 5 freehand rug designs on graph paper, experimenting with balance and focal points
- Design a rug using a limited color palette (3–4 colors) and explain how color contrast guides the viewer's eye
- Map out how pile direction (cut vs. loop) would change the visual weight and shading of one of your designs
- Photograph or sketch existing rugs and analyze their use of negative space, scale, and composition
- Create a design mood board for a specific rug project, collecting color, pattern, and compositional references from graphic design sources
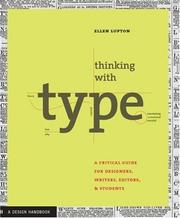
Next up: Understanding design principles and composition from Lupton's framework equips you to translate visual concepts into actual tufting gun technique, where pile height, direction, and yarn choice become the tools for executing your planned designs.
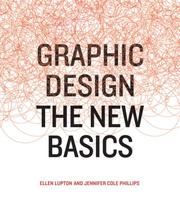
Tufting is as much about design as technique. This book teaches color theory, grid systems, and visual hierarchy that translate directly into planning bold, balanced rug compositions.
Finishing, Backing & Durability
IntermediateMaster the back-end processes — latex adhesive application, secondary backing attachment, binding edges, and blocking — that turn a raw tufted piece into a durable, professional rug or wall hanging.
▸ Study plan for this stage
Pace: 2–3 weeks, ~20–25 pages/day, with 2–3 dedicated practice days for backing and blocking techniques
- Latex adhesive selection, application methods, and curing times for securing tufted backing
- Secondary backing materials (burlap, linen, canvas) and their suitability for different rug types and end uses
- Edge binding techniques (whip-stitching, bias tape, serging) and their impact on durability and aesthetics
- Blocking and stretching methods to ensure square, even dimensions and prevent warping
- Moisture and humidity management during the finishing process
- Quality control checkpoints to identify weak seams, adhesive gaps, or backing failures before completion
- What are the key differences between latex adhesive types, and how do you select the right one for your tufted piece?
- How do you properly apply latex adhesive to ensure full coverage without oversaturation, and what is the typical curing timeline?
- What secondary backing materials are recommended for rugs versus wall hangings, and why does material choice affect durability?
- Describe the step-by-step process for binding edges, including tool selection and stitch techniques.
- How do you block a tufted piece to achieve square corners and even dimensions, and what environmental factors must you control?
- What are the most common finishing defects, and how do you inspect and repair them before the piece is complete?
- Apply latex adhesive to a practice tufted swatch using both brush and roller methods; compare coverage, drying time, and adhesive thickness.
- Attach secondary backing (burlap, linen, canvas) to three different tufted samples and test durability by tugging seams and checking for separation.
- Practice edge binding on a finished rug using whip-stitching, bias tape, and serging; evaluate which method produces the neatest, most durable edge.
- Block a completed tufted piece using stretcher bars or a blocking board; measure corners and edges before and after to confirm squareness.
- Conduct a quality inspection checklist on a finished rug: examine adhesive coverage, backing attachment, edge binding, and overall dimensions; document any defects.
- Create a finishing workflow document for your own rug project, including adhesive cure times, blocking duration, and environmental conditions (humidity, temperature) needed for optimal results.
Next up: Understanding the finishing, backing, and durability processes establishes the foundation for advanced topics such as scaling production, troubleshooting common failures, and adapting techniques to specialized rug types or custom commissions.

Provides deep knowledge of textile structure, sett, and finishing methods that inform how to treat rug edges, prevent curling, and choose the right secondary backing for different end uses.
Advanced Design & Artistic Voice
ExpertPush beyond functional rugs into large-scale tufted art, mixed-media textile work, and a personal design language — with the confidence to exhibit or sell your work.
▸ Study plan for this stage
Pace: 8–10 weeks, ~25–30 pages/day (alternating between Gordon and Cameron), with 2–3 days per week dedicated to creative practice and design journaling
- Textiles as cultural artifacts: understanding how fiber, technique, and symbolism carry meaning across history and geography, informing your own design choices
- The relationship between function and art in textile work: recognizing when and how to transcend utilitarian constraints to create statement pieces
- Personal creative voice and artistic identity: developing a recognizable aesthetic through consistent practice, risk-taking, and self-discovery
- The role of constraint and limitation in fostering innovation: using tufting and punch needle's technical boundaries as creative catalysts rather than obstacles
- Narrative and intention in large-scale work: embedding personal meaning, cultural references, or conceptual depth into pieces meant for exhibition or sale
- Overcoming creative blocks and perfectionism: building resilience and trust in the artistic process through Cameron's tools and reflection
- Textile history as inspiration, not imitation: learning from traditional and contemporary textile practices to inform original, contemporary work
- How can understanding the cultural and historical significance of textiles (from Gordon) inform and deepen the conceptual foundation of your own tufted or punch needle work?
- What is your personal artistic voice in fiber work, and how do you distinguish your work from functional craft into the realm of fine art?
- How do you use Cameron's creative practices (morning pages, artist dates, play) to overcome self-doubt and maintain momentum on ambitious, large-scale projects?
- What role does constraint—whether technical, material, or conceptual—play in generating your most innovative and authentic designs?
- How would you articulate the narrative or intention behind a large-scale tufted or punch needle piece you want to create, and what textile traditions or contemporary references inform it?
- What strategies from Cameron's work help you move from perfectionism or fear of judgment to a place of creative risk-taking and exhibition-ready confidence?
- Read and annotate Gordon's chapters on textile symbolism and cultural meaning; create a visual mood board or written reflection connecting 3–5 historical or cultural textile traditions to a large-scale piece you want to make
- Complete Cameron's 'Morning Pages' practice for 4 weeks (3 pages of stream-of-consciousness writing each morning) and track how themes, ideas, or creative breakthroughs emerge in your design thinking
- Design a large-scale tufted or punch needle artwork (sketch, color study, written concept statement) that explicitly incorporates a narrative, cultural reference, or conceptual layer informed by Gordon's textile history insights
- Conduct a 'constraint challenge': create a series of 3–5 small tufted or punch needle studies using only one color, one stitch type, or one geometric motif, then reflect on how limitation sparked unexpected creativity
- Execute one full large-scale piece (12×12 inches or larger) intended for exhibition or sale, documenting your process through photos and a brief artist statement that connects your work to both technical mastery and personal vision
- Participate in or organize a peer critique session where you present your work and receive feedback; practice articulating your artistic intent and responding to questions about your design choices with confidence
Next up: This stage establishes you as a confident, conceptually grounded fiber artist with a recognizable voice and exhibition-ready portfolio; the next stage will likely focus on the business, marketing, and professional practices needed to sustain and scale your artistic practice—whether through galleries, commissions, teaching, or direct sales.
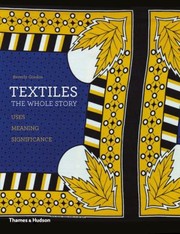
A sweeping cultural and technical history of textiles that contextualizes tufting within the broader fiber-art world, inspiring ambitious conceptual directions and an understanding of what makes textile art resonate.

At the advanced stage the main obstacle is creative block, not technique. This widely-used creative-unblocking program helps serious makers develop a consistent practice and original artistic voice.
Discussion
Keep reading
Paths that share books, cover the same subject, or open a related topic.