Polymer clay for beginners: the best books to sculpt, cane, and bake
This curriculum takes a complete beginner from their very first block of polymer clay all the way through advanced surface techniques, caning, and professional finishing. Each stage builds directly on the last — you'll establish safe handling and basic shaping before layering in color theory, then master the iconic millefiori cane work that defines the craft, and finally refine your pieces with sculptural detail and jewelry-grade finishing.
Foundations: Clay Basics & First Projects
BeginnerUnderstand what polymer clay is, how to condition and handle it safely, use basic tools, and complete simple jewelry and decorative pieces with confidence.
▸ Study plan for this stage
Pace: 4–5 weeks, ~20–25 pages/day, with 2–3 hands-on practice sessions per week
- What polymer clay is: composition, types (Sculpey, Fimo, Kato), and how it differs from air-dry or natural clay
- Conditioning techniques: hand-warming, pasta machine use, and recognizing when clay is properly prepared
- Safe handling practices: workspace setup, ventilation, temperature control, and hygiene to prevent contamination
- Basic tool mastery: using clay sculpting tools, cutters, texture makers, and household items effectively
- Fundamental hand-building techniques: rolling, shaping, blending, and joining clay pieces securely
- Baking and curing: oven temperatures, timing, preventing browning, and post-bake finishing
- Simple jewelry projects: making beads, pendants, and earrings with consistent results
- Decorative pieces: creating small sculptures, ornaments, and mixed-media projects with confidence
- What are the main types of polymer clay available, and how do their properties differ in terms of firmness, color range, and best uses?
- Describe the conditioning process step-by-step: why is it necessary, what happens if clay is under- or over-conditioned, and what tools can you use?
- What safety precautions should you take when working with polymer clay, and how do you set up a dedicated, contamination-free workspace?
- What are the essential tools for polymer clay work, and how do you use each one effectively for shaping, texturing, and joining?
- Walk through the complete process of making a simple polymer clay bead or pendant, from conditioning to baking to finishing.
- How do you bake polymer clay correctly to avoid browning, cracking, or burning, and what should you do after it cools?
- What are three common beginner mistakes when working with polymer clay, and how do you prevent or fix them?
- Condition 3–4 different polymer clay colors by hand and with a pasta machine; document how the texture changes and note the differences between brands
- Create a texture sampler: use 6–8 different tools (toothpicks, stamps, fabric, leaves, combs) to impress patterns into clay samples, bake, and label each
- Make 10 simple beads of varying sizes and shapes (round, oval, cube, disc); practice consistent sizing and smooth finishing
- Sculpt a small decorative object (animal figurine, plant pot, or ornament) using only basic hand-building: rolling, shaping, and blending
- Bake a test tile with different clay thicknesses and colors to observe browning patterns and understand oven behavior with your specific oven
- Create a simple jewelry set: make matching earrings and a pendant using the same design or color scheme; practice symmetry and consistency
- Condition and blend two clay colors into a smooth gradient or marbled pattern; practice color mixing and blending techniques
- Build a small mixed-media project combining polymer clay with found objects (beads, wire, fabric) to explore how clay integrates with other materials
Next up: This stage equips you with foundational skills and confidence in clay handling and basic projects, preparing you to advance to intermediate techniques such as sculpting detailed figures, creating complex surface designs, and working with specialized methods like caning and mokume-gane.

A thorough, beginner-friendly reference covering clay brands, conditioning, baking, and a wide range of starter projects — the ideal first book to build vocabulary and safe habits.

Picks up where a reference guide leaves off by walking through hands-on beginner projects step by step, reinforcing conditioning and basic shaping skills with immediate, satisfying results.
Color & Surface: Mixing, Blending & Texture
BeginnerDevelop a working understanding of color mixing with polymer clay, create smooth Skinner blends, and apply surface textures and transfers to jewelry and decor pieces.
▸ Study plan for this stage
Pace: 4–5 weeks, ~20–25 pages/day with daily hands-on practice
- Color theory fundamentals applied to polymer clay (primary, secondary, tertiary colors, and how to mix them)
- Skinner blend technique for creating smooth color gradations and ombré effects
- Conditioning clay properly to achieve consistent texture and workability for blending
- Surface texturing methods (stamping, carving, pressing, and found-object techniques)
- Transfer techniques for applying images, patterns, and designs to clay surfaces
- Layering and combining textures with color blends for dimensional effects
- Material properties: how different clay brands respond to mixing, blending, and texture application
- How do you create a true secondary color using only primary polymer clays, and what happens if you over-mix?
- What is the Skinner blend technique, and what are the key steps to execute it successfully without streaking?
- How does clay conditioning affect your ability to blend colors smoothly, and what are signs of under- or over-conditioning?
- What are at least three different surface texturing methods described in Marshall's book, and when would you use each one?
- How do transfer techniques work with polymer clay, and what surfaces or images transfer most effectively?
- How can you combine a Skinner blend with surface texture to create a finished piece with visual depth?
- Create a color wheel using polymer clay by mixing primary colors into secondary and tertiary shades; bake and photograph for reference
- Execute 5 Skinner blends using different color pairs (e.g., white-to-black, blue-to-yellow, red-to-white) and compare smoothness and gradient quality
- Condition a piece of clay through 10 passes through a pasta machine, documenting texture and workability at each stage
- Make a texture sampler tile using at least 6 different tools and found objects (stamps, toothpicks, leaves, fabric, etc.); label each technique
- Create a transfer test sheet: apply 3–4 different image transfers (magazine clippings, printed designs, photocopies) to clay and evaluate adhesion and clarity
- Design and construct a small jewelry piece (pendant, earring, or brooch) that incorporates both a Skinner blend and at least two surface textures
Next up: Mastering color mixing, blending, and texture application provides the technical foundation needed to move into more complex projects—such as sculpting dimensional forms, creating patterned canes, or combining these surface techniques with structural design in the next stage.
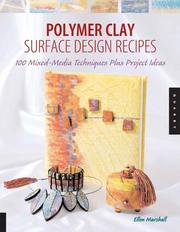
Introduces a broad toolkit of surface treatments (textures, stamps, transfers, inks) that work on top of your newly mastered color blends, expanding creative options for jewelry and decor.
Caning: Millefiori & Pattern Work
IntermediateBuild, reduce, and apply complex millefiori canes — the signature technique of polymer clay — to create patterned beads, pendants, and decorative veneers.
▸ Study plan for this stage
Pace: 4–5 weeks, ~20–25 pages/day, with 2–3 dedicated practice days per week for cane building and reduction
- Cane construction fundamentals: building base shapes (logs, sheets, coils) and assembling them into organized patterns
- Reduction techniques: proper squeezing, rolling, and stretching methods to scale canes down without distorting the pattern
- Millefiori design principles: planning repeating patterns, color theory, and achieving symmetry in cross-sections
- Slicing and application: cutting thin, even slices from reduced canes and adhering them to bead and pendant surfaces
- Veneer creation: using cane slices to cover larger clay forms for decorative effects
- Pattern complexity: layering multiple canes, creating nested patterns, and combining different cane types in single designs
- Finishing techniques: sanding, buffing, and sealing millefiori work for professional appearance
- What are the essential steps for building a stable base cane, and how does the order of assembly affect the final pattern?
- Explain the difference between reduction methods (squeezing, rolling, stretching) and when to use each technique to preserve pattern integrity
- How do you plan a millefiori design to ensure the pattern repeats correctly and symmetrically in cross-section?
- What techniques ensure clean, even slices from a reduced cane, and how do you apply them smoothly to curved surfaces like beads?
- How can you layer multiple canes or create nested patterns, and what challenges arise when combining complex designs?
- Describe the complete process for creating a veneer from cane slices and applying it to a pendant or decorative form
- Build 3–4 basic single-pattern canes (striped, checkerboard, simple floral) and reduce each using different methods; document which technique best preserves your pattern
- Create a millefiori cane with at least two nested layers (e.g., a center motif surrounded by a contrasting border); reduce and slice to test pattern clarity
- Make 10–15 millefiori beads using slices from your reduced canes, experimenting with placement, orientation, and layering of slices on the bead surface
- Design and execute a pendant or decorative tile using cane slices as a veneer; practice smooth adhesion and blending of slice edges
- Combine two or three different cane types in a single bead or pendant design to explore how patterns interact and complement each other
- Practice finishing techniques: sand and buff a completed millefiori piece, then seal it; compare the appearance before and after to understand the impact of finishing
Next up: This stage equips you with the core technical mastery of cane-building and pattern application needed to move into advanced design work, such as creating original artistic compositions, scaling techniques to larger sculptural forms, or developing signature personal styles that combine multiple caning methods.
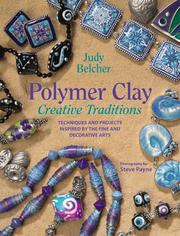
Expands caning into broader design traditions and shows how finished canes are assembled into cohesive jewelry collections and decorative objects — bridging technique and finished craft.
Sculpting: Figures, Faces & Dimensional Work
IntermediateSculpt expressive figures, faces, and three-dimensional decorative objects using armatures, proportion guides, and anatomical shortcuts suited to polymer clay.
▸ Study plan for this stage
Pace: 4–5 weeks, ~20–25 pages/day with frequent sculpting breaks; allocate 2–3 days per major technique chapter for hands-on practice
- Armature construction and internal support systems for polymer clay figures
- Proportion systems and measurement guides for realistic human faces and bodies
- Anatomical shortcuts: simplified muscle groups, bone structure, and facial landmarks suited to clay
- Building faces methodically: eye placement, nose and mouth positioning, ear attachment
- Character expression through subtle facial adjustments and body posture
- Dimensional decorative objects: combining figure techniques with functional or display-oriented design
- Clay conditioning, tool selection, and surface finishing for professional character work
- What are the main types of armatures Carlson recommends, and when should you use each one for different figure scales?
- How do you establish correct proportions for a human face, and what are the key measurement ratios Carlson teaches?
- Describe the step-by-step process for sculpting an expressive face, from basic structure to final details.
- What anatomical shortcuts does Carlson use to simplify the sculpting process while maintaining believability?
- How do you convey emotion and character through facial features and body positioning?
- What techniques does Carlson teach for creating dimensional decorative objects that incorporate figure elements?
- Build at least two different armature types (e.g., wire-based and clay-based) and test their stability with a small figure on each
- Sculpt a simple head using Carlson's proportion guidelines, measuring and marking key facial landmarks before adding details
- Create three different expressive faces on the same basic head form by adjusting only the eyes, mouth, and brow position
- Sculpt a complete small figure (4–6 inches) following Carlson's step-by-step character-building process from the book
- Design and execute a dimensional decorative object (e.g., a wall plaque, ornament, or box topper) that incorporates a face or figure element
- Practice Carlson's anatomical shortcuts by sculpting a simplified torso and limbs, then compare your result to a more detailed version to understand where shortcuts work best
Next up: This stage equips you with the core skills to build expressive, anatomically sound figures and faces, preparing you to advance to specialized techniques such as surface detailing, costume/clothing design, or creating narrative scenes with multiple characters.

Follows her first sculpting book with a focus on personality, expression, and character design — deepening figure-making skills and preparing you for more complex, finished sculptural pieces.
Finishing & Jewelry Making: Professional Results
ExpertApply professional baking protocols, sanding, buffing, varnishing, and jewelry findings to produce gallery-quality finished pieces ready to wear, display, or sell.
▸ Study plan for this stage
Pace: 4–5 weeks, ~20–25 pages/day, with 2–3 dedicated practice days per week for finishing techniques
- Professional baking protocols: temperature control, timing, and oven management to prevent browning, cracking, and warping
- Sanding and smoothing techniques: wet sanding progression, grit selection, and surface preparation for a flawless finish
- Buffing and polishing methods: achieving high-gloss surfaces and understanding how different clay brands respond to buffing
- Varnishing and sealing: selecting appropriate finishes (gloss, matte, satin), application methods, and durability for wearable pieces
- Jewelry findings integration: attaching clasps, earring posts, jump rings, and chains securely using adhesives and mechanical methods
- Surface finishing aesthetics: color enhancement, antiquing, and creating professional visual appeal for gallery-quality work
- Quality control and troubleshooting: identifying and correcting common finishing defects before pieces are complete
- What are the critical temperature and timing parameters for baking polymer clay, and how do you prevent common baking defects like browning and warping?
- Walk through the complete sanding progression from rough to fine grit—what grits do you use, and why is wet sanding preferable to dry sanding?
- How do you achieve a professional high-gloss finish through buffing, and what differences exist between clay brands in their response to buffering?
- What are the advantages and disadvantages of different varnish types (gloss, matte, satin), and how do you apply them to ensure durability on wearable pieces?
- Describe the process of securely attaching jewelry findings to finished polymer clay pieces—what adhesives work best, and when should you use mechanical attachment instead?
- How do you troubleshoot common finishing problems such as fingerprints, dust contamination, uneven varnish, or loose findings?
- Bake a series of test tiles at different temperatures and times to identify your oven's exact calibration and the optimal settings for your clay brand
- Practice the complete sanding progression (220→400→600→1000 grit) on a finished bead or pendant, documenting how the surface changes at each stage
- Create three identical small pieces and finish each with a different varnish type (gloss, matte, satin), then compare durability, appearance, and feel after one week of wear
- Attach jewelry findings (earring posts, jump rings, clasps) to finished pieces using both epoxy adhesive and mechanical methods, then stress-test each to determine which holds best
- Buff a series of finished pieces using different techniques (hand buffing, rotary tool, polishing cloth) and compare the gloss level and finish quality achieved
- Design and complete a wearable jewelry piece (earrings, bracelet, or pendant) from raw clay through final varnishing and finding attachment, documenting each finishing step
- Intentionally create common finishing defects (fingerprints, dust, uneven varnish, loose findings) on test pieces, then practice correcting or preventing each problem
Next up: This stage equips you with the technical mastery to transform raw polymer clay into museum-quality, commercially viable pieces, preparing you to either specialize in advanced artistic techniques (sculptural detail work, mixed media integration) or move into business and production scaling (batch finishing, quality assurance, and selling your work).
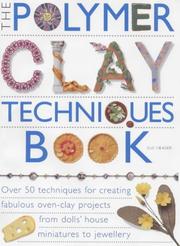
Sue Heaser's encyclopedic technique reference is best read last, as a capstone: it covers advanced finishing, troubleshooting baking problems, and professional surface treatments that elevate every earlier skill.
Discussion
Keep reading
Paths that share books, cover the same subject, or open a related topic.