Learn origami: from first folds to complex models
This curriculum takes a complete beginner from their very first fold all the way to complex, exhibition-quality origami art. Each stage builds on the last — first mastering the universal language of diagrams and classic bases, then tackling intermediate models, then diving into the mathematical and design principles that unlock truly advanced work.
First Folds: Foundations & Classic Bases
BeginnerLearn the core vocabulary (valley fold, mountain fold, reverse fold, etc.), read standard Yoshizawa-Randlett diagrams confidently, and complete the essential bases (bird, fish, frog, preliminary) that underpin hundreds of models.
▸ Study plan for this stage
Pace: 4–5 weeks, roughly 10–15 pages of reading per session (3–4 sessions/week), with each session paired with hands-on folding time of equal or greater length — expect to spend 60–90 minutes total per session
- Valley fold and mountain fold as the two atomic building blocks of all origami, and how they are represented by dashed vs. dash-dot lines in Yoshizawa-Randlett diagrams
- Standard diagram notation conventions: arrows (fold toward, fold away, fold and unfold, push/sink), x-ray lines, and repeat marks — as taught through Lang's clear symbol glossary
- The concept of a 'base' as a reusable geometric starting point, and why mastering a small set of bases unlocks hundreds of downstream models
- The Preliminary Base (square base): how to form it from a square sheet and recognize it as the parent of both the bird and frog bases
- The Bird Base: the sequence of petal folds that transform the preliminary base, and its role as the foundation for the classic flapping bird and thousands of complex models
- The Fish Base: its distinct folding sequence and the family of fish- and leaf-shaped models it generates
- The Frog Base: the most complex of the four essential bases, requiring careful petal folds on all four flaps, and its use in lifelike amphibian and floral models
- Reverse folds (inside and outside): how to read, execute, and troubleshoot them, and why they are the single most important intermediate technique beyond basic valley/mountain folds
- Without looking at the book, can you draw and label the Yoshizawa-Randlett symbols for a valley fold, mountain fold, fold-and-unfold, inside reverse fold, and outside reverse fold?
- What is the step-by-step folding sequence that takes a square sheet to the Preliminary Base, and how does the Bird Base extend from it via petal folds?
- How do the Fish Base and Bird Base differ in their starting moves and in the silhouette of flaps they produce — and what kinds of models does each naturally suggest?
- What distinguishes an inside reverse fold from an outside reverse fold, and how does the direction of the spine crease change in each case?
- Looking at any diagram page in The Complete Book of Origami, can you identify every symbol present and predict what the paper should look like after each step before actually folding it?
- Why are bases considered the 'grammar' of origami, and how does understanding the Frog Base prepare you for models with four symmetrical points (legs, petals, etc.)?
- Symbol flashcard drill: make a set of index cards — one symbol per card (valley, mountain, fold-and-unfold, inside reverse, outside reverse, sink, pleat, repeat) — and quiz yourself until you can name and sketch every one in under 30 seconds
- Fold each of the four essential bases (Preliminary, Bird, Fish, Frog) three times each from fresh square sheets, the last time entirely from memory without consulting Lang's diagrams, checking only at the end
- Diagram-reading dry run: before touching the paper, 'air fold' a complete model from The Complete Book of Origami by narrating every step aloud — then fold it for real and compare your prediction to the result
- Reverse-fold isolation practice: take a strip of paper and deliberately execute 10 inside reverse folds and 10 outside reverse folds in a row, focusing on keeping layers aligned and creases sharp
- Complete at least three finished models from The Complete Book of Origami that use the Bird Base (e.g., the flapping bird, crane, or similar) and three that use a different base, writing one sentence after each about which steps were hardest to read from the diagram
- Crease-pattern journaling: after folding each base, unfold it completely and sketch the crease pattern on paper, labeling every line as valley or mountain — then compare your sketch to the flat sheet to verify accuracy
Next up: Mastery of the four classic bases and fluent diagram-reading gives you the geometric intuition and technical vocabulary needed to tackle intermediate models with more complex crease sequences, multi-sink maneuvers, and subject-specific shaping techniques in the next stage.

Lang's step-by-step diagrams are exceptionally clear, making this the perfect second book for a beginner to practice reading standard notation while building real, satisfying models.
Building Fluency: Classic Models & Intermediate Technique
BeginnerFold a wide range of recognizable models (animals, boxes, flowers) with increasing precision, and internalize the logic of how bases transform into finished forms.
▸ Study plan for this stage
Pace: 8–10 weeks total: Weeks 1–5 cover "Origami Zoo" by Robert J. Lang (~4–6 models per week, revisiting each model at least twice before moving on); Weeks 6–10 cover "Teach Yourself Origami" by John Montroll (~3–5 models per week, spending extra time on the technique commentary and step re-reading). Aim
- The four classic bases (bird, fish, frog, preliminary/square) and how each one is the structural skeleton for multiple finished models in both books
- Petal folds and squash folds as transformative moves — recognizing when a step is calling for one and executing it cleanly
- Inside and outside reverse folds: understanding the geometry of why paper travels in a specific direction and how to pre-crease before committing
- Sink folds and their role in locking or reshaping a model's interior structure, introduced progressively in Montroll's models
- The concept of 'shaping' vs. 'folding' — the final 3D sculpting steps (rounding, curling, inflating) that turn a flat folded form into a lifelike figure, emphasized throughout Lang's animal models
- Valley/mountain fold fluency: reading a crease pattern diagram confidently and translating 2D symbols into 3D action without hesitation
- Proportional accuracy — how small deviations in early folds compound into misaligned later steps, and the habit of aligning edges and points precisely before creasing
- Model families: grouping models by shared base to see the creative logic of how one base (e.g., the bird base in Lang's zoo) spawns many different animals
- Given a model from 'Origami Zoo,' can you identify which classic base it starts from and name at least two other models in either book that share that same base?
- What is the mechanical difference between an inside reverse fold and an outside reverse fold, and how do the diagrams in 'Teach Yourself Origami' signal which one to use?
- How does Robert J. Lang use the shaping stage (the final steps of his animal models) differently from the structural folding stages — and why does rushing those steps undermine the finished look?
- In 'Teach Yourself Origami,' Montroll builds complexity gradually within each chapter. What folding skills does he expect you to have mastered before introducing sink folds, and how can you tell from his diagrams?
- Why does proportional accuracy in the first two or three folds of a model matter more than accuracy in later steps? Use a specific example from either book to support your answer.
- How does working through a wide variety of model types (animals, boxes, flowers) across both books reinforce the idea that origami technique is transferable rather than model-specific?
- 'Base drill' warm-up: Before each folding session, fold one of the four classic bases from memory without looking at diagrams — track how long it takes each week and aim for smooth, confident execution by Week 4.
- Repeat-fold challenge with 'Origami Zoo': Choose any three animal models and fold each one three times on three separate days, deliberately focusing on a different quality each time (accuracy, neatness of reverse folds, final shaping). Write two sentences after each session on what improved.
- 'Teach Yourself Origami' step-narration exercise: As you fold any Montroll model, say aloud (or write) what you are doing and *why* at every step — e.g., 'I'm squash-folding here to open the flap so the next petal fold has somewhere to go.' This forces conscious understanding over muscle memory.
- Error-hunting fold: Intentionally fold a model from 'Origami Zoo' with a small misalignment in step 3, then continue to completion. Photograph or observe how the error propagated. Refold it correctly and compare — this viscerally teaches the importance of early precision.
- Model-family mapping: After finishing both books, draw a simple diagram (on paper or digitally) grouping every model you folded by its starting base. Add arrows showing which techniques appear in each group. This visual map cements the concept of transferable technique.
- Teach-back session: Pick one model from each book and 'teach' it to a friend, family member, or even to yourself via a voice recording. Explaining each fold out loud exposes gaps in understanding and deepens retention of Montroll's and Lang's instructional logic.
Next up: Mastering the classic bases and intermediate techniques across Lang's and Montroll's model libraries builds the precise folding habits and base-recognition fluency needed to tackle complex multi-step models and original design logic at the next level.
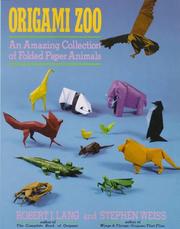
A beloved collection of animal models at the low-to-mid intermediate level — the variety forces the reader to apply every base learned so far in new contexts.
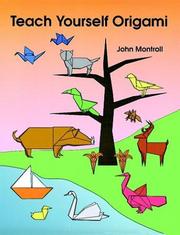
Montroll is the gold standard for clearly graded difficulty; this volume systematically bridges the gap between beginner and intermediate, with models arranged in strict order of complexity.
Intermediate Mastery: Complexity & Precision
IntermediateTackle multi-step models with 50–100+ steps, develop the patience and spatial reasoning for complex folding sequences, and begin appreciating design intent behind each crease.
▸ Study plan for this stage
Pace: 8–10 weeks total; ~2–3 models per week. Spend weeks 1–5 on "Animal Origami for the Enthusiast" (roughly 1–2 folding sessions per model, 60–90 min each) and weeks 6–10 on "Origami Sea Life" (same cadence, but budget extra time for the more complex multi-sheet and wet-folding techniques). Read each mo
- Multi-step sequencing: tracking the cumulative effect of 50–100+ steps and understanding how early creases constrain later ones
- Landmark recognition: using reference points (edges, intersections, colored layers) to place folds precisely without guessing
- Inside and outside reverse folds at compound angles, as demanded repeatedly across Montroll's animal figures
- Sink folds and open sinks: understanding when to collapse vs. open a pocket, a recurring technique in both books' more advanced models
- Shaping and three-dimensionality: the transition from flat folded form to sculptural volume, especially critical in 'Origami Sea Life' for fins, shells, and body curves
- Design intent literacy: reading a crease pattern or step sequence to ask 'why this fold here?' rather than just executing mechanically
- Paper selection and preparation: choosing appropriate paper weight and size for complex models where thin, strong paper (e.g., washi or foil-backed) prevents tearing across many layers
- Error recovery and back-tracking: developing the discipline to unfold several steps cleanly and re-execute rather than forcing a misaligned crease forward
- After completing a model from 'Animal Origami for the Enthusiast,' can you identify which three or four early creases were the structural 'keystones' that determined the final proportions of the animal?
- How does Montroll signal a change in the model's orientation between steps, and what happens to your fold accuracy if you miss those orientation cues?
- In 'Origami Sea Life,' how do the techniques for creating fins and tails differ from the leg/tail techniques in 'Animal Origami for the Enthusiast,' and what does that tell you about how subject matter drives design choices?
- What is the difference between a closed sink and an open sink, and can you point to at least one example of each across the two books?
- How does paper choice (size, weight, and finish) affect the outcome of a 50+-step model differently than it affects a 20-step beginner model?
- Can you articulate, in your own words, the design intent behind at least one sequence of five consecutive steps in any model from either book — i.e., what structural or aesthetic goal is that passage of steps building toward?
- 'Fold-then-diagram' drill: After successfully completing any model from either book, close the book and attempt to sketch the key steps from memory. Compare your sketch to Montroll's diagrams to identify which steps you internalized vs. which you executed on autopilot.
- Double-fold protocol: Fold every model twice — first with inexpensive copy paper to make all your mistakes cheaply, then a second time with quality paper (washi, tant, or kami) to practice precision and finish. Note what changed between attempts.
- Crease-pattern analysis pause: Before folding any new model, spend 10 minutes studying the finished photo and the first 5 steps. Write down your prediction of what the base will look like at step 20. Check your prediction when you get there.
- Layer-count audit: At the midpoint of any complex model (e.g., around step 40–50), stop and count the number of paper layers at the thickest point. Reflect on how that layer buildup is affecting fold accuracy and what Montroll does in subsequent steps to manage it.
- Sea life shape study: Before folding a model from 'Origami Sea Life,' find a reference photo of the real animal. Annotate the photo with arrows pointing to features (dorsal fin, gill, tail curve) and then, after folding, evaluate how well the model captures each feature — this builds design-intent awareness.
- Timed error-recovery exercise: Deliberately fold one step incorrectly at around step 30 of any model, then practice unfolding cleanly back to that step and re-executing. Time how long recovery takes and journal what made the unfolding difficult (layers, prior creases, paper stress).
Next up: Mastering Montroll's 50–100+ step models builds the crease discipline, spatial memory, and design-reading fluency needed to approach the even greater complexity, abstract bases, and intentional design philosophy found in advanced-level works by designers like Robert Lang or Peter Engel.
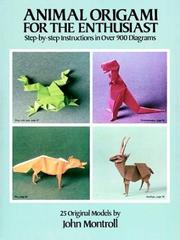
Montroll's most celebrated intermediate-to-advanced animal collection; completing these models proves genuine diagram-reading fluency and prepares the folder for complex work.
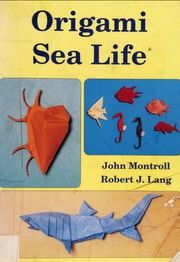
Co-authored with Lang, this book introduces more demanding shaping and wet-folding concepts, expanding the technical toolkit beyond pure dry folding.
Advanced Art: Complex Models & Design Thinking
ExpertFold genuinely complex, exhibition-quality models (insects, realistic figures) and begin to understand the design decisions — point allocation, flap management — that make them possible.
▸ Study plan for this stage
Pace: 10–14 weeks total: Weeks 1–5 on "Origami Insects and Their Kin" (~15–20 pages/day, folding each model before moving on); Weeks 6–14 on "Origami Design Secrets" (~20–25 pages/day, pausing at each design chapter to sketch and experiment before continuing).
- Point allocation and the relationship between paper area and the number/length of appendages in insect models (Lang's Insects and Their Kin)
- Flap management: identifying, separating, and shaping individual flaps to represent legs, antennae, and wings without losing structural integrity
- Uniaxial bases and how Lang's insect designs derive from modified uniaxial structures with carefully placed reference points
- Circle/river packing as the geometric foundation for designing new models — assigning circles on the square to represent each point of the finished figure (Origami Design Secrets)
- Tree theory: translating a stick-figure 'tree' of a subject into a crease pattern via circle packing and molecule selection
- Molecule types (triangle, rabbit-ear, gusset, hex) and how choosing the right molecule for each region of the circle packing determines the internal structure of the base
- Shaping and finishing: the role of wet-folding, tension, and three-dimensional sculpting in elevating a technically correct fold into an exhibition-quality model
- Iterative design thinking: how Lang uses successive prototypes, crease-pattern analysis, and deliberate revision to refine a model from concept to final diagram
- Given a desired insect with 6 legs, 2 antennae, and 2 wings, how would you allocate points on a square sheet and roughly estimate the circle sizes needed before touching the paper?
- What is a uniaxial base, and why are Lang's insect bases in 'Origami Insects and Their Kin' considered uniaxial or near-uniaxial? What constraints does this impose on the model?
- Explain the relationship between a tree diagram, its corresponding circle packing, and the resulting crease pattern as described in 'Origami Design Secrets'. Why must circles not overlap?
- What is a 'molecule' in Lang's design framework, and how does the choice of molecule (e.g., triangle vs. gusset) affect the thickness, layer count, and shaping potential of a flap?
- How does wet-folding change the design decisions a folder must make, and which models in 'Origami Insects and Their Kin' benefit most from this technique?
- Describe the iterative process Lang advocates in 'Origami Design Secrets' for refining a new design. What typically changes between a first prototype and a finished, diagrammed model?
- Fold at least four complete models from 'Origami Insects and Their Kin' at increasing complexity (e.g., start with a simpler beetle before attempting the scorpion or long-horned beetle), photographing each finished piece and annotating where flap management was most challenging.
- After folding each Lang insect, unfold it completely and study the crease pattern. Sketch the crease pattern freehand, labeling which creases form each appendage — this builds the visual literacy required for 'Origami Design Secrets'.
- Work through the tree-theory chapters of 'Origami Design Secrets' with a pencil and graph paper: draw a stick-figure tree for a simple 4-point subject (e.g., a fish with tail and two fins), pack circles on a square, and attempt to derive a crease pattern by hand before checking any reference solution.
- Use Lang's TreeMaker software (described and motivated in 'Origami Design Secrets') to generate a crease pattern for an original 6–8 point subject of your choice, then fold the resulting base and evaluate whether the proportions match your intent — revise the tree and repeat at least once.
- Select one model from 'Origami Insects and Their Kin' and re-fold it in a larger sheet (at least 40 cm) using wet-folding techniques. Document how the larger, dampened paper changes your ability to shape the body, legs, and wings, and write a one-page reflection on the design trade-offs observed.
- Design a simple original insect (6 legs minimum) from scratch using the full pipeline from 'Origami Design Secrets': tree diagram → circle packing → molecule selection → crease pattern → folded prototype → one round of revision. Keep a design journal logging every decision and change.
Next up: Mastering Lang's design pipeline — tree theory, circle packing, and molecule selection — gives the reader a systematic, mathematical vocabulary for inventing original models, which is the essential prerequisite for exploring computational design tools, curved folding, and the broader structural and mathematical theory of origami at the expert level.

Lang's insect designs are widely considered among the most impressive in the art form; successfully folding even one model here marks a major milestone in a folder's development.
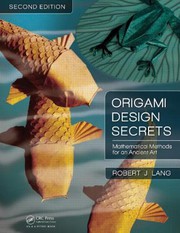
The definitive text on how complex origami is actually designed — circle packing, tree theory, crease patterns — transforming the reader from a folder of others' models into a potential designer.
Mastery & Creative Vision: Crease Patterns & Personal Style
ExpertRead and fold from raw crease patterns (no step-by-step diagrams), explore modular and artistic origami traditions, and develop the tools to create or adapt original designs.
Engel weaves philosophy, art history, and advanced models together, giving the serious folder the cultural and aesthetic context to develop a personal artistic voice.
Discussion
Keep reading
Paths that share books, cover the same subject, or open a related topic.