Best Books on Lost-Wax Casting, in Order
This curriculum takes an intermediate learner through the full lost-wax casting process — from mastering wax work and model preparation, through investment and burnout, to metal pouring and finishing. Each stage builds directly on the last: you must understand the wax before you can invest it, and you must understand investment chemistry before you can diagnose casting failures or refine your metal work.
Wax Mastery: Carving, Modeling & Spruing
IntermediateDevelop confident hands-on skill with jeweler's wax — carving, building, and constructing sprue systems that set up a clean casting.
▸ Study plan for this stage
Pace: 4–5 weeks, ~20–25 pages/day, focusing on chapters covering wax working, carving techniques, and sprue system design
- Jeweler's wax properties: hardness grades, temperature sensitivity, and how these affect carving and modeling techniques
- Carving and subtractive techniques: using files, burrs, gravers, and heat tools to shape wax precisely
- Additive modeling: building up wax forms using heat, adhesives, and layering for complex geometries
- Sprue system design: understanding how to attach wax models to sprues and gates to ensure proper metal flow and minimize defects
- Draft angles and undercuts: recognizing and managing these in wax to prevent casting failures
- Surface finish in wax: achieving the desired surface quality that will transfer to the final metal casting
- Scaling and proportioning: translating designs into wax while accounting for shrinkage and metal properties
- What are the different grades of jeweler's wax, and how do their hardness and melting points affect your choice of tool and technique?
- Describe the process of carving a detailed form in wax using both hand tools and rotary tools—what are the advantages and limitations of each?
- How do you construct a sprue system, and what factors determine where you attach the sprue to your wax model to ensure clean casting?
- What are draft angles and undercuts, and why do they matter when designing a wax model for casting?
- How can you achieve a high-quality surface finish in wax, and what techniques transfer that finish to the final metal piece?
- When scaling a design for casting, what adjustments must you make to account for metal shrinkage and structural integrity?
- Carve a simple geometric form (cube, sphere, or cone) from a block of jeweler's wax using only hand files and gravers to develop tactile control
- Create a textured surface study: experiment with different burrs, gravers, and heat tools on scrap wax to understand how each tool marks the material
- Model an organic form (leaf, petal, or small animal shape) by building up wax layers and using heat to blend and smooth transitions
- Design and construct a sprue system for a simple pendant or ring: attach the wax model to a sprue rod at the optimal angle and location, then justify your placement
- Identify draft angles and undercuts in a provided wax model or sketch, then modify the design to eliminate problematic areas
- Create a multi-part wax assembly: carve separate components and join them using wax adhesive or heat fusion to practice assembly techniques
Next up: Mastering wax carving and sprue design equips you to move into the investment and casting stages, where your wax model's precision and sprue placement directly determine the success of the mold and the quality of the final metal casting.
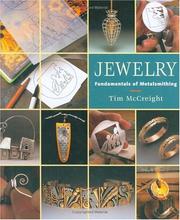
McCreight's clear coverage of model-making and sprue attachment gives the intermediate learner a reliable reference for proportioning and positioning sprues before moving to investment.
Investment, Burnout & the Flask
IntermediateUnderstand investment mixing ratios, flask preparation, burnout schedules, and the chemistry that determines whether a mold survives the kiln.
▸ Study plan for this stage
Pace: 4–5 weeks, ~25–30 pages/day, with 2–3 days per week dedicated to hands-on flask preparation and investment mixing practice
- Investment material composition and the role of binders, silica, and refractory fillers in thermal stability
- Mixing ratios and water-to-powder ratios: how precision affects mold strength and porosity
- Flask preparation techniques including sizing, coating, and sealing to prevent investment failure
- Burnout schedules and temperature ramps: understanding the chemistry of wax elimination and investment consolidation
- Thermal shock and mold integrity: how heating rates and cooling cycles affect ceramic survival
- Permeability and gas escape: why investment porosity matters for casting success
- Common investment failures (cracking, slumping, incomplete burnout) and their chemical/physical causes
- What are the key components of investment material, and how do each contribute to mold performance during burnout?
- How do water-to-powder ratios affect investment strength, setting time, and permeability, and what happens if ratios are incorrect?
- What is the purpose of a burnout schedule, and why must temperature ramps be gradual rather than rapid?
- How does incomplete wax burnout compromise a casting, and what chemical indicators show when burnout is complete?
- What role does flask size and coating play in preventing thermal shock and investment cracking?
- Why does investment porosity matter, and how do mixing and preparation techniques control it?
- Prepare three investment batches using different water-to-powder ratios (document each ratio, setting time, and final hardness); compare results and record which ratio produces the strongest, most permeable mold
- Build and prepare three flasks of different sizes using McCreight's and Rose's specifications; coat them according to protocol and document any differences in thermal behavior during a test burnout
- Conduct a controlled burnout schedule on a practice flask containing a wax model, following a slow ramp (e.g., 2–4°F/hour to 300°F, then 5°F/hour to final temperature); document temperature readings and observe for cracks or slumping
- Mix investment, pour a flask, and intentionally vary one parameter (e.g., mixing time, water temperature, or vibration technique) while keeping others constant; burn out and examine the resulting mold for defects
- Create a detailed burnout schedule chart for your kiln, accounting for its heating rate and your investment type; test it on a sacrificial flask and refine based on results
- Examine a failed investment mold (or create one deliberately) and diagnose the failure mode (cracking, slumping, incomplete burnout, etc.); trace it back to a specific step in mixing, preparation, or burnout
Next up: This stage equips you with the knowledge to produce a reliable, chemically stable mold that survives the kiln—the foundation for the next stage, where you'll focus on pouring metal into that mold and managing the casting pour itself.
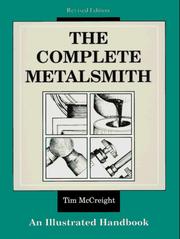
The industry-standard bench reference; its casting chapter covers investment brands, water-to-powder ratios, vacuum investing, and burnout curves in practical, step-by-step form.
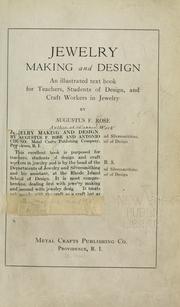
A classic foundational text whose investment and burnout sections provide historical context and underlying principles that help the reader understand *why* modern schedules are structured as they are.
Pouring Metal: Centrifugal, Vacuum & Torch Casting
IntermediateExecute safe, successful metal pours using centrifugal and vacuum-assist machines, and understand how alloy choice and flask temperature affect fill and grain structure.
▸ Study plan for this stage
Pace: 4–5 weeks, ~25–30 pages/day, with 2–3 dedicated lab/casting days per week
- Centrifugal casting mechanics: how rotational force drives metal into mold cavities and the relationship between RPM, radius, and fill quality
- Vacuum-assist casting: how reduced air pressure improves metal flow, reduces porosity, and enables casting of thin-walled or complex geometries
- Flask temperature management: optimal preheating ranges for different alloys and how temperature affects viscosity, mold reaction, and grain structure
- Alloy selection for casting: how composition (gold, silver, bronze, etc.) influences melting point, fluidity, shrinkage, and final mechanical properties
- Safety protocols for molten metal handling: personal protective equipment, crucible management, emergency procedures, and workspace setup
- Metal pouring technique: crucible positioning, pouring speed, timing, and how to recognize successful vs. failed pours
- Post-pour cooling and grain structure: how cooling rate affects crystalline formation, strength, and surface quality
- Troubleshooting common casting defects: misruns, cold shuts, porosity, and how machine parameters and alloy choice prevent them
- What is the relationship between centrifugal force, RPM, and mold fill, and how do you calculate or adjust RPM for different flask sizes?
- How does vacuum-assist casting reduce porosity and improve surface detail compared to gravity or centrifugal casting alone?
- What flask temperature range is optimal for your chosen alloy, and what happens if the flask is too cold or too hot?
- How do alloy composition (e.g., gold karat, silver content, bronze type) affect melting point, fluidity, and shrinkage during casting?
- What are the critical safety steps before, during, and after a metal pour, and how do you respond to a crucible failure or spill?
- What visual and tactile cues indicate a successful pour, and what defects (misruns, cold shuts, porosity) suggest about your technique or parameters?
- Read and annotate Chastain's sections on centrifugal casting mechanics; create a reference chart showing RPM recommendations for 3–4 common flask sizes and alloys
- Perform a dry run (no metal) of your centrifugal or vacuum-assist machine: practice flask loading, balance, machine startup, and shutdown to build muscle memory and confidence
- Conduct flask temperature tests using an infrared thermometer: preheat flasks to 3–4 different temperatures and document how each affects metal flow in a test pour (use a low-cost alloy or scrap)
- Compare two pours side-by-side using different alloys (e.g., gold vs. bronze) or different flask temperatures; examine the castings for surface quality, fill, and grain structure under magnification
- Execute 3–5 successful production pours with your chosen alloy, documenting machine settings, flask temperature, pouring time, and post-pour observations for each
- Analyze a failed or defective casting: identify the defect type (misrun, cold shut, porosity), hypothesize the cause using Chastain's troubleshooting guidance, and plan a corrective pour
Next up: Mastery of safe, repeatable metal pouring and alloy behavior prepares you to advance to finishing and refinement techniques—surface finishing, heat treatment, and quality control—where you'll optimize the mechanical and aesthetic properties of your castings.
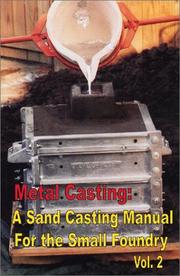
Although focused on small foundry work, Chastain's rigorous treatment of metal temperature, alloy behavior, and pour dynamics builds the metallurgical intuition that jewelry casters need when troubleshooting porosity and misruns.
Finishing the Cast Piece
IntermediateRemove, clean, and refine a raw casting through sprue cutting, filing, polishing, and surface treatment to a professional standard.
▸ Study plan for this stage
Pace: 4–5 weeks, ~25–30 pages/day, with 2–3 dedicated practice days per week at the bench
- Safe sprue removal techniques and tools (saws, cutters, files) as detailed in O'Connor's bench reference
- Understanding grain structure and work-hardening to avoid cracking during finishing, per Revere's metallurgical guidance
- Progressive filing and abrasive techniques (coarse to fine grits) for achieving smooth, professional surfaces
- Polishing methods and compound selection for different metals and finishes, as covered in both texts
- Surface treatments and patinas specific to gold and silver work, per Revere's professional standards
- Quality control and inspection protocols to identify and correct defects before final delivery
- What are the safest methods for removing sprues from delicate jewelry pieces, and what tools does O'Connor recommend for different casting sizes?
- How does work-hardening affect your finishing process, and what annealing strategies does Revere suggest to prevent cracking?
- Describe the progression of abrasive grits and filing techniques needed to move from a rough casting to a smooth, ready-to-polish surface.
- What polishing compounds and techniques does Revere specify for achieving a professional finish on gold versus silver?
- What surface treatments and patinas are appropriate for different jewelry designs, and how do you apply them safely?
- How do you inspect a finished casting for defects, and what remedial techniques can address common flaws?
- Remove sprues from 3–5 practice castings using at least two different tools (saw, cutter, file) and document which method works best for each piece size
- File a rough casting through all progressive grits (coarse, medium, fine) and photograph each stage to internalize the visual progression
- Anneal and work-harden a test piece intentionally, then attempt to finish it; compare results to an unworked piece to feel the difference
- Polish a finished casting using at least two different compounds (rouge, tripoli) and compare surface quality and reflectivity
- Apply a patina or surface treatment to a completed piece following Revere's specifications, then seal and inspect for evenness
- Conduct a full quality-control inspection on a finished casting using a loupe and light source, documenting any defects and remedial steps taken
Next up: This stage equips you with the technical finishing skills and quality standards needed to move into assembly, setting, and final presentation—where you'll learn to integrate finished components into complete jewelry pieces and prepare work for client delivery.

A practical shop reference covering sprue removal, filing sequences, and polishing compounds; reading this after casting grounds finishing decisions in real bench workflow.
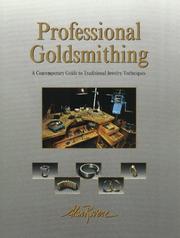
Revere's professional-level text addresses finishing and surface refinement in the context of production quality, teaching the learner to evaluate and correct casting defects before final polish.
Advanced Troubleshooting & Design for Casting
ExpertDiagnose and prevent casting failures, optimize designs for castability, and integrate the full process into a repeatable, professional workflow.
▸ Study plan for this stage
Pace: 6–8 weeks, ~40–50 pages/day, with 2–3 dedicated casting lab sessions per week
- Root causes of common casting defects (porosity, shrinkage, misruns, cold shuts, inclusions) and their prevention strategies
- Design principles for castability: wall thickness, draft angles, undercuts, and mass distribution to minimize stress concentration
- Mold material behavior under thermal and mechanical stress, and how to select materials for specific casting requirements
- Centrifugal force application in lost-wax casting: timing, speed, and g-force calculations to achieve complete mold fill
- Wax pattern optimization: gating system design, sprue placement, and runner sizing to control metal flow and cooling rates
- Burnout cycle refinement: temperature profiles, hold times, and atmosphere control to prevent pattern fragmentation and mold strength loss
- Alloy selection and metallurgical considerations: how composition affects fluidity, shrinkage, and mechanical properties in finished castings
- Process documentation and quality control: establishing repeatable workflows, troubleshooting protocols, and inspection standards for professional production
- What are the primary causes of porosity in lost-wax castings, and what specific design or process changes can eliminate each type?
- How do you calculate and apply centrifugal force to ensure complete mold fill without causing mold erosion or metal turbulence?
- What wall thickness and draft angle ranges optimize castability while maintaining structural integrity in jewelry applications?
- How does the burnout temperature profile affect mold strength and pattern removal, and what are the consequences of deviating from optimal schedules?
- What gating and sprue system design principles minimize turbulence, gas entrapment, and directional solidification defects?
- How do you diagnose a casting failure from the finished piece and trace it back to its root cause in design, mold preparation, or metal handling?
- Conduct a systematic defect analysis: cast 5–6 intentionally flawed patterns (varying wall thickness, gate placement, sprue size) and document the resulting defects; correlate each defect to Untracht's failure taxonomy
- Design and cast a complex multi-part jewelry piece with optimized gating: apply Bovin's centrifugal casting principles to calculate sprue diameter, runner length, and centrifuge speed; document metal flow behavior
- Perform a burnout cycle experiment: run three identical molds through different temperature profiles (per Bovin's recommendations) and compare mold strength, dimensional accuracy, and surface finish of resulting castings
- Create a process control document: establish standard operating procedures for your casting workflow, including material specifications, timing checkpoints, temperature targets, and inspection criteria (based on both texts)
- Redesign a previously failed casting: identify the defect, propose three design or process modifications using principles from Untracht and Bovin, and execute the improved version with full documentation
- Perform a gating system study: design and cast the same piece with three different gating configurations (varying gate diameter, sprue angle, and runner placement); measure fill time, defect rate, and metal yield for each
Next up: This stage equips you to diagnose and prevent failures independently, positioning you to move into specialized applications—such as high-precision casting for functional components, large-scale production optimization, or advanced alloy work—where you can apply these troubleshooting and design principles to new material systems and design constraints.

Untracht's magnum opus synthesizes every stage of the casting process — design, wax, investment, metal, and finishing — into a single authoritative reference that rewards re-reading at the advanced level.

Bovin's dedicated lost-wax manual is the most process-specific book in the canon; its troubleshooting charts and failure-analysis sections are essential for the advanced caster refining their practice.
Discussion
Keep reading
Paths that share books, cover the same subject, or open a related topic.