Best Books on Enameling, in Reading Order
This curriculum is designed for intermediate crafters who already understand basic metalworking and want to master enameling in depth — from kiln and torch fundamentals through advanced cloisonné, champleve, color theory, and surface troubleshooting. Each stage builds directly on the last: technical vocabulary and process logic come first, then technique-specific mastery, then the nuanced artistry of color, counter-enamel, and problem-solving at the surface level.
Solid Foundations & Process Logic
IntermediateEstablish a rigorous understanding of enamel chemistry, kiln and torch firing principles, surface preparation, and counter-enamel — building the technical vocabulary needed for every technique that follows.
▸ Study plan for this stage
Pace: 4–5 weeks, ~20–25 pages/day, with 2–3 days per week reserved for hands-on practice and note-taking
- Enamel composition: glass, flux, and colorant chemistry and how they interact during firing
- Thermal dynamics of kiln and torch firing: temperature control, heating rates, and cooling cycles
- Surface preparation protocols: cleaning, priming, and adhesion chemistry for enamel adherence
- Counter-enamel application and function: preventing warping, stress relief, and structural integrity
- Coefficient of thermal expansion (CTE) matching between enamel and metal substrate
- Firing defects and their causes: crazing, crawling, pitting, and blistering
- Metal substrate selection and compatibility with different enamel types
- Torch vs. kiln firing trade-offs: control, consistency, and technical outcomes
- What are the three main components of enamel, and how does the ratio of each affect the final result?
- Why is counter-enamel essential, and what specific problems does it prevent?
- How do coefficient of thermal expansion (CTE) mismatches cause crazing or crawling, and how do you diagnose which is occurring?
- What are the key differences between torch and kiln firing in terms of temperature control, heating rate, and repeatability?
- What does proper surface preparation involve, and why does each step matter chemically?
- How do you identify and correct common firing defects (pitting, blistering, crawling) by adjusting your process?
- Create a detailed reference chart mapping enamel types (soft, medium, hard) to their flux content, melting temperatures, and recommended firing methods
- Prepare and fire a series of test tiles with different surface preparations (bare metal, pickled, primed) on the same enamel to observe adhesion differences
- Practice counter-enameling on at least 5 metal blanks, documenting thickness, firing time, and visual results to develop consistency
- Conduct a CTE mismatch experiment: fire the same enamel on copper and silver substrates, then cool rapidly to observe crazing patterns and document differences
- Keep a detailed firing log for 10+ pieces including: metal type, enamel batch, surface prep method, firing temperature, duration, and visual outcome—analyze patterns in defects
- Mix or source 3 different enamel batches and fire them side-by-side under identical conditions to understand batch variation and consistency
Next up: This stage equips you with the chemical and thermal literacy to understand why specific techniques work, setting the foundation for mastering application methods (wet-packing, dry-sifting, stenciling) and advanced decorative processes in the next stage.
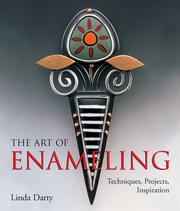
The single most comprehensive modern reference for intermediate enamelists — covers kiln and torch firing, surface prep, counter-enamel, and troubleshooting in one authoritative volume. Read this first to establish a shared technical language for the entire curriculum.
Cloisonné — Wire, Cell & Color
IntermediateMaster the full cloisonné workflow: forming and placing fine-silver wire, flooding cells with transparent and opaque enamels, building layers, and achieving a polished, level surface.
▸ Study plan for this stage
Pace: 4–5 weeks, ~25–30 pages/day, with 2–3 hands-on practice sessions per week
- Fine-silver wire selection, annealing, and straightening techniques for precise cloisonné cell formation
- Cell design principles: creating closed compartments that hold enamel without leakage or distortion
- Soldering and adhesion methods for securing wire to the base plate while maintaining structural integrity
- Transparent vs. opaque enamel properties: how light transmission, firing temperatures, and layering affect final color and finish
- Wet-packing and dry-packing enamel application techniques to fill cells evenly and minimize air bubbles
- Multi-layer firing sequences: building depth, adjusting colors, and managing thermal expansion across successive firings
- Surface finishing: grinding, polishing, and beveling to achieve a level, glass-smooth surface without exposing wire edges
- Troubleshooting common defects: crazing, pitting, enamel flow, and wire displacement during firing
- What is the proper sequence for annealing and straightening fine-silver wire, and why does wire condition affect cell integrity?
- How do transparent and opaque enamels behave differently during firing, and when would you choose one over the other in a single piece?
- Describe the steps for soldering wire cells to a base plate without compromising the enamel application process.
- What are the key differences between wet-packing and dry-packing enamel, and how does each method affect the final surface quality?
- How do you build multiple enamel layers while managing color shifts, thermal stress, and maintaining a level surface?
- What finishing techniques are required to achieve a polished, level surface, and how do you avoid exposing wire edges?
- Prepare 10–15 lengths of fine-silver wire: practice annealing, pickling, straightening, and measuring for consistency; document wire diameter and temper changes
- Design and construct 3–4 simple cloisonné cell patterns (geometric or organic) on copper base plates using soldered wire; test different wire gauges and cell sizes
- Create a transparent enamel color chart: layer the same transparent enamel 2–4 times on a test tile, firing between layers to observe color deepening and light transmission
- Execute a multi-cell practice piece using both transparent and opaque enamels; fill cells using wet-packing method, fire, and document enamel flow and adhesion
- Prepare a second multi-cell piece and fill using dry-packing method; compare surface quality, bubble formation, and finishing requirements against the wet-packed piece
- Complete a finished cloisonné piece (minimum 4–6 cells): apply multiple enamel layers, fire progressively, then grind and polish the surface to a level, glass-smooth finish; photograph and document each stage
Next up: This stage equips you with complete technical mastery of the cloisonné workflow—from wire to polished surface—preparing you to advance into specialized techniques such as plique-à-jour (transparent cells without backing), champlevé (etched recesses), or complex multi-color narrative designs.

A focused, step-by-step guide to cloisonné that walks through wire-bending, cell construction, and sequential firing — the ideal entry point into this specific technique after the foundational stage.

A classic studio reference by one of America's foremost mid-century enamelists, with deep attention to color relationships within cloisonné cells and the aesthetic decisions that separate competent work from expressive art.
Champleve, Etching & Recessed Techniques
IntermediateUnderstand how to create recessed fields in metal through etching, engraving, and rolling-mill techniques, then fill and fire enamel into those recesses — the defining skill set of champleve.
▸ Study plan for this stage
Pace: 4–5 weeks, ~20–25 pages/day, focusing on chapters covering etching, engraving, and champleve techniques. Plan 2–3 dedicated practice sessions per week.
- Metal surface preparation and degreasing as the foundation for etching and enamel adhesion
- Etching chemistry: resist application, mordant selection, and timing for controlled metal removal
- Engraving and chasing techniques for creating precise recessed fields without chemical processes
- Rolling mill techniques for creating texture and recessed patterns through mechanical deformation
- Champleve design principles: planning recessed areas to hold enamel and prevent overflow
- Enamel application into recesses: consistency, filling techniques, and avoiding air pockets
- Firing schedules specific to champleve work: temperature, duration, and multiple firing cycles
- Finishing and polishing champleve pieces while protecting enamel surfaces
- What are the key steps in preparing metal for etching, and why is degreasing critical before applying resist?
- How do etching mordants work, and what factors determine the depth and speed of metal removal?
- What are the main differences between etching, engraving, and rolling-mill techniques for creating recesses, and when would you choose each?
- How do you design a champleve pattern to ensure enamel stays in the recesses during firing?
- What is the correct enamel consistency for filling recesses, and how do you avoid trapping air bubbles?
- Why do champleve pieces often require multiple firing cycles, and how do you manage enamel flow between firings?
- Practice etching a simple geometric pattern on copper using acid-resist and a mordant; document timing and depth achieved
- Create a small engraved or chased design on a metal sheet using hand tools; measure and photograph the recessed depth
- Run a test piece through the rolling mill with a textured surface to create mechanical recesses; compare texture consistency
- Design a small champleve piece (2–3 inches) on paper, mapping out recessed areas and planned enamel colors
- Mix and test enamel to the correct consistency for filling recesses; practice application into a pre-etched test piece without trapping air
- Fire a champleve test piece through a complete cycle; document temperature, duration, and any enamel flow or settling; repeat with a second firing if needed
Next up: Mastering recessed-field creation and enamel-filling techniques prepares you to explore cloisonné and other compartmentalized enameling methods, where wire walls replace etched recesses as the enamel containment system.
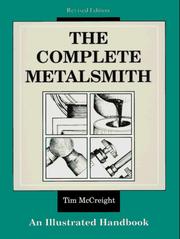
Though broader in scope, this canonical metalsmithing reference is essential here for its coverage of etching chemistry, engraving, and surface preparation — the metalworking underpinning that champleve demands at this level.
Discussion
Keep reading
Paths that share books, cover the same subject, or open a related topic.