Bladesmithing and knife making: essential books to forge your first blade
This curriculum takes a beginner from zero knowledge of metalworking all the way to advanced bladesmithing techniques, building skills in a logical order: first understanding steel and basic forging, then mastering grinding and heat treatment, and finally refining fit, finish, and handle craftsmanship. Each stage assumes the vocabulary and hands-on intuition built in the previous one, so reading in order is essential.
Foundations: Steel, Fire & First Blades
BeginnerUnderstand what bladesmithing is, how steel behaves under heat and hammer, and complete a first simple knife from start to finish with confidence.
▸ Study plan for this stage
Pace: 4–5 weeks, ~25–30 pages/day, with 2–3 dedicated practice days per week at the forge or anvil
- Steel composition and how carbon content affects hardness, flexibility, and workability
- Heat management: reading color, temperature control, and how heat transforms steel's crystalline structure
- Hammer technique and striking mechanics for drawing out, tapering, and shaping metal
- Pattern-welding fundamentals: layering different steels, forge-welding, and creating decorative/functional patterns
- The complete forging sequence: from billet preparation through drawing, bending, and forming a functional blade edge
- Hardening and tempering: achieving the right balance of hardness and toughness in a finished blade
- Safety protocols and workshop setup for solo bladesmithing work
- What is pattern-welding, and why would a bladesmith choose it over working with a single steel?
- How do you recognize when steel has reached the correct temperature for forging, and what happens if it's too hot or too cold?
- Describe the basic hammer strikes used to draw out and taper a blade blank from a billet
- What is the difference between hardening and tempering, and why are both necessary?
- Walk through the complete sequence of steps to forge a simple pattern-welded blade from start to finish
- How do you safely set up a forge and anvil workspace, and what are the critical safety checks before striking?
- Forge a simple steel billet through multiple heat cycles, practicing heat recognition by color and learning how the metal responds to hammer blows at different temperatures
- Create a practice pattern-welded billet by stacking and forge-welding two contrasting steels (e.g., mild steel and high-carbon), then etch it to reveal the pattern
- Forge a simple blade blank (8–10 inches) using proper hammer technique: draw out the metal, taper the spine, and shape the profile
- Harden and temper your blade blank, testing the hardness and flexibility by hand to understand the effect of temperature control
- Complete one full simple knife from billet to finished blade, including grinding/finishing the edge and handle preparation
- Document each step of your first blade with photos or sketches, noting temperatures, hammer techniques, and any challenges encountered
Next up: This stage gives you hands-on mastery of heat, hammer, and the fundamentals of pattern-welding, preparing you to tackle more advanced techniques—such as complex multi-steel patterns, specialized blade geometries, and professional finishing methods—in the next level.
The perfect entry point — Goddard shows how to start bladesmithing with minimal tools and budget, demystifying the craft and building immediate motivation before any technical depth is needed.
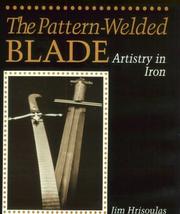
Hrisoulas introduces the history and metallurgy of blades in an accessible way, giving beginners essential vocabulary about steel structure and forge welding that underpins all later study.
Forging & Shaping: Hammer, Anvil & Steel
BeginnerDevelop real forging technique — how to move steel efficiently with a hammer, profile a blade, draw out a tang, and understand how forge work affects the final knife.
▸ Study plan for this stage
Pace: 8–10 weeks, ~25–30 pages/day, with 2–3 dedicated forge practice sessions per week
- Hammer control and striking technique — developing consistent, efficient blows to move steel without waste
- Heat management and color reading — understanding when steel is workable and how temperature affects forging behavior
- Drawing out and tapering — the fundamental technique for extending steel along the length to form blade profiles and tangs
- Anvil work and tool use — proper positioning, use of fulcrums, and integration of anvil tools (hardy tools, swages) into the forging sequence
- Blade profile development — how hammer work shapes the cross-section and longitudinal profile to create functional geometry
- Tang formation and proportioning — forging the handle attachment point with proper taper and strength
- Metal flow and grain structure — understanding how hammer direction and force affect internal steel structure and final blade performance
- Scaling techniques from small to large blades — adapting hammer weight, heat cycles, and striking patterns as blade size changes
- What are the key differences between hammer control for drawing out versus for setting shoulders or forming transitions, and why does each require different striking angles or force?
- How do you read steel color at the forge to determine workability, and what happens if you forge steel that is too cold or too hot?
- Describe the step-by-step process of drawing out a tang from a billet, including heat cycles, hammer positioning, and how you know when it is complete.
- What is the relationship between hammer weight, anvil mass, and the size of blade you are forging, and how do you adjust technique when these variables change?
- How does the direction and angle of hammer strikes affect the final grain structure and strength of the blade, and why does this matter for different blade sections?
- What are the common mistakes in early forging that lead to warping, uneven profiles, or weak tangs, and how do you prevent them?
- Heat and forge a practice billet (mild steel) repeatedly, focusing solely on hammer control and consistent striking — aim for smooth, even tapering without twisting or uneven thickness
- Forge a complete tang from a square billet, documenting each heat cycle and the color of the steel; compare your finished tang to the proportions described in Hrisoulas's work
- Practice drawing out a blade profile (flat or simple cross-section) on a small billet, stopping at each major step to measure and compare against target dimensions
- Forge the same blade design twice — once with a light hammer and once with a heavier hammer — and document how technique and final shape differ
- Create a series of practice blades at increasing sizes (4 inches, 6 inches, 8 inches) and adjust your hammer weight, heat cycles, and striking pattern for each; record what changes
- Forge a blade with intentional mistakes (too-cold steel, wrong strike angle, uneven heating) and then correct it, documenting what you observe and how you fix it
Next up: This stage builds the muscle memory and intuition for moving steel efficiently; the next stage will layer on hardening, tempering, and finishing techniques that depend on having a properly forged blank with correct geometry and grain structure.
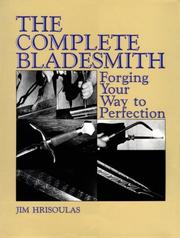
A thorough, step-by-step guide to forging blades from raw stock, this book builds directly on the vocabulary from Stage 1 and teaches proper hammer technique, bevel forging, and tang work.
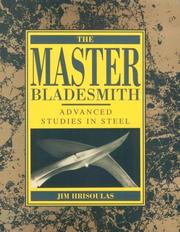
Hrisoulas's follow-up raises the bar with more complex blade geometries and forge techniques, making it the natural next read after The Complete Bladesmith as skills and confidence grow.
Heat Treatment & Metallurgy: Making Steel Perform
IntermediateUnderstand the science of steel — carbon content, grain structure, hardening, tempering, and quenching — so every blade is heat treated correctly for lasting sharpness and toughness.
▸ Study plan for this stage
Pace: 4–5 weeks, ~25–30 pages/day, with 2–3 days per week reserved for metallurgy experiments and note-taking
- Carbon content and its effect on steel hardness, brittleness, and workability
- Iron-carbon phase diagram and how temperature and cooling rates determine microstructure
- Grain structure formation and how grain size affects blade properties (hardness vs. toughness)
- Hardening mechanisms: martensite formation and the role of rapid cooling (quenching)
- Tempering as a controlled reheating process to reduce brittleness while retaining hardness
- Quenching media (water, oil, brine) and their cooling rates relative to steel composition
- Austenite, ferrite, cementite, and pearlite: understanding what these microstructures mean for blade performance
- Critical temperature thresholds (Ac1, Ac3) and how to identify them for specific steel compositions
- How does carbon content influence the hardness and brittleness of steel, and why is there a trade-off between the two?
- What is the iron-carbon phase diagram, and how do you use it to predict what microstructure will form at a given temperature and cooling rate?
- Explain the difference between austenite, martensite, and pearlite, and why martensite is desirable for blade hardness
- What happens during quenching, and why do different quenching media (water vs. oil) produce different results?
- Why is tempering necessary after hardening, and how does reheating to specific temperatures reduce brittleness without losing hardness?
- How do you determine the critical temperatures (Ac1 and Ac3) for a specific steel, and why do these temperatures matter for heat treatment?
- Create a personal reference chart mapping carbon percentages (0.3%–1.5%) to typical blade applications (chef's knives, cleavers, hunting knives) and note the hardness/toughness trade-offs
- Plot and annotate an iron-carbon phase diagram by hand, labeling key regions (ferrite, austenite, cementite, pearlite) and marking the Ac1 and Ac3 lines for a 1095 steel
- Conduct a controlled hardening and tempering experiment on small steel samples: heat to critical temperature, quench in different media (water, oil, salt water), and compare hardness using a file test or hardness tester
- Document a full heat-treat cycle for a specific steel type (e.g., 1095, O1, or A2): record exact temperatures, soak times, quench medium, and tempering temperature, then photograph the color progression during tempering
- Research and write a 1–2 page summary on how grain size affects blade performance, including why rapid cooling creates fine grains and why that matters for edge retention
- Perform a simple metallographic examination: etch a polished steel sample with ferric chloride or acid, observe grain structure under magnification, and sketch what you see alongside notes on how the microstructure relates to the heat treatment applied
Next up: This stage equips you with the theoretical foundation and hands-on intuition for heat treatment, preparing you to apply these principles to specific steel types and forge techniques in the next stage, where you'll learn how to select and heat-treat particular alloys for different blade designs and purposes.

Verhoeven is the definitive accessible metallurgy reference for bladesmiths — this book explains exactly what happens inside steel during heat treatment, giving the reader true scientific understanding rather than rule-of-thumb knowledge.
Handles, Design & Mastery: The Complete Knife
ExpertDesign knives with purpose, craft ergonomic and beautiful handles in wood, bone, and synthetic materials, and develop a personal style that integrates all previous skills into complete, durable, sharp knives.
▸ Study plan for this stage
Pace: 8–10 weeks, ~40–50 pages/day with 2–3 days/week dedicated to hands-on practice and reflection
- Integrated knife design philosophy: balancing blade geometry, handle ergonomics, and material selection for purpose-driven knives
- Handle design principles: achieving comfort, control, and aesthetic harmony through proportional relationships and user-centered design
- Material mastery for handles: understanding wood grain, bone structure, and synthetic material properties to select and work with each appropriately
- Finishing techniques: achieving durability and beauty through proper sealing, shaping, and surface treatment of handle materials
- Personal style development: synthesizing blade-making, heat-treating, and handle-crafting skills into a cohesive, recognizable maker's voice
- Functional aesthetics: designing knives where form follows function while maintaining visual elegance and cultural/historical awareness
- Advanced joinery and attachment: mastering tang-to-handle integration methods that ensure structural integrity and longevity
- How do blade geometry, balance point, and handle ergonomics work together to create a knife suited to a specific task or user?
- What are the key design considerations when selecting wood, bone, or synthetic materials for a handle, and how do material properties affect durability?
- How does Murray Carter's approach to handle design reflect Japanese knife-making traditions, and how can you adapt these principles to your own style?
- What finishing and sealing methods preserve handle beauty while ensuring the knife withstands regular use and cleaning?
- How do you develop a personal design signature that is recognizable across multiple knives while remaining functionally sound?
- What are the structural and aesthetic differences between full-tang, hidden-tang, and other attachment methods, and when is each appropriate?
- Design three complete knives on paper (or digitally) for different purposes—a chef's knife, a utility knife, and a specialized blade—documenting handle proportions, material choices, and ergonomic reasoning
- Craft handles from at least three different materials (e.g., one wood species, bone, and one synthetic) for practice blades or tang blanks, comparing workability, finish quality, and durability
- Create a handle design portfolio documenting the relationship between blade profile, balance, and handle shape; photograph and annotate each to show how form serves function
- Practice multiple handle attachment methods (full-tang, hidden-tang, etc.) on scrap blades, testing structural integrity and refining your preferred technique
- Finish and seal three different handle materials using various methods (oil, epoxy, wax, etc.), then subject them to water and use tests to evaluate durability and maintenance requirements
- Forge and complete one 'signature knife'—a blade and handle that represents your personal style—documenting design decisions, material choices, and the integration of all previous skills
Next up: This stage synthesizes all foundational blade-making, heat-treating, and material skills into complete, market-ready knives with intentional design and personal style, preparing you to either specialize further (e.g., in custom commissions, production methods, or advanced metallurgy) or establish yourself as a recognized maker.

Carter, a 17th-generation Yoshimoto bladesmith, brings a master's perspective on full knife completion — handle shaping, balance, ergonomics, and sharpening — tying every prior skill into a unified, refined process.
Discussion
Keep reading
Paths that share books, cover the same subject, or open a related topic.