Millinery and hat making for beginners: top books to craft custom hats
This curriculum takes a complete beginner from the foundational history and vocabulary of millinery through hands-on hat construction, materials mastery, and finally advanced blocking and couture finishing techniques. Each stage builds directly on the last — you'll learn to see and talk about hats before you sew them, sew simple forms before you block complex ones, and master trims and embellishments only after the underlying structure is solid.
Foundations: History, Vocabulary & Inspiration
BeginnerUnderstand the rich tradition of millinery, learn the essential vocabulary of hat styles and construction terms, and develop an eye for design before picking up a needle.
▸ Study plan for this stage
Pace: 4–5 weeks, ~20–25 pages/day (approximately 140–175 pages total across both books)
- The evolution of hat-making from ancient times through the 20th century and how cultural/social factors shaped millinery design
- Essential hat styles and their historical contexts (bonnets, cloches, fascinators, fedoras, pillboxes, etc.) and when/why they emerged
- Core millinery vocabulary: blocking, brim, crown, sweatband, facing, trimming, blocking blocks, and other construction terminology
- The relationship between materials (felt, straw, silk, feathers, ribbons) and hat construction methods
- How fashion, social etiquette, and practical needs influenced hat design across different eras and cultures
- The role of inspiration sources: observing silhouettes, proportions, color, and embellishment in existing designs
- Basic design principles: balance, proportion, and visual hierarchy as they apply to hat aesthetics
- What are the major historical periods in millinery development, and what distinctive hat styles emerged in each era according to Ginsburg and Amphlett?
- How do the terms 'blocking,' 'crown,' 'brim,' and 'facing' relate to hat construction, and why does understanding these distinctions matter before making hats?
- What role did social customs, gender expectations, and practical needs play in determining which hat styles became popular in different time periods?
- How do different materials (felt, straw, silk, feathers) influence both the construction process and the final aesthetic of a hat?
- What design elements (color, proportion, trimming, silhouette) should you observe and analyze when studying existing hats for inspiration?
- How does understanding millinery history help you make intentional design choices rather than copying styles randomly?
- Create a visual timeline: Collect images or sketches of 8–10 iconic hat styles from the books, arrange them chronologically, and write 2–3 sentences about the historical context and key features of each
- Vocabulary flashcards: Make physical or digital cards for 15–20 millinery terms (blocking, sweatband, fascinator, etc.) with definitions and sketches of where each part appears on a hat
- Museum or online collection study: Visit a museum with hat collections (or explore online archives like the V&A or Met Museum) and sketch 3–5 hats, labeling their parts and noting materials, era, and design choices
- Inspiration mood board: Gather 12–15 images of hats you find visually interesting (from the books, magazines, or online) and organize them by design principle (color harmony, proportion, embellishment style, silhouette)
- Comparative analysis: Select two hat styles from different eras in the books and write a 1-page comparison of how their design reflects the social/cultural context of their time
- Design observation exercise: Sketch or photograph 5 hats (from life, online, or museum images) and annotate them with observations about balance, proportion, and visual weight distribution
Next up: This stage equips you with the historical knowledge, design vocabulary, and visual literacy needed to move into hands-on construction, where you'll apply these concepts by learning blocking techniques, selecting appropriate materials, and building your first hat.

A beautifully illustrated survey of hat history and style across centuries — reading this first gives you the visual vocabulary and cultural context that makes every later technique feel meaningful.
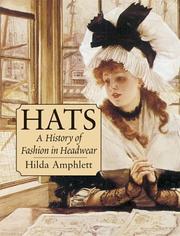
Amphlett's detailed typology of hat forms and construction methods across history acts as a practical reference glossary, cementing the terminology you'll need throughout the curriculum.
First Stitches: Beginner Hat Construction by Hand & Machine
BeginnerComplete your first real hats using fabric, felt, and basic sewing techniques, learning pattern cutting, seaming, lining, and simple finishing by hand.
▸ Study plan for this stage
Pace: 4–5 weeks, ~20–25 pages/day with daily hands-on practice
- Pattern selection and adaptation for different hat styles and head sizes
- Fabric and felt preparation, blocking, and stretching techniques
- Hand and machine sewing fundamentals specific to millinery (backstitch, whip stitch, running stitch)
- Cutting patterns accurately and marking grain lines and placement points
- Seaming methods for hat crowns and brims, including French seams and fell seams
- Lining construction and attachment to finished hat bodies
- Simple finishing techniques: binding edges, adding sweatbands, and basic trims
- How to troubleshoot common construction problems (puckering, misalignment, loose seams)
- What are the key steps in preparing fabric or felt before cutting a hat pattern, and why does blocking matter?
- How do you select and adapt a pattern from Kaye's designs to fit different head measurements?
- What is the difference between hand-sewing methods used in millinery (backstitch vs. whip stitch), and when do you use each?
- Walk through the process of cutting, seaming, and lining a simple crown—what are the critical points where mistakes often happen?
- How do you attach a sweatband and finish the edge of a hat brim to look professional?
- What are three common construction problems you might encounter, and how would you fix or prevent each one?
- Cut and construct a simple fabric or felt hat crown using Kaye's basic pattern, practicing accurate pattern placement and grain-line alignment
- Practice the three main hand-sewing stitches (backstitch, whip stitch, running stitch) on scrap fabric until you achieve even tension and consistent stitch length
- Block and stretch a piece of felt using Kaye's techniques, then measure the result to confirm proper shaping
- Sew a practice seam using both hand and machine methods on hat-weight fabric, comparing finish quality and durability
- Construct a simple lining from muslin or cotton, then attach it to a completed hat crown using the whip stitch
- Make a complete beginner hat (e.g., a basic cloche or pillbox) from start to finish, including pattern cutting, seaming, lining, and edge binding
- Bind the edge of a hat brim using bias tape or a facing, practicing neat, even stitching
- Add a sweatband to a finished hat and secure it with hand stitching, ensuring comfort and durability
Next up: Understanding these foundational hand and machine techniques—pattern reading, seaming, lining, and finishing—prepares you to tackle more complex hat structures, decorative elements, and advanced millinery methods in the next stage.
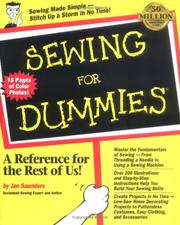
A classic practical manual covering materials, basic blocking on simple forms, and hand-sewing techniques; reading it second in this stage reinforces and expands on the construction logic introduced in the previous book.
Core Craft: Blocking, Structure & Materials
IntermediateMaster the central millinery skills of blocking felt and straw over hat blocks, working with buckram and wire foundations, and selecting and preparing the right materials for each hat form.
▸ Study plan for this stage
Pace: 4–5 weeks, ~20–25 pages/day, with 2–3 dedicated practice days per week for blocking and material preparation exercises
- Hat blocking fundamentals: understanding how to steam, stretch, and mold felt and straw over wooden blocks to achieve proper shape and crown height
- Buckram and wire construction: selecting appropriate weights and types of buckram, wiring edges for structure and durability, and assembling foundations that support hat forms
- Material properties and selection: identifying the characteristics of different felts, straws, and blends, and matching materials to hat styles and intended use
- Preparation techniques: blocking, sizing, and conditioning materials before assembly to ensure professional results
- Structural integrity: using blocking, wiring, and foundation work to create hats that hold their shape and withstand wear
- Millinery tools and equipment: proper use of hat blocks, steamers, blocking stands, and hand tools specific to the craft
- What are the key steps in blocking felt or straw over a hat block, and how does steam and moisture affect the material's malleability?
- How do you select and prepare buckram for different hat styles, and what role does wire play in creating structural support?
- What are the main differences between felt and straw as millinery materials, and when would you choose one over the other?
- How do you properly size and condition materials before blocking to achieve consistent, professional results?
- What techniques ensure that a blocked hat maintains its shape after removal from the block?
- How do you construct and attach wire foundations to create clean, durable edges on a finished hat?
- Block a felt hood or body over a wooden block using proper steaming and stretching techniques; document the process with photos and notes on how the material responds to heat and tension
- Prepare and wire the edge of a buckram foundation using millinery wire, practicing both hand-stitching and binding techniques to create a smooth, finished edge
- Compare three different felt or straw samples by blocking small test pieces over blocks; record observations on how each material behaves, shrinks, and holds shape
- Create a complete buckram foundation for a simple cloche or pillbox style, including proper sizing, wiring, and reinforcement at stress points
- Practice material preparation: size and condition a piece of felt or straw, then block it; compare the results with an unprepared sample to understand the importance of prep work
- Design and execute a small hat project (e.g., a fascinator base or simple beret) that incorporates blocking, buckram work, and wiring—from material selection through finished blocking
Next up: This stage equips you with the foundational blocking and structural skills needed to move into shaping, trimming, and finishing techniques, where you'll learn to refine your blocked forms and add decorative elements that transform raw blocked bases into finished millinery pieces.
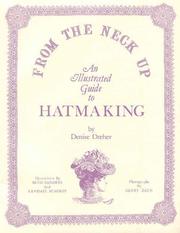
Dreher's comprehensive companion volume goes deeper into structure, sizing, and professional finishing — read it after 'Hats Made Easy' to consolidate and extend your blocking and construction skills.
Advanced Practice: Couture Techniques & Professional Finishing
ExpertAchieve professional-level results by mastering couture hand-sewing, complex blocked shapes, bespoke fitting, and the finishing details that distinguish a truly beautiful custom hat.
▸ Study plan for this stage
Pace: 4–5 weeks, ~25–30 pages/day, with 2–3 dedicated practice days per week for hands-on technique work
- Professional hand-sewing techniques: backstitch, pad stitch, fell seam, and slip stitch applications specific to hat construction
- Complex blocked shapes and their underlying geometry: understanding how blocking tools, steam, and tension create couture silhouettes
- Bespoke fitting principles: measuring, blocking to individual head shapes, and adjusting internal structures for comfort and aesthetics
- Couture finishing details: bound edges, hand-rolled hems, invisible seaming, and decorative hand stitching that elevate a hat from good to exceptional
- Quality control and professional standards: inspecting seams, reinforcing stress points, and ensuring durability in luxury garments
- Pattern drafting and customization: adapting existing blocks to create unique shapes while maintaining structural integrity
- Material selection and preparation: choosing fabrics and trims appropriate for couture work and preparing them for precision construction
- What are the key differences between basic and couture hand-sewing techniques, and when should each be used in hat construction?
- How do blocking techniques in 'The Costume Technician's Handbook' apply to creating complex hat shapes, and what tools and materials are essential?
- Describe the process of taking custom measurements and fitting a hat to an individual client's head shape and preferences.
- What finishing techniques from 'Couture Sewing Techniques' distinguish a professional-quality hat from an amateur one?
- How do you identify and reinforce stress points in a hat to ensure longevity while maintaining a clean, invisible finish?
- What is the relationship between fabric choice, blocking method, and the final silhouette of a couture hat?
- Practice all fundamental couture hand stitches (backstitch, pad stitch, fell seam, slip stitch) on scrap millinery materials until you achieve consistent, invisible seams; photograph your work for quality assessment
- Block a simple hat shape (e.g., cloche or pillbox) using steam and blocking tools, then reblock the same shape to a custom measurement to understand how individual fitting works
- Create a bound edge on a hat brim using the techniques from Shaeffer's book; practice on 3–4 different hat styles to master the method
- Draft and construct a custom hat block based on a client's head measurements; document the process with photos and notes on adjustments made
- Hand-roll a hem on a hat crown or brim, focusing on creating an invisible finish; compare your work to professional examples
- Construct a complete couture hat from start to finish (blocking, seaming, fitting, finishing) with at least two fittings and documented alterations
Next up: This stage equips you with the technical mastery and quality standards needed to move into specialized areas such as period-specific millinery, advanced trimming and embellishment techniques, or business and client management for a professional hat-making practice.
Though broad in scope, this professional-grade reference is the definitive backstage manual for couture construction and finishing standards — the hand-sewing, pressing, and fitting chapters directly elevate millinery work to a professional level.
Shaeffer's masterclass in hand-finishing, invisible stitching, and couture detail is the ideal final text — applying these techniques to hat linings, bindings, and trims is what separates a handmade hat from a truly beautiful custom one.
Discussion
Keep reading
Paths that share books, cover the same subject, or open a related topic.