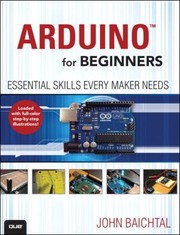
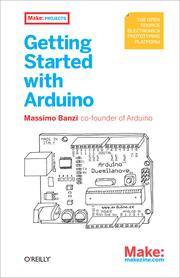
Raspberry Pi projects: start building
This curriculum takes a complete beginner from unboxing a Raspberry Pi to confidently building real hardware and software projects. It starts with Linux fundamentals and Pi setup, moves into electronics and GPIO wiring, and culminates in hands-on projects that tie everything together — each stage building directly on the vocabulary and skills of the last.
Getting the Pi Up and Running
BeginnerSet up a Raspberry Pi from scratch, navigate Linux on the command line, and feel comfortable with the basic operating environment.
▸ Study plan for this stage
Pace: 6–8 weeks total. Week 1–2: Read the "Official Raspberry Pi Beginner's Guide" cover-to-cover (~20–25 pages/day), pausing to follow every hardware and software step hands-on. Week 3–8: Work through "The Linux Command Line" at ~25–30 pages/day, completing the shell exercises at the end of each chapter
- Hardware anatomy of the Raspberry Pi: GPIO pins, microSD slot, USB, HDMI, and power requirements (from Halfacree's Beginner's Guide)
- Flashing and configuring Raspberry Pi OS using Raspberry Pi Imager, including locale, Wi-Fi, and SSH settings (Beginner's Guide)
- The Linux filesystem hierarchy: understanding /, /home, /etc, /var, /usr, and relative vs. absolute paths (The Linux Command Line, Part 1)
- Shell fundamentals: navigating with cd/ls/pwd, manipulating files with cp/mv/rm/mkdir, and using wildcards and tab completion (The Linux Command Line, Ch. 1–8)
- Permissions and ownership: reading rwx notation, using chmod and chown, and understanding why root vs. user matters on a shared system (The Linux Command Line, Ch. 9)
- Redirection and pipelines: stdin/stdout/stderr, the | pipe operator, > and >> for output redirection, and combining commands (The Linux Command Line, Ch. 6)
- Package management with APT: apt update, apt upgrade, apt install, and apt remove to keep the Pi's software current (Beginner's Guide + Linux Command Line context)
- Text editing on the command line: creating and editing files with nano (introduced in Beginner's Guide) and a first look at vi/vim (The Linux Command Line, Ch. 12)
- Can you describe every port and connector on the Raspberry Pi board and explain what each is used for, as covered in the Beginner's Guide?
- Walk through the full first-boot setup process: how do you flash Raspberry Pi OS, configure it with Raspberry Pi Imager, and reach a working desktop or terminal?
- What is the Linux filesystem hierarchy, and where would you expect to find user data, system configuration files, and installed programs respectively?
- How do file permissions work in Linux? Given the output '-rwxr--r-- 1 pi pi 4096 Jan 1 config.sh', who can read, write, and execute this file, and how would you change it so all users can execute it?
- Explain the concept of a pipeline. Write a one-line command that lists all running processes, filters for lines containing 'python', and saves the result to a file called procs.txt.
- What is the difference between apt update and apt upgrade, and why must you run them in that order on your Raspberry Pi?
- Hardware setup from zero: unbox (or re-image) your Pi, flash a fresh copy of Raspberry Pi OS using Raspberry Pi Imager following the Beginner's Guide exactly, boot it, and complete the first-run wizard — document every decision you make and why.
- Command-line scavenger hunt: using only the terminal (no file manager), navigate to five different directories in the Linux filesystem hierarchy, create a folder tree ~/projects/stage1/notes/, copy a file into it, rename it, then delete the original — all using commands from The Linux Command Line Ch. 1–5.
- Permissions lab: create three test files, assign them different permission combinations using chmod (symbolic and octal notation), verify with ls -l, then create a second user account on the Pi and test which files that user can access.
- Pipeline challenge: write a single pipeline that (1) lists all files in /etc, (2) filters only those containing the word 'network' in their name, (3) sorts them alphabetically, and (4) saves the output to ~/projects/stage1/network_files.txt — referencing The Linux Command Line Ch. 6.
- APT package management drill: update your package list, upgrade all installed packages, install the 'tree' utility, use it to visualise your ~/projects directory, then cleanly remove it — following the workflow described in the Beginner's Guide.
- Text-file editing sprint: using nano, write a short shell script that prints 'Hello, Raspberry Pi!' and today's date, save it, make it executable with chmod, and run it from the terminal — combining skills from both books.
Next up: Mastering the Pi's hardware setup and Linux command-line fundamentals gives you the stable, confident operating environment you'll need to start writing and running real programs in the next stage, where the focus shifts from operating the machine to programming it.
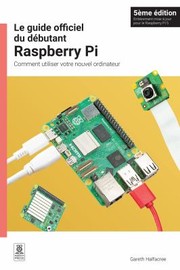
The official Raspberry Pi Foundation guide — walks you through unboxing, installing Raspberry Pi OS, and first steps. The ideal starting point before anything else.
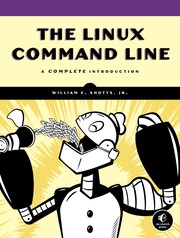
Raspberry Pi OS is Linux, and this is the most-recommended beginner book for the command line. Reading it here gives you the shell fluency every later project will assume.
Learning to Code on the Pi
BeginnerWrite Python scripts confidently enough to control hardware, automate tasks, and follow project code without getting stuck on syntax.
▸ Study plan for this stage
Pace: 8–10 weeks total. Weeks 1–5: "Python Crash Course" by Eric Matthes — aim for ~25–30 pages/day, completing Parts I (Chapters 1–11, the language fundamentals) and Part II (Chapters 12–20, projects) in sequence; don't skip the "Try It Yourself" exercises embedded in each chapter. Weeks 6–10: "Automate
- Variables, data types, and expressions — the absolute baseline before touching any hardware API
- Control flow: if/elif/else, for/while loops, and break/continue — essential for polling sensors and reacting to GPIO states
- Functions and scope — writing reusable, readable code blocks that map cleanly to hardware actions (e.g., blink(), read_sensor())
- Lists, dictionaries, and tuples — storing sensor readings, pin mappings, and configuration data
- File I/O and working with the filesystem (Automate Ch. 8–9) — logging sensor data to CSV/text files on the Pi's SD card
- Modules and imports — understanding how to pull in RPi.GPIO, time, os, and third-party Pi libraries the same way Matthes teaches importing pygame/requests
- Error handling with try/except — preventing a crashed script from leaving GPIO pins in a dangerous state
- Automating repetitive tasks with os, shutil, and scheduling (Automate Ch. 9–17) — running scripts at boot, moving log files, and sending alerts
- After reading Python Crash Course Ch. 1–2, can you explain the difference between an integer, a float, and a string, and demonstrate type conversion in the Python REPL on the Pi?
- Can you write a function that accepts a GPIO pin number and a duration, blinks an LED for that duration, and returns the number of blinks completed — applying the function concepts from Python Crash Course Ch. 8?
- How do dictionaries (Python Crash Course Ch. 6) let you map human-readable sensor names to their GPIO pin numbers, and why is that better than a plain list for this use case?
- Using the file-handling techniques from Automate the Boring Stuff Ch. 8–9, how would you append a timestamped temperature reading to a log file every 60 seconds without overwriting previous entries?
- What does a try/except block (Python Crash Course Ch. 10) protect you from when a sensor returns an unexpected value or a file path doesn't exist?
- How would you use the os and subprocess modules (Automate the Boring Stuff Ch. 9 & 17) to make a Python script run automatically when the Pi boots?
- Pi REPL warm-up (Week 1): Open the Python 3 REPL directly on the Pi and reproduce every data-type and variable example from Python Crash Course Ch. 1–3 — type them by hand, don't copy-paste, to build muscle memory for Python syntax.
- LED blink script (Week 2–3): After finishing Python Crash Course Ch. 7–8 (loops & functions), write a standalone blink.py that uses a for loop and a custom blink() function to flash an LED a user-specified number of times; accept the count as a command-line argument using sys.argv.
- Sensor data dictionary (Week 3–4): Map at least three imaginary (or real) sensors to GPIO pins using a dictionary, iterate over it with a for loop, and pretty-print a status table — directly applying Python Crash Course Ch. 6 dictionary skills.
- File logger (Week 6–7): Using Automate the Boring Stuff Ch. 8–9, write a script that reads a value (even a random number standing in for a sensor), appends a CSV row with a timestamp to sensor_log.csv, and automatically archives the file to a dated folder when it exceeds 1 MB using shutil.
- Task automator (Week 8–9): Following Automate the Boring Stuff Ch. 17, schedule your logger script to run every minute using cron (Linux) or a simple while True + time.sleep() loop; then add a try/except so a simulated bad reading prints a warning but does not crash the loop.
- Project code reading drill (Week 10): Find any open-source Pi project on GitHub (e.g., a weather station or plant-watering system), read its main Python file, and annotate every line with a comment explaining what it does — using vocabulary and concepts exclusively from the two books in this stage.
Next up: Mastering Python syntax, file I/O, and automation scripting here gives you the coding fluency needed to confidently read, modify, and write GPIO and hardware-interfacing code in the next stage, where the focus shifts from the language itself to physical computing — controlling real-world components like sensors, motors, and displays on the Raspberry Pi.

The most widely used beginner Python book — clear, fast-paced, and project-driven. Python is the lingua franca of Raspberry Pi projects, so this comes before any GPIO work.
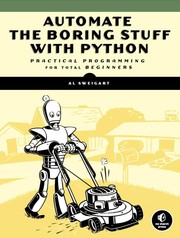
Reinforces Python with practical, real-world scripts (files, web, automation) that mirror the kind of utility programs you'll write on the Pi. Cements the language before moving to hardware.
Wiring, Electronics, and GPIO
IntermediateUnderstand basic electronics, safely wire components to the GPIO pins, and write Python code that reads sensors and controls actuators.
▸ Study plan for this stage
Pace: 8–10 weeks total: Week 1–3 — "Make More Electronics" (~25–30 pages/day, focusing on hands-on experiments); Week 4–6 — "Raspberry Pi Cookbook" (~20–25 pages/day, working through GPIO and sensor recipes as you read); Week 7–10 — "Programming the Raspberry Pi" (~15–20 pages/day, typing and running ever
- Fundamental electronic components and their behavior: resistors, capacitors, transistors, op-amps, and logic ICs as covered in Make More Electronics' progressive experiments
- Reading and interpreting datasheets and component specifications introduced in Make More Electronics
- Breadboard prototyping discipline: safe wiring practices, current-limiting resistors for LEDs, and pull-up/pull-down resistors for GPIO inputs
- GPIO pin numbering schemes (BCM vs. BOARD) and the electrical constraints of Raspberry Pi GPIO pins (3.3 V logic, max current per pin) as detailed in the Raspberry Pi Cookbook
- Using the RPi.GPIO and gpiozero libraries in Python to configure pins as inputs or outputs, as taught in both the Raspberry Pi Cookbook and Programming the Raspberry Pi
- Reading digital and analog sensors (buttons, PIR, DHT11/22, potentiometers via ADC) using cookbook recipes and translating them into standalone Python scripts
- Controlling actuators — LEDs, buzzers, DC motors, and servos — through GPIO, PWM, and transistor driver circuits covered across all three books
- Structuring clean, readable Python scripts with loops, conditionals, and functions to create reliable hardware-control programs, as emphasized in Programming the Raspberry Pi
- What happens to a GPIO pin if you connect it directly to 5 V or draw more than ~16 mA, and how do the protective resistor calculations from Make More Electronics apply to preventing this?
- What is the difference between BCM and BOARD pin numbering in RPi.GPIO, and which does the Raspberry Pi Cookbook recommend for portability?
- How do you use a transistor as a switch (as demonstrated in Make More Electronics) to drive a load — such as a motor or relay — that exceeds the GPIO pin's current limit?
- Walk through the steps of a Raspberry Pi Cookbook sensor recipe (e.g., reading a DHT temperature sensor): what library calls are made, what do the return values mean, and how would you log the data to a file?
- How does gpiozero (covered in the Raspberry Pi Cookbook) simplify LED and button code compared to raw RPi.GPIO, and when might you still prefer the lower-level library?
- Using concepts from Programming the Raspberry Pi, how would you structure a Python script that polls a button, debounces it in software, and toggles an LED — including proper cleanup on exit?
- Work through at least five consecutive experiments in Make More Electronics using a physical breadboard — document each circuit with a hand-drawn schematic and record measured vs. expected voltages in a lab notebook.
- Wire an LED to a GPIO pin with a correctly calculated current-limiting resistor, then write a Python script using both RPi.GPIO and gpiozero (from the Raspberry Pi Cookbook) to blink it, comparing the verbosity and structure of each approach.
- Implement a Raspberry Pi Cookbook sensor recipe end-to-end: connect a DHT11 or DHT22 temperature/humidity sensor, read it every 10 seconds with Python, and append timestamped readings to a CSV file — then plot the data with a simple script.
- Build a transistor-switched motor circuit from Make More Electronics, then control its speed using hardware PWM from a Python script modeled on the Raspberry Pi Cookbook's motor recipes; vary the duty cycle and observe the effect.
- Create a 'reaction timer' project from scratch using Programming the Raspberry Pi as a guide: an LED lights up after a random delay, the user presses a button, and the elapsed time is printed — incorporating software debouncing, RPi.GPIO callbacks, and clean GPIO teardown.
- Design and wire a small multi-component circuit (e.g., a PIR motion sensor that triggers a buzzer and logs an event) that combines at least one input sensor and one actuator, writing all Python code without copying directly from the books — then review it against the relevant Raspberry Pi Cookbook recipes to identify improvements.
Next up: Mastering safe wiring, GPIO control, and sensor/actuator Python scripting gives you the physical and software foundation to tackle more complex projects — such as networked IoT devices, camera modules, or multi-board systems — where the electronics knowledge is assumed and the focus shifts to higher-level software architecture and connectivity.
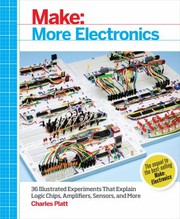
A hands-on introduction to real electronics — resistors, capacitors, transistors, and circuits — before you connect anything to your Pi. Prevents costly (or dangerous) wiring mistakes.

A recipe-style reference covering GPIO, sensors, motors, displays, and networking on the Pi. Read after the electronics primer so the wiring diagrams make immediate sense.
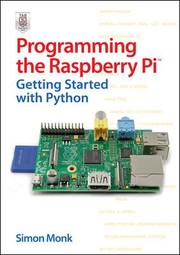
Bridges Python programming and GPIO control in a single focused volume, reinforcing both skills together and preparing you for larger multi-component projects.
Building Real Projects
IntermediateComplete several substantial end-to-end projects — combining Linux, Python, and hardware — and develop the problem-solving habits of a confident Pi maker.
▸ Study plan for this stage
Pace: 6–8 weeks, ~20–25 pages/day (roughly 3–4 projects per week); dedicate weekday sessions to reading and planning, weekend sessions to hands-on build time for each project chapter
- End-to-end project architecture: breaking a real-world problem into hardware, OS, and software layers on the Pi
- GPIO interfacing: connecting and controlling sensors, LEDs, motors, and other peripherals safely using Python (RPi.GPIO / gpiozero)
- Python scripting for hardware: writing clean, modular scripts that read sensor data, react to inputs, and drive outputs
- Linux system skills in context: using the terminal, managing packages, writing shell scripts, and setting up services (systemd/cron) to automate project startup
- Networking and connectivity: exposing Pi projects via Wi-Fi, SSH, and simple web interfaces (Flask or similar) to enable remote control and monitoring
- Debugging and iteration: reading error messages, using multimeters and logic probes, isolating faults in hardware vs. software, and incrementally improving a working prototype
- Component selection and wiring discipline: reading datasheets, respecting voltage/current limits, using breadboards and then soldering for permanent builds
- Maker problem-solving mindset: scoping a project, sourcing parts, adapting example code to new requirements, and documenting your own builds
- For any project in 'Raspberry Pi Projects', how would you decompose it into its hardware wiring, OS configuration, and Python code layers before writing a single line of code?
- How do you safely connect a 5 V sensor or motor driver to the Pi's 3.3 V GPIO pins, and what protection components does Robinson recommend?
- What is the role of a systemd service or cron job in a finished Pi project, and how would you configure one of the book's projects to start automatically on boot?
- How does the book's approach to Flask (or equivalent web interface chapters) allow you to control or monitor a Pi project from another device on the same network?
- Describe the debugging workflow you would follow if a project's Python script runs without errors but the connected hardware does not respond as expected.
- Pick any two projects from the book: what hardware components, Python libraries, and Linux configuration steps do they share, and how could you combine them into a single new project?
- Build-along fidelity run: Reproduce at least three complete projects from 'Raspberry Pi Projects' exactly as written, verifying each works before moving on — this builds confidence and exposes your environment's quirks.
- Component substitution challenge: After completing a project, swap one key component (e.g., a different sensor model or LED matrix) and modify the Python code to accommodate it, practicing datasheet reading and code adaptation.
- Autostart hardening: For every completed project, write a systemd unit file or cron job so it launches on boot without any manual intervention — then reboot and confirm it works unattended.
- Remote control extension: Add a minimal Flask web page to a project that originally had no network interface, exposing at least one control (e.g., toggle an LED, read a sensor value) accessible from your phone's browser over Wi-Fi.
- Project journal: Maintain a written or digital log for each build — schematic sketch, parts list, problems encountered, solutions found, and a photo of the finished circuit — mirroring professional maker documentation habits.
- Mashup project: Design and build one original project that deliberately combines hardware and code elements from at least two different chapters in the book, writing your own README explaining the design decisions.
Next up: Completing these end-to-end builds gives you a solid repertoire of working Pi patterns — GPIO control, networking, and automation — which provides the practical foundation needed to tackle more advanced or specialized topics such as computer vision, IoT cloud integration, or custom PCB design in the next stage of the curriculum.

A project-focused book covering cameras, weather stations, media centers, and more. Applies everything learned so far in complete, satisfying builds.
Going Deeper: Systems and Advanced Builds
ExpertUnderstand the Pi at a systems level, explore networking and IoT integration, and tackle advanced projects with confidence.
▸ Study plan for this stage
Pace: 6–8 weeks, ~25–35 pages/day (the book is ~700 pages); plan for longer sessions on weekends to tackle the hardware-heavy chapters that benefit from simultaneous bench work alongside reading
- Linux internals on the Pi: filesystem hierarchy, process management, systemd services, and shell scripting for automation
- GPIO at a low level: memory-mapped I/O, sysfs and /dev interfaces, and writing C/C++ programs that talk directly to hardware registers
- Interfacing protocols in depth: SPI, I²C, and UART — how each works electrically and programmatically, and when to choose one over another
- Kernel modules and device drivers: understanding how the Linux kernel abstracts hardware, loading/unloading modules, and writing simple drivers
- Networking and connectivity: configuring wired/wireless interfaces, SSH hardening, setting up the Pi as a server or access point, and socket programming basics
- IoT integration: MQTT protocol, publishing and subscribing to sensor data, and connecting the Pi to cloud platforms or home-automation hubs
- Real-time considerations: understanding the limits of a general-purpose OS for time-critical tasks and strategies (RT patches, offloading to microcontrollers) to work around them
- Advanced project architecture: partitioning a complex build into hardware, firmware, OS, and application layers and managing each cleanly
- How does a user-space C program toggle a GPIO pin using memory-mapped I/O, and how does this differ from using the sysfs interface or a library like WiringPi/pigpio?
- Walk through the full data path of an I²C transaction between the Pi and a sensor: what happens electrically, in the kernel driver, and in your application code?
- What is a systemd unit file, and how would you write one to auto-start a custom Python or C service on boot, restart it on failure, and log its output?
- Explain the MQTT publish/subscribe model: what roles do broker, publisher, and subscriber play, and how would you wire a Pi sensor reading into an IoT dashboard using this pattern?
- What are the key reasons a standard Raspbian/Raspberry Pi OS kernel is unsuitable for hard real-time tasks, and what are two practical mitigation strategies Molloy discusses?
- How would you design the software architecture of an advanced Pi project (e.g., a networked sensor hub) so that hardware abstraction, business logic, and communication layers are cleanly separated?
- **GPIO deep dive:** Wire up an LED and a button; write a C program (no libraries) that controls the LED via memory-mapped I/O and debounces the button using interrupts — compare the experience to a Python/library approach and document the differences.
- **I²C sensor pipeline:** Connect an I²C sensor (e.g., BMP280 pressure/temperature), read raw registers from the command line with i2c-tools, then write a C program that reads and converts the data, and finally wrap it as a systemd service that logs readings every 30 seconds.
- **Custom kernel module:** Follow Molloy's kernel-module chapters to write, compile, and load a minimal character device driver that exposes a value via /dev; test reading and writing it from user space with a small C program.
- **Networked MQTT sensor hub:** Set up a Mosquitto MQTT broker on the Pi, publish sensor data (real or simulated) from a C or Python client, subscribe from a second device or browser-based dashboard, and add TLS authentication to the broker.
- **Pi as a network service:** Configure the Pi as a Wi-Fi access point (hostapd + dnsmasq), run a lightweight web server (nginx) behind it, and serve a live sensor-data page — document every configuration file changed and why.
- **Capstone advanced build:** Design and build a project that combines at least two protocols (e.g., I²C + MQTT), a systemd-managed service, and a network interface; write a one-page architecture document before building, then compare it to what you actually implemented and reflect on the gaps.
Next up: Mastering the Pi's systems layer and advanced project patterns in Molloy's book gives you the mental model of hardware-OS-network integration needed to confidently move into specialized domains — such as embedded Linux on custom hardware, FPGA co-processing, or production-grade IoT deployments — where these same principles apply at greater scale and with fewer guardrails.

The most thorough technical deep-dive available — covers Linux internals, kernel modules, networking, and advanced GPIO. The natural capstone for someone who wants to truly understand what's happening under the hood.
Discussion
Keep reading
Paths that share books, cover the same subject, or open a related topic.