Build your own home security camera system
This curriculum takes a complete beginner from zero to confidently designing and installing their own home security camera and sensor systems. It starts by building foundational knowledge of home security principles and basic electronics/networking, then advances through hands-on installation skills, and finally reaches the level of integrating smart sensors, automation, and hardening the system against threats.
Foundations: How Home Security Works
BeginnerUnderstand the core principles of home security, threat assessment, and the landscape of available DIY systems before touching any hardware.
▸ Study plan for this stage
Pace: 5–6 weeks total: Weeks 1–3 on "The Complete Guide to Home Security" (~25–30 pages/day, reading methodically and taking notes on terminology and checklists); Weeks 4–6 on "Home Hacking Projects for Geeks" (~20–25 pages/day, reading more slowly to absorb the technical overviews before attempting any p
- The layered 'defense-in-depth' model — perimeter, exterior, interior, and safe-room layers — as introduced in Wacker's framework
- Threat assessment and risk profiling: how to evaluate your home's specific vulnerabilities based on location, layout, and lifestyle (Wacker)
- The three pillars of home security: deterrence, detection, and delay — and how every measure maps to one or more pillars (Wacker)
- Entry-point analysis: doors, windows, garages, and sliding doors as primary attack vectors, and their relative risk rankings (Wacker)
- The DIY vs. professionally monitored spectrum: understanding trade-offs in cost, response time, and reliability before choosing a system (Wacker)
- Introduction to the hacker/maker mindset applied to home security: sensors, microcontrollers, and open-source platforms as building blocks (Faulkner)
- Core hardware vocabulary: sensors (PIR, magnetic contact, glass-break), controllers, actuators, and communication protocols introduced in Faulkner's project overviews
- The concept of system integration: how standalone devices (cameras, alarms, locks) can be combined into a cohesive, automated security ecosystem (Faulkner)
- According to Wacker, what are the three pillars of home security, and can you give one real example from your own home for each pillar?
- How does Wacker's layered defense model differ from simply installing a single alarm system — what does each layer protect against?
- Using Wacker's threat-assessment methodology, what are the top three vulnerabilities in your current home, and what is your reasoning?
- What distinctions does Wacker draw between DIY self-monitored and professionally monitored systems, and under what circumstances does he recommend each?
- Based on Faulkner's introductory chapters, what is the role of a microcontroller in a DIY security project, and how does it differ from a commercial security panel?
- After reading both books, how would you describe the relationship between the 'principles' covered by Wacker and the 'projects' introduced by Faulkner — where do they reinforce each other?
- Home vulnerability walk-through: Armed with Wacker's entry-point checklist, physically walk every room and exterior of your home, photographing and logging each potential vulnerability. Produce a one-page written risk profile.
- Threat matrix: Create a simple 2×2 matrix (likelihood vs. impact) and plot at least 8 threats identified in Wacker's guide against your own home's context. Prioritize the top 3 to address.
- Pillar mapping exercise: List every security device or measure currently in your home (deadbolts, outdoor lights, a dog, etc.) and label each as Deterrence, Detection, or Delay — note any pillar that is completely unrepresented.
- Glossary build: As you read Faulkner, maintain a running glossary of every hardware term (PIR sensor, reed switch, relay, etc.) with a one-sentence plain-English definition and a note on which security pillar it serves.
- System sketch: After finishing both books, draw a rough floor plan of your home and sketch out a complete beginner DIY security system using only concepts (no purchases yet) — label each component with its layer and pillar.
- Comparison chart: Research two real commercial DIY systems (e.g., Ring Alarm, SimpliSafe) and map their components to Wacker's framework and Faulkner's hardware vocabulary. Note what each system cannot do that a custom build could.
Next up: Completing this stage gives you a threat-aware mental model and a working hardware vocabulary, so that when the next stage introduces hands-on installation and configuration of actual components, every wire and sensor has a clear 'why' rooted in the principles learned here.

A plain-language introduction to home security concepts — locks, alarms, cameras, and sensors — giving the beginner a mental map of every layer of a home security system before diving into specifics.

Bridges the gap between consumer security products and DIY thinking, introducing the mindset of building and customizing your own solutions rather than relying on off-the-shelf black boxes.
Networking & Electronics Essentials
BeginnerGain enough knowledge of home networking and basic electronics to confidently run cables, configure IP cameras on a local network, and understand how devices communicate.
▸ Study plan for this stage
Pace: 6–8 weeks total: Weeks 1–4 on "Home Networking for Dummies" (~25–30 pages/day, including time to pause and experiment with your own router/devices); Weeks 5–8 on "Make More Electronics" (~20–25 pages/day, with dedicated bench time after each chapter to build the circuits Platt demonstrates).
- IP addressing and subnets: understanding how devices on a home network get addresses (static vs. DHCP), as covered in Home Networking for Dummies, so you can assign fixed IPs to cameras
- Router and switch fundamentals: how a home router separates the LAN from the WAN, what a switch does, and how traffic is directed between devices — foundational to placing cameras on a dedicated network segment
- Ethernet wiring standards: Cat5e vs. Cat6 cable, RJ-45 termination, T-568A/B wiring schemes, and PoE (Power over Ethernet) as the backbone of a wired camera installation
- Wi-Fi basics: 2.4 GHz vs. 5 GHz bands, SSID configuration, WPA2/WPA3 security, and signal range trade-offs relevant to placing wireless cameras
- Network security hygiene: changing default router credentials, enabling firewalls, setting up a guest/IoT VLAN — drawn from the security chapters in Home Networking for Dummies
- Ohm's Law and basic circuit analysis: voltage, current, resistance relationships from Make More Electronics, essential for understanding camera power requirements and PoE budgets
- Electronic components in context: capacitors, transistors, sensors, and logic gates as covered by Platt — building intuition for how the electronic 'guts' of a security device actually work
- Reading datasheets and schematics: Platt's hands-on approach to decoding component specifications, directly applicable to evaluating IP camera hardware specs and power supplies
- After reading Home Networking for Dummies: Can you explain the difference between a dynamic (DHCP) and a static IP address, and describe the exact steps to assign a static IP to an IP camera in your router's admin interface?
- What is PoE, which Ethernet cable categories support it, and how would you calculate whether your switch's PoE budget can support four cameras drawing 12 W each?
- What are the security risks of leaving a router at factory defaults, and which specific settings does Home Networking for Dummies recommend changing immediately on a new installation?
- After reading Make More Electronics: Using Ohm's Law, if a camera module runs at 12 V and draws 500 mA, what is its power consumption, and what resistor would you need to drop the voltage to 5 V for a secondary sensor?
- How does Platt's explanation of transistors as switches apply to understanding how a motion-triggered relay circuit could cut power or send a signal to a recording device?
- What is the purpose of a decoupling capacitor in a circuit, and why does Platt emphasize placing them close to IC power pins — and how does this translate to understanding stable power delivery in an always-on camera system?
- Cable termination drill: Purchase a 10-foot length of Cat6 cable, two RJ-45 connectors, and a crimping tool. Terminate both ends using the T-568B standard (as described in Home Networking for Dummies), then verify continuity with a cheap cable tester. Repeat until you can do it confidently in under 5 minutes.
- Router deep-dive: Log into your home router's admin panel and complete the following using Home Networking for Dummies as your guide — change the admin password, rename the SSID, enable WPA3 (or WPA2), reserve a static IP for one device by MAC address, and document every setting you changed in a notebook.
- Network map your home: Use a free tool like Angry IP Scanner or your router's connected-devices list to discover every device on your network. Draw a physical diagram showing the router, any switches, access points, and end devices. Label each with its IP address and note which are wired vs. wireless.
- Ohm's Law worksheet (Platt-style): Before touching a breadboard, work through 10 written problems — calculate missing voltage, current, or resistance values for circuits similar to those in Make More Electronics. Then verify each answer by building the circuit on a breadboard and measuring with a multimeter.
- Build Platt's sensor circuits: Work through at least two of the sensor or transistor-based projects in Make More Electronics on a breadboard. Swap component values, measure the results, and write a one-paragraph 'lab note' for each explaining what changed and why — mirroring Platt's own experimental narrative style.
- Simulate a camera network: Using any two networked devices (a laptop and a phone, for example), configure one as a simple MJPEG stream (via a free app) and access it from the other using only its static IP address and port number. Troubleshoot any firewall or routing issues using the concepts from Home Networking for Dummies, and document each problem and its solution.
Next up: Mastering IP addressing, Ethernet wiring, and basic electronics here gives you the physical and logical infrastructure vocabulary you'll need in the next stage, where you'll apply those skills directly to selecting, installing, and configuring actual IP cameras and DVR/NVR systems.
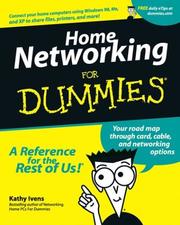
Establishes the networking vocabulary (IP addresses, routers, switches, Wi-Fi vs. wired) that is essential for setting up and troubleshooting IP cameras and smart sensors.

Provides hands-on intuition for circuits, sensors, and wiring — directly applicable to understanding motion detectors, door/window sensors, and how to wire a camera power supply correctly.
Hands-On Installation: Cameras & Sensors
IntermediatePlan camera placement, run wiring, mount and configure IP/PoE cameras, and install door, window, and motion sensors as a cohesive system.
▸ Study plan for this stage
Pace: 6–8 weeks total: Weeks 1–4 cover "CCTV Surveillance" by Herman Kruegle (~25–30 pages/day, focusing on camera technology, placement theory, and system design chapters); Weeks 5–8 cover "Wiring a House" by Rex Cauldwell (~20–25 pages/day, concentrating on low-voltage/structured wiring, cable runs, and
- Camera types and their trade-offs: fixed vs. PTZ, analog vs. IP, indoor vs. outdoor-rated (Kruegle) — understanding which camera suits which coverage zone in a residential layout
- Field of view, focal length, and lens selection: how to calculate coverage angles and avoid blind spots when planning camera placement (Kruegle)
- IP and PoE fundamentals: how Power over Ethernet delivers both data and power on a single Cat5e/Cat6 run, and how this simplifies residential camera installation (Kruegle)
- System architecture: NVR vs. DVR topology, network segmentation for cameras, and integrating door/window/motion sensors into a unified security system (Kruegle)
- Low-voltage wiring principles from Cauldwell: understanding the difference between line-voltage and low-voltage circuits, NEC code considerations for security/data cabling, and when permits are required
- Cable selection and routing: choosing the right cable (Cat6, RG59/RG6 coax, 18/2 alarm wire) for each device type, and running cables through walls, attics, and crawlspaces safely and cleanly (Cauldwell)
- Sensor installation mechanics: how door/window contact sensors and PIR motion detectors are wired or wirelessly paired, and how their placement logic mirrors camera coverage-gap filling (Kruegle + Cauldwell)
- Weatherproofing, conduit, and mounting best practices: protecting outdoor cable penetrations, using junction boxes correctly, and ensuring tamper-resistant mounts (Kruegle + Cauldwell)
- After reading Kruegle, can you sketch a camera placement plan for a typical single-family home — labeling camera type, mounting height, field of view, and overlap zones for every entry point?
- How does PoE simplify a residential IP camera installation compared to a traditional analog CCTV system, and what are the cable-run length limits you must respect (from Kruegle)?
- Using Cauldwell's guidance, what NEC rules govern low-voltage security wiring, and in which situations would you need to pull a permit or use conduit for an indoor camera cable run?
- What is the correct process — per Cauldwell — for fishing cable through an existing finished wall without damaging drywall, and which tools are required?
- How do you position PIR motion sensors and door/window contacts to complement camera coverage and eliminate detection dead zones, as described in Kruegle?
- If a PoE switch port shows a camera as 'connected' but the image is blank, what systematic troubleshooting steps — drawing on both Kruegle's system-design principles and Cauldwell's wiring checks — would you follow?
- Camera placement blueprint: Using graph paper or free floor-plan software, draw your home's layout and mark every proposed camera location. Annotate each with the camera type from Kruegle's taxonomy, mounting height, lens angle, and the specific threat (entry door, driveway, blind-corner) it addresses. Verify there are no uncovered entry points.
- PoE cable run lab: Run a measured Cat6 cable from a PoE switch to a test camera location (even if temporary/unmounted). Use a cable tester to verify all 8 conductors, confirm the camera powers on via PoE, and document the run length — then compare against Kruegle's maximum distance guidelines.
- Sensor wiring drill: Wire one wired door/window contact sensor and one PIR motion detector to a test alarm panel or Arduino-based mock panel. Follow Cauldwell's low-voltage wiring color conventions and verify each zone triggers correctly before moving to the next.
- Wall-fishing practice: On a scrap section of drywall (or a low-stakes interior wall), practice the full Cauldwell method: drill top-plate and bottom-plate holes, use a fish tape or glow rods, pull a length of Cat6 through, and seal the penetration with fire-stop caulk.
- Full system integration test: Mount at least two cameras, one motion sensor, and one door contact as a mini-system. Connect all devices to an NVR or a free VMS (e.g., Milestone Husky X2 Free). Verify live video, confirm sensor events appear in the event log, and adjust camera angles to eliminate the blind spot revealed by sensor triggers.
- Weatherproofing audit: Inspect every outdoor cable penetration you've made (or simulate one on a test board). Apply silicone sealant in a 'drip loop' configuration per Cauldwell's exterior-wiring guidance, and photograph before/after to build a personal installation checklist.
Next up: Mastering physical installation and wiring here provides the working hardware foundation needed to move into network configuration, remote access, and automation — the logical layer that turns standalone cameras and sensors into a remotely monitored, intelligent security system.
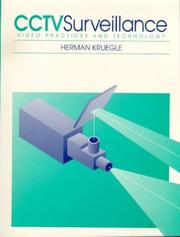
The canonical technical reference for video surveillance — covers camera types, lens selection, field-of-view calculations, and cable runs, giving you the engineering knowledge to place cameras correctly.
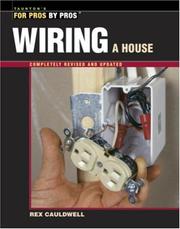
Teaches safe, code-compliant low-voltage and power wiring techniques needed to run camera cables, power supplies, and sensor wiring through walls and attics without creating hazards.
Smart Home Integration & Automation
IntermediateIntegrate cameras and sensors into a unified smart home platform with automations, alerts, and dashboards so the system responds intelligently to events.
▸ Study plan for this stage
Pace: 4–5 weeks, ~25–35 pages/day; focus chapters: 1–6 (Python fundamentals), 7–8 (pattern matching & file I/O), 11 (web scraping for API polling), 15–17 (scheduling, launching programs, sending notifications via email/SMS), and 18 (GUI automation for dashboard control)
- Python scripting fundamentals (variables, loops, functions, modules) as the automation engine for a smart home system
- File I/O and JSON handling to read/write sensor logs, config files, and alert histories
- Scheduled tasks and cron-like job scheduling (using Python's `schedule` library and OS-level task schedulers) to trigger timed security checks
- HTTP requests and web APIs — polling smart device APIs (cameras, door sensors, motion detectors) and parsing JSON responses
- Email and SMS notification pipelines using smtplib and/or Twilio to fire real-time security alerts
- Conditional logic and event-driven programming to define 'if sensor X triggers, then do Y' automation rules
- Logging and error handling to keep automations running reliably 24/7 without silent failures
- Modular script design — organizing camera checks, sensor polling, alert dispatch, and dashboard updates into reusable, maintainable Python modules
- How would you write a Python script that polls a smart camera or door-sensor API every 60 seconds and logs each event to a timestamped JSON file?
- What Python modules and techniques from the book would you use to send an SMS or email alert the moment a motion sensor fires, and how do you avoid duplicate alerts?
- How can you use file I/O and JSON parsing (as taught in the book) to build a simple persistent dashboard that tracks the last-known state of every sensor in your home?
- How does the book's approach to scheduling and launching programs translate into keeping a security automation script running continuously on a Raspberry Pi or home server?
- What error-handling strategies from the book are critical when your automation script depends on network calls to smart-home device APIs that may time out or return unexpected data?
- How would you structure a multi-module Python project — drawing on the book's code-organization patterns — so that camera logic, sensor logic, and alert logic are each in separate, testable files?
- Write a Python script that uses the `requests` module to poll a local or cloud smart-home API (e.g., a Philips Hue bridge, a Wyze camera endpoint, or a mock REST API) every 30 seconds and appends each response to a rolling JSON log file — applying the file I/O patterns from the book.
- Build an event-driven alert dispatcher: define a dictionary of rules (e.g., {'front_door': 'open'} → send email) and use the book's smtplib walkthrough to fire a formatted HTML email with sensor name, timestamp, and a snapshot URL whenever a rule is matched.
- Create a 'security dashboard' text file that your script regenerates every minute, listing each sensor's name, current state, and time since last update — practice the string formatting and file-writing techniques covered in the book.
- Use the book's scheduling techniques (combined with the third-party `schedule` library) to run three concurrent jobs: sensor polling, log rotation (archiving logs older than 7 days), and a nightly summary email — then deploy it as a background process on your machine.
- Simulate a full automation flow end-to-end: a mock motion-sensor script writes a trigger to a shared JSON file, a watcher script detects the change using a loop, dispatches an SMS via Twilio (following the book's web-API patterns), and logs the action — all three scripts running simultaneously in separate terminals.
- Refactor all of the above into a clean multi-module package (`sensors.py`, `alerts.py`, `scheduler.py`, `dashboard.py`) with a single `main.py` entry point, applying the book's guidance on imports and code reuse to make each module independently testable.
Next up: Mastering Python-driven automation and API communication here gives you the scripting backbone needed to tackle more advanced topics — such as computer-vision-based intrusion detection, machine-learning anomaly alerts, or hardened network security — where custom code glues together sophisticated tools and data pipelines.
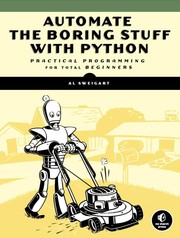
Teaches practical Python scripting so you can write custom automations — such as sending yourself a photo alert when a sensor triggers — without needing a formal programming background.
Hardening & Advanced Defense
ExpertSecure the security system itself — protect cameras and sensors from hacking, segment the network, and think like an adversary to find and close gaps in your setup.
▸ Study plan for this stage
Pace: 6–8 weeks total: Weeks 1–3 cover "The Art of Intrusion" (~25–30 pages/day, reading each case study twice — once for narrative, once to extract the attacker's decision tree); Weeks 4–8 cover "Network Security Assessment" (~20–25 pages/day, slower pace to allow hands-on tool practice alongside each ch
- Adversarial thinking (Mitnick): understanding how real attackers scout, probe, and exploit physical + digital systems — directly applicable to spotting weaknesses in your own camera/sensor setup
- Social engineering as an attack vector: Mitnick's cases show that technology alone never closes every gap; human and procedural vulnerabilities must be hardened too
- Attack chain / kill-chain analysis: mapping each intrusion story in 'The Art of Intrusion' to a sequence of steps (reconnaissance → initial access → persistence) so you can break that chain in your own home network
- Network segmentation: McNab's methodology for isolating high-value devices (NVRs, IP cameras, smart locks) onto dedicated VLANs so a compromised IoT device cannot pivot to your main LAN
- Service enumeration and banner grabbing: McNab's techniques for discovering exactly what ports and services your security devices expose — and why default firmware often leaves dangerous services open
- Vulnerability assessment workflow: McNab's structured approach (discover → enumerate → evaluate → exploit proof-of-concept) applied as a self-audit checklist for every device in your security system
- Credential and authentication hardening: lessons from both books on default passwords, weak authentication protocols, and certificate/key management for cameras and hubs
- Defensive countermeasures and continuous monitoring: McNab's guidance on logging, alerting, and re-testing after changes — treating home security hardening as an ongoing cycle, not a one-time task
- After reading Mitnick's case studies, can you reconstruct the specific reconnaissance and exploitation steps an attacker would take against a typical home IP camera system, and identify at least three points where the attack chain could be broken?
- What network segmentation strategy does McNab recommend for separating untrusted IoT/security devices from trusted hosts, and how would you implement that on a consumer-grade router or managed switch?
- Which services and open ports does McNab flag as most dangerous on embedded devices, and which of those are commonly found on off-the-shelf NVRs and smart doorbells?
- How do the social-engineering and physical-intrusion stories in 'The Art of Intrusion' change the way you think about the non-technical perimeter of your home security setup (e.g., installer access, cloud account credentials, shared Wi-Fi passwords)?
- What does McNab's vulnerability assessment workflow look like end-to-end, and how would you adapt it into a quarterly self-audit routine for your home security devices?
- How would you verify, using the scanning and enumeration techniques in 'Network Security Assessment', that your segmentation and hardening changes have actually closed the gaps you identified?
- Attack-story deconstruction (Mitnick): For each case study in 'The Art of Intrusion', draw a kill-chain diagram on paper. Label every step the attacker took and annotate it with the specific countermeasure that would have stopped them. Keep a running list of countermeasures that apply to home security.
- Threat-model your own setup: Using the adversarial mindset Mitnick demonstrates, write a one-page 'attacker brief' for your home — enumerate every camera, sensor, hub, and cloud account as if you were planning to compromise them. Identify your three highest-risk targets.
- Network scan of your security VLAN (McNab): Using nmap (as detailed in 'Network Security Assessment'), run a full port + service version scan against every device on your security network. Compare open services against McNab's 'dangerous services' reference and close or firewall anything unnecessary.
- Segmentation implementation lab: Follow McNab's segmentation principles to create (or verify) a dedicated IoT/security VLAN on your router. Confirm isolation by attempting to ping or reach a main-LAN host from the security VLAN — document what is and isn't reachable and tighten firewall rules accordingly.
- Credential audit sprint: Inventory every device and cloud account in your security system. Change all default credentials, enforce strong unique passwords, enable MFA on every cloud portal, and — where McNab's assessment techniques reveal it — disable Telnet/HTTP management in favor of SSH/HTTPS.
- Quarterly re-audit checklist: Draft a repeatable checklist (drawing on McNab's assessment workflow) that you will run every 90 days: re-scan for new open ports, check firmware versions against vendor advisories, review access logs for anomalies, and re-test VLAN isolation. Run it once now as a baseline.
Next up: Mastering adversarial thinking and network-level hardening here equips the reader to move beyond reactive defense — the natural next stage is automation, integration, and resilience: tying cameras, sensors, and alerts into a unified monitoring and incident-response workflow that can detect and react to threats in real time.
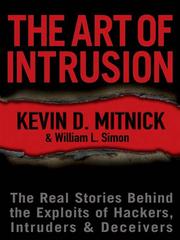
Reading real-world physical and digital intrusion case studies trains you to think like an attacker, revealing the human and technical gaps that a home security system must address.
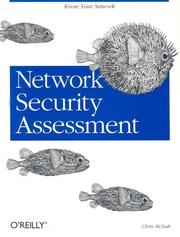
Provides the practical methodology to audit your own home network — identifying exposed camera streams, weak passwords, and unpatched firmware — so you can lock down the system you just built.
Discussion
Keep reading
Paths that share books, cover the same subject, or open a related topic.