Pyrography: The Best Books on Wood Burning Art
This curriculum takes a complete beginner from their very first burn to confident, artistic pyrography across multiple surfaces — wood, leather, and gourds. Each stage builds on the last: you'll first master tools and safety, then develop shading and stroke control, then tackle patterns and portraiture, and finally explore advanced multi-surface and artistic design work.
Foundations: Tools, Safety & First Burns
BeginnerUnderstand pyrography equipment, wood selection, basic safety, and how to make controlled, consistent burns on a flat surface.
▸ Study plan for this stage
Pace: 4–5 weeks, ~20–25 pages/day (alternating between reading and hands-on practice sessions)
- Pyrography pen types and temperature control: understanding solid-point, wire-nib, and specialty tips and how to adjust heat settings for different effects
- Wood selection and preparation: choosing appropriate wood species (softwoods vs. hardwoods), grain direction, surface preparation, and why these choices affect burn quality
- Essential safety protocols: proper ventilation, heat management, skin protection, and preventing accidental burns during setup and use
- Grip, posture, and pen control: holding the pyrography pen correctly to achieve steady, controlled marks and consistent pressure
- Basic burn techniques on flat surfaces: creating lines, dots, shading, and simple patterns with uniform depth and tone
- Reading and interpreting pyrography patterns: understanding design notation and how to translate workbook exercises into actual burns
- Wood burning as a skill progression: recognizing how foundational marks build toward more complex designs
- What are the main differences between solid-point and wire-nib pyrography pens, and when would you use each?
- How do you prepare a wood surface before burning, and why is grain direction important?
- What are the three most critical safety precautions when working with a pyrography pen, and why?
- Describe the correct grip and hand position for controlling a pyrography pen, and how does this affect burn quality?
- What are the basic burn marks (lines, dots, shading) you can create on a flat surface, and how do you vary them?
- How do you read a pyrography pattern from the workbook and translate it into an actual design on wood?
- Complete the pen-control warm-up exercises from the Pyrography Workbook: make 10 straight lines, 10 curved lines, and 10 dots on scrap wood, focusing on consistent pressure and speed
- Burn a simple test grid on prepared wood: create a 4×4 grid of different mark types (light line, medium line, heavy line, light dot, medium dot, heavy dot, light shade, medium shade) to understand how pressure and dwell time affect results
- Practice wood selection and preparation: prepare 3 different wood samples (one softwood, one hardwood, one with challenging grain) and note how each responds to burning
- Burn the first 2–3 simple patterns from the Pyrography Workbook (e.g., basic geometric designs or simple borders) on prepared wood, following the workbook's instructions exactly
- Create a personal safety checklist based on Irish's safety chapter and Walters' workbook notes; practice your setup routine 3 times to make it automatic
- Burn a free-form practice piece: create your own simple design (5–10 marks) on wood without a pattern, experimenting with mark variation and spacing
Next up: Mastering these foundational techniques—pen control, wood selection, and consistent flat-surface burns—gives you the mechanical confidence and safety habits needed to move into more complex designs, shading techniques, and multi-layered compositions in the next stage.

Lora Irish is the most recognized name in pyrography instruction. This book is the ideal starting point, covering tool types, temperature control, wood grain, and beginner exercises that build essential muscle memory before anything else.
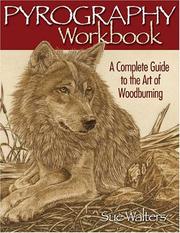
Sue Walters provides a highly structured, project-based introduction with clear step-by-step photography. Reading this second reinforces the basics from Irish while introducing the concept of tonal value and shading from the very start.
Shading, Texture & Stroke Mastery
BeginnerDevelop confident shading techniques, understand how to build texture and depth, and learn the full range of pyrography strokes used to render realistic surfaces.
▸ Study plan for this stage
Pace: 4–5 weeks, ~20–25 pages/day with daily practice sessions (30–45 minutes of hands-on burning)
- Pressure control and heat modulation as the foundation for shading depth and tonal variation
- Layering techniques: building multiple passes to create smooth gradations from light to dark
- Stroke vocabulary: understanding the mechanics and visual effects of lines, dots, stippling, cross-hatching, and curved strokes
- Texture creation through stroke combination and spacing—how repetition and pattern simulate fur, wood grain, fabric, and skin
- Directional stroking and flow to guide the viewer's eye and enhance form and dimension
- Blending and feathering techniques to soften transitions and create realistic surface qualities
- Practical application: rendering specific surfaces (wood grain, foliage, animal fur, human features) using the stroke and shading methods learned
- How does pressure control directly affect the darkness and character of a pyrography stroke, and how would you adjust your hand technique to achieve consistent light shading versus deep, dark tones?
- Describe the layering process for creating a smooth tonal gradient from white paper to dark black. Why is multiple passes preferable to trying to achieve darkness in a single stroke?
- What is the difference between stippling, cross-hatching, and directional line work, and when would you choose each technique to render a specific texture (e.g., tree bark vs. animal fur vs. fabric)?
- How do you use stroke direction and flow to enhance the three-dimensional form of an object, and what visual effect does directional stroking have on the viewer's perception of depth?
- Explain the concept of feathering and blending in pyrography. How do these techniques differ, and what surfaces or effects are they best suited for?
- Given a reference image of a realistic surface (wood, skin, leaves), how would you plan your stroke sequence and shading approach to capture its texture and depth?
- Pressure control drills: Create a series of 10 graduated tone scales on scrap wood, each using a single stroke type (line, dot, cross-hatch) but varying only pressure and heat to move from very light to very dark. Annotate each with the pressure level used.
- Layering practice: Burn the same simple shape (circle or square) five times on a practice board, building one additional layer of shading on each successive shape to demonstrate smooth gradation. Compare the smoothness of the final result to a single-pass attempt.
- Stroke sampler: Create a reference sheet with at least 12 distinct stroke types and variations (straight lines, curves, stipples, cross-hatches, spirals, etc.), each labeled with its name and best-use application. Refer to this during future projects.
- Texture studies: Select three different surfaces from the books (e.g., tree bark, animal fur, water ripples) and burn a 3×3 inch study of each, focusing solely on replicating the texture pattern and stroke direction shown in the reference.
- Directional flow exercise: Burn a simple form (sphere, cylinder, or draped fabric) using only directional line strokes to suggest contour and dimension. Do not use shading—rely entirely on stroke direction to convey shape.
- Feathering and blending practice: Burn a gradient that transitions from one texture to another (e.g., smooth skin to rough fabric) using feathering and blending techniques to create a soft, realistic transition zone between the two surfaces.
Next up: Mastery of shading, texture, and stroke techniques provides the technical foundation needed to tackle the next stage—composition, design, and project planning—where you'll learn to orchestrate these individual skills into complete, cohesive pyrography pieces.
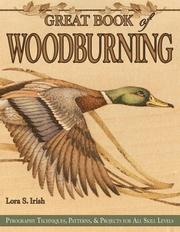
This comprehensive volume by Irish goes deeper into shading systems, stroke families, and surface textures like fur, feathers, and bark — the vocabulary you need to move beyond flat outlines into dimensional art.

Easton's approach focuses on deliberate stylistic choices and decorative stroke patterns, offering a creative counterpoint to Irish's technical focus and expanding your expressive range at this stage.
Patterns, Portraits & Project Work
IntermediateTransfer and adapt patterns accurately, burn realistic portraits and wildlife subjects, and complete full multi-step projects from sketch to finished piece.
▸ Study plan for this stage
Pace: 6–8 weeks, ~15–20 pages/day with daily practice burns; allocate 3–4 days per week for full project work
- Pattern transfer methods: tracing, carbon paper, pounce powder, and direct drawing techniques for accuracy
- Scaling and adapting patterns to different wood sizes and surfaces without distortion
- Tonal pyrography: building depth and realism through layered burning, shading, and value gradation
- Wildlife anatomy and proportions: understanding animal structure to burn convincing portraits and subjects
- Sue Walters' signature techniques: her approach to texture, fur, feathers, and fine detail work
- Multi-step project workflow: planning, pattern preparation, wood selection, burning sequence, and finishing
- Tool control and pressure variation: achieving fine lines, soft transitions, and realistic fur/feather effects
- What are the advantages and limitations of each pattern transfer method (tracing, carbon, pounce powder) for different wood types and pattern sizes?
- How do you scale a pattern accurately without distortion, and what adjustments must you make when transferring to wood of different dimensions?
- Describe Sue Walters' approach to building tonal depth in wildlife subjects—how does she layer burns to create realistic fur, feathers, and skin texture?
- What anatomical features are essential to capture when burning a recognizable wildlife portrait, and how do proportions differ across species?
- Walk through the complete workflow for a multi-step project from this book: from pattern selection through final finishing, including tool choices and burn sequence
- How do you adapt one of the 30 designs in the book to a different animal, size, or surface while maintaining the realism and style demonstrated?
- Transfer the same pattern using three different methods (tracing, carbon paper, pounce powder) onto practice wood; compare accuracy, speed, and cleanup required
- Scale one of Walters' wildlife patterns to three different sizes (50%, 100%, 150%) and burn each version, noting how detail and tool control must adjust
- Select a tonal wildlife design and burn it in stages, stopping after each layer to photograph and compare your value progression against Walters' finished example
- Burn a portrait-focused design (such as a bird or fox head) concentrating on facial anatomy: eyes, nose, ears, and proportions—compare your result to the book's reference
- Complete one full multi-step project from start to finish: choose a pattern, prepare wood, transfer accurately, execute the burn in planned sequence, and finish the piece
- Adapt one of the 30 designs by changing the animal species, pose, or composition while maintaining Walters' tonal and texture techniques; burn and document the adaptation
Next up: Mastery of pattern transfer, tonal control, and realistic wildlife rendering in this stage equips you to tackle more complex compositions, mixed-media integration, and advanced subject matter in the next level of the curriculum.

Walters focuses on rendering realistic animals — fur, feathers, scales — with detailed tonal mapping. This is the best bridge from controlled exercises to full, finished wildlife compositions.
Advanced Art & Personal Style
ExpertDevelop a personal artistic voice in pyrography, integrate color, mixed media, and complex original designs, and produce gallery-quality finished work.
▸ Study plan for this stage
Pace: 4–5 weeks, ~20–25 pages/day, with 2–3 dedicated practice days per week for extended pyrography sessions
- Advanced shading and tonal control techniques to create depth, dimension, and photorealistic effects in pyrography
- Color integration methods—using colored pencils, watercolor, and other media to enhance monochromatic pyrography work
- Developing a distinctive personal artistic voice by identifying your unique style preferences, subject matter, and technical signature
- Complex original design creation: translating inspiration into custom patterns, scaling designs, and adapting reference material for pyrography
- Mixed media integration—combining pyrography with painting, staining, inlay, and other surface treatments for gallery-quality results
- Material mastery: selecting appropriate wood types, surface preparation, and finishing techniques for professional-grade work
- Composition and design principles specific to pyrography: balance, focal points, and visual flow in burned imagery
- Portfolio development and presentation standards for exhibiting and selling pyrography work
- How do you use varying heat levels, pen pressure, and stroke techniques to achieve advanced shading and create photorealistic depth in pyrography?
- What are the most effective methods for integrating color into pyrography work, and how do you choose between colored pencils, watercolor, and other media based on your design goals?
- How do you identify and develop your personal artistic voice in pyrography, and what role does subject matter selection and technical signature play in this process?
- What steps do you take to transform an original concept or reference image into a custom pyrography design, including scaling, composition adjustments, and pattern transfer?
- How can you combine pyrography with mixed media techniques (painting, staining, inlay, etc.) to create cohesive, gallery-quality finished pieces?
- What wood selection, surface preparation, and finishing processes are essential for producing professional-grade pyrography work suitable for exhibition or sale?
- Complete 3–5 advanced shading studies using only pyrography: create grayscale studies of faces, landscapes, or objects focusing on subtle tonal transitions and photorealistic effects
- Create a series of 4–6 small test pieces (4×6 inches) experimenting with different color integration methods—one with colored pencils, one with watercolor, one with stain, etc.—to determine your preferred approach
- Develop a personal style statement: write 1–2 pages describing your artistic voice, preferred subject matter, technical strengths, and visual signature; then create 3 pieces that deliberately showcase these elements
- Design and execute 2 original, complex pyrography pieces from your own concept or heavily modified reference material (not direct copies), including full-scale pattern creation and composition planning
- Create 1 mixed media piece combining pyrography with at least two additional techniques (e.g., pyrography + watercolor + wood stain, or pyrography + acrylic paint + inlay), documenting your process
- Prepare 5–8 finished pieces for portfolio presentation: select work that demonstrates range, skill, and personal style; mount or frame appropriately; and write artist statements for each piece
Next up: Mastering advanced pyrography techniques, personal style development, and mixed media integration positions you to either specialize further in a particular niche (botanical, portraiture, abstract, etc.), explore business and exhibition strategies, or mentor others—establishing yourself as a skilled practitioner ready for the next phase of your artistic journey.

This advanced title synthesizes everything — original design, compositional theory, color washes, and finishing — pushing the pyrographer from skilled craftsperson to confident fine artist.
Discussion
Keep reading
Paths that share books, cover the same subject, or open a related topic.