Basket Weaving: The Best Books to Learn Basketry
This curriculum takes a complete beginner from the very first knot and coil all the way to mastering traditional reed, willow, and natural-material basketry. Each stage builds on the last — starting with core vocabulary and simple forms, moving through structured techniques with specific materials, and finally reaching the depth of traditional craft and artistic expression.
Foundations: Tools, Terms & First Baskets
BeginnerUnderstand the essential vocabulary of basketry (weavers, stakes, spokes, coiling, plaiting), learn how to prepare materials, and complete your first simple baskets with confidence.
▸ Study plan for this stage
Pace: 4–5 weeks, ~20–25 pages/day, with 2–3 hands-on weaving sessions per week
- Essential basketry vocabulary: weavers, stakes, spokes, coiling, plaiting, and base structures
- Material preparation and selection: soaking, conditioning, and assessing fiber quality for different basket types
- Basic weaving techniques demonstrated in The Basket Book: over-under patterns, tension control, and edge finishing
- Understanding the relationship between tool choice and basket outcome
- Foundational coiling and plaiting methods as alternative construction approaches
- How to read and follow simple basket patterns from written instructions
- Common beginner mistakes and how to troubleshoot them
- What is the difference between stakes and spokes, and when would you use each in a basket design?
- How do you properly prepare and condition basket-weaving materials before beginning a project?
- What are the key steps in executing a basic over-under weave, and how does tension affect the final product?
- Explain the difference between coiling and plaiting basketry methods, and give an example of when you'd choose one over the other.
- What does it mean to 'finish' a basket edge, and why is this step important for durability?
- How do you identify and correct common beginner weaving errors such as loose weaving or uneven tension?
- Complete a small practice basket using the basic over-under weave technique from The Basket Book, focusing on consistent tension throughout.
- Prepare and condition three different types of basket-weaving materials (e.g., reed, willow, or cane) and document how each responds to soaking and handling.
- Weave a simple coiled basket following Siler's instructions, paying attention to how the coil structure differs from stake-and-weaver construction.
- Practice plaiting techniques on a flat surface before incorporating them into a three-dimensional basket form.
- Create a reference sheet with sketches and written descriptions of each major weaving technique covered in The Basket Book for quick consultation during projects.
- Weave two identical small baskets using the same pattern but different materials, then compare how material choice affected the weaving process and final appearance.
Next up: This stage equips you with the core vocabulary, material-handling skills, and confidence in fundamental techniques needed to progress to more complex basket forms, pattern variations, and specialized methods in the next stage.
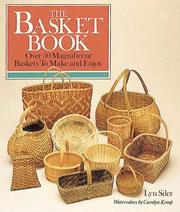
The single most recommended beginner's basketry book in print — it introduces all core terminology, tools, and materials clearly, and walks through foundational techniques step by step with excellent illustrations.
Reed & Cane: Structured Woven Basketry
BeginnerWork confidently with round reed, flat reed, and cane to produce a variety of woven basket forms using spoke-and-weaver construction, twining, and basic handle attachments.
▸ Study plan for this stage
Pace: 4–5 weeks, ~25–30 pages/day, with 2–3 days per week dedicated to hands-on weaving practice
- Reed and cane material properties: how to select, prepare, and condition round reed, flat reed, and cane for weaving
- Spoke-and-weaver construction: building a stable base, setting up spokes, and maintaining tension throughout the weaving process
- Twining technique: the mechanics of over-and-under weaving patterns and how twining differs from other basketry methods
- Basic handle attachments: methods for securing handles to basket forms using reed and cane materials
- Basket form variations: how to adapt spoke-and-weaver and twining techniques to create different basket shapes and sizes
- Finishing and sealing: proper edge finishing, trimming, and optional sealing techniques for durability
- What are the key differences between round reed, flat reed, and cane, and when should you use each material?
- How do you prepare and condition reed and cane before beginning a basket project?
- Describe the process of setting up spokes for a spoke-and-weaver basket, including how to maintain even tension
- What is the difference between twining and other weaving patterns, and what are the advantages of using twining?
- How do you attach a handle securely to a finished basket using reed or cane?
- What finishing techniques ensure a professional appearance and long-lasting basket?
- Complete a small practice spoke-and-weaver basket (4–6 inches diameter) using round reed to master spoke setup and basic weaving rhythm
- Weave a flat reed basket using the same spoke-and-weaver method to understand how material choice affects tension and form
- Practice twining on a small sample frame to develop muscle memory for the over-and-under pattern before applying it to a full basket
- Create a simple twined basket form using cane to experience how cane's flexibility differs from reed
- Attach handles to two completed baskets using different methods (wrapped attachment and woven-in attachment) and compare results
- Finish and seal a completed basket following Wright's recommended techniques, then assess durability over time
Next up: Mastery of these fundamental materials and construction methods—spoke-and-weaver, twining, and handle attachment—provides the technical foundation needed to explore more advanced basketry techniques, specialized forms, and decorative variations in the next stage.

A classic, comprehensive reference covering reed and cane work in depth; its structured, project-by-project approach makes it the ideal next step after Siler's introduction.
Bridges the gap between commercial reed work and natural materials, introducing the reader to harvesting and preparing plant fibers alongside clear woven-basket projects.
Willow: The Living Craft
IntermediateUnderstand the unique properties of willow — growing, harvesting, drying, and soaking — and execute traditional staked-and-woven willow baskets including borders, handles, and lids.
▸ Study plan for this stage
Pace: 8–10 weeks, ~20–25 pages/day with 2–3 hands-on weaving sessions per week
- Willow species selection and growth characteristics — identifying varieties suited for basketry (e.g., Salix viminalis, Salix alba) and understanding their seasonal growth patterns
- Harvesting techniques — timing the cut (dormant season vs. growing season), proper cutting methods, and post-harvest handling to preserve flexibility and strength
- Drying and storage protocols — air-drying processes, moisture content management, and long-term storage to maintain willow quality without brittleness or mold
- Soaking and preparation — rehydrating dried willow, achieving optimal pliability for weaving, and timing soaks relative to basket construction
- Staked-and-woven basket structure — understanding the role of stakes (vertical framework), weavers (horizontal elements), and how tension and pattern create form and durability
- Traditional border techniques — finishing the top edge securely using methods like the four-rod border, six-rod border, and variations that reinforce structural integrity
- Handle construction — designing, shaping, and securing handles that are both functional and aesthetically integrated into the basket body
- Lid design and attachment — creating fitted lids with appropriate hinges or rims, and ensuring proper proportions and closure mechanisms
- What are the key differences between willow species used in basketry, and how do their growth patterns influence harvesting timing?
- Describe the complete process from freshly harvested willow to soaked and ready-to-weave material, including drying duration and moisture targets
- How do stakes and weavers work together in a staked-and-woven basket, and what role does tension play in the final structure?
- What are at least three traditional border finishes described in Gabriel's work, and when would you choose one over another?
- How do you design and attach a handle to a willow basket so it is both structurally sound and visually proportionate?
- What are the key considerations when creating a fitted lid for a willow basket, and how does it attach to the basket body?
- Source and identify at least two willow species locally or through a supplier; document their physical characteristics (color, flexibility, diameter) and compare them to Gabriel's descriptions
- Practice the complete harvest-to-weave cycle: cut fresh willow, dry it over 4–6 weeks, then soak and weave a small test basket to internalize the material transformations
- Weave a small staked-and-woven basket (6–8 inches diameter) using pre-prepared willow, focusing on consistent stake spacing, even weaver tension, and neat joins
- Execute at least two different border finishes (e.g., four-rod and six-rod borders) on separate practice baskets, photographing each step to build muscle memory and visual reference
- Design and construct a handle for a completed basket, experimenting with different shaping techniques (steaming, bending around a form) and attachment methods
- Create a lidded basket with a fitted lid, documenting measurements, attachment method, and any adjustments needed to achieve a smooth closure
Next up: Mastery of willow's living properties and traditional staked-and-woven construction prepares you to explore advanced techniques—such as decorative patterns, mixed-material basketry, or specialized forms—and to understand how different materials and methods build on these foundational principles.
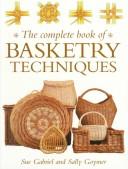
A thorough technical reference that covers willow alongside other materials, making it ideal at this stage to cross-reference techniques and deepen understanding of structure and form.
Traditional Mastery & Artistic Depth
ExpertStudy the historical and ethnographic roots of basketry traditions, understand advanced design principles, and develop a personal artistic voice grounded in authentic craft knowledge.
▸ Study plan for this stage
Pace: 8–10 weeks, ~25–30 pages/day with 2–3 days per week dedicated to hands-on practice and reflection
- Basketry as a legitimate textile art form with historical significance and contemporary relevance
- The relationship between cultural context, materials, and basket design across different traditions
- Advanced structural techniques (coiling, plaiting, twining, wickerwork) and their aesthetic possibilities
- Design principles including proportion, rhythm, color integration, and compositional balance in basket forms
- The distinction between functional and sculptural basketry and how to intentionally shift between them
- Material selection and preparation as a creative decision that shapes artistic expression
- Personal artistic voice development through mastery of traditional techniques and deliberate innovation
- Documentation and analysis of historical basketry traditions as a foundation for contemporary work
- How does Rossbach position basketry within the broader textile art tradition, and what arguments does he make for its artistic legitimacy?
- What are the primary structural techniques covered in Harvey's work, and how do the material properties and cultural origins of each technique influence its aesthetic possibilities?
- How can a basket maker intentionally move between functional and sculptural approaches, and what design decisions enable this shift?
- What role does cultural and historical research play in developing an authentic personal artistic voice in basketry?
- How do proportion, rhythm, and color function as design principles in basket composition, and how can these be manipulated for expressive effect?
- What is the relationship between material constraints and creative innovation in advanced basketry practice?
- Read and annotate Rossbach's arguments about basketry as textile art; create a visual essay (sketches, photos, written reflection) connecting his ideas to 3–4 historical baskets you research independently
- Master one primary technique from Harvey's text (coiling, plaiting, twining, or wickerwork) by completing 4–5 progressively complex samples, documenting material choices and structural variations
- Conduct a comparative analysis of two basketry traditions (e.g., Native American and Japanese): research their historical contexts, primary techniques, and aesthetic values, then create a visual/written comparison chart
- Design and execute a basket that deliberately bridges functional and sculptural concerns—document your design decisions and how you used proportion, rhythm, or color to achieve your artistic intent
- Create a personal material study: experiment with 3–4 different fiber materials (natural and prepared), documenting how each material's properties influence structural possibilities and visual outcomes
- Develop a sketchbook practice: weekly drawings analyzing the proportions, structural logic, and design details of historical baskets from different cultures, with written reflections on what you discover
Next up: This stage grounds your practice in historical knowledge, technical mastery, and intentional design principles, preparing you to synthesize these foundations into sustained personal artistic projects and potentially teach or exhibit your work with informed confidence.
A landmark text by one of the most influential figures in studio basketry — it reframes basketry as a serious art form and exposes the reader to the full range of structural possibilities, essential for moving beyond technique into design.
A rigorous, scholarly analysis of basketry structures from a textile-arts perspective, providing the advanced maker with a deep analytical framework to understand and invent new forms grounded in tradition.
Discussion
Keep reading
Paths that share books, cover the same subject, or open a related topic.