Mosaic Art: The Best Books to Learn Mosaics
This curriculum takes a beginner from zero mosaic experience to confident, skilled mosaic artist across four progressive stages. It begins with hands-on fundamentals and material literacy, moves through technique mastery for cutting tile, glass, and stone, then tackles design principles and specific project types (walls, tables, garden art), and finally deepens understanding through the history and aesthetics of mosaic as an art form — giving the learner both craft skill and artistic vision.
Cutting & Material Mastery: Tile, Glass, and Stone
BeginnerDevelop precise cutting skills for different materials — ceramic tile, stained glass, and natural stone — and learn how material choice affects texture, color, and durability.
▸ Study plan for this stage
Pace: 4–5 weeks, ~20–25 pages/day, with 2–3 days per week dedicated to hands-on material practice
- Material properties and selection: understanding how ceramic tile, stained glass, and natural stone differ in hardness, brittleness, workability, and aesthetic qualities
- Cutting techniques for each material: appropriate tools (wheeled cutters, glass cutters, stone chisels) and proper technique to achieve clean, safe cuts
- Tool safety and maintenance: correct handling, sharpening, and care of cutting implements to ensure precision and longevity
- How material choice affects final mosaic design: color permanence, texture variation, light transmission, and durability in different environments
- Preparing and conditioning materials before cutting: scoring, annealing, and surface preparation specific to each material type
- Waste reduction and material efficiency: maximizing usable pieces and understanding the economics of material selection
- Texture and surface variation: how different cutting angles and material grain create visual and tactile effects in finished mosaics
- What are the key differences in hardness and brittleness between ceramic tile, stained glass, and natural stone, and how does each property affect your cutting approach?
- Describe the correct technique and safety precautions for cutting stained glass using a glass cutter versus cutting ceramic tile with a wheeled cutter.
- How does material choice influence the durability and color longevity of a mosaic intended for outdoor versus indoor display?
- What preparation steps are necessary before cutting natural stone, and why are these steps important for achieving clean breaks?
- Explain how texture variation created through different cutting angles and material grain can enhance the visual impact of a mosaic design.
- What are the most common cutting mistakes for each material, and how can you prevent them?
- Practice cutting 20–30 ceramic tiles using a wheeled cutter on scrap material, focusing on straight cuts, angled cuts, and small pieces; document any breakage patterns and refine your technique
- Cut a variety of stained glass colors and opacities (clear, opalescent, textured) using a glass cutter, scoring and breaking each piece cleanly; keep samples to observe how light transmission varies
- Prepare and cut 3–5 small natural stone pieces (marble, slate, or limestone) using appropriate chisels and a hammer, practicing controlled breaks and observing grain direction
- Create a material comparison chart documenting the cutting difficulty, tool marks, edge quality, and waste percentage for each of the three materials
- Design and execute a small 6×6 inch test mosaic using all three materials (ceramic, glass, and stone) to experience how cutting precision affects final assembly and adhesion
- Maintain and sharpen your cutting tools (glass cutter wheel, tile cutter blade, chisels) and document the impact of tool condition on cut quality
Next up: Mastering these foundational cutting and material skills prepares you to design and execute larger, more complex mosaics with confidence, knowing how your material choices will translate into specific visual, tactile, and structural outcomes.

Sonia King is one of the foremost mosaic artists in the world; this book goes deep on cutting methods, material properties, and surface preparation, making it the essential bridge from beginner to skilled cutter.
Design, Composition & Grouting
IntermediateApply design principles — color theory, andamento (tile flow), negative space, and pattern — and master grouting choices and color to make finished mosaics visually stunning.
▸ Study plan for this stage
Pace: 4–5 weeks, ~25–30 pages/day, with 2–3 days per week dedicated to hands-on design and grouting practice
- Color theory fundamentals: hue, saturation, value, and how to create harmony, contrast, and visual flow in mosaic compositions
- Andamento: the directional flow and movement of tiles, and how it guides the viewer's eye and reinforces the design's narrative
- Negative space: strategic use of background and empty areas to balance focal points and strengthen overall composition
- Pattern and repetition: creating visual rhythm through deliberate tile placement, size variation, and directional choices
- Grouting as a design element: grout color selection, width, and finish to enhance or subdue tile edges and unify the composition
- Design planning and sketching: translating concept to cartoon (full-scale drawing) with attention to composition principles
- Material and technique integration: how substrate choice, tile size, and placement method affect the visual impact of design decisions
- How do you use hue, saturation, and value to create focal points and guide movement in a mosaic design?
- What is andamento, and how does varying tile direction and flow strengthen a composition's visual narrative?
- How can negative space be used strategically to balance a busy focal area and improve overall composition?
- What role does grout color and width play in the finished appearance of a mosaic, and how do you choose grout to enhance your design?
- How do you develop a design cartoon that incorporates color theory, andamento, and pattern while maintaining compositional balance?
- What are the key differences between grouting methods (flush, recessed, raised), and when is each appropriate for your design goals?
- Complete 3–4 small color studies (6×6 inches) exploring different color harmonies (complementary, analogous, triadic) on paper or foam board before committing to tile
- Sketch 5 different andamento patterns (linear, circular, radiating, organic, geometric) and practice drawing them at scale to internalize directional flow
- Create a design cartoon (full-scale drawing) for a 12×12-inch mosaic that deliberately uses negative space to frame a focal point; annotate your color and grout choices
- Groom and grout 2–3 small practice pieces (8×8 inches) using different grout colors and widths to observe how grout affects the visual weight and unity of the finished work
- Analyze 3–5 published mosaics from *Making Mosaics* or other sources: identify the andamento, color strategy, use of negative space, and grouting choice; write a brief critique
- Design and execute a 12×16-inch mosaic that intentionally applies at least three design principles from the stage (e.g., complementary color harmony + radiating andamento + strategic negative space); document your process and final result
Next up: Mastering design, composition, and grouting equips you to move into advanced techniques—such as mixed-media mosaics, sculptural forms, and site-specific installations—where these foundational principles become the springboard for experimental and conceptual work.
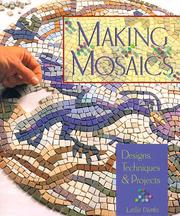
Focuses on the design process — sketching, scaling, color planning, and andamento — giving the learner a structured creative workflow to apply to any project.
Applied Projects: Walls, Tables & Garden Art
IntermediateExecute ambitious, real-world mosaic projects on vertical surfaces (walls, murals), furniture (tables), and outdoor/garden installations, accounting for substrate prep, weatherproofing, and scale.
▸ Study plan for this stage
Pace: 4–5 weeks, ~25–30 pages/day, with 2–3 days per week dedicated to hands-on project planning and material sourcing
- Substrate selection and preparation for walls, tables, and outdoor surfaces (concrete, plywood, MDF, stone)
- Weatherproofing techniques: sealers, adhesives, and grout formulations for exterior durability
- Design scaling and transfer methods for large-scale murals and installations
- Mosaic composition principles applied to functional objects (tables, benches, planters)
- Material selection for different environments (frost-resistant tiles, outdoor adhesives, UV-stable grout)
- Installation techniques for vertical surfaces and load-bearing furniture
- Garden integration: designing mosaics as landscape focal points and pathways
- Project planning: budgeting, timeline estimation, and site assessment for ambitious commissions
- What are the key differences in substrate preparation between indoor wall mosaics and outdoor garden installations, and why does each matter?
- How do you select and apply weatherproofing materials to ensure a mosaic table or garden art will withstand seasonal temperature changes and moisture?
- Describe the process of scaling a mosaic design from a small sketch to a full-size wall mural or large furniture piece.
- What design principles from 'The Mosaic Idea Book' would you apply to create visual cohesion in a multi-piece garden installation?
- How would you plan and budget a real-world mosaic project for a client, including material costs, labor time, and contingencies?
- What are the practical challenges of installing a large-scale vertical mosaic, and how would you address them?
- Select a wall or outdoor surface in your home or community and conduct a detailed site assessment: measure dimensions, check for moisture, sun exposure, and structural integrity; document findings in a written report.
- Design a full-scale mosaic table (minimum 2×2 feet) using Wates' composition principles; create a scaled drawing, material list, and substrate preparation plan.
- Source materials for an outdoor garden mosaic project: compare tile options (ceramic, vitreous glass, stone) for frost resistance, UV stability, and cost; document supplier information and pricing.
- Execute a small-scale vertical wall mosaic (2–3 square feet) on properly prepared substrate, practicing the weatherproofing and adhesive techniques described in the book.
- Plan a hypothetical mural commission: write a client brief, design proposal, timeline, and budget for a 4×8 foot exterior wall mosaic.
- Create a substrate preparation sample board testing different adhesives, sealers, and grout formulations on various materials (concrete, plywood, stone) to understand durability differences.
Next up: This stage equips you with the practical expertise to execute professional-grade mosaic installations on real surfaces and structures; the next stage will likely deepen your understanding of advanced finishing techniques, restoration, and how to refine your artistic voice across a body of work.
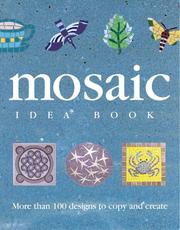
A project-rich guide spanning walls, tabletops, and decorative objects with clear instructions for scaling up designs and working on large or irregular surfaces — a practical capstone for applied work.
Discussion
Keep reading
Paths that share books, cover the same subject, or open a related topic.