Needle felting for beginners: the best books to sculpt with wool
This curriculum takes a complete beginner from zero knowledge of needle felting through core tools and techniques, then into structured animal and figure projects, and finally into decorative and sculptural work. Each stage builds directly on the last — you'll learn the vocabulary and hand skills before tackling complex 3-D forms, so nothing feels overwhelming.
Foundations: Tools, Wool & First Techniques
BeginnerUnderstand what needle felting is, set up a safe and effective workspace, learn the properties of wool, and practice the fundamental stabbing and shaping techniques on flat and simple 3-D forms.
▸ Study plan for this stage
Pace: 4–5 weeks, ~20–25 pages/day with daily practice sessions
- What needle felting is: the process of using barbed needles to entangle wool fibers into felt
- Essential tools and materials: felting needles (gauges and types), wool roving, work surfaces, and safety equipment
- Wool properties: crimp, scale structure, how different fiber types (merino, corriedale, etc.) behave and felt at different rates
- Workspace setup: ergonomic positioning, needle safety, ventilation, and creating a dedicated practice area
- Fundamental stabbing technique: proper needle grip, angle, depth, and rhythm to avoid breakage and repetitive strain
- Flat felting: creating dense, even sheets of felt through consistent stabbing patterns
- Simple 3-D shaping: building basic forms (balls, eggs, simple sculptures) by layering and sculpting with the needle
- Troubleshooting common beginner mistakes: over-felting, uneven density, needle breakage, and fiber waste
- What is needle felting and how does the barbed needle create felt?
- What are the key differences between needle gauges and when would you use each one?
- How do the crimp and scale structure of wool affect how it felts, and why do different wool types felt at different speeds?
- What does a safe and ergonomic needle felting workspace look like, and what safety precautions are essential?
- What is the correct stabbing technique, and what are the most common mistakes that lead to needle breakage or repetitive strain?
- How do you create a flat, evenly felted sheet, and what adjustments do you make when moving to simple 3-D forms like a ball?
- Set up your workspace following Pace's guidelines: arrange your work surface, needles, wool, and safety equipment; practice proper posture and needle grip for 10 minutes daily
- Practice the basic stabbing technique on a small piece of wool roving for 15–20 minutes daily, focusing on consistent angle, depth, and rhythm without breaking needles
- Create a flat felt sample (3×3 inches) using a single color of wool roving, aiming for even density across the entire surface
- Felt a simple ball or egg shape (1–2 inches) by layering wool and sculpting with the needle, paying attention to how you build dimension
- Experiment with at least two different wool types (e.g., merino and corriedale) on separate samples to observe and document how they felt differently
- Create a troubleshooting journal: record any needle breakages, uneven felting, or strain issues you experience, then reference Pace's solutions and adjust your technique
Next up: Mastering these foundational techniques and understanding wool behavior will equip you to move into the next stage—creating more complex shapes, adding details, and combining multiple colors and techniques to build recognizable figures and finished projects.
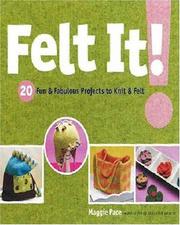
Introduces flat and lightly sculptural felting with very approachable step-by-step instructions, bridging the gap between raw technique and your first finished pieces.
Core Techniques: Sculpting Animals & Figures
BeginnerLearn to build armatures, layer wool colors, and sculpt recognizable 3-D animal bodies and simple human figures using structured, project-based guidance.
▸ Study plan for this stage
Pace: 4–5 weeks, ~20–25 pages/day with daily sculpting practice (30–45 minutes)
- Building stable armatures using wire and wool core to support 3-D animal forms
- Layering and blending wool colors through needle felting to create realistic fur and skin tones
- Sculpting recognizable animal features (heads, limbs, bodies) with proper proportions and structure
- Using stabbing and sculpting needle techniques to shape and define details on figures
- Creating simple human figures with basic anatomy and posture using the same armature principles
- Understanding density and firmness levels needed for different body parts (soft joints vs. firm structural areas)
- Finishing techniques including surface smoothing and adding embellishments (eyes, noses, details)
- How do you construct a basic wire and wool armature, and why is it essential for creating stable 3-D animal figures?
- What is the difference between building a core structure and adding surface detail layers, and how does this process apply to both animals and human figures?
- How do you blend and layer wool colors to achieve realistic fur patterns and skin tones on your sculptures?
- What needle felting techniques does 'Wool Pets' demonstrate for sculpting specific animal features (e.g., ears, snouts, limbs)?
- How do you adjust your needle felting technique to create different textures and densities for different parts of a figure (e.g., soft belly vs. firm legs)?
- What are the key differences between sculpting a four-legged animal and a simple human figure, and how do armature principles transfer between them?
- Complete at least 2–3 small animal projects directly from 'Wool Pets' (e.g., a simple cat, dog, or bird), following the book's step-by-step instructions exactly
- Build 3 different wire and wool armatures of varying complexity (small, medium, large) and practice stabilizing them before adding surface details
- Create a color-blending study by felting 5–6 small wool samples, experimenting with layering 2–3 colors to achieve realistic fur or skin tones
- Sculpt 2 simple human figures (head, torso, limbs) using the armature techniques from 'Wool Pets', focusing on basic proportions and posture
- Practice sculpting the same animal feature (e.g., a cat's face or a dog's ear) 3 times in succession, refining your technique and consistency each iteration
- Complete a 'texture study' project where you deliberately create different surface finishes (smooth, fluffy, detailed) on separate sections of a single figure to understand density control
Next up: This stage equips you with the foundational armature-building and color-layering skills needed to advance to more complex character design, where you'll combine multiple figures, add clothing and accessories, and develop distinctive personalities and poses.
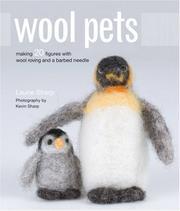
Focuses on creating lifelike wool animal sculptures with clear armature and layering instructions — a natural next step after learning basic shaping.
Decorations, Scenes & Finishing Touches
IntermediateApply your sculpting skills to seasonal decorations, narrative scenes, and mixed-media finishing techniques, producing polished, display-ready pieces.
▸ Study plan for this stage
Pace: 4–5 weeks, ~20–25 pages/day with project work
- Creating narrative needle felted characters with distinct personalities and proportions
- Designing and executing thematic seasonal scenes using multiple felted elements
- Integrating mixed-media materials (fabric, embroidery, found objects) with needle felted components
- Developing storytelling through composition, color choice, and character placement
- Finishing techniques for display-ready pieces (mounting, backing, protective sealing)
- Working at smaller scales with refined detail work for decorative pieces
- Building coherent visual narratives that communicate mood and theme
- How does Salley Mavor use character proportions and facial features to convey personality and emotion in her felted figures?
- What mixed-media materials does Mavor incorporate alongside needle felting, and how do they enhance the final composition?
- How would you design a seasonal scene that tells a story using multiple felted characters and environmental elements?
- What finishing and mounting techniques does Mavor employ to make pieces display-ready and durable?
- How can you use color, composition, and scale to guide a viewer's eye through a narrative scene?
- What strategies does Mavor use to balance detail work with overall visual impact in small-scale decorative pieces?
- Recreate one complete character from 'Felt Wee Folk' with attention to Mavor's proportions, facial expression, and clothing details
- Design and execute a small seasonal scene (winter holiday, spring garden, or autumn harvest) featuring at least 3 felted characters and environmental elements
- Experiment with 3 different mixed-media additions (embroidery, fabric scraps, beads, wire, etc.) on separate test pieces to understand integration techniques
- Create a character with a distinct personality using only needle felting and color choices—no embroidery—to isolate emotional expression
- Photograph and mount one finished piece as Mavor would for display, including backing and any protective finishing
- Sketch 2–3 narrative scene compositions before felting, planning character placement, scale relationships, and focal points
Next up: This stage equips you with the ability to compose multi-element scenes and integrate mixed media, preparing you to advance toward more complex sculptural installations, wearable art, or large-scale environmental storytelling in subsequent levels.

A beloved, widely used guide to creating detailed folk figures and decorative characters from wool and natural materials — ideal for making ornaments, seasonal displays, and gift pieces.
Discussion
Keep reading
Paths that share books, cover the same subject, or open a related topic.