Etching and Engraving: The Best Books to Read, in Order
Etching and engraving are the two oldest ways of making a printable image out of a metal plate, and they are learned in opposite directions: engraving cuts the line directly with a burin, etching lets acid do the cutting through a protective ground. Almost everything else — drypoint, aquatint, mezzotint, soft ground, sugar lift — is a variation on how you get the mark into the plate before it goes under the press. This path starts with the two workshop manuals that still teach the processes best, widens to the general printmaking references you will keep on the bench, then turns to the classic treatise and the history, and ends with learning to read other people's prints, which is how you work out what a technique is actually for.
At the Bench: The Working Manuals
BeginnerGet a plate grounded, bitten, inked, wiped and through a press. After this stage you should be able to pull a straight-line etching and a drypoint without supervision, and know what each tool and chemical in the studio does.
▸ Study plan for this stage
Pace: Six to eight weeks, paced by press access rather than by reading. Chamberlain's Etching and Engraving is around 200 pages of procedure and can be read in a week, but it is designed to be worked through — expect to spend two or three sessions at a bench per chapter. Leaf is a similar length and is co
- The intaglio principle and the two ways of getting a mark into a plate: ink sits in the recesses, the surface is wiped clean, and damp paper is pressed in under enough pressure to lift the ink out — relief printing is the opposite, and confusing the two makes every later instruction unreadable. Engr
- Hard ground and soft ground, and what each is for: hard ground for a drawn line, soft ground for texture pressed into the surface. Chamberlain sets out the laying, smoking and drawing procedure for both.
- Mordants and biting times. Nitric bites fast and spreads sideways, giving an open line; Dutch mordant and ferric chloride bite more slowly and hold a finer line. Biting time is the only variable controlling line depth, and depth is what controls how much ink a line holds.
- Stopping-out and multiple bites, which is how tonal range is produced in a line etching: bite everything, stop out the lightest passages with varnish, bite again, repeat. This is the technique that separates a flat plate from a good one.
- Aquatint as the tonal method — a porous rosin or spray ground that lets the acid bite around each particle, producing a printable tone rather than a line. Rocking a mezzotint plate and scraping back is the other tonal approach and is vastly more labour.
- Drypoint and the burr: the needle throws up a ridge of displaced metal that holds ink and prints as a soft dark line, and the burr wears down within a few dozen impressions. This is why drypoint editions are small and why the early impressions are the ones people want.
- Inking and wiping is where most beginners actually lose the print — dabber or roller, tarlatan wiping, hand wiping, and the deliberate retention of plate tone. Leaf is stronger on this than Chamberlain.
- Press setup: blankets, pressure, registration, and damping the paper properly. An under-damped sheet will not take ink out of a fine line no matter how well the plate is bitten.
- Explain what happens physically when an etched plate is printed, from inking through to the paper lifting. Where in that sequence does each of the common faults occur?
- Why does nitric acid produce a different quality of line from ferric chloride? Answer in terms of how each bites.
- What is foul biting, what causes it, and what does Leaf say to do about it once it has happened?
- Describe the stopping-out sequence for a plate with four tonal values. How many bites and in what order?
- How does a drypoint burr differ from an etched line, both in how it is made and in how it prints and wears?
- Which materials described by Chamberlain would a current studio not use, and what does Grabowski substitute?
- Ground a small plate, draw a simple line image, bite it in a single immersion, and pull three impressions. Do not attempt tone. The point is to complete the entire chain once — ground, draw, bite, degrease, ink, wipe, print — and find out where your own process fails.
- Make a bite-time test strip exactly as Chamberlain describes: one plate, a series of identical lines, progressively stopped out at fixed intervals. Print it and keep it. That strip is your own mordant calibration and it is worth more than any published table, because it is your acid at your temperature.
- Pull a drypoint of ten impressions from a single plate and lay them out in order. Watching the burr collapse across ten prints teaches the limitation of the technique faster than any description of it.
- Deliberately produce three faults from Leaf's troubleshooting chapter — a foul-bitten passage, a ground failure, an over-wiped plate — and then correct each by her method. Making the fault on purpose is the only way to recognise it when it happens by accident.
- Lay an aquatint on half a plate and leave the other half bare, then bite both together and print. The comparison in a single sheet shows what an aquatint ground actually does to the way acid meets metal.
Next up: You can now execute a procedure; the next stage is the reference literature that lets you choose which procedure to use, including the modern non-toxic systems.

The standard workshop manual and the correct first book: grounds, mordants, biting times, drypoint, aquatint, mezzotint and the mechanics of inking, wiping and printing, all set out as procedures rather than as theory. Old enough that some materials have been superseded on safety grounds, which the later books in this path correct.
Read second, as the practical companion to Chamberlain. Leaf is stronger on troubleshooting — foul biting, ground failure, plate tone, uneven wiping — which is where beginners actually lose prints. The Dover edition is widely held and cheap, which is why it is the usual second book on a studio shelf.
Published as Printmaking: A Complete Guide to Materials and Processes, and the modern corrective to the two above: it covers current non-toxic and acrylic-resist practice, photopolymer plates and safer mordants such as ferric chloride. Note that the full subtitled form does not resolve here — the catalogue files it under the bare title.
The Reference Shelf
IntermediateMove from following a procedure to choosing one. These are the books you consult rather than read straight through, and between them they cover every intaglio variant plus the relief and planographic processes you will eventually want to combine with them.
▸ Study plan for this stage
Pace: Four to six weeks of consultation rather than continuous reading, run alongside continued bench work. Ross, Romano and Ross's The Complete Printmaker is around 350 large-format pages covering every printmaking family; Adam and Robertson's Intaglio is around 200 pages and is the one to read properly
- The Complete Printmaker's function is context: intaglio sits alongside relief, lithography and screen printing, and knowing what each family does well is how you decide which one a given image wants.
- Combination printing — intaglio with relief rolls, chine collé, multiple plates in registration — which only becomes available once you know more than one process. This is the main reason to own a general survey rather than an intaglio-only manual.
- Adam and Robertson's safety-first system in full: acrylic and photopolymer resists in place of solvent-based grounds, ferric chloride and saline sulphate etch in place of nitric, vegetable-oil-based cleaning, and the ventilation and handling that go with each. Take it as a system rather than as a me
- Ferric chloride and copper sulphate etching for copper and for zinc respectively, and what changes in biting behaviour and timing when you switch mordant. The test strip from stage one has to be redone for each new mordant.
- Photopolymer plates: a light-sensitive film or plate exposed through a positive and developed in water, producing an intaglio matrix with no acid at all. This is the largest single change in intaglio practice in fifty years and none of the older books cover it.
- Ventilation as the binding constraint in a home or shared studio, which is the practical reason the safety-first system matters more than its ethical framing. A domestic room will not support open nitric baths or a rosin box.
- The Printmaking Bible's step-by-step photographic sequences for the awkward processes — mezzotint rocking, sugar-lift aquatint, spit bite, à la poupée inking — which are the ones written instructions handle badly because the judgement is visual.
- Chine collé and the papers question generally: which papers take intaglio, how they are sized, and how damping time varies by weight. This is under-covered in the workshop manuals and well handled here.
- For a given image, how would you decide between etching, relief and screen? Give the criteria The Complete Printmaker implies.
- Set out Adam and Robertson's substitutions one by one: for each traditional material, what replaces it and what changes in handling.
- How does a saline sulphate etch behave differently from nitric on zinc? What does that mean for how you draw?
- Describe the photopolymer process end to end. What does it make easy, and what does it make impossible?
- What ventilation does each of the processes in stage one actually require? Answer specifically enough to plan a room.
- Which of the awkward processes in The Printmaking Bible could you not have learned from Chamberlain's prose alone, and why not?
- Convert one process you learned in stage one to the Adam and Robertson equivalent — acrylic resist instead of hard ground, or ferric instead of nitric — and print the same image both ways. The side-by-side comparison is the only honest way to judge what the safer system costs you in line quality, if anything.
- Make a new bite-time test strip for your replacement mordant, exactly as you did in stage one. Two strips pinned side by side is a working reference nobody can give you second-hand.
- Make a sugar-lift aquatint following The Printmaking Bible's photographic sequence, then read Chamberlain's written description of the same process afterwards. Doing it in that order shows you exactly what the photographs were carrying.
- Print one plate with chine collé using three different papers and note the damping time, the pressure and the result for each. Paper is the variable beginners ignore and it changes more than most technique choices do.
- Using The Complete Printmaker, plan a two-colour print combining an intaglio plate with a relief roll, and execute it in registration. This forces you to think across process families, which is what the reference shelf is for.
Next up: With the processes under control, the next stage asks what an etched line is for, through the classic treatise on the subject and a history of how the techniques arrived in the order they did.
The broadest single-volume technical survey in print, and the one that puts intaglio in context alongside relief, lithography and screen. Read it once you can already etch: its value is showing you which process to reach for, not teaching the first one.
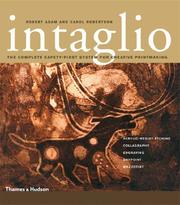
Adam and Carol Robertson's studio manual, subtitled The Complete Safety-First System for Creative Printmaking, and the fullest treatment of working intaglio without traditional acids and solvents. Take it directly after Grabowski if you are setting up a home or shared studio, where ventilation is the binding constraint.

The heaviest of the modern references and the best illustrated — step-by-step photographic sequences for every intaglio variant, including the awkward ones like mezzotint rocking and sugar-lift aquatint that written instructions handle badly. Use it as the picture book alongside Chamberlain's prose.
The Classic Treatise and the Long View of Process
IntermediateRead etching as a craft with a tradition and an argument behind it, not just a set of steps — and see how the processes changed as the technology and the market for prints changed.
▸ Study plan for this stage
Pace: Four to five weeks. Lumsden's The Art of Etching is around 400 pages, half manual and half criticism, and the critical half is what you are here for — read it slowly, with prints or reproductions to hand. Saff and Sacilotto's Printmaking is a large textbook of around 400 pages organised process by p
- Lumsden's central argument, and the reason he is still read a century on: the quality of an etched line is not incidental to the image but is the expressive content. He is arguing about what a line should look like, which only means something once you have made a bad one.
- The etching revival of the late nineteenth and early twentieth centuries — Whistler, Haden, Meryon, Cameron — as the context Lumsden writes from and occasionally for. He is a partisan of a particular taste in etching, and it is worth knowing that his strictures are period judgements as well as techn
- The distinction Lumsden draws between an etching and a reproduction: the etching revival was in part a reaction against reproductive engraving, and his aesthetics are shaped by that fight.
- Selective wiping, retroussage and plate tone treated as expressive decisions rather than as faults. This is where Lumsden is most useful practically — the earlier manuals teach you to wipe cleanly, and he explains when not to.
- Saff and Sacilotto's structural insight: each intaglio technique appeared when a specific need and a specific material capability met. Aquatint arrives when a tonal method is wanted for reproducing wash drawings; mezzotint arrives and then dies with the arrival of photography.
- Reproductive printmaking as the industry that funded most historical printmaking, and photomechanical reproduction as the thing that destroyed it. Most of the technical development in this subject was driven by the reproduction market rather than by artists.
- Steel-facing, the electroplating of a copper plate to extend its edition life, which changes what an edition means and is the reason nineteenth-century editions can run into the thousands.
- How the history feeds back into practice: knowing why a technique was developed tells you what it is optimised for, which is more useful than a list of steps.
- What does Lumsden say makes a good etched line? State it in his terms and then decide whether you agree.
- Which of Lumsden's judgements are technical and which are taste? Find an example of each and say how you told them apart.
- What is retroussage, when does Lumsden recommend it, and what does it do to an impression?
- According to Saff and Sacilotto, why did aquatint appear when it did? Name the need and the enabling material.
- What killed reproductive engraving and mezzotint, and roughly when? What replaced them commercially?
- What is steel-facing and how does it change what a numbered edition tells you about a print?
- Print the same plate three ways — wiped clean, with deliberate plate tone, and with retroussage — and set the three impressions side by side. Lumsden's argument about wiping is not really arguable in the abstract and is entirely obvious in three sheets.
- Take one of Lumsden's judgements about a named etcher and find reproductions of the work he is judging. Write down whether you see what he sees. Doing this twice tells you how much of his book is transferable and how much is 1925.
- Using Saff and Sacilotto, build a timeline of intaglio techniques with the date of first significant use and the purpose each was developed for. Six or seven entries is enough and it is the most useful single page you can make from this stage.
- Etch a small plate deliberately in the style Lumsden approves of — economical line, selective biting, no tonal crutches — and then a second version of the same subject with everything you have. Comparing them is a better test of his aesthetic than agreeing or disagreeing with it on the page.
- Find one historical print that was made to reproduce a painting and one made as an original etching, and list the differences in how the marks are used. The reproductive tradition is invisible until you look for it and then it is everywhere.
Next up: Having read one etcher's argument about what a line should be, the next stage teaches you to identify by eye what any process has actually done, which is the connoisseurship half of the subject.

The classic, from 1925, and still the best book anyone has written on why an etched line looks the way it does. Half technical manual, half critical account of the etching revival. Read it after you can pull a print, because Lumsden argues about quality of line and that only means something once you have made a bad one.
A different book from the Grabowski volume above despite the near-identical shelf presence, so check the author when ordering — the catalogue record for this one displays as the bare word Printmaking. Saff and Deli Sacilotto run each technique alongside its historical development, which explains why intaglio methods appeared in the order they did.
Learning to Read a Print
IntermediateTell an engraving from an etching from a mezzotint by eye, at a glance, from the marks themselves. This is the connoisseurship half of the subject and it feeds directly back into your own work.
▸ Study plan for this stage
Pace: Five to six weeks, and this stage works best combined with visits to a print room or a museum's works-on-paper collection. Gascoigne's How to Identify Prints is around 200 pages, mostly high-magnification plates, and is used with a loupe rather than read in an armchair; Griffiths's Prints and Printm
- The identifying marks of each process, which is Gascoigne's entire subject: the burin's swelling and tapering line with clean lozenge-shaped ends, the etched line's even width and blunt terminations, drypoint's soft velvety edge, aquatint's granular reticulated tone, mezzotint's continuous dark grou
- The magnification requirement. Almost none of these distinctions can be made with the naked eye, and the single most useful thing in this stage is acquiring a loupe and learning what each mark looks like at ten times.
- States versus editions, which Griffiths handles best: a state is a stage in the plate's development with visible differences, an edition is a printing run. Rembrandt's plates exist in many states and the state number is a claim about sequence, not about quality.
- Provenance, publishers and the print market as Griffiths sets it out — collectors' marks, publishers' lines, the difference between a lifetime impression and a posthumous restrike, and why late impressions from a worn plate look the way they do.
- Photomechanical reproduction and the modern problem it creates: a photogravure or a collotype can imitate the appearance of a hand process closely, and the screen or the grain is often the only tell.
- Hind's coverage from the fifteenth century to 1914 as the standard reference for who made what and when. Superseded on details and unreplaced in scope — use the index, not the narrative.
- The feedback into your own practice, which is why this stage sits in a making path at all: identifying what a technique physically did on somebody else's plate is the fastest way to learn what it can do on yours.
- Paper, plate marks and margins as evidence: the impression of the plate edge, the paper's chain lines and watermark, and trimming all carry information about how and when a sheet was printed.
- Describe, at magnification, how you would distinguish an engraved line from an etched line. What are the two decisive features?
- How do you tell an aquatint from a mezzotint by eye? Answer in terms of how each tone is physically constructed.
- What is a state, how is it identified, and why do collectors care about them?
- What tells you that an impression is late rather than early from the same plate? Name three signs.
- How would you detect a photogravure imitating an original etching?
- Take one process you have practised and describe its characteristic mark as Gascoigne would describe it.
- Get a loupe and work through Gascoigne's plates one process at a time, describing each mark in your own words before reading his caption. Doing it in that order is the difference between recognising the marks and recognising the pictures.
- Visit a print room or a museum collection and identify five prints by process without reading the labels, then check. Getting two of five right on the first attempt is normal and the errors are the instruction.
- Take your own impressions from stages one and two, examine them under magnification, and write the Gascoigne-style description of each. Identifying your own marks is easier than identifying a stranger's and builds the vocabulary.
- Find two impressions of the same historical print online at high resolution — auction catalogues are the practical source — and compare them for state differences and wear. Write down what you can and cannot determine from a reproduction.
- Use Hind's index to trace one technique's practitioners across two centuries and write four sentences on how the mark changed. This is what the book is for and it is not obvious until you have used it that way.
Next up: You can now read a print; the last stage puts the two bodies of work in front of you that every serious etcher eventually studies.
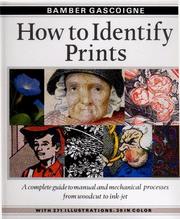
The best book of its kind and the one to read first here: high-magnification details of every process, hand and photomechanical, with the tell-tale marks labelled. Start with it and the museum cases in the next two books become legible.
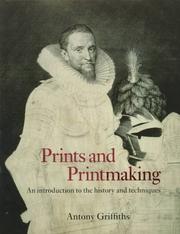
The British Museum's introduction to the history and techniques of Western prints, written by the keeper of its print room. Read after Gascoigne: it supplies the historical and market context — states, editions, publishers, reprints — that identifying a process alone does not give you.
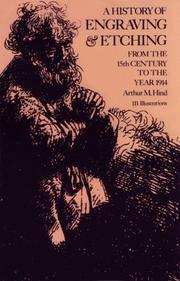
The scholarly history, first published in 1923 and still the standard reference for the period from the fifteenth century to 1914. Dense and superseded in details, but nothing has replaced its coverage. Keep it for looking things up rather than reading through.
The Masters
IntermediateStudy the two bodies of work that every serious etcher eventually studies, and see what the techniques in stage one look like in the hands of people who had nothing else to work with.
▸ Study plan for this stage
Pace: Four to five weeks. White's Rembrandt as an Etcher is a substantial scholarly study of around 250 pages of text with extensive plates, and it must be read with images to hand — the argument is entirely about what is visible in specific impressions. Eichenberg's The Art of the Print is a very large s
- Why Rembrandt is the technical benchmark and not merely the famous one: he combined etching, drypoint and engraving on the same plate, reworked plates through many states, and used plate tone and paper choice as expressive variables rather than as accidents.
- White's method, which is the real lesson of the book: he works through the successive states of individual prints to show what was added, burnished out and reworked, and reconstructs the decisions from the evidence in the impressions.
- Drypoint burr in Rembrandt's late work, particularly in the large religious plates, and the consequence that early impressions differ radically from later ones. This is the single clearest historical demonstration of what stage one taught you about burr wear.
- Paper as a variable: Rembrandt printed on Japanese paper, on vellum and on European laid, and the same state on different supports reads as a different image. Most reproductions flatten this out entirely.
- Selective wiping and plate tone in his hands, which is Lumsden's argument from stage three demonstrated by the artist Lumsden was arguing about.
- Eichenberg wrote The Art of the Print as a working wood engraver rather than as a curator, which is why the book keeps returning to what was physically involved in making each image. That is the right closing perspective for a path that began at a bench.
- The breadth Eichenberg supplies — Dürer, Callot, Piranesi, Goya, Blake, the Japanese woodblock tradition, the twentieth century — which places intaglio inside the whole history of the printed image rather than treating it as the subject.
- Goya's aquatints as the counterpart to Rembrandt's drypoint: the demonstration of what the tonal method can carry, and the reason to study a second master rather than one.
- How does White reconstruct the sequence of states for a given print? What counts as evidence?
- Name a Rembrandt print where the burr is decisive, and describe how an early and a late impression differ.
- What does printing on Japanese paper do to a Rembrandt impression, and why did he choose it?
- Where in Rembrandt's practice can you identify all three of etching, drypoint and engraving on a single plate? What does each contribute?
- What does Eichenberg's perspective as a practising printmaker add that a curatorial history would not?
- After studying both, what single technical decision from Rembrandt or Goya would you take back to your own plates?
- Take one print White discusses in detail, find reproductions of two or more states, and identify every change yourself before reading his account. This is the exercise the book is built to support and it is the closest thing to an apprenticeship available on paper.
- Copy a small passage of a Rembrandt etching onto your own plate — not the whole image, a few square inches of hatching — and try to match the line quality. You will fail and the failure will be specific, which is the point.
- Make one plate that combines etching, drypoint and engraving in the way White describes Rembrandt doing, and print it. Having all three marks on a single sheet you made yourself is what makes them legible in his.
- Print one of your own plates on three different papers, including a thin Japanese sheet if you can get one, and compare. Rembrandt's paper choices are usually treated as connoisseurship and they are actually a technical variable you can test.
- Using Eichenberg, find one printmaker outside the European intaglio tradition whose marks you cannot immediately account for, and work out how they were made. The whole path has been building the ability to answer that question.
Next up: This is the final stage; you have the bench procedures, the modern safer systems, the aesthetic argument, the ability to identify any process by eye, and two bodies of master work to measure your own plates against.
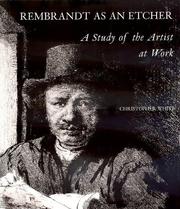
The definitive study of the etcher whose plates are still the technical benchmark — White works through the states of individual prints to show how Rembrandt built and reworked an image, including his use of drypoint burr and selective plate tone. Read it with prints or good reproductions in front of you.
Written by a working wood engraver rather than a curator, which is what makes it the right closing book: masterpieces, history and technique in one volume, with an artist's attention to what was physically involved in making each one. The record here carries no reliable publication year.
Discussion
Keep reading
Paths that share books, cover the same subject, or open a related topic.