Blender and 3D modeling: a beginner's book learning path
This curriculum takes you from zero Blender experience to producing polished, fully rendered 3D scenes. It begins with interface literacy and core modeling concepts, then layers on materials, texturing, lighting, and rendering, before finishing with advanced techniques and real-world project workflows — each stage building directly on the vocabulary and skills of the last.
Foundations: Interface & Core Modeling
BeginnerNavigate Blender confidently, understand 3D space, and build clean geometry using essential modeling tools.
▸ Study plan for this stage
Pace: 4–5 weeks, ~25–30 pages/day. Start with "Blender for Dummies" (weeks 1–2) to build interface familiarity, then move to "The Complete Guide to Blender Graphics" (weeks 3–5) for deeper modeling techniques and practice.
- Blender's interface layout: viewports, properties panels, outliner, and timeline navigation
- 3D coordinate system: X, Y, Z axes, world origin, and spatial orientation in 3D space
- Object vs. Edit mode: when and how to switch between modes for different modeling tasks
- Essential modeling tools: extrude, bevel, loop cut, inset, and scale operations
- Mesh topology: vertices, edges, faces, and how clean geometry supports further modeling
- Transformations: move, rotate, scale with precision using keyboard shortcuts and numeric input
- Selection methods: box select, circle select, wireframe mode, and selection modes (vertex/edge/face)
- Basic shading and material preview: visualizing your model with simple materials and lighting
- How do you navigate the 3D viewport efficiently, and what are the primary panels in Blender's default layout?
- Explain the difference between Object mode and Edit mode, and describe at least three tasks you would perform in each.
- What is the purpose of the extrude tool, and how does it differ from the inset tool in modeling workflows?
- How do you create clean, usable geometry, and why is proper topology important for future modeling and animation?
- Describe how to use loop cuts and bevels to add detail to a simple mesh while maintaining clean geometry.
- What are the three primary transformation tools (move, rotate, scale), and how do you apply them with precision using keyboard shortcuts?
- Follow the interface tour in 'Blender for Dummies': customize your workspace layout and practice navigating the viewport with mouse and keyboard shortcuts until it feels natural.
- Model a simple cube, then use extrude and inset to create a basic house shape with a door and window openings—focus on clean topology.
- Create a low-poly character head by starting with a UV sphere, using loop cuts and proportional editing to shape basic features (eyes, nose, mouth area).
- Build a simple table or chair using basic primitives (cubes, cylinders) and transformations; practice precise scaling and positioning using numeric input.
- Model a beveled box or rounded container by applying bevel modifiers and loop cuts to create smooth, professional-looking edges.
- Recreate one of the beginner projects from 'The Complete Guide to Blender Graphics' (e.g., a simple scene or object) to reinforce modeling workflow and tool usage.
Next up: This stage establishes the muscle memory and mental model needed to work efficiently in Blender's environment, preparing you to tackle more advanced modeling techniques (hard-surface modeling, sculpting, or character modeling) and material/shading workflows in the next stage.

The single most beginner-friendly entry point to Blender — it demystifies the interface, viewport navigation, and core object manipulation before anything else, giving you the vocabulary every later book assumes.

After the Dummies overview, Blain's comprehensive walkthrough solidifies modeling fundamentals — mesh editing, modifiers, and scene organization — with structured exercises that build muscle memory.
Modeling Deeper: Form, Topology & Hard-Surface
IntermediateCreate production-quality models with clean topology, understand subdivision workflows, and tackle both organic and hard-surface subjects.
▸ Study plan for this stage
Pace: 4–5 weeks, ~40–50 pages/day with daily modeling practice
- Topology fundamentals: edge flow, vertex density, and pole management for clean deformation
- Subdivision surface modeling workflow and how to prepare models for subdivision
- Hard-surface modeling techniques: bevels, boolean operations, and sharp creases
- Organic modeling with proper topology for rigging and animation
- UV unwrapping and texture preparation for production-quality assets
- Modifiers workflow: combining multiple modifiers for efficient, non-destructive modeling
- Retopology and optimization for game engines and real-time rendering
- What is edge flow and why does it matter for organic character and creature modeling?
- How do you prepare a high-poly model for subdivision surfaces, and what topology errors should you avoid?
- What are the key differences between organic and hard-surface topology, and when would you use each approach?
- How do boolean operations and bevels work together in hard-surface workflows, and what are their limitations?
- What is retopology, and why is it necessary for game-ready or animation-ready models?
- How do you set up UV seams and unwrap a complex model to minimize stretching and distortion?
- Model a simple organic head using subdivision surfaces, focusing on clean edge flow around the eyes, mouth, and nose
- Create a hard-surface object (e.g., a sci-fi weapon or mechanical part) using boolean operations and bevels, then clean up the topology
- Retopologize a high-poly sculpted model down to production-ready polygon count while maintaining silhouette and detail
- Build a character hand with proper topology for deformation, ensuring correct pole placement and edge loops
- UV unwrap a complete asset (organic or hard-surface) with minimal stretching, using seams strategically
- Model both an organic and hard-surface object in the same scene, demonstrating mastery of both workflows
Next up: This stage equips you with the topology discipline and modifier fluency needed to move into advanced character rigging, material shading, and rendering—where your clean models will deform correctly and display textures flawlessly.

Villar's project-driven book walks through a full character and environment pipeline, cementing intermediate modeling skills and introducing the concept of a disciplined, scene-level workflow.
Materials, Texturing & UV Mapping
IntermediateUnwrap UVs correctly, paint and apply textures, and build physically based materials in Blender's Shader Editor.
▸ Study plan for this stage
Pace: 4–5 weeks, ~20–25 pages/day, with 2–3 dedicated modeling/texturing sessions per week
- UV unwrapping fundamentals: seams, islands, and layout optimization to minimize distortion
- Texture painting workflows in Blender using the Texture Paint mode and brush tools
- PBR (Physically Based Rendering) material principles: albedo, metallic, roughness, and normal maps
- Shader Editor node-based material creation and linking textures to material inputs
- Baking textures from high-poly to low-poly models for game-ready assets
- Applying textures to mechanical objects with proper scale, alignment, and detail variation
- Understanding texture coordinate systems and their role in material consistency across models
- What are UV seams and why are they critical for unwrapping complex mechanical models without distortion?
- How do you set up and use Blender's Texture Paint mode to paint directly onto a 3D model?
- What are the four main texture maps in a PBR workflow, and what does each one control?
- How do you connect image textures to material nodes in the Shader Editor to make them visible on your model?
- What is texture baking, and when would you use it instead of real-time shaders?
- How do you ensure textures scale correctly and align properly on mechanical parts with repeating geometry?
- Unwrap a simple mechanical part (e.g., a gear or pipe) by strategically placing seams, then optimize the UV layout to minimize wasted space
- Paint a custom texture directly onto a 3D model using Texture Paint mode; experiment with different brush types and opacity settings
- Create a basic PBR material in the Shader Editor using separate image textures for albedo, normal, and roughness; apply it to a mechanical object
- Texture a complete machine assembly from 'Blender 3D Incredible Machines' by unwrapping, painting, and applying shaders to at least 3 distinct parts
- Bake textures from a high-poly detailed model onto a low-poly version, then verify the baked maps in the Shader Editor
- Build a metallic material for a machine part using the Principled BSDF node, adjusting metallic and roughness values to match real-world references
Next up: Mastering materials and texturing equips you with the skills to make mechanical models photorealistic and production-ready, preparing you for lighting, rendering, and final scene composition in the next stage.
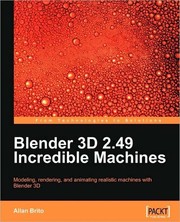
Focused on hard-surface projects, this book is the best practical introduction to UV unwrapping and material assignment in context — you learn texturing by actually finishing detailed mechanical models.
Lighting, Rendering & Compositing
IntermediateLight scenes convincingly, configure Cycles and EEVEE renders, and composite final images with Blender's node-based compositor.
▸ Study plan for this stage
Pace: 8–10 weeks, ~40–50 pages/day (mix of dense technical content and practical exercises)
- Cycles rendering engine architecture: sampling, noise reduction, and render passes
- Light types in Blender (emission, area, sun, spot, point) and their physical properties
- Material nodes and shader networks for realistic surface representation
- EEVEE real-time rendering workflow, limitations, and optimization techniques
- Compositing fundamentals: node-based workflow, color correction, and post-processing
- Lighting theory: three-point lighting, color temperature, and shadow control
- Render settings optimization: samples, denoising, and quality vs. performance trade-offs
- Node-based compositor for final image assembly, grading, and effects
- What are the key differences between Cycles and EEVEE rendering engines, and when should you use each?
- How do you set up a three-point lighting rig in Blender, and what role does each light play?
- Explain the relationship between sampling, noise, and render time in Cycles, and how denoising algorithms address this.
- How do you use Blender's compositor to combine render passes and apply color correction to a final image?
- What are the main material node types in Cycles, and how do you construct a physically-based shader network?
- How do you optimize EEVEE render settings for real-time performance while maintaining visual quality?
- Set up a three-point lighting scene (key, fill, back) in Blender and render with Cycles; compare results with different sample counts and denoising methods
- Create a physically-based material using Principled BSDF nodes (metal, plastic, fabric) and light it convincingly with area lights
- Render the same scene in both Cycles and EEVEE, document the visual differences, and optimize EEVEE settings to match Cycles quality
- Composite a multi-pass Cycles render (diffuse, specular, shadow, AO) in the compositor to create a final graded image
- Light a product shot using Birn's lighting principles (color temperature, contrast, shadow control) and iterate on the lighting setup
- Build a complex shader network combining multiple node types (mix, color ramp, math) and test its appearance under different lighting conditions
- Render an interior or exterior scene with Cycles, experiment with different denoiser options (OptiX, OpenImageDenoise), and compare quality vs. speed
- Use the compositor to apply color grading, vignetting, and depth-of-field effects to a rendered image, then export the final result
Next up: This stage equips you with the technical rendering and lighting skills to produce publication-ready images; the next stage will likely focus on animation, dynamics, and bringing these lit and rendered scenes to life with motion and interactivity.

Dedicated entirely to Cycles rendering, this cookbook-style book teaches HDRI lighting, light rigs, render settings, and material-light interaction — the focused deep dive on rendering that broader books skip over.

A software-agnostic classic on the art and science of 3D lighting — reading it here gives you the theoretical foundation (shadows, color temperature, three-point lighting) that makes your Blender renders look professional rather than accidental.
Advanced Workflows & Finished Scenes
ExpertCombine all skills into complete, polished projects — environments, characters, or product visualizations — using industry-level pipelines.
▸ Study plan for this stage
Pace: 8–10 weeks, ~40–50 pages/day (with project work interspersed). Week 1–4: "Blender 3D Architecture, Buildings, and Scenery" (primary focus); Week 5–8: "The VES Handbook of Visual Effects" (theory + application); Week 9–10: Integration project combining both.
- Architectural modeling pipelines: terrain, buildings, materials, and lighting workflows in Blender for photorealistic environments
- Modular asset creation and reusability: building efficient libraries of architectural components for scalable scene construction
- Advanced material and shading techniques: PBR workflows, displacement mapping, and weathering effects for believable surfaces
- Lighting design for environments: three-point lighting, HDRI integration, and global illumination strategies for architectural visualization
- VFX production pipeline fundamentals: pre-production planning, asset management, compositing workflows, and render optimization
- Industry-standard compositing and post-production: using node-based compositing to achieve final polish, color grading, and effects layering
- Optimization and rendering strategies: managing complexity, render passes, denoising, and performance tuning for production-quality output
- Project management and iteration: version control, feedback integration, and quality assurance in professional 3D pipelines
- How do you structure a modular architectural asset library, and what are the benefits of this approach in a production pipeline?
- Describe a complete lighting and material workflow for creating a photorealistic building exterior in Blender, from setup to final render.
- What are the key stages of a VFX production pipeline, and how does pre-production planning impact downstream asset creation and compositing?
- How do you use node-based compositing to achieve professional-grade post-production effects, and what render passes are essential for maximum flexibility?
- What optimization techniques would you apply to a complex architectural scene to maintain render quality while reducing render time?
- How do you integrate architectural environments with character or product assets in a unified scene, and what are the technical considerations?
- Build a complete modular residential building (house or apartment complex) using Brito's architectural workflows: model the structure, create reusable window/door/trim components, apply PBR materials, and light it for photorealism.
- Create a detailed urban environment (street block or plaza) combining multiple buildings, terrain, vegetation, and street furniture; practice asset organization and scene management at scale.
- Develop a full material library for architectural surfaces (concrete, brick, wood, glass, metal) using displacement, normal maps, and weathering techniques; document the workflow for reuse.
- Light a complex architectural interior or exterior scene using HDRI and three-point lighting principles; render multiple passes (diffuse, specular, shadow, AO) for compositing flexibility.
- Execute a complete VFX-style compositing workflow: import raw renders from Blender, layer multiple passes in a node compositor, apply color correction, depth-of-field, and atmospheric effects to achieve final polish.
- Plan and execute a small product visualization or architectural walkthrough project following industry pipeline standards: pre-production brief, asset checklist, render strategy, and final composite.
Next up: This stage establishes mastery of complete, production-ready 3D workflows—combining architectural modeling, advanced materials, professional lighting, and VFX compositing—preparing you to either specialize deeper in a particular domain (animation, VFX, game assets) or lead collaborative projects where you understand the full pipeline from concept to final delivery.
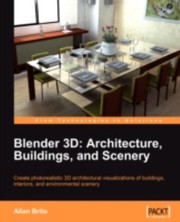
Brito's project-based book challenges you to build complete architectural scenes, forcing you to integrate modeling, texturing, lighting, and rendering into one cohesive pipeline for the first time.
This industry-standard reference from the Visual Effects Society broadens your perspective to professional production pipelines and finishing techniques, giving you the conceptual ceiling to keep growing well beyond Blender alone.
Discussion
Keep reading
Paths that share books, cover the same subject, or open a related topic.