Audio engineering: an ordered reading list for beginners
This curriculum takes a complete beginner from the fundamental physics of sound and signal flow all the way through professional mixing and mastering techniques. Each stage builds directly on the last — you must understand how sound works before you can record it well, and you must record it well before you can mix and master it with confidence. Expect a rewarding, hands-on journey of roughly 10 books across 4 progressive stages.
Foundations: Sound, Signal Flow & the Studio
BeginnerUnderstand how sound works as a physical phenomenon, how audio signals travel through a studio chain, and how to navigate a DAW and basic studio gear with confidence.
▸ Study plan for this stage
Pace: 4–5 weeks, ~25–30 pages/day (approximately 150–180 pages total)
- Sound as a physical phenomenon: vibration, frequency, amplitude, and how these properties shape what we hear
- The relationship between space, acoustics, and music perception—how environment shapes sonic character
- Signal flow and the journey of audio: from source through processing to listener
- The role of technology and equipment in capturing, shaping, and reproducing sound
- How human perception and psychology influence our experience of music and audio
- The practical studio chain: understanding how different tools (microphones, preamps, DAWs, monitors) work together
- Byrne's philosophy of intentional listening and awareness of sonic context
- What are the fundamental physical properties of sound (frequency, amplitude, wavelength), and how do they translate to what we perceive as pitch, loudness, and timbre?
- How does the acoustic environment (room size, materials, reflections) affect the character of recorded or performed music?
- Trace the complete signal flow from a sound source through a studio chain to the listener's ear—what happens at each stage?
- Why does David Byrne emphasize the importance of context and intentional listening when working with audio?
- What role does technology play in music creation, and how can understanding its limitations help you make better creative decisions?
- How do human perception and psychology shape the way we hear and respond to audio, and what implications does this have for studio work?
- Conduct a frequency listening exercise: identify high, mid, and low frequencies in familiar songs; record observations about which frequencies dominate different genres or instruments
- Perform an acoustic space analysis: record the same sound source (voice, instrument, or speaker) in 3–4 different rooms/spaces and compare how the environment colors the sound
- Create a signal flow diagram: map out a complete audio chain from microphone to speaker, labeling each component and describing what happens to the signal at each stage
- Set up a basic DAW project: record a simple audio source (voice or instrument), apply basic processing (gain, EQ, reverb), and listen critically to how each step changes the sound
- Practice intentional listening: spend 15–20 minutes listening to a single song with focused attention on different elements (drums, bass, vocals, space), then write reflections on what you discovered
- Experiment with microphone placement: record the same source from different distances and angles; document how proximity and angle affect tone and presence
Next up: This foundation in how sound behaves physically and how it travels through a studio chain prepares you to dive into the technical skills of recording, mixing, and signal processing with a clear understanding of *why* each tool and technique matters.

A highly accessible, big-picture exploration of how sound, space, and technology shape music — builds genuine intuition and enthusiasm before diving into technical detail.
The most widely used introductory textbook in audio engineering programs; covers microphones, signal flow, consoles, and DAWs in a logical, beginner-friendly order.
Recording: Capturing Great Sound at the Source
BeginnerLearn microphone theory and placement, gain staging, room acoustics, and how to record vocals, instruments, and ensembles cleanly and with intention.
▸ Study plan for this stage
Pace: 8–10 weeks, ~25–30 pages/day (5–6 days/week). The handbook is ~400 pages; allocate 2–3 weeks for foundational chapters (microphone types, polar patterns, preamps), 3–4 weeks for recording techniques (vocals, drums, instruments, ensembles), and 2–3 weeks for review and hands-on application.
- Microphone types (dynamic, condenser, ribbon) and how their construction affects frequency response, sensitivity, and polar patterns
- Polar patterns (cardioid, omnidirectional, figure-8) and how to use them strategically to reject room noise and isolate sources
- Gain staging: setting levels at the source, preamp, and console to maximize signal-to-noise ratio and avoid clipping
- Room acoustics fundamentals: how reflections, standing waves, and room modes color recordings, and basic treatment strategies
- Microphone placement techniques for vocals, drums, guitars, bass, and ensemble instruments to capture tone and minimize bleed
- Proximity effect and how distance from the source shapes tone and presence
- Preamp and interface characteristics: impedance, noise floor, and how they interact with microphone output
- Recording workflow: signal chain, monitoring, and decision-making at the source to reduce mixing burden
- What are the three main microphone types, and how does their construction affect their frequency response and typical use cases?
- How do polar patterns work, and which pattern would you choose to isolate a lead vocal from room reflections?
- Explain gain staging: why is it critical to set levels correctly at the source and preamp, and what are the consequences of setting them too high or too low?
- How does proximity effect influence vocal tone, and how would you use distance to shape the character of a recording?
- What are standing waves and room modes, and how do they affect microphone placement in a small recording space?
- Describe a complete microphone placement strategy for recording a drum kit, including mic selection, positioning, and polar pattern choices for each drum.
- How do you match a microphone's impedance and output level to your preamp and interface to achieve a clean signal?
- What is the relationship between microphone placement, room acoustics, and mixing decisions, and how can intentional recording choices reduce mixing work?
- Set up a microphone in your recording space and experiment with three different polar patterns (if available). Record the same source (voice, instrument, or ambient room tone) at each setting and compare how each pattern rejects or captures room reflections.
- Record a vocal take using three different microphone types (e.g., dynamic, condenser, ribbon if available). Document the frequency response, proximity effect, and noise floor of each, then compare in playback.
- Practice gain staging: record the same source at five different preamp levels (too quiet, quiet, optimal, loud, too loud). Listen for noise floor, clipping, and dynamic range, then identify the sweet spot.
- Map the standing waves and room modes in your recording space using a tone generator and your ears (or measurement software if available). Identify problem frequencies and experiment with microphone placement to minimize their impact.
- Record a complete instrument or vocal with intentional microphone placement based on Owsinski's techniques. Document your mic choice, placement distance, polar pattern, and gain staging. Review the recording and note what worked and what you'd change.
- Record a small ensemble (2–4 musicians or layered tracks) using multiple microphones. Focus on isolation, bleed control, and consistent gain staging across all channels. Compare the raw tracks to identify which placement and gain decisions made mixing easier.
Next up: This stage establishes the technical and practical foundation for capturing clean, intentional recordings; the next stage will build on these source-level decisions by teaching mixing, EQ, compression, and effects to shape and balance the recordings you've learned to capture here.
Packed with real-world microphone placement diagrams and session advice from top engineers; bridges theory and practice at the perfect point in the learning path.
Mixing: Shaping Tone, Space & Balance
IntermediateMaster the full mixing toolkit — EQ, compression, reverb, delay, stereo imaging, and automation — to build balanced, three-dimensional mixes from raw tracks.
▸ Study plan for this stage
Pace: 8–10 weeks, ~40–50 pages/day, with 2–3 days per week dedicated to hands-on mixing practice
- EQ fundamentals: identifying problem frequencies, surgical vs. tonal EQ, and using EQ to create separation and clarity in mixes
- Compression and dynamics: threshold, ratio, attack, release, and how to use compression for control, glue, and character across different sources
- Reverb and delay: room simulation, spatial depth, pre-delay, decay, and using effects to place instruments in three-dimensional space
- Stereo imaging and panning: creating width without losing mono compatibility, using stereo effects strategically, and balancing center and side information
- Automation: dynamic mixing with fader, pan, and effect automation to maintain interest, control dynamics, and guide listener focus throughout a song
- Gain staging and level balancing: proper headroom, relative levels, and how to build a balanced mix from the ground up
- Mixing workflow and decision-making: establishing reference points, critical listening, and systematic approaches to solving mix problems
- Practical application in small studio environments: working with limited gear, plugin-based mixing, and achieving professional results with constraints
- How do you identify whether a mix problem is best solved with EQ, compression, or a combination of both, and what are the sonic differences between surgical and tonal EQ approaches?
- Explain the relationship between compression parameters (threshold, ratio, attack, release) and describe how to set them for different sources (vocals, drums, bass, guitars).
- How do reverb pre-delay, decay time, and room size contribute to creating depth and space in a mix, and when should you use reverb vs. delay for spatial effects?
- What is the difference between panning for width and using stereo imaging effects, and how do you maintain mono compatibility while creating a wide stereo image?
- Describe a practical automation workflow: what elements benefit most from automation, and how does automation differ from static mixing?
- How do you establish and maintain proper gain staging throughout a mix, and why is headroom important for the final master?
- EQ ear training: Take a raw vocal track and use only EQ to reduce harshness, add clarity, and create separation from other instruments; document which frequencies you targeted and why.
- Compression comparison: Apply compression to a drum bus with different ratio/attack/release settings; record notes on how each setting changes the character and cohesion of the drums.
- Spatial depth project: Mix a simple 4–8 track song using only reverb and delay (no EQ or compression) to create a convincing three-dimensional space; experiment with pre-delay and decay times.
- Stereo imaging exercise: Take a stereo guitar or synth track and use panning and stereo effects to widen it while checking mono compatibility on headphones or a mono speaker.
- Full-song automation pass: Choose one song and add automation to at least three elements (vocal level, reverb send, drum compression) to guide the listener through the mix dynamically.
- Small-studio mix challenge: Mix a 12–16 track song using only stock plugins or free tools, focusing on achieving professional balance and separation despite limited resources.
Next up: This stage equips you with the technical and creative skills to shape raw tracks into polished, three-dimensional mixes; the next stage will focus on advanced mixing techniques, genre-specific approaches, and mastering the final mix for distribution across different playback systems.
The canonical mixing reference; introduces the 'five elements of a great mix' framework and walks through every major processor with clear, practical guidance.

Specifically addresses the challenge of mixing on imperfect monitors in untreated rooms — critical for most learners — and reinforces EQ and compression concepts with a practical focus.
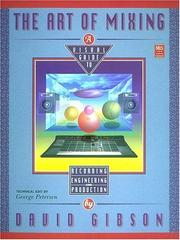
Uses a unique visual 'sound stage' model to explain how every mixing decision affects the three-dimensional perception of a track; deepens creative and spatial thinking after the technical groundwork is laid.
Mastering & the Professional Standard
ExpertUnderstand the mastering chain end-to-end — loudness, dynamics, stereo width, sequencing, and delivery formats — and develop the critical listening skills to finish music to a professional, release-ready standard.
▸ Study plan for this stage
Pace: 8–10 weeks, ~40–50 pages/day (mix of reading and practical listening sessions)
- The mastering chain: metering, monitoring, equalization, compression, limiting, and loudness optimization in sequence
- Loudness standards and normalization: LUFS targets, true peak limits, headroom, and format-specific requirements (streaming, broadcast, vinyl)
- Critical listening environment: acoustic treatment, monitoring speaker calibration, and the role of reference mixes in objective decision-making
- Stereo imaging and width control: mid-side processing, phase coherence, and maintaining translation across playback systems
- Dynamics and spectral balance: identifying and correcting frequency masking, tonal imbalance, and dynamic inconsistencies across a mix
- Sequencing and metadata: track spacing, ISRC codes, CD/streaming delivery specifications, and preparing masters for different distribution formats
- The mastering mindset: objectivity, restraint, and knowing when not to process—balancing technical precision with artistic intent
- What are the key differences between mixing and mastering, and why is the mastering chain typically applied in a specific order?
- How do loudness standards (LUFS, true peak) differ across streaming platforms, broadcast, and physical media, and how do you optimize a master for multiple formats?
- What role does your monitoring environment play in mastering decisions, and what are the minimum requirements for a professional mastering setup?
- How do you use mid-side processing and phase analysis to evaluate and improve stereo imaging without losing mono compatibility?
- What are the common frequency masking and dynamic problems you encounter in mixes, and what tools and techniques do you use to address them?
- How do you prepare and deliver masters for different formats (streaming, CD, vinyl, broadcast), and what metadata and technical specifications are required?
- Set up a reference listening environment: measure your room acoustically, calibrate your monitors to 85 dB SPL, and create a listening log comparing your space to professional mastering suites (via reference recordings)
- Master 3–5 complete mixes end-to-end using the mastering chain order from Katz: metering → EQ → compression → limiting → loudness normalization, documenting your decisions at each step
- Perform critical listening comparisons: A/B your masters against commercial releases in the same genre, identifying differences in loudness, frequency balance, stereo width, and dynamic range using both ears and metering tools
- Create masters for multiple delivery formats: take one mix and produce versions optimized for Spotify (LUFS -14), Apple Music (LUFS -16), YouTube (LUFS -13), and CD (true peak -1 dB), documenting format-specific adjustments
- Practice mid-side processing: isolate the mid and side channels of 2–3 stereo mixes, analyze phase relationships, adjust width and imaging, and verify mono compatibility using a mono sum
- Build a mastering checklist based on Owsinski's workflow: document the sequence of steps, metering targets, and quality checks you apply to every master, then refine it after each project
Next up: This stage equips you with the technical and listening skills to finish music to professional standards; the next stage will likely deepen your understanding of specialized mastering techniques (e.g., stem mastering, genre-specific approaches, or advanced restoration) or shift focus to the business and communication skills required to work with artists and labels in a professional mastering enviro

Written by one of the world's foremost mastering engineers, this is the definitive text on the subject — covering K-System metering, dynamics, EQ, and the philosophy of loudness with unmatched authority.

Complements Katz with interviews from top mastering engineers and a practical walkthrough of the mastering session workflow, delivery specs, and quality control — the ideal final book in the curriculum.
Discussion
Keep reading
Paths that share books, cover the same subject, or open a related topic.