Produce music in your bedroom studio
This four-stage curriculum takes a complete beginner from zero to finishing polished tracks at home. Each stage builds directly on the last: you first get your ears and studio thinking right, then master your DAW and recording workflow, then dive into the craft of mixing, and finally learn how to polish and release finished music.
Foundations: Ears, Concepts & Studio Thinking
BeginnerDevelop the vocabulary, listening skills, and mental models that every later technical skill depends on — so nothing in the DAW feels like a black box.
▸ Study plan for this stage
Pace: 10–12 weeks total. Week 1–4: "How Music Works" by David Byrne (~20–25 pages/day, reading reflectively with a listening journal). Week 5–8: "Producing Music with Ableton Live" by Jake Perrine (~15–20 pages/day, always at the computer with Live open). Week 9–12: "The Musician's Guide to Home Recording
- Music as context-dependent architecture: Byrne's central argument that music is shaped by the space and culture it's made for — not just the artist's intention — reframes how you listen to and design sound.
- Active listening vs. passive hearing: Training yourself to deconstruct a finished record into its layers (rhythm, harmony, texture, space, dynamics) before you ever touch a fader.
- The signal chain mental model: Understanding that every sound travels a path — source → capture/input → processing → output — and that every problem in a mix can be traced somewhere on that chain (introduced concretely in McIan).
- DAW as a compositional instrument: Perrine's framing of Ableton Live not as a recorder but as an instrument in itself, where arrangement, clips, and automation are creative decisions, not technical afterthoughts.
- Frequency, dynamics, and space as the three dimensions of a mix: Learning to hear low/mid/high content, loud/soft relationships, and dry/wet depth as separate, controllable axes.
- Room acoustics and monitoring: McIan's grounding principle that what you hear in your room is not neutral — understanding early reflections, standing waves, and why speaker placement matters before you EQ anything.
- Workflow thinking over tool thinking: Building the habit of asking 'what do I want this sound to do?' before reaching for a plugin — a mindset Perrine reinforces throughout his Ableton walkthroughs.
- The vocabulary of music production: Internalizing terms (gain staging, transient, timbre, headroom, sends/returns, arrangement vs. session view) so that later technical reading has a language to land on.
- After reading Byrne: Can you describe a specific song and explain how its production style reflects the context (venue, era, culture) it was made for — in your own words, without using technical jargon?
- After starting Perrine: What is the difference between Ableton's Session View and Arrangement View, and when would a home producer use each one as a primary workspace?
- Across all three books: Can you trace the complete signal path of a vocal recorded in a home studio — from microphone to final stereo output — naming every stage and one thing that can go wrong at each?
- From McIan: Why does your room acoustically color what you hear, and what are two low-cost steps you can take right now to make your monitoring more reliable?
- Synthesizing all three books: What does 'gain staging' mean, why does it matter, and at which point(s) in the signal chain does it apply?
- Big-picture synthesis: In one paragraph, explain the relationship between listening critically, understanding your room, and making intentional decisions in the DAW — how do these three ideas depend on each other?
- Listening deconstruction log (Byrne phase): Pick 5 songs across different genres. For each, write a one-page breakdown: What space does it sound like it was made for? What is the dominant frequency range? Where does the energy live — top, middle, or bottom? What is the loudest moment and why?
- Ableton orientation sessions (Perrine phase): Before reading each new chapter, spend 15 minutes freely exploring the feature Perrine is about to explain. After reading, spend 30 minutes deliberately replicating his examples. Note every question that comes up — these become your 'unknown unknowns' list.
- Signal chain diagram exercise (McIan phase): Draw your own home studio's signal chain by hand — every cable, every device, every software insert — then annotate each node with its purpose and one potential failure point. Redraw it after finishing McIan to see what you missed the first time.
- Room listening test: Play a familiar, well-produced reference track (e.g., something you know from headphones) through your studio monitors. Walk around the room and note where the bass gets louder or disappears. Clap once sharply and listen for flutter echo. Document what you find and compare it to McIan's descriptions of acoustic problems.
- Vocabulary flashcard sprint: After finishing each book, extract 15 new terms you encountered. Write a definition in your own words on one side and a real-world example from your own listening on the other. Review all cards before moving to the next book.
- Mini-production sketch (end of stage capstone): Using only what you've learned, build a 60-second loop in Ableton Live — one rhythmic element, one harmonic element, one melodic element. Write a one-paragraph producer's note explaining every decision: why that sound, why that level, why that arrangement. The goal is not a great track; it's a fully conscious one.
Next up: By the end of this stage you have ears that can deconstruct sound, a mental map of the signal chain, and a working Ableton session under your belt — giving the next stage's deeper technical dives into synthesis, mixing, and sound design a concrete, already-experienced foundation to build on rather than abstract theory to memorize.

A wide-angle, non-technical look at how sound, space, and context shape music — builds genuine curiosity and listening awareness before any gear is touched.

A gentle, project-based introduction to the DAW mindset and basic signal flow; reading this first makes every subsequent technical book land faster.
Covers the practical basics of setting up a home studio — acoustics, gear choices, and signal chain — giving beginners a realistic picture of the physical environment before going deeper.
DAW Mastery & Recording Workflow
BeginnerConfidently navigate a DAW, record audio and MIDI, edit takes, and build complete song arrangements from scratch.
▸ Study plan for this stage
Pace: 4–5 weeks, ~20–25 pages/day — read each chapter of The Mixing Engineer's Handbook actively at the DAW, pausing to apply concepts in a session before moving on
- DAW session setup: sample rate, bit depth, buffer size, and routing fundamentals as described in Owsinski's foundational chapters
- Signal flow: understanding how audio travels from input through tracks, buses, and outputs — the backbone of every recording workflow
- Recording audio and MIDI: gain staging from the source, avoiding clipping, and capturing clean takes as a prerequisite to any mixing work Owsinski discusses
- Track organization and arrangement: naming, color-coding, grouping, and ordering tracks to build a navigable, professional session
- Editing takes: comping, trimming, crossfading, and aligning audio/MIDI regions to construct a polished performance before any mixing begins
- The three-dimensional mix picture: Owsinski's concept of width (panning), depth (reverb/delay), and height (EQ) as a mental model to guide arrangement decisions even at the recording stage
- Balancing and rough mixing: using faders and panning to create an initial static mix that reveals arrangement problems early
- Listening critically: Owsinski's emphasis on reference tracks, ear fatigue, and monitoring environment as habits to build from day one
- What sample rate and bit depth should you choose for a home recording session, and why does Owsinski stress getting gain staging right before any mixing begins?
- How does signal flow work in a DAW — from a recorded track through a bus to the master output — and why does understanding this prevent common routing mistakes?
- What is Owsinski's 'three-dimensional mix picture,' and how can you apply width, depth, and height thinking while building a song arrangement, not just during mixing?
- What is a static mix, and why does Owsinski recommend establishing one before reaching for plugins or effects?
- How do you comp multiple takes into a single, seamless performance, and what editing techniques (crossfades, nudging, quantization) does Owsinski reference to clean up recordings?
- What monitoring habits — reference tracks, listening levels, ear breaks — does Owsinski prescribe, and how do you implement them in a home studio context?
- Session template build: Create a reusable DAW session template with correctly named and color-coded tracks (drums, bass, guitars, keys, vocals, FX buses) informed by the signal-flow principles in Owsinski's opening chapters. Save it and use it for every subsequent exercise.
- Gain-staging drill: Record a single instrument (voice, guitar, or a virtual instrument) at three different input levels — too hot, too quiet, and optimal. Compare the results and document the noise floor and clipping behavior, connecting your findings to Owsinski's gain-staging guidance.
- Take-comping exercise: Record four passes of a 16-bar melody or chord progression. Use your DAW's comping tools to assemble the best single performance, applying crossfades at every edit point. Play the result back and check for clicks or timing inconsistencies.
- Static mix challenge: Import or record a 4–6 track demo (drums, bass, one instrument, one vocal). Using only faders and panning — no EQ or compression — build the best balance you can, then annotate what feels wrong. Map your observations to Owsinski's three-dimensional mix picture.
- Three-dimensional arrangement map: Draw (on paper or a digital tool) a top-down and front-back 'map' of a reference song you admire, placing each instrument in its panned position and estimated depth. Compare it to a rough arrangement you've built in your DAW and adjust accordingly.
- Full song arrangement from scratch: Using your session template, record or program at minimum a drum pattern, a bass line, a chord instrument, and a lead/vocal over a 2-minute structure (intro, verse, chorus, outro). Apply all editing and comping techniques from the book before declaring the arrangement 'done.'
Next up: Mastering the DAW workflow and Owsinski's foundational mix-thinking in this stage gives you clean, well-organized sessions to bring into the next stage, where deeper focus on sound design, synthesis, and music theory will demand that same disciplined session management as a reliable creative foundation.
Introduces the professional mindset around tracks and sessions early, so that recording decisions are made with the final mix already in mind — a crucial habit to build now.
Mixing: Depth, Space & Balance
IntermediateApply EQ, compression, reverb, delay, and stereo placement to create mixes that are clear, punchy, and emotionally engaging.
▸ Study plan for this stage
Pace: 10–12 weeks total: Week 1–4 — "Mixing Secrets for the Small Studio" (~25–30 pages/day, including re-reading key chapters on EQ and monitoring); Week 5–8 — "The Art of Mixing" (~20–25 pages/day, spending extra time studying Gibson's 3D visual diagrams); Week 9–11 — "Zen and the Art of Mixing" (~25 pa
- Compensating for small-room acoustics and near-field monitor limitations (Senior) — understanding how your listening environment colors every decision you make
- Frequency management and surgical EQ: cutting problem frequencies, carving space for each element, and avoiding masking between instruments (Senior)
- Dynamic control through compression: attack/release shaping, gain staging, parallel compression, and preserving transient punch (Senior)
- Gibson's 3D sound-space model: visualizing every sound source as occupying a position in a three-dimensional field defined by left/right pan, front/back depth (reverb/volume), and up/down frequency register
- Reverb and delay as spatial tools — not just effects — for creating perceived distance, room size, and emotional atmosphere (Gibson, Mixerman)
- Stereo placement and width: using panning, mid/side processing, and stereo reverbs to build a convincing, wide image without losing mono compatibility (Senior, Gibson)
- The emotional and intentional dimension of mixing: Mixerman's philosophy that every technical choice must serve the song's feeling, and that over-processing is the enemy of emotion
- Developing critical listening and decision-making discipline: knowing when a mix is done, trusting your ears over meters, and breaking 'knob-tweaking' loops (Mixerman)
- After reading Senior, can you explain at least three specific ways your small room or budget monitors may be deceiving you, and what practical steps (acoustic treatment, reference tracks, cross-checking on multiple playback systems) you can take to compensate?
- Using Gibson's 3D model, how would you describe the spatial 'address' of a lead vocal, a rhythm guitar, and a kick drum in a well-balanced mix — and what tools would you use to move each one closer or farther from the listener?
- What is the difference between using reverb for depth/space versus using it as a textural effect, and how does the pre-delay setting affect the perceived clarity of a wet signal?
- How does Mixerman define the relationship between technical mixing decisions and the emotional intent of a song, and what does he mean when he warns against 'chasing the mix'?
- How do EQ and compression work together to control a sound's presence in the mix — specifically, why might you compress before EQing in one situation and EQ before compressing in another?
- What is mono compatibility, why does it matter in modern music distribution, and what techniques from Senior and Gibson help you check and preserve it?
- Room & monitor calibration drill (Senior): Before any mixing session, play three commercially released reference tracks you know well on your monitors, on headphones, and on a phone speaker. Log in writing where your room exaggerates or hides frequencies. Build a personal 'translation checklist' you update weekly.
- Frequency carving exercise (Senior): Take a rough multi-track session (your own or a free stem pack). Solo each track and use a spectrum analyzer alongside your ears to identify its 'core zone' and its 'problem zone.' Apply subtractive EQ to remove clashes, then unsolo and verify the mix opens up. Do this for at least 8 tracks.
- Gibson's 3D mapping exercise (Gibson): Before touching a fader or plugin on a new mix, draw a top-down and front-facing diagram of where you *intend* every instrument to sit in the 3D sound field. After mixing, draw a second diagram of where things actually ended up. Compare and discuss the gap.
- Reverb & delay space-building exercise (Gibson + Senior): Create three versions of the same 4-bar loop — one dry, one using only reverb for depth, one using only delay for depth. Critically compare how each version changes the perceived size of the room and the emotional feel. Export and listen on multiple devices.
- Compression character study (Senior): Pick one drum bus and process it three times: (1) fast attack/fast release for maximum control, (2) slow attack/fast release to emphasize transients, (3) parallel compression blending both. Render each version and write a one-paragraph description of how each feels emotionally — not just technically.
- Mixerman's 'intention-first' session (Mixerman): Before opening your DAW, write a one-page brief for a mix: what is the song about, what should the listener *feel* at the chorus, and which three elements must be most prominent to serve that feeling? Mix with that brief taped to your monitor. Afterward, evaluate every plugin decision against the brief and remove anything that doesn't serve it.
Next up: Mastering the interplay of EQ, compression, reverb, and intentional space in this stage gives you a polished, translation-ready mix — the essential raw material for the next stage, which will focus on mastering and final delivery, where those same frequency, dynamic, and spatial decisions are refined and optimized for distribution across all playback formats.

The single most practical mixing book for home producers — it addresses the exact problem of untreated rooms and consumer monitors, making it the perfect first deep-dive into mixing.
Uses a unique visual 'soundstage' model to explain how every element occupies three-dimensional space in a mix, building strong spatial intuition that complements Senior's technical approach.
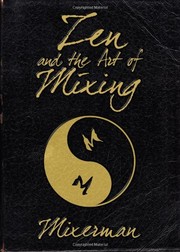
Shifts focus from tools to decision-making and taste — read after the technical books to learn how professionals think and listen, not just what knobs they turn.
Finishing Tracks: Mastering, Release & the Full Picture
ExpertMaster your own tracks to a release-ready standard, understand streaming loudness targets, and develop a repeatable end-to-end workflow for completing and releasing music.
▸ Study plan for this stage
Pace: 8–10 weeks total: Weeks 1–5 cover "Mastering Audio" by Bob Katz (~25–30 pages/day, including re-reading dense technical sections on metering and EQ); Weeks 6–10 cover "The Music Producer's Handbook" by Bobby Owsinski (~20–25 pages/day, with slower pacing on business/workflow chapters that require re
- The K-System metering standard (K-20, K-14, K-12) and how Katz's loudness philosophy aligns with modern streaming normalization targets (Spotify −14 LUFS, Apple Music −16 LUFS, YouTube −14 LUFS)
- The mastering signal chain: corrective EQ → dynamic control (compression/limiting) → stereo enhancement → final brick-wall limiting, and the purpose of each stage as detailed in Mastering Audio
- Monitoring environment fundamentals — room acoustics, speaker placement, and calibrated listening levels — as the prerequisite for trustworthy mastering decisions (Katz's 'Magic Reference Level')
- Dynamic range, loudness war context, and the artistic/commercial trade-offs of pushing integrated loudness versus preserving transient punch and depth
- Dithering and bit-depth reduction: why and how to apply dither when bouncing from 32-bit float or 24-bit sessions to 16-bit CD/streaming masters (covered in Mastering Audio)
- The producer's full end-to-end role as framed by Owsinski in The Music Producer's Handbook: pre-production planning, session management, mix oversight, and delivery
- Release preparation workflow from Owsinski: metadata, ISRC codes, distribution formats (WAV, FLAC, MP3), and working with digital distributors
- Building a repeatable personal workflow that connects mix sign-off → mastering session → quality-control listening → file delivery, synthesizing both books
- According to Bob Katz's K-System, what does K-14 mean in practice, and which genre or listening context is it best suited for compared to K-20?
- What is integrated LUFS, and how does understanding it from Mastering Audio help you make informed decisions about final limiter ceiling and gain-reduction settings before uploading to streaming platforms?
- Katz emphasizes a calibrated monitoring level as the foundation of mastering — what is his recommended reference SPL, and why does a fixed monitoring level improve consistency across sessions?
- How does Owsinski's description of the producer's role in The Music Producer's Handbook reframe mastering not as an isolated technical step but as part of a larger creative and logistical responsibility?
- What file specifications (bit depth, sample rate, loudness ceiling, metadata) should a release-ready master include, drawing on the delivery guidance in both books?
- What are the signs that a mix is not ready to be mastered, and how do the combined perspectives of Katz and Owsinski help you diagnose mix problems before committing to a master?
- K-System calibration exercise: Using Katz's instructions in Mastering Audio, calibrate your studio monitors to his reference SPL using pink noise and a sound-pressure-level meter (or a calibrated app). Master one of your own tracks at K-14 and again at K-12, then compare the results on headphones, laptop speakers, and a phone — document what changes and why.
- Loudness matching shootout: Export three versions of the same master at −14 LUFS integrated, −16 LUFS integrated, and an un-normalized 'loud' version (e.g., −8 LUFS). Upload all three to a private SoundCloud or use a loudness-normalization plugin to simulate streaming playback. Write a one-page reflection on perceived dynamics, punch, and clarity at each level, referencing Katz's loudness war argu
- Signal chain deconstruction: Build a mastering chain in your DAW using only the concepts described in Mastering Audio (EQ → compression → stereo widening → limiting). Process a rough mix step by step, bypassing each plugin in turn and recording before/after screenshots of your spectrum analyzer and loudness meter. Annotate what each stage fixed or enhanced.
- Dither practice: Take a 24-bit mix bounce and export it to 16-bit with dither (TPDF or noise-shaped) and without dither. Use a null test or a spectrum analyzer to observe the difference in the noise floor. Write a brief explanation of why dither matters for streaming and CD delivery, citing Katz's chapter on the topic.
- End-to-end release simulation (Owsinski-driven): Using the workflow framework from The Music Producer's Handbook, take one original track from final mix to a fully packaged release folder. This means: mastered WAV at −14 LUFS / −1 dBTP ceiling, 320 kbps MP3 version, embedded metadata (title, artist, ISRC placeholder, year, genre), and a one-page release checklist you can reuse for every future rel
- Critical listening log: Over the course of this stage, choose five released songs in your genre and analyze each one using the vocabulary from both books (dynamic range, stereo width, tonal balance, loudness). Note what mastering decisions you think were made and whether they align with Katz's principles. Present your findings as a written log you can reference when mastering your own work.
Next up: Completing this stage gives you a fully closed loop — from initial idea to released master — which means any future stage can zoom back into earlier parts of the chain (sound design, arrangement, mixing) with the confidence of knowing exactly what the finished product must achieve.

The definitive book on mastering by one of its foremost practitioners — covers loudness, dynamics, EQ, and the K-System standard that every serious home producer should understand.
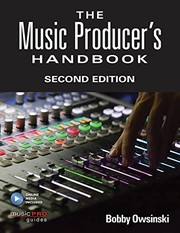
Zooms out to the full producer role — finishing songs, working with artists, and thinking about releases — giving the curriculum a satisfying capstone that connects every earlier skill to a real finished product.
Discussion
Keep reading
Paths that share books, cover the same subject, or open a related topic.