Appliance repair: the best books to fix it yourself and save money
This curriculum takes a beginner from zero appliance knowledge to confident DIY diagnosis and repair across all major home appliances. It starts by building essential electrical safety and tool literacy, then moves into appliance-specific troubleshooting, and finally reaches advanced repair logic and parts-level diagnosis — each stage unlocking the vocabulary and confidence needed for the next.
Foundations: Safety, Tools & How Things Work
BeginnerUnderstand basic electricity, hand tools, and how household appliances are powered and controlled — the essential vocabulary for everything that follows.
▸ Study plan for this stage
Pace: 4–5 weeks, ~25–30 pages/day. Start with "Wiring a House" (weeks 1–2), then "Reader's Digest Complete Do-It-Yourself Manual" (weeks 3–5), allowing time for hands-on practice between reading sessions.
- Electrical fundamentals: voltage, amperage, resistance, and how they interact in household circuits
- AC vs. DC current and why household appliances use AC power
- Circuit breakers, fuses, and grounding as safety mechanisms
- Common hand tools (multimeter, screwdrivers, wire strippers, pliers) and their proper use
- How household appliances are powered: the path from the breaker box through circuits to the appliance
- Reading wiring diagrams and understanding circuit symbols
- Basic troubleshooting methodology: identifying problems before attempting repairs
- Safety protocols when working with electricity and appliances
- What is the difference between voltage, amperage, and resistance, and how do they relate to each other?
- Why do household appliances use AC power instead of DC, and what does this mean for how they operate?
- How does a circuit breaker protect a circuit, and what happens when you overload a circuit?
- What are the essential hand tools for appliance repair, and what is each one used for?
- How does electricity flow from the breaker box to an appliance, and what components does it pass through?
- How do you read a basic wiring diagram, and what do common circuit symbols represent?
- Using a multimeter, measure voltage, resistance, and continuity on a dead (unplugged) appliance cord to verify it's safe to work with
- Trace the electrical path in your home from the breaker box to a specific outlet, identifying the circuit breaker, wire gauge, and grounding
- Practice stripping, crimping, and reconnecting wire using scrap wire and connectors in a safe, non-powered environment
- Draw a simple wiring diagram for a basic circuit (light switch + bulb + power source) using standard symbols from the books
- Identify and safely handle the hand tools mentioned in the manual: practice proper grip and technique with screwdrivers, pliers, and wire strippers on non-powered items
- Inspect a household appliance (unplugged) and locate its power cord, plug, internal wiring, and any visible circuit components; sketch what you find
Next up: This stage equips you with the electrical literacy and tool proficiency needed to safely diagnose and repair specific appliances in the next stage, where you'll apply these fundamentals to common household systems like refrigerators, washers, and HVAC units.
Builds a solid, practical understanding of residential electrical systems — circuits, breakers, outlets, and grounding — so you can work safely around any appliance. Read this first to demystify the power side of every repair.
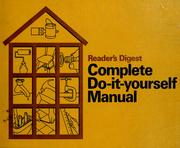
A broad, illustrated reference that introduces tools, fasteners, plumbing basics, and home systems in plain language. It gives beginners the cross-trade vocabulary that appliance manuals assume you already have.
Core Appliance Repair: Diagnosis & Common Fixes
BeginnerLearn a systematic troubleshooting method and perform the most common repairs on washers, dryers, refrigerators, dishwashers, and ranges.
▸ Study plan for this stage
Pace: 6–8 weeks, ~25–30 pages/day, with 1–2 days per week for hands-on practice and appliance teardowns
- Systematic troubleshooting methodology: identifying symptoms, isolating variables, and testing components methodically
- Safety protocols specific to each appliance type (electrical, gas, water, moving parts)
- Common failure points in washers, dryers, refrigerators, dishwashers, and ranges (belts, thermostats, valves, heating elements)
- How to read wiring diagrams, schematics, and component labels to understand appliance architecture
- Basic component replacement techniques: removing fasteners, disconnecting electrical/water connections, and reassembling
- Diagnostic tools and when to use them: multimeters, thermometers, visual inspection, and listening for abnormal sounds
- Parts sourcing and compatibility: model numbers, OEM vs. aftermarket, and supplier relationships
- When to repair vs. when to call a professional or replace the appliance
- Walk through the troubleshooting process for a washing machine that won't drain: what symptoms would you observe, what components would you test, and in what order?
- Explain the safety precautions you must take before opening a refrigerator or dishwasher for repair, and why each one matters.
- Given a dryer that produces heat but doesn't tumble, what are the three most likely failure points, and how would you test each one?
- How do you use a multimeter to determine whether a heating element or thermal fuse is the problem in a range or dryer?
- Describe how to locate and interpret the model number on an appliance, and explain why it's critical for ordering the correct replacement part.
- What is the difference between a symptom and a root cause, and why does this distinction matter when diagnosing appliance problems?
- Complete a full teardown and reassembly of a non-working washing machine or dryer (with supervision if needed), documenting each step with photos and identifying all major components.
- Practice reading and sketching wiring diagrams from 'Troubleshooting and Repairing Major Appliances' for at least two different appliance types; label all components and trace current flow.
- Perform a multimeter diagnostic on a faulty heating element, thermal fuse, or motor from a discarded appliance to confirm continuity and resistance values against the book's specifications.
- Repair or replace a belt, seal, or valve on an actual appliance (washer, dryer, dishwasher, or refrigerator) following the step-by-step procedures in 'Dare to Repair'; photograph the before, during, and after states.
- Create a troubleshooting flowchart for each of the five appliance types (washer, dryer, refrigerator, dishwasher, range) based on the most common symptoms and failure modes described in both books.
- Source and order a replacement part for a broken appliance using only the model number and the part identification methods taught in the books; verify compatibility before purchase.
Next up: This stage equips you with the diagnostic mindset and hands-on skills to tackle the most frequent repairs independently; the next stage will likely deepen your expertise into less common failures, advanced electrical diagnostics, and specialized appliances (microwaves, ovens, ice makers), building on the foundation you've established here.

A confidence-building, beginner-friendly guide to fixing home systems and appliances with clear step-by-step instructions. Its approachable tone makes it the ideal first appliance-specific book before tackling denser technical manuals.
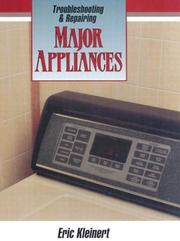
The most comprehensive and technically rigorous book dedicated entirely to major appliance repair, covering refrigerators, washers, dryers, dishwashers, and more with wiring diagrams and test procedures. This is the cornerstone technical reference of the curriculum.
Mastery: HVAC, Refrigeration & Advanced Systems
ExpertDiagnose and service refrigeration sealed systems, HVAC components, and electronically controlled modern appliances — reaching near-professional repair capability.
▸ Study plan for this stage
Pace: 12–16 weeks, ~40–50 pages/day with lab work; allocate 2–3 days per week for hands-on practice and system diagnostics
- Sealed system fundamentals: refrigerant properties, pressure-temperature relationships, and thermodynamic cycles in HVAC and refrigeration
- Evacuation, charging, and recovery procedures for refrigerant systems using proper EPA-certified equipment and techniques
- Diagnosis of sealed system faults using manifold gauges, leak detection, superheat/subcooling measurement, and electrical troubleshooting
- HVAC component operation: compressors, condensers, evaporators, expansion devices, and their interaction in heating and cooling cycles
- Electronic controls in modern appliances: thermostats, sensors, control boards, and how they regulate sealed systems
- Refrigerant types (CFC, HCFC, HFC, HFO) and their environmental/safety implications; proper handling and EPA compliance
- System recovery, recycling, and reclamation; safe disposal and record-keeping for refrigerants
- Practical troubleshooting methodology: symptom analysis, performance testing, and systematic component isolation
- What is the relationship between pressure and temperature in a sealed refrigeration system, and how do you use a pressure-temperature chart to diagnose system problems?
- Describe the complete evacuation and charging procedure for a refrigeration system, including equipment setup, safety precautions, and how to verify proper charge level.
- How do you measure superheat and subcooling, and what do abnormal readings indicate about system operation or faults?
- Explain the role of the expansion device (TXV, capillary tube, or electronic expansion valve) in controlling refrigerant flow and system efficiency.
- What are the key differences between diagnosing a sealed system fault versus an electrical control fault, and how do you isolate each?
- Why is proper refrigerant recovery and EPA compliance critical, and what are the legal and environmental consequences of improper handling?
- Set up and use a manifold gauge set on a working refrigeration system; record pressure readings and compare them to pressure-temperature charts to assess system health.
- Practice evacuation on a test system: connect recovery equipment, evacuate to proper micron levels, and document the process; verify evacuation with a micron gauge.
- Perform a complete charging procedure on a sealed system using both weight and superheat/subcooling methods; compare results and troubleshoot discrepancies.
- Conduct a leak detection exercise using multiple methods (bubble test, electronic detector, dye injection) on systems with intentional small leaks; locate and document findings.
- Measure and interpret superheat and subcooling on at least three different systems in various operating conditions; correlate readings to system faults (undercharge, overcharge, TXV malfunction).
- Disassemble and inspect a compressor, condenser, evaporator, and expansion device; identify wear, contamination, and proper operation; reassemble and test.
- Troubleshoot a sealed system with a known fault (e.g., stuck TXV, weak compressor, refrigerant leak) using systematic diagnosis; document each test step and conclusion.
- Complete EPA Section 608 certification practice exam material from the book; achieve mastery-level scores on sealed system and recovery/recycling questions.
Next up: Mastery of sealed system diagnosis and service, combined with electronic control troubleshooting, positions you to tackle complex multi-system appliance failures and specialized equipment (ice makers, heat pumps, variable-capacity systems) in the next stage.
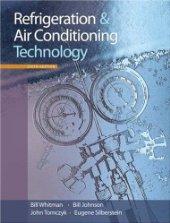
The industry-standard textbook for understanding sealed refrigeration systems, compressors, refrigerants, and heat transfer — essential for tackling refrigerator and freezer sealed-system problems that go beyond basic fixes.
Discussion
Keep reading
Paths that share books, cover the same subject, or open a related topic.