Become a home inspector: independent & in demand
This curriculum takes a complete beginner from zero knowledge of residential construction all the way to running an independent home inspection business. The four stages build deliberately: first you learn how houses are actually built and how their systems work, then you study the professional standards and inspection methodology, then you master the craft of reporting and field judgment, and finally you learn how to launch and grow a profitable solo practice.
How Houses Work — Building Systems Foundations
BeginnerUnderstand how a house is constructed from the ground up — structure, envelope, mechanical systems, electrical, and plumbing — so that every later inspection concept has a physical picture to attach to.
▸ Study plan for this stage
Pace: 6–8 weeks total. Week 1–4: "Renovating Old Houses" by George Nash (~25–30 pages/day, reading chapters in sequence from foundation to finish; pause at the end of each major system chapter to review notes). Week 5–8: "Wiring a House" by Rex Cauldwell (~20–25 pages/day, slower pace to absorb code table
- Foundation types and load paths — how a house transfers gravity and lateral loads from roof to footing, as detailed in Nash's coverage of sills, joists, posts, beams, and bearing walls
- Building envelope integrity — how Nash treats walls, windows, doors, roofing, and insulation as a continuous weather-resistant system that controls heat, air, and moisture
- Structural red flags in older construction — balloon framing vs. platform framing, notched or bored joists, sagging ridges, and other deficiencies Nash documents in renovation contexts
- Mechanical systems overview — how Nash integrates heating, ventilation, and basic plumbing into the whole-house picture, giving inspectors a sense of how systems share space and interact
- Electrical service entrance to panel — Cauldwell's explanation of how utility power arrives, passes through the meter, and lands on the main breaker and bus bars inside the panel
- Branch circuits, wire sizing, and breaker ratings — Cauldwell's rules for matching conductor gauge (AWG) to breaker amperage and load type (lighting, receptacle, appliance, HVAC)
- Grounding and bonding — Cauldwell's distinction between the equipment grounding conductor, the neutral, and the grounding electrode system, and why each matters for safety
- Code-driven inspection mindset — how Cauldwell uses NEC requirements not as abstract rules but as the physical reason behind every wiring decision, establishing the habit of asking 'what does code require here and why?'
- After reading Nash, can you sketch a cross-section of a wood-framed house and label the foundation, sill plate, floor joists, subfloor, wall studs, top plate, rafters, and roof sheathing — explaining how each element transfers load to the next?
- What is the difference between balloon framing and platform framing, and why does Nash's treatment of older homes make this distinction critical for a home inspector assessing fire-stop integrity?
- How does Nash describe the building envelope as a system? What happens when any single layer — roofing, flashing, sheathing, vapor retarder, or insulation — fails, and how do failures in one layer accelerate damage in others?
- Using Cauldwell's framework, can you trace the path of electricity from the utility transformer through the service entrance conductors, meter, main breaker, hot bus bars, a branch-circuit breaker, and out to a receptacle — naming the wire colors and their functions at each step?
- What does Cauldwell say about the relationship between wire gauge, breaker size, and circuit load? Why is an oversized breaker on an undersized wire one of the most dangerous conditions an inspector can find?
- How does Cauldwell explain the difference between grounding and bonding, and what specific components (grounding electrode, grounding electrode conductor, equipment grounding conductor) must an inspector look for in a panel inspection?
- House walk-through sketch: Before starting Nash, draw a blank house cross-section from memory. After finishing Nash, redraw it with every structural element labeled and annotated with its function. Compare the two drawings to measure what you learned.
- Framing scavenger hunt: Visit any house under construction, a renovation site, or an exposed basement/attic and physically locate and touch: sill plate, rim joist, floor joist, bearing wall, top plate, rafter or truss, and roof sheathing. Cross-reference each element with Nash's descriptions and photographs.
- Envelope failure case study: Find three photos of water-damaged interiors (real estate listings, contractor portfolios, or online inspection forums). For each photo, use Nash's envelope-system framework to hypothesize which layer failed first and how the damage cascaded — write a one-paragraph narrative per photo.
- Panel labeling exercise: With the main breaker OFF and following all safety precautions, open your own (or a willing neighbor's) electrical panel. Using Cauldwell's diagrams as a guide, identify: the service entrance conductors, main breaker, hot bus bars, neutral bus bar, grounding electrode conductor, and at least five branch-circuit breakers. Note any discrepancies between what you see and what
- Wire gauge and breaker matching quiz: Create a two-column flashcard set — one side lists a wire gauge (e.g., 14 AWG, 12 AWG, 10 AWG, 8 AWG) and the other lists the correct maximum breaker size and a typical circuit application per Cauldwell's tables. Drill until you can answer in under three seconds per card.
- Integrated system narrative: Write a one-page 'story of a house' that begins with a concrete footing and ends at a working light switch — weaving together Nash's structural and envelope concepts with Cauldwell's electrical pathway. This forces you to connect both books into a single mental model before advancing to inspection-specific material.
Next up: Mastering how a house is physically built and wired — the 'what is supposed to be there and why' — gives you the baseline normal against which every defect, deficiency, and safety hazard in a formal home inspection course will be immediately recognizable as a deviation.

Covers the anatomy of older housing stock — the most common inspection challenge — explaining how original construction ages, fails, and is repaired, building crucial diagnostic intuition.
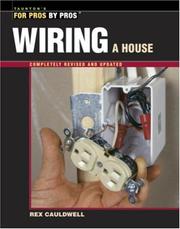
Electrical defects are among the most cited inspection findings; this Taunton Press title explains residential wiring in depth so inspectors can identify hazards with confidence.
Inspection Standards, Methodology & the Profession
BeginnerLearn what a home inspector is legally and professionally required to do, how to walk through a property systematically, and what the national standards of practice actually demand.
▸ Study plan for this stage
Pace: 4–5 weeks, ~20–25 pages/day (the book is ~400 pages); read in the morning when focus is sharpest, and reserve 30 minutes each evening to review notes and sketch diagrams of systems covered that day
- The scope and legal boundaries of a home inspection — what an inspector IS and IS NOT responsible for reporting
- National Standards of Practice (e.g., ASHI/InterNACHI frameworks) as reflected in Becker's methodology: what systems must be inspected and to what depth
- Systematic walk-through methodology: Becker's room-by-room and system-by-system approach (structure, roofing, electrical, plumbing, HVAC, interior, exterior, site)
- Condition vs. code: understanding that inspectors report observable conditions, not code compliance, and how Becker distinguishes defects from deficiencies
- The inspector's role as an impartial, visual, non-invasive observer — limitations of the inspection (no destructive testing, no concealed areas)
- Reporting language and professional communication: how findings are categorized (safety hazard, major defect, maintenance item) as demonstrated throughout Becker's chapters
- Roof, foundation, and structural systems as the highest-priority inspection areas and why Becker treats them as the backbone of any inspection
- Professional and ethical obligations: managing client expectations, avoiding conflicts of interest, and maintaining objectivity
- According to Becker, what are the core systems a home inspector must evaluate on every inspection, and what is explicitly outside the inspector's scope?
- How does Becker's walk-through methodology ensure that nothing is missed — what is the logic behind his sequencing of systems and areas?
- What is the difference between a 'defect,' a 'deficiency,' and a 'maintenance item' as Becker uses these terms, and why does the distinction matter to a client?
- Why does Becker emphasize that home inspection is a visual, non-invasive process, and what are the practical and legal implications of that limitation?
- How should an inspector communicate a safety hazard versus a minor cosmetic issue in a report, based on the language and examples Becker provides?
- What makes the roof and foundation inspection so critical, and what specific indicators does Becker instruct the reader to look for in each?
- Shadowing walk-through drill: Use Becker's chapter sequence as a checklist and physically walk through your own home (or a friend's), noting every system in the order Becker presents it — roof to foundation, exterior to interior. Write one sentence of 'inspector language' for each observation.
- Defect classification practice: After each major chapter (roof, electrical, plumbing, HVAC, structure), list 5 conditions Becker describes and classify each as a Safety Hazard, Major Defect, or Maintenance Item. Compare your classifications to Becker's own language in the text.
- Scope boundary quiz: Write out 10 scenarios (e.g., 'client asks if the wiring meets current code,' 'inspector notices a sealed crawl space door'). For each, decide whether it is IN or OUT of scope per Becker's standards, and cite the relevant section.
- Sketch-it exercise: After reading each systems chapter, draw a simple labeled diagram of that system (e.g., a roof cross-section showing flashing, ridge, valley, and fascia) from memory. Use Becker's diagrams and photos to self-correct.
- Mock report paragraph: Choose any three defects Becker describes and write a one-paragraph report entry for each, using professional, non-alarmist language. Practice distinguishing what you saw, what it means, and what action is recommended.
- Terminology flashcard deck: Build a set of at least 40 flashcards from Becker's glossary and chapter key terms (e.g., efflorescence, kick-out flashing, GFCI, heat exchanger). Review daily for the last two weeks of the stage.
Next up: Mastering Becker's systematic methodology and the professional standards of what must be inspected gives the reader the structural framework needed to dive deeper into individual building systems — understanding not just that something must be inspected, but precisely how each system works, fails, and is diagnosed at a technical level.

A canonical, system-by-system inspection reference that has guided inspectors for decades; read after Feiza to reinforce methodology with detailed component-level checklists.
Field Judgment — Defects, Diagnosis & Report Writing
IntermediateDevelop on-site diagnostic skill — recognizing, categorizing, and communicating real defects — and produce clear, defensible inspection reports that serve clients and protect the inspector.
▸ Study plan for this stage
Pace: 4–5 weeks, ~25–35 pages/day; read each chapter twice — once for comprehension, once to annotate defects, their causes, and how Cauldwell phrases findings in report language
- Systematic whole-house inspection methodology — Cauldwell's room-by-room and system-by-system sequencing to ensure nothing is missed
- Defect recognition vs. defect diagnosis — distinguishing what you see (symptom) from what caused it (root cause), as Cauldwell demonstrates across structural, electrical, plumbing, HVAC, and roofing systems
- Severity triage — categorizing findings as safety hazards, major defects, minor defects, or maintenance items, mirroring the priority language Cauldwell uses throughout
- Moisture and water intrusion patterns — reading staining, efflorescence, rot, and mold indicators as diagnostic clues to source and duration of a problem
- Electrical safety red flags — identifying ungrounded outlets, double-tapped breakers, improper wiring, and panel deficiencies the way Cauldwell frames them for a lay audience
- Structural indicators — recognizing foundation cracks, settlement patterns, sagging framing, and roof deck issues and understanding when to defer to a specialist
- Report writing discipline — translating field observations into clear, neutral, client-readable language that is specific, defensible, and free of alarmist or dismissive framing
- Inspector liability and scope management — understanding the limits of a visual inspection and how precise language in reports protects the inspector professionally
- After reading Cauldwell's walkthrough of a typical inspection, can you describe the sequence he recommends and explain why that order reduces the chance of overlooking defects?
- How does Cauldwell distinguish between a defect that requires immediate safety action and one that is a routine maintenance recommendation — and how should each be worded differently in a report?
- Given a described moisture stain on a basement wall, what diagnostic questions would Cauldwell's framework prompt you to ask, and what additional evidence would you look for to identify the source?
- What electrical conditions does Cauldwell flag as automatic safety hazards, and what specific report language would you use to communicate each one without overstating or understating the risk?
- How does Cauldwell advise inspectors to handle conditions that are beyond the visual scope of the inspection (e.g., concealed structure, inaccessible crawlspaces) in both field practice and written reports?
- What are the hallmarks of a defensible inspection report according to the principles Cauldwell models — and what common writing mistakes make a report legally or professionally vulnerable?
- Shadow inspection drill: Walk through your own home or a willing neighbor's property using Cauldwell's inspection sequence as a checklist. Document every finding on paper before touching any reporting software — practice raw field observation first.
- Defect photo journal: Photograph 20 real-world conditions (cracks, staining, worn components, etc.) and write a two-sentence report entry for each — one sentence describing what was observed, one sentence stating the recommended action — mirroring Cauldwell's plain-language style.
- Severity sorting exercise: Take 15 findings from your photo journal or from Cauldwell's case examples and sort them into four buckets (safety hazard / major defect / minor defect / maintenance item). Justify each classification in writing.
- Root-cause mapping: For five defects Cauldwell discusses (e.g., a sagging ridge, a rusted water heater flue, a tripped GFCI), draw a simple cause-and-effect chain from the visible symptom back to the probable origin — then note what follow-up specialist referral, if any, is warranted.
- Mock report writing: Using your shadow inspection notes, produce a one-page summary report section (narrative style) for one major system (e.g., electrical panel). Then rewrite it in a bullet/checklist style. Compare which version is clearer, more defensible, and more client-friendly.
- Peer review swap: Exchange your mock report with a study partner or post it in a home inspection forum. Ask reviewers to flag any language that is vague, alarmist, or that could expose an inspector to liability — then revise accordingly using Cauldwell's measured tone as your benchmark.
Next up: Mastering defect recognition and report writing on individual systems through Cauldwell builds the diagnostic vocabulary and professional communication baseline needed to tackle more specialized or code-focused study — such as advanced structural assessment, mechanical systems deep-dives, or business and legal dimensions of the inspection profession.
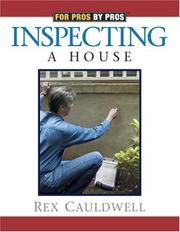
A Taunton Press field guide organized around the actual inspection walk-through sequence, training the reader to spot and prioritize defects the way a working inspector does.
Launching & Growing an Independent Inspection Business
ExpertBuild a sustainable solo or small-firm inspection business — pricing, marketing, legal structure, client relationships, and long-term professional growth.
▸ Study plan for this stage
Pace: 6–8 weeks total: Weeks 1–4 for "The E-Myth Revisited" (~20–25 pages/day, 5 days/week); Weeks 5–8 for "The Referral Engine" (~15–20 pages/day, 5 days/week). Allow 1–2 buffer days per week for reflection and exercise completion.
- The E-Myth Fatal Assumption: the danger of believing that technical skill (home inspection expertise) automatically translates into business ownership success — from Gerber's core thesis in The E-Myth Revisited
- The Three Personas — Technician, Manager, and Entrepreneur — and how an inspector must consciously balance all three roles rather than defaulting entirely to the Technician, per Gerber
- Working ON the business vs. IN the business: Gerber's framework for building systems and processes so the inspection business can run independently of the owner's constant presence
- The Franchise Prototype mindset: designing every inspection workflow, client communication, and back-office process as if it needed to be replicated across 1,000 locations — Gerber's blueprint for scalability and consistency
- The Referral Flywheel: Jantsch's model in The Referral Engine showing that a systematic, intentional referral process — not random word-of-mouth — is the engine of sustainable small-business growth
- Strategic Referral Partners vs. passive referrers: Jantsch's distinction between building a curated network of complementary professionals (real estate agents, mortgage brokers, contractors) who actively send clients vs. hoping satisfied customers mention you
- Content and education as trust currency: Jantsch's argument that inspectors who teach, publish, and share expertise consistently become the obvious referral choice in their market
- Creating a referral-worthy client experience: combining Gerber's systems thinking with Jantsch's relationship principles to design an inspection process so remarkable that clients and partners are compelled to refer it
- According to Gerber in The E-Myth Revisited, what is the 'Fatal Assumption' and how does it specifically threaten a newly independent home inspector who was previously an excellent field technician?
- How would you apply Gerber's Franchise Prototype concept to your inspection business — what are three specific systems (e.g., scheduling, report delivery, follow-up) you would document and standardize today?
- Jantsch argues in The Referral Engine that referrals must be systematized rather than left to chance — what are the key components of a referral system tailored to a home inspection practice?
- Who are the highest-value strategic referral partners for a home inspector according to Jantsch's framework, and what mutual value exchange makes those partnerships sustainable?
- How do Gerber's 'working ON the business' principle and Jantsch's content/education strategy complement each other when planning the long-term growth of an independent inspection firm?
- Using both books, how would you design a new-client onboarding and post-inspection follow-up process that simultaneously delivers a consistent experience (Gerber) and maximizes referral generation (Jantsch)?
- Business Persona Audit (E-Myth): Track your work hours for one full week, tagging each task as Technician (doing inspections), Manager (scheduling, admin, QA), or Entrepreneur (strategy, marketing, growth). Calculate the percentage split and write a one-page plan to shift at least 10% of time toward Entrepreneur activities within 90 days.
- Franchise Prototype Documentation (E-Myth): Choose one recurring process — such as the pre-inspection confirmation email sequence or the report delivery workflow — and write a step-by-step Standard Operating Procedure (SOP) detailed enough that a newly hired assistant could execute it without asking you a single question.
- Referral Partner Mapping (Referral Engine): Create a spreadsheet of 15–20 potential strategic referral partners in your local market (real estate agents, lenders, attorneys, contractors, stagers). For each, note what value you can offer them and draft a one-sentence outreach pitch based on Jantsch's mutual-value principle.
- Referral System Design (Referral Engine): Design a complete, written referral follow-up sequence — including the timing and content of a thank-you touchpoint at 24 hours post-inspection, a check-in at 30 days, and a referral ask at 90 days — using Jantsch's framework as your guide.
- Content Trust-Builder (Referral Engine + E-Myth): Write and publish (blog, LinkedIn, or local neighborhood group) one short educational piece (400–600 words) aimed at home buyers in your market — e.g., 'Top 5 Things Your Home Inspector Wants You to Know Before Closing.' Schedule this as a monthly recurring Entrepreneur task in your calendar.
- Integrated Business Blueprint: Combine both books into a one-page 'Business Operating Model' for your inspection firm. Include: your three core systems (Gerber), your top 5 referral partners and the touchpoint cadence for each (Jantsch), one content channel you will own, and a 12-month revenue target with the client volume needed to hit it.
Next up: Mastering the business-building and referral systems in these two books gives the inspector a stable, growing client base and documented processes — the operational foundation needed to confidently pursue the next stage's focus on advanced technical specializations, certifications, and expanded service offerings that command premium pricing.
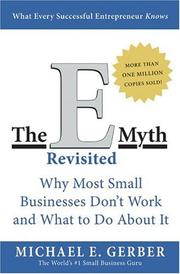
The foundational small-business operations book; teaches inspectors to build systems and processes so the business runs reliably rather than depending entirely on the owner's daily heroics.

Home inspection is almost entirely a referral-driven business; this book provides a practical, low-cost framework for generating consistent word-of-mouth from real estate agents and past clients.
Discussion
Keep reading
Paths that share books, cover the same subject, or open a related topic.