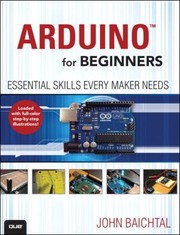
Home electrical work, safely
This four-stage curriculum takes a true beginner from "don't touch that wire" to confidently diagnosing, repairing, and upgrading residential electrical systems — while building a rock-solid instinct for when a licensed electrician is the right call. Each stage layers new vocabulary, hands-on technique, and code awareness onto the last, so no book assumes knowledge the reader hasn't yet earned.
Foundations: Safety, Vocabulary & How It All Works
BeginnerUnderstand how household electricity flows, learn essential safety rules, and build the vocabulary needed to read any electrical book or product label with confidence.
▸ Study plan for this stage
Pace: 6–8 weeks total. Week 1–3: Read "Wiring a House" by Rex Cauldwell (~20–25 pages/day), focusing on the introductory and safety chapters first before moving into circuits and panels. Week 4–8: Read "Electrical Wiring, Residential" by Ray C. Mullin (~15–20 pages/day), which is denser and code-heavy — s
- The flow of electricity: how voltage, current (amperage), and resistance interact (Ohm's Law) and why each matters in a home circuit
- The role of the service entrance, main panel, and subpanels: how power enters a house and is distributed through branch circuits
- Grounding vs. neutral: what each conductor does, why they are kept separate, and what happens when they are confused
- Overcurrent protection: how fuses and circuit breakers detect faults and protect wiring from heat damage
- The National Electrical Code (NEC) as introduced in Mullin's book: what it is, why it exists, and how local amendments work
- Wire sizing and ampacity: how to read AWG gauge numbers, match wire size to breaker size, and understand why undersized wire is a fire hazard
- Essential vocabulary from both books: hot, neutral, ground, GFCI, AFCI, service drop, load center, conductor, raceway, box fill
- Core safety rules: lockout/tagout discipline, always verifying power is OFF with a tester, working with one hand when possible, and respecting 240 V circuits
- After reading Cauldwell's panel chapter, can you trace the path electricity takes from the utility pole all the way to a single outlet in a bedroom — naming every component it passes through?
- What is the difference between a grounding conductor and a neutral conductor, and why does Cauldwell stress never bonding them together downstream of the main panel?
- Using the wire-sizing guidance in both Cauldwell and Mullin, what AWG wire and breaker size would a standard 20-amp kitchen small-appliance circuit require, and why?
- What does the NEC (as introduced by Mullin) actually regulate, and what must a homeowner or electrician do if their local jurisdiction has adopted amendments to it?
- How do GFCI and AFCI breakers/receptacles differ in what they protect against, and in which locations does Mullin indicate each type is required?
- What are the non-negotiable safety steps — as described by Cauldwell — that must be completed before touching any wire or device in an existing circuit?
- Sketch a one-line diagram of your own home's electrical system from memory: mark the service entrance, main panel, and at least three branch circuits. Then walk your home and verify it against reality, labeling breaker sizes and wire gauges where visible.
- Using a non-contact voltage tester (inexpensive, ~$15), practice the Cauldwell safety routine on every outlet in one room: announce the circuit, flip the breaker, verify dead at the outlet, then restore power. Do this until the sequence is automatic.
- Create a personal flashcard deck (physical or digital) of every bolded or italicized term in the first three chapters of Mullin's book. Quiz yourself until you can define each term without hesitation and use it correctly in a sentence.
- Pull the cover off your main panel (do NOT touch any wires — observe only) and identify: the service entrance conductors, the main breaker, at least one 240 V double-pole breaker, and the neutral/ground bus bars. Compare what you see to Cauldwell's panel diagrams.
- Read a product label on a household appliance (microwave, hair dryer, power tool) and decode every electrical specification listed (watts, volts, amps, Hz, UL listing). Use Ohm's Law (W = V × A) to verify the wattage claim.
- Download the NEC table of contents (or use Mullin's appendix) and map which NEC articles correspond to topics covered in each chapter of Mullin you have read so far — this builds the habit of cross-referencing code that you will need in later stages.
Next up: ">Mastering the vocabulary, safety discipline, and system-level mental model built in this stage gives you the precise language and conceptual framework needed to tackle hands-on wiring methods — rough-in, device installation, and circuit design — without being slowed down by unfamiliar terms or unsafe habits.
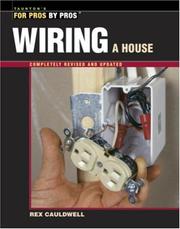
A master electrician's plain-language walkthrough of how a residential electrical system is structured from the utility line to the outlet — the single best orientation book for a beginner before touching anything.
The standard textbook used in trade-school electrical programs; read it here for its clear diagrams and definitions that cement the vocabulary introduced by Cauldwell.
First Repairs: Common Fixes Done Right
BeginnerSafely replace outlets, switches, fixtures, and circuit breakers, and diagnose the most frequent household electrical problems without guesswork.
▸ Study plan for this stage
Pace: 8–10 weeks total. Weeks 1–6: "Black & Decker The Complete Photo Guide to Wiring" — read ~20–25 pages/day, leaning on the full-color photos and step-by-step sequences; pause at each project chapter to study the diagrams before moving on. Weeks 7–10: "Troubleshooting and Repairing Major Appliances" by
- Electrical safety fundamentals: lockout/tagout, testing for live voltage with a non-contact tester, and always working with the breaker OFF — as drilled throughout the Black & Decker guide's safety chapters
- Anatomy of a home circuit: how hot, neutral, and ground conductors work together, how circuits are protected at the panel, and how to read a basic wiring diagram (Black & Decker, early chapters)
- Outlet and switch replacement: identifying wire connections (backstab vs. screw terminal), proper pigtailing, GFCI vs. standard outlets, single-pole vs. 3-way switches — covered in detail with photo sequences in Black & Decker
- Fixture replacement: ceiling lights, ceiling fans, and under-cabinet lighting — understanding mounting brackets, grounding metal boxes, and matching fixture load to circuit capacity (Black & Decker project chapters)
- Circuit breaker basics: distinguishing a tripped breaker from a failed one, safely replacing a single-pole breaker, and understanding the difference between standard, AFCI, and GFCI breakers (Black & Decker panel chapter)
- Systematic fault diagnosis: Kleinert's diagnostic flowchart methodology — symptom → probable cause → test → repair — applied first to appliance circuits but transferable to any household electrical problem
- Reading appliance wiring diagrams and schematics: how to trace a circuit on paper before touching a wire, a core skill developed throughout Kleinert's appliance chapters
- Common household electrical problems decoded: dead outlets, flickering lights, frequently tripping breakers, and failed appliance components — root-cause thinking drawn from both books
- After shutting off the correct breaker, how do you confirm a circuit is truly de-energized before touching any wires — and what tool does the Black & Decker guide recommend for this verification?
- What is the functional difference between a GFCI outlet and a GFCI breaker, and in what locations does the Black & Decker guide say each is required by code?
- Walk through the steps to replace a standard single-pole switch with a 3-way switch: what additional wire (the traveler) is involved, and how do you identify which terminal it connects to?
- Using Kleinert's diagnostic approach, a washing machine fills with water but the drum does not spin — what is the logical sequence of components to test, and what instrument readings would confirm a failed lid switch versus a failed motor?
- A breaker trips repeatedly under normal load. According to the Black & Decker panel chapter, what are the three most likely causes, and which one requires calling a licensed electrician rather than a DIY fix?
- How do you safely replace a single-pole circuit breaker: what is the correct sequence for removing the old breaker and seating the new one, and what does the Black & Decker guide say about working near the always-live service lugs?
- Dead-outlet drill: find a non-GFCI outlet in your home that is dead or suspect, use a plug-in outlet tester (as shown in Black & Decker) to confirm, then trace back to the panel and the nearest upstream GFCI to identify the true cause before touching a single wire
- Outlet swap: with the breaker locked off and voltage confirmed absent, replace one standard outlet with a GFCI outlet following the Black & Decker photo sequence exactly — photograph each wire connection before disconnecting it, then verify proper operation with an outlet tester afterward
- Switch replacement practice: replace a working single-pole switch with a new one of the same type, documenting the original wire positions with your phone camera, then restore power and test — repeat with a dimmer switch if your fixture is compatible
- Breaker panel mapping: with the panel cover on and the main breaker OFF, draw a hand-labeled map of every circuit in your panel, noting breaker amperage, type (standard/AFCI/GFCI), and what it feeds — compare your map to the Black & Decker panel-reading section
- Appliance diagnostic simulation using Kleinert: pick a common appliance (dishwasher, dryer, or refrigerator) that is working normally, locate its wiring diagram (from the manufacturer or Kleinert's appendix), and trace the full circuit on paper from plug to each component — then use a multimeter to measure resistance across the heating element or motor winding and compare to spec
- Multimeter fundamentals workout: using a cheap lamp or extension cord as a safe test subject, practice measuring continuity, AC voltage (with power ON and a helper present for safety), and resistance across known-good components until the meter feels instinctive — this directly supports both books' diagnostic procedures
Next up: Mastering these common fixes and Kleinert's fault-diagnosis mindset gives the reader a reliable safety habit and a repeatable test-before-touch workflow, which are the exact prerequisites for tackling more complex projects — running new circuits, adding subpanels, or rewiring rooms — in the next stage of the curriculum.

A heavily illustrated, step-by-step repair manual covering the exact tasks a homeowner faces most — outlets, switches, ceiling fans, GFCI — building directly on the theory from Stage 1.
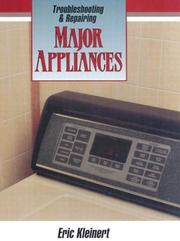
Extends repair skills to the appliances fed by the circuits you now understand, teaching systematic diagnosis that sharpens your overall electrical problem-solving instinct.
Going Deeper: Code, Panels & Smarter Upgrades
IntermediateRead and apply the National Electrical Code to real projects, work safely around the service panel, and plan permitted upgrades like adding circuits or upgrading to AFCI/GFCI protection.
▸ Study plan for this stage
Pace: 6–8 weeks, ~20–25 pages/day (the NEC is dense regulatory text — read in focused 30–45 minute sessions, revisiting each article at least twice before moving on)
- NEC article structure: how to navigate definitions (Article 100), scope (Article 90), and the hierarchy of rules vs. exceptions
- Wiring methods and materials: approved cable types (NM, BX/AC, conduit), their permitted uses, and installation requirements as defined in NEC Chapters 3–4
- Overcurrent protection principles: sizing fuses and breakers to conductors, the relationship between wire gauge (AWG) and ampacity tables in NEC Article 310
- Grounding and bonding: the distinction between equipment grounding conductors and grounding electrode systems (Article 250), and why both are required
- Branch circuit requirements: the NEC's rules for general-purpose, small-appliance, and individual circuits — load calculations and outlet spacing (Articles 210 & 220)
- Service panel anatomy and service entrance rules: service conductor sizing, main disconnect requirements, and panel directory discipline (Article 230)
- GFCI and AFCI protection requirements: which locations mandate each type of protection and the code basis for upgrading older circuits (Articles 210.8 and 210.12)
- Permit and inspection logic: understanding how the NEC is adopted locally, what an AHJ (Authority Having Jurisdiction) enforces, and how to prepare work for inspection
- Given a 20-amp branch circuit, what is the minimum wire gauge required by the NEC ampacity tables, and what exceptions might allow a smaller conductor?
- According to Article 210.8 of the NEC, which indoor locations require GFCI protection, and what is the code rationale behind each location?
- How does the NEC define the difference between 'grounding' and 'bonding,' and why does Article 250 treat them as separate but related requirements?
- Walk through the NEC's load calculation process for a residential service: what loads are included, how are demand factors applied, and how is the minimum service size determined?
- What does the NEC say about the maximum number of circuits in a panelboard, and what labeling/directory requirements apply to a service panel?
- How would you use the NEC to justify adding a new 15-amp lighting circuit to a finished basement — what articles govern the wiring method, outlet spacing, overcurrent protection, and box fill?
- NEC Scavenger Hunt: Choose five common household scenarios (bathroom outlet, kitchen counter, garage receptacle, basement lighting, outdoor outlet) and locate the exact NEC article and section that governs each one. Write a one-paragraph 'code justification' for each.
- Ampacity & Breaker Sizing Drill: Using the conductor ampacity tables in NEC Article 310, calculate the correct wire gauge and breaker size for five hypothetical circuits (e.g., a 240V dryer, a 20A kitchen small-appliance circuit, a 15A bedroom circuit). Check your answers against the overcurrent protection rules in Article 240.
- Panel Audit: With the main breaker OFF and following all lockout/tagout safety steps, open your home's service panel. Identify every breaker, verify the panel directory matches actual circuits, note any double-tapped breakers or unlabeled slots, and cross-reference what you find against NEC Article 230 and panel manufacturer specs.
- Box Fill Calculation: Select an existing outlet or switch box in your home, count all conductors, devices, and clamps inside, and perform a box fill calculation per NEC Article 314 to determine whether the box is code-compliant. Document your work on paper as if preparing it for an inspector.
- Simulated Permit Application: Research your local AHJ's (city or county building department) residential electrical permit requirements. Draft a written scope of work for a hypothetical project — adding one 20-amp kitchen circuit — including a simple single-line diagram, materials list, and the specific NEC articles that authorize each element of the work.
- GFCI/AFCI Upgrade Plan: Walk through your home and identify every location that would require GFCI or AFCI protection under NEC Articles 210.8 and 210.12. Compare this to what is actually installed, document the gaps, and price out the materials needed to bring the home up to code.
Next up: Mastering the NEC's rules and panel fundamentals gives the reader the code literacy and safety discipline needed to confidently tackle more complex projects — such as subpanel installation, whole-home rewiring, or low-voltage and smart-home integration — that form the focus of advanced stages.
The authoritative legal and safety standard for all U.S. residential wiring — reading the relevant residential chapters (Articles 100, 200s, 300s, 210, 220, 230, 250) is what separates a careful DIYer from one who passes inspection.
Bridges code language back to practical projects — panel work, new circuits, outdoor wiring — with permit and inspection checklists that reinforce exactly when to call a pro.
Mastery: Low-Voltage, Smart Home & Professional Judgment
ExpertIntegrate low-voltage systems (data, audio, security), smart-home devices, and whole-home energy thinking into your skill set, and develop the professional judgment to scope any project and know its limits.
▸ Study plan for this stage
Pace: 6–8 weeks total: Weeks 1–3 cover "Smart Home Hacks" (~20–25 pages/day, reading tips/hacks in clusters by topic); Weeks 4–8 cover "Audel House Wiring" (~25–30 pages/day, treating each chapter as a self-contained reference unit to revisit as needed).
- Low-voltage system categories: structured wiring for data (Ethernet/coax), audio distribution, and security/alarm circuits, and how they coexist with line-voltage wiring without interference
- Smart-home device ecosystems, automation controllers, and protocols (X10, Z-Wave, Zigbee, Wi-Fi bridges) as covered in Smart Home Hacks — understanding which layer of the home each operates on
- Whole-home energy thinking: load calculation fundamentals, service entrance sizing, panel capacity, and identifying circuits that are candidates for upgrade or automation
- Professional scoping judgment: reading Audel House Wiring to distinguish DIY-permissible work from work requiring a licensed electrician, permit pull, or inspection
- National Electrical Code (NEC) article awareness as presented in Audel — knowing which articles govern residential wiring, low-voltage wiring, and communication circuits (Articles 800, 810, 820)
- Conduit, cable types, and raceway selection for both line-voltage and low-voltage runs in finished and unfinished spaces
- Grounding and bonding principles extended to data/coax/antenna systems to prevent ground loops and protect equipment
- Troubleshooting methodology at the professional level: systematic fault isolation across both line-voltage and low-voltage systems in an integrated smart home
- After reading Smart Home Hacks, can you explain the difference between a power-line carrier protocol (like X10) and a dedicated RF mesh protocol (like Z-Wave), and describe a scenario where each is the better choice?
- What are the NEC requirements (as outlined in Audel House Wiring) that separate Class 1, Class 2, and Class 3 low-voltage wiring, and why does that classification matter for a home security or audio run?
- Using the load-calculation guidance in Audel House Wiring, how would you determine whether an existing 200-amp service panel has sufficient capacity before adding a bank of smart-home devices and an EV charger?
- How do you physically route and separate low-voltage data/audio cables from line-voltage circuits to comply with code and prevent interference, based on the practices described in Audel House Wiring?
- From Smart Home Hacks, what are the key integration points between a home-automation controller and legacy line-voltage devices (lights, HVAC), and what electrical safety considerations arise at those integration points?
- At what point — based on the combined guidance of both books — should a competent advanced DIYer stop work and call a licensed electrician, and what are the legal/insurance implications of crossing that line?
- Structured wiring audit: Walk your home and document every low-voltage run (coax, Cat5/6, speaker wire, alarm wire). Note where they cross or run parallel to line-voltage cables, and produce a simple sketch identifying any NEC-violation-risk areas based on Audel's separation guidelines.
- Smart-home protocol lab: Using Smart Home Hacks as a guide, set up or reconfigure at least two devices on different protocols (e.g., one Wi-Fi smart switch and one Z-Wave sensor). Document the pairing process, any interference issues, and how the controller unifies them.
- Panel capacity worksheet: Using the load-calculation method from Audel House Wiring, fill out a complete load calculation for your own home (or a sample floor plan). Determine the minimum service size required and identify any circuits that are overloaded or undersized.
- Low-voltage termination practice: Run a short home-run of Cat6 and terminate both ends with keystone jacks or an RJ-45 patch panel, then test with a cable tester. Repeat with RG-6 coax using compression fittings. Focus on the mechanical and code-compliant practices described in Audel.
- Project scoping exercise: Choose a realistic upgrade project (e.g., adding a whole-home audio system with smart control). Write a one-page scope document that lists every task, labels each as DIY-permissible or licensed-electrician-required, identifies required permits, and estimates materials — drawing explicitly on both books.
- Grounding/bonding check: Inspect the grounding of your coax, telephone, and antenna entry points. Using Audel House Wiring's guidance on NEC Articles 800/810/820, verify or correct the bonding connections to the home's grounding electrode system and document your findings.
Next up: Mastering the integration of low-voltage, smart-home, and whole-home energy thinking — and developing the judgment to scope any project's limits — equips the reader with the complete mental model of a home's electrical ecosystem, forming the professional foundation needed to tackle advanced specialty work, code-compliance deep dives, or even pursue formal licensure study.

Covers the low-voltage and networked-device layer that sits on top of line-voltage wiring — essential as modern homes blend both, and a natural next frontier once panels and circuits are mastered.
A comprehensive professional reference that consolidates everything — service entrance to final trim-out — giving the advanced reader a single authoritative volume to consult on edge cases and confirm when a licensed electrician truly must take over.
Discussion
Keep reading
Paths that share books, cover the same subject, or open a related topic.