Pop-Up Books and Paper Engineering: The Best Books to Read, in Order
Paper engineering is a small field with an unusually well-defined literature: a handful of designers have written almost all of it, and their books divide cleanly into mechanism catalogues, technique manuals and the wider discipline of folding that pop-ups sit inside. This path starts with books you can build from on a kitchen table, moves to the design books that teach you to invent a mechanism rather than copy one, then widens into folding and paper as materials in their own right, and ends with production questions and a finished master's book to take apart. Expect a lot of Paul Jackson and Duncan Birmingham; that is not narrow curation, it is what the field has published.
Build Before You Design
BeginnerMake working pop-ups from given patterns, and learn the names of the basic mechanisms — v-fold, parallel fold, layer, pull-tab — by cutting them rather than reading about them.
▸ Study plan for this stage
Pace: Three to four weeks, measured in models rather than pages. This is a making stage: budget two or three evenings a week at a cutting mat and aim to complete around twenty mechanisms. Jackson's The Pop-Up Book (160 pages) supplies the projects — work forward from the single-slit forms rather than jump
- The four mechanism families that everything else is built from: the v-fold, the parallel fold, the layer or platform, and the pull-tab. Almost every spread you will ever admire is a combination of these with the joins hidden.
- A pop-up is driven entirely by the spine. The mechanism does not have its own power source — the energy comes from the reader opening the book, and every design decision is about transmitting that one motion.
- Score, crease and cut are three different operations with three different tools, and confusing them is the commonest reason a beginner's model looks soft. A scored fold is crisp because the fibres were compressed before they were bent.
- Grain direction determines whether a fold is clean or ragged. Paper folds well along the grain and cracks across it, which is why the same design succeeds and fails on the same stock depending on how it was cut.
- The mechanism must lie flat when the book is closed. That constraint — not aesthetics — is what generates most of the geometry, and it is the reason pop-up design is an engineering problem rather than a decorative one.
- Carter's book is a dictionary, not a tutorial. Its value is that each mechanism is demonstrated as a working model on the page where it is described, so you can open, close and reverse-engineer it in your hands.
- Building before designing is a deliberate sequencing choice: the design books in the next stage are written for readers who already know what a v-fold feels like at ninety degrees, and they are close to unreadable without that.
- What is the geometric difference between a v-fold and a parallel fold, and what does each one do that the other cannot?
- Why must every mechanism collapse flat, and what happens to a design that violates that constraint at ninety, one hundred and thirty five, and one hundred and eighty degrees?
- How does the position of a fold line relative to the spine change the height and angle of what pops up?
- Which of the mechanisms you have built are driven directly by the spine and which are driven by a secondary mechanism riding on another? Identify one of each.
- What differences did you notice between folding with and against the grain, and how would you test an unfamiliar stock before committing a design to it?
- Build every project in the first third of Jackson's book in order, without skipping ahead to the ones that look impressive. The dull early ones are the vocabulary.
- Make each of the four core mechanisms three times: once as the book specifies, once at half scale, once at double. Note which ones stop working and why.
- Take one Carter spread, work out the mechanism, then rebuild it from scratch on plain card without looking. Repeat until you can do it from memory.
- Keep a mechanism notebook: one page per mechanism, with a small working model tipped in, the fold geometry drawn, and a note on what it is good for. This becomes the reference you actually use later.
- Deliberately build one mechanism that fails to lie flat, then diagnose why. Understanding the failure is faster than avoiding it.
Next up: With the mechanisms in your hands and their names in your head, the design books stop being abstract and become what they are — instructions for inventing new mechanisms rather than copying old ones.
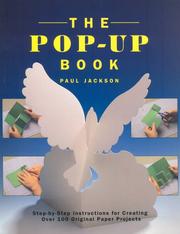
The gentlest entry: around a hundred projects with templates, arranged from a single slit upward. Start here because you need the mechanisms in your hands before any of the design books make sense.

A short, cheerful make-it book aimed at absolute beginners and children, useful second as a fast confidence pass through the same core mechanisms with far less text than Jackson's.

The mechanism dictionary, and itself a pop-up book — every mechanism is demonstrated as a working model on the page it is described on. Read third, once you have built enough to recognise what you are looking at; from here it becomes a lifelong reference rather than a read-through.
Designing Your Own Mechanisms
IntermediateMove from following a template to working out the geometry yourself: where a fold line must fall, how a mechanism behaves as the spread closes, and how to build a dummy before committing to a design.
▸ Study plan for this stage
Pace: Six to eight weeks, and this is the longest stage for good reason. Jackson's Cut and Fold Techniques for Pop-Up Designs is drill work: two weeks of short, frequent sessions rather than long ones, because accuracy degrades with fatigue. Birmingham's Pop-Up Design and Paper Mechanics (48 pages) is sho
- The transition this stage exists for: from following a template to computing where a fold line must fall. Once you can predict the behaviour of a mechanism from its geometry, you can vary it deliberately instead of by trial.
- The ninety-degree and one-hundred-and-eighty-degree cases behave differently, and a mechanism that works beautifully in one can fail in the other. Decide early which opening angle your book assumes.
- Accuracy is a skill, not a temperament. Jackson's drills exist because a millimetre of error at the score compounds through every subsequent fold, and the difference between a wobbly pop-up and a crisp one is almost entirely cutting and scoring discipline.
- Birmingham groups mechanisms by how they work rather than by what they depict, which is the organising principle that makes variation possible. Learn the group, then the members.
- Hiner is strongest on card mechanisms specifically — the single-spread greeting-card form, where there is no book block to hide structure in. The two authors describe the same folds differently and one of the two explanations usually clicks; that redundancy is why both are here.
- The dummy is the step almost everyone skips and the one Barton is most patient about. A rough model in cheap stock answers questions about angle, clearance and collapse that no drawing will.
- Clearance and collision are the practical constraints of a multi-mechanism spread: two elements can each work perfectly and foul each other as the page closes.
- Birmingham's Pop Up! A Manual of Paper Mechanisms is the earlier edition of the same work and appears in this catalogue as a separate record. Buy one, not both.
- Given a v-fold of a particular width and angle, how do you predict how far it will project when the spread is fully open? Work it from the geometry, not from a table.
- What changes about a mechanism's design when the book is intended to open to ninety degrees rather than flat, and which mechanism families survive both?
- Where do Birmingham and Hiner explain the same mechanism differently, and which explanation do you find you actually reason with?
- What questions does building a dummy answer that a drawing cannot? Name three you have hit yourself.
- How would you diagnose a spread where two mechanisms work individually and jam when combined?
- What is your own cutting and scoring error in practice, measured rather than guessed, and where does it show up in a finished model?
- Work through Jackson's cut-and-fold drills to the point where you can score a straight line to within half a millimetre repeatably. Measure it; do not assume it.
- Take one Birmingham mechanism and produce five deliberate variations — taller, wider, off-centre, rotated, doubled — and record what each change does to the motion.
- Build a full dummy of a four-spread book in cheap paper before making anything final. Photograph each spread at closed, half and full opening.
- Design one original mechanism that is not in any of the three books, document its geometry on a single sheet, and hand the sheet to someone else to build. If they can build it, the documentation is good.
- Combine three mechanisms on one spread and resolve every collision. Note each fix and whether it was geometric or a change of layer order.
Next up: Pop-ups are one branch of a much older craft of folded paper, and the next stage supplies the wider fold vocabulary that designers, packaging engineers and origami practitioners have in common.

The bridge book. Same author as your first, but organised as drills on cutting and folding accuracy rather than as projects, which is exactly the skill that separates a wobbly pop-up from a crisp one.

The standard design manual: mechanisms grouped by how they work, with the geometry explained so you can vary them. This is a re-issue of Birmingham's earlier Pop Up! A Manual of Paper Mechanisms, which resolves as a separate record here — buy one, not both.
Older and slimmer than Birmingham, and still the clearest short treatment of card mechanisms specifically. Read it alongside Birmingham as a second explanation of the same ideas — the two authors describe the same folds differently, and one of the two usually clicks.
Barton's series teaches one mechanism family at a time with pre-scored models you assemble, and is the most patient book here on the step almost everyone skips: making a proper dummy. Placed last in this stage as the workbook you return to while designing.
Folding as a Discipline
IntermediateUnderstand pop-ups as one branch of a much larger craft of folded paper, and pick up the vocabulary that designers, packaging engineers and origami practitioners share.
▸ Study plan for this stage
Pace: Five to six weeks for roughly 650 pages, plus folding time. Jackson's Folding Techniques for Designers (224 pages) is the centre of the stage — read it over two to three weeks and fold every family it introduces, since it is a book about sheets rather than about projects. Complete Pleats (304 pages)
- Folding is a general discipline of turning a flat sheet into a form, and pop-ups are one application of it. Jackson writes for designers of any material, which is why the book changes how you look at paper rather than teaching you tricks.
- The mountain and valley notation, and crease patterns as a design representation. Once a structure can be written as a crease pattern it can be varied, scaled and communicated.
- Pleats produce the most striking large-scale effects available to a paper engineer and are the least forgiving to execute, because error accumulates across every repeat rather than staying local.
- Curved folds behave differently from straight ones: the sheet is forced into a developable surface and the structure carries load in a way flat-folded work does not.
- Origamic architecture imposes a hard constraint — one sheet, cut and folded, no glue and no added parts. Working inside that restriction is the fastest available training in fold planning, because there is no way to patch a mistake with an extra piece.
- Constraint as a design method is the transferable lesson of this stage. Every restriction Chatani accepts generates structure, which is the same reason the lie-flat rule generates pop-up geometry.
- Chatani's discipline is adjacent to pop-ups rather than inside them, and reading it that way keeps you from treating it as a rival technique — it is a different set of rules producing overlapping results.
- What does a crease pattern let you do that a step-by-step folding sequence does not?
- Why does error accumulate in a pleated structure, and what practical measures reduce it — marking method, scoring order, stock choice, sheet size?
- How does a curved fold change what the sheet can do structurally compared with a straight fold of the same length?
- What does the no-glue, single-sheet constraint of origamic architecture force you to plan that a glued pop-up lets you defer?
- Which techniques from Jackson's folding survey have direct pop-up applications, and which are genuinely for other materials?
- Fold one example from every family Jackson introduces and keep them in a labelled box. This physical library is more useful later than any set of notes.
- Execute one pleated structure with at least sixteen repeats. Measure the cumulative error at the last repeat and then do it again with a different marking method.
- Build three Chatani-style cards from a single sheet each, with no glue and no additions, working up from a simple stepped form.
- Take one of your own pop-up mechanisms and re-express it as a crease pattern, then hand the pattern to yourself a week later and fold from it cold.
- Try one curved fold structure and note where the paper resists you. That resistance is the structural behaviour Jackson is describing.
Next up: You can now design and fold; the last stage deals with everything that only appears once the design has to become a physical object that survives paper choice, production and handling.
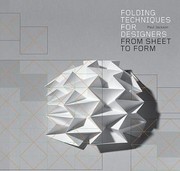
Jackson's systematic survey of folding for designers of any material, and the book that will most change how you look at a sheet of paper. Comes after the mechanism books because it assumes you already care about fold geometry. Its record here carries the fuller published title including From Sheet to Form.

A deep dive into pleated structures — the family that produces the most striking large-scale pop-up effects and the hardest ones to score accurately. Read only after Folding Techniques, which sets up its terminology.

Chatani invented the cut-and-fold architectural card made from a single sheet, a discipline adjacent to pop-ups with its own constraint: no glue, no added parts. Included because working within that restriction is the fastest way to improve your fold planning.
Paper, Production and a Finished Book
IntermediateDeal with the questions that only arise once a design has to become an object: what paper to use, how a structure survives being manufactured, and what a professionally engineered book actually looks like inside.
▸ Study plan for this stage
Pace: Four to six weeks, and it is the most open-ended stage. Jackson's Structural Packaging (128 pages) is a fortnight of designing containers from first principles rather than reading. Hiebert's Playing with Paper is project-led and can run alongside. The Papermaker's Companion (224 pages) is optional f
- Structural packaging and pop-up engineering are the same problem in different clothing: a flat sheet that must become a rigid three-dimensional object, hold that shape under handling, and often return to flat.
- Designing a net from first principles rather than copying one is the skill Jackson's packaging book teaches, and it transfers directly to any pop-up element that has to be self-supporting rather than spine-driven.
- Paper properties that decide whether a correct design works: weight, calliper, grain direction, opacity and surface. Hiebert widens this vocabulary to include translucency and lighting, which is what usually separates a technically sound piece that still looks flat from one that does not.
- Making a sheet by hand teaches grain and fibre faster than any amount of reading about them, which is the argument for keeping The Papermaker's Companion on the path rather than dropping it. It is optional; the concept is not.
- Production imposes constraints no maquette reveals: how a mechanism is die-cut, how it is glued at speed, whether it survives being flattened in a carton, and what a print run does to a design that depends on a half-millimetre tolerance.
- Commercially produced pop-ups by Sabuda and Reinhart are the benchmark for what the medium can do at scale, and they are legible: every spread is an assembly of the mechanisms catalogued in Carter's dictionary.
- Reverse-engineering a finished professional book is the closing exercise of the whole path because it tests every earlier stage at once — mechanism recognition, geometry, fold discipline, paper choice and production thinking.
- Encyclopedia Prehistorica Dinosaurs is not a manual and should not be treated as one. Its role here is as the final examination.
- What does designing a folded container from first principles teach that copying an existing net does not?
- Which paper properties would you specify to a printer for a pop-up spread, and what would go wrong if each one were substituted?
- Take one of your own designs and say what would have to change for it to be die-cut and machine-glued at volume.
- Open one Sabuda spread slowly and name every mechanism in it. Which ones are from Carter's dictionary unchanged, and which are combinations?
- Where in a professionally produced book can you see production compromises — simplified joins, generous tolerances, mechanisms chosen for robustness over ambition?
- After the whole path, what is the actual limiting factor on your own work: mechanism knowledge, cutting accuracy, paper choice, or design ambition?
- Design and build three packaging forms from first principles using Jackson's method, then adapt one of them into a self-supporting pop-up element.
- Test the same mechanism in four different paper stocks and record how each one performs on crispness, spring and durability over a hundred openings.
- If you can, make a small batch of paper by hand and fold it. Note where the grain runs and how it differs from a machine-made sheet.
- Dismantle one Sabuda spread on paper: draw the exploded structure, name each mechanism, and mark the glue tabs. Do not cut the book.
- Produce one finished original piece from concept to bound object — dummy, mechanism design, paper selection, final build — and write a short post-mortem of what you would change.
Next up: That closes the path: mechanisms built by hand, geometry you can compute, folding as a wider discipline, and a professionally engineered book you can now take apart in your head — which is the point at which you stop reading about paper engineering and start doing it.

Teaches you to design a folded container from first principles rather than copy a net. The discipline transfers directly to pop-ups: both are about a flat sheet that has to become a rigid three-dimensional thing and then survive handling.

Widens the material vocabulary — translucency, weight, grain direction, lighting — with projects that push paper beyond the mechanism. Read it when your engineering is sound and your pieces still look flat.
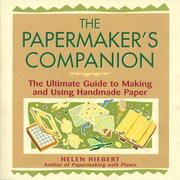
A practical guide to making paper yourself. Optional for most readers, and placed here rather than dropped because grain and fibre are the two properties that most often ruin an otherwise correct fold, and nothing teaches them faster than making a sheet.

Not a manual at all — a commercially produced Sabuda and Reinhart pop-up, included as the final exercise. Open it slowly, work out which mechanism from Carter's dictionary each spread is using, and you will have read the whole path back to front.

