Model Railroading: The Best Books to Build Your Layout
This curriculum takes a beginner from zero knowledge of model railroading all the way to confidently planning, building, wiring, and detailing realistic multi-scale layouts. Each stage builds on the last — starting with the hobby's big picture and core vocabulary, moving into track planning and benchwork, then tackling wiring and operations, and finally mastering advanced scenery and realistic detailing.
Track Planning: Designing Your Layout
BeginnerLearn how to design a realistic, operationally interesting track plan for HO, N, or O scale — from a small shelf layout to a full basement railroad.
▸ Study plan for this stage
Pace: 4–5 weeks, ~20–25 pages/day (Armstrong's book is dense with diagrams; allow time to study track plans and sketches carefully)
- Operational realism: designing layouts that support realistic train operations and switching moves, not just running trains in circles
- Space planning fundamentals: how to fit a functional track plan into available space (shelf, room, basement) while maintaining operational interest
- Prototype inspiration: studying real railroad operations and geography to inform your own design decisions
- Track geometry essentials: proper grades, curves, turnouts, and clearances to ensure reliable operation and realistic appearance
- Staging and interchange: how to design hidden staging areas and interchange points that support continuous operation and realistic car movements
- Switching operations: creating industries, spurs, and yard layouts that generate meaningful switching tasks for operators
- Benchwork and infrastructure planning: translating a track plan into a buildable structure with proper support and access
- What is the difference between a 'run-around' layout and an operationally interesting layout, and why does Armstrong emphasize operational realism?
- How do you determine the minimum radius and grade for your scale and available space, and what are the consequences of ignoring these limits?
- What role does staging play in a track plan, and how should you design hidden staging areas to support continuous operation?
- How do you design a switching layout or industrial spur that creates realistic operating tasks without requiring excessive space?
- What prototype research should you do before drawing your track plan, and how does it influence your design decisions?
- What are the key measurements and clearances you must account for when translating a track plan into physical benchwork?
- Sketch three different track plan concepts for your available space (e.g., 4×8 shelf, 10×12 room, or basement), each emphasizing a different operational theme (mainline running, switching operations, or branch line)
- Study at least two prototype railroad maps or operational diagrams from Armstrong's examples; identify the key operational features and explain how they could be adapted to your scale and space
- Draw a detailed track plan for a small switching layout (e.g., a single industry with 3–5 sidings) including turnouts, clearances, and grades; calculate minimum radius and maximum grade for your chosen scale
- Create a staging area design for your chosen track plan, showing how hidden tracks will connect to the visible layout and how cars will be sorted and dispatched
- Build a simple test track section (2–3 feet) using your planned curve radius and grade; run your locomotives and cars to verify smooth operation and identify any geometry problems
- Photograph or sketch three real railroad scenes (yards, industries, branch lines) and annotate them with the track planning principles from Armstrong; explain how each principle appears in the prototype
Next up: Mastering track planning principles prepares you to move into detailed construction and benchwork design, where you'll translate your finalized track plan into a sturdy, accessible structure that supports reliable operation and future expansion.
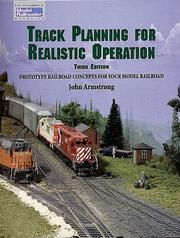
The canonical classic on track planning; Armstrong's concept of 'givens and druthers' is the industry-standard framework for designing any layout, and this book is universally cited as required reading before drawing a single track.
Benchwork & Construction: Building the Layout
IntermediateBuild a solid, well-engineered layout foundation — including benchwork, roadbed, and track laying — for HO, N, and O scale railroads.
▸ Study plan for this stage
Pace: 4–5 weeks, ~20–25 pages/day with hands-on construction work interspersed
- Benchwork design principles: choosing layout size, shape, and height for ergonomic access and operational realism
- Structural engineering fundamentals: load-bearing capacity, material selection (wood types, fasteners, bracing), and stability requirements for different scales
- Roadbed construction methods: cork, foam, and hybrid approaches for proper track bed preparation and vibration isolation
- Track laying techniques: alignment, gauge accuracy, rail fastening systems, and ensuring smooth operation across joints and transitions
- Scale-specific considerations: how HO, N, and O scale layouts differ in benchwork requirements, spacing, and construction details
- Moisture and environmental control: protecting wooden benchwork from warping, swelling, and long-term degradation in various climates
- What are the key factors to consider when determining the optimal height and dimensions of your benchwork, and how do these differ across HO, N, and O scales?
- Explain the structural requirements for benchwork that will support your layout's weight, and what materials and bracing strategies does Westcott recommend?
- What are the main roadbed options discussed, and what are the advantages and disadvantages of each for different layout scenarios?
- How do you ensure proper track alignment and gauge accuracy during laying, and what common mistakes should you avoid?
- What environmental and maintenance considerations are essential for preserving your benchwork over time?
- How does the benchwork and roadbed foundation you build in this stage enable the scenic and operational work that follows?
- Design a benchwork plan for a hypothetical layout in your preferred scale (HO, N, or O), including dimensions, height, and bracing strategy, with sketches or CAD drawings
- Build a small test section of benchwork (2–3 feet) using Westcott's methods, including proper fastening and bracing, and evaluate its stability under load
- Construct and compare two different roadbed samples (e.g., cork vs. foam) on scrap wood, then test them for vibration isolation and durability
- Lay 10–15 feet of track on your test benchwork section, checking gauge, alignment, and smoothness at joints; document any adjustments needed
- Create a materials list and cost estimate for a full-size benchwork and roadbed project in your chosen scale, referencing Westcott's specifications
- Document your benchwork construction with photos and notes as you build, identifying potential improvements for future layouts
Next up: This stage establishes the rock-solid physical foundation—level, stable, and properly prepared—that allows you to move forward with track geometry, wiring, and scenic work, knowing your layout will operate reliably and look professionally finished.

The definitive Kalmbach guide to building the physical structure of a layout; covers open-grid, L-girder, and foam construction methods that apply across all scales.
Wiring & DCC: Powering the Railroad
IntermediateUnderstand and implement complete layout wiring — from basic DC block wiring to full Digital Command Control (DCC) with sound decoders — safely and reliably.
▸ Study plan for this stage
Pace: 4–5 weeks, ~25–30 pages/day with hands-on wiring sessions 2–3 times per week
- DC block wiring fundamentals: how to isolate track sections and prevent short circuits using gaps and insulators
- Power supply selection and sizing: matching amp capacity to layout complexity and locomotive requirements
- Feeder wire gauge, routing, and connection best practices to minimize voltage drop and ensure reliable power delivery
- DCC system architecture: command station, booster, throttle, and decoder integration
- Sound decoder installation and programming: CV (Configuration Variable) basics and decoder addressing
- Troubleshooting wiring faults: identifying shorts, testing continuity, and diagnosing decoder communication issues
- Safety practices: proper use of circuit protection, fusing, and preventing electrical hazards on the layout
- What is the purpose of track gaps and insulators in DC block wiring, and how do they prevent shorts?
- How do you calculate the correct power supply amperage for your layout, and what happens if you undersized it?
- What gauge feeder wire should you use for different distances from the power supply, and why does gauge matter?
- Explain the role of the command station, booster, and throttle in a DCC system—how do they communicate?
- What are Configuration Variables (CVs), and how do you program a decoder's address and basic sound settings?
- Describe a systematic troubleshooting approach for a locomotive that doesn't respond on the DCC bus
- What safety precautions should you take when wiring a layout, and what role does circuit protection play?
- Build a simple DC block wiring test section: create two isolated track blocks with proper gaps and insulators, then verify isolation with a multimeter
- Calculate power supply requirements for a sample layout (given locomotive count, decoder types, and accessory loads), then select an appropriate supply
- Install feeder wires on a section of track: practice proper gauge selection, solder connections, and routing to minimize voltage drop
- Wire a complete DCC command station, booster, and throttle system on a test bench; verify all connections before powering on
- Install a sound decoder in a locomotive: address it, program basic CVs (address, volume, motor control), and test operation on the layout
- Conduct a troubleshooting exercise: introduce a deliberate short or decoder fault, then use a multimeter and DCC diagnostics to locate and fix it
- Create a wiring diagram for your layout showing all blocks, feeders, power supplies, and safety devices; have it reviewed for safety compliance
Next up: Mastering reliable wiring and DCC control establishes the electrical foundation needed to add advanced features—such as automated block detection, turnout control systems, and layout automation—in the next stage.

A clear, modern, step-by-step guide to layout wiring that starts with fundamentals (bus wires, feeders, gaps) before moving into DCC — the logical first wiring read for any scale.
Advanced Realism: Scenery, Operations & Detailing
ExpertAchieve museum-quality realism in scenery, structures, and operations — making the layout look and run like a convincing miniature railroad world.
▸ Study plan for this stage
Pace: 8–10 weeks, ~40–50 pages/day, with 2–3 days per week dedicated to hands-on layout work and experimentation
- Prototype observation and research as the foundation for accurate modeling decisions
- Realistic scenery construction using proper landform techniques, vegetation, and weathering to create depth and authenticity
- Structure placement and detailing that reflects actual railroad operations and geography
- Operational realism: scheduling, dispatching, and train movements that mimic prototype railroad behavior
- Integration of scenery, structures, and operations into a cohesive miniature world that tells a convincing story
- Weathering and aging techniques to make both structures and landscape appear lived-in and realistic
- Track planning and hidden staging areas that support realistic operational scenarios
- How do you use prototype observation to inform decisions about scenery, structure placement, and operations on your layout?
- What are the key steps in building realistic landforms and scenery, and how do you avoid common mistakes like unrealistic slopes or vegetation placement?
- How should structures be positioned and detailed to reflect the actual operations and geography of a prototype railroad?
- What does realistic model railroad operation look like, and how do you design a schedule and dispatch system that mimics prototype behavior?
- How do weathering, aging, and detailing techniques contribute to the overall realism and believability of your layout?
- How do scenery, structures, and operations work together to create an integrated, convincing miniature railroad world?
- Visit or research a prototype railroad (or study detailed photographs and videos) and document how geography, structures, and train movements interact; use these observations to sketch a revised plan for your layout
- Build a sample scenery section (2–3 square feet) using landform techniques from McClanahan's book, including proper grading, drainage, and vegetation placement; photograph the progression
- Select 3–5 structures on your layout and research their prototype counterparts; reposition and detail them to match realistic operational placement (e.g., near sidings, water sources, or industry)
- Design and implement a simple operating session schedule for your layout, including train consists, arrival/departure times, and switching moves based on Koester's operational principles
- Weather and age 2–3 structures and a section of scenery using techniques from the books; compare before-and-after photos to evaluate the impact on realism
- Create a detailed operational scenario (e.g., a day in the life of a local freight train) that incorporates scenery, structure placement, and realistic train movements; run the session and document what works and what needs adjustment
Next up: This stage transforms your layout from a collection of components into a cohesive, believable miniature railroad world; the next stage will likely focus on either advanced electronics and automation, specialized operations (like prototype-specific modeling), or publishing and sharing your finished layout.
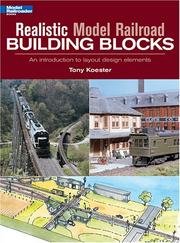
Koester synthesizes decades of Model Railroader editorial experience into a holistic approach to realism — covering prototype research, scene composition, and operations together, tying all previous stages into a coherent philosophy.

A deep-dive into advanced scenic techniques — plaster landforms, realistic water, and fine detailing — that elevates a functional layout into a convincing landscape at any scale.
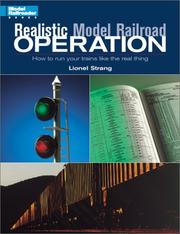
The final capstone: Koester teaches car-forwarding systems, timetable operation, and prototype-based switching logic so your finished layout runs with the drama and purpose of a real railroad.
Discussion
Keep reading
Paths that share books, cover the same subject, or open a related topic.