Best Books on Encaustic Painting, in Order
This curriculum is built for an intermediate painter who already understands basic art materials and wants to go deep into encaustic — from mastering the wax-and-damar medium itself, through layering, fusing, and mixed-media techniques, to building a professional and safe hot-wax studio practice. Each stage builds directly on the last: medium literacy first, then technical mastery, then creative expansion, and finally studio professionalism.
Medium Mastery: Wax, Damar & the Encaustic Foundation
IntermediateUnderstand how encaustic medium is composed, prepared, and handled — including the role of damar resin, working temperatures, and the logic of fusing — so every later technique rests on solid material knowledge.
▸ Study plan for this stage
Pace: 4–5 weeks, ~25–30 pages/day, with 2–3 days per week dedicated to hands-on practice and material testing
- Encaustic medium composition: the role of beeswax, damar resin, and oil in creating a stable, workable mixture
- Why damar resin is essential: its function in raising the melting point of beeswax and preventing bloom and cracking
- Working temperatures and heat management: optimal ranges for different tools and techniques, and the risks of overheating
- The chemistry of fusing: how heat bonds layers of wax together at the molecular level and why incomplete fusion causes adhesion failure
- Preparing and testing encaustic medium: mixing ratios, consistency, and how to assess quality before painting
- Safety protocols: ventilation, fume management, and proper handling of heated wax to prevent burns and inhalation hazards
- How substrate preparation and priming affect wax adhesion and longevity of the finished work
- The relationship between medium consistency and application method: how different ratios suit different tools and surfaces
- What is the purpose of damar resin in encaustic medium, and what problems occur if you use beeswax alone?
- Explain the ideal working temperature range for encaustic painting and why exceeding it compromises both safety and the finished work.
- How does the fusing process work at a molecular level, and what visual or tactile signs indicate that layers are properly fused?
- What are the correct mixing ratios for a basic encaustic medium, and how do you test whether your mixture has the right consistency?
- Describe the ventilation and safety measures required when working with heated encaustic medium, and why each is necessary.
- How does substrate preparation influence wax adhesion, and what surfaces are suitable for encaustic painting?
- Prepare three batches of encaustic medium using different damar-to-beeswax ratios (e.g., 1:10, 1:15, 1:20) and document how each behaves at working temperature—note viscosity, flow, and ease of application.
- Create a temperature test chart: heat your medium to different temperatures (160°C, 180°C, 200°C, 220°C) and record how it flows, smokes, and fuses to test substrates; identify your personal safe working range.
- Practice fusing on scrap materials: apply multiple thin layers of medium to a primed panel, fusing each layer with a heat gun or torch, and examine cross-sections or test adhesion to understand what proper fusion feels and looks like.
- Set up and test your ventilation system: measure air flow, identify dead zones, and practice working while monitoring for fumes; adjust your setup based on observations.
- Prepare five different substrates (wood panel, paper, fabric, ceramic tile, metal) with appropriate primers, then apply encaustic medium to each and assess adhesion and finish quality.
- Mix a batch of encaustic medium from raw materials (beeswax, damar resin, and optional oils), document the process step-by-step, and compare your result to a commercial medium in terms of consistency, working properties, and cost.
Next up: Mastering the composition and behavior of encaustic medium—its chemistry, temperature sensitivity, and fusing logic—provides the technical foundation necessary to confidently explore specific application techniques (brushwork, scraping, collage, and mixed media) in the next stage.
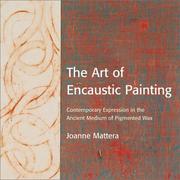
The canonical encaustic reference. Mattera covers wax-and-damar ratios, pigment loading, heat tools, and fusing with authority; reading this first establishes the shared vocabulary and material logic the entire field uses.

A focused primer on medium preparation and basic mark-making that reinforces Mattera's chemistry with clear step-by-step process, consolidating your understanding of the medium before moving into layering.
Layering, Fusing & Surface Building
IntermediateDevelop confident control of multi-layer fusing, incising, scraping, and building relief surfaces — the core technical vocabulary of serious encaustic work.
▸ Study plan for this stage
Pace: 4–5 weeks, ~20–25 pages/day, with 2–3 dedicated studio practice days per week
- Multi-layer fusing: building depth and complexity through controlled heat application between wax layers
- Incising and scraping techniques: carving into fused layers to reveal underlying colors and create linear detail
- Relief surface building: adding dimension and texture through strategic wax buildup and removal
- Heat control and tool mastery: understanding how different temperatures and tools affect layer adhesion and surface finish
- Color mixing and layering strategy: planning color sequences to achieve desired optical and tactile effects
- Surface integrity: maintaining cohesion across multiple layers while preserving individual layer identity
- Compositional use of texture: deploying incising, scraping, and relief as expressive elements, not just technical steps
- How do you determine the optimal heat level when fusing multiple wax layers without causing them to merge into an undifferentiated mass?
- What is the difference between incising and scraping, and when would you use each technique to achieve different visual or tactile outcomes?
- How can you plan a color sequence across 4–5 layers so that incising and scraping reveal meaningful color relationships?
- What are the main risks when building relief surfaces, and how do you prevent delamination or structural failure?
- How do the techniques in Seggebruch's *Encaustic Workshop* and Womack's *Embracing Encaustic* differ in their approach to multi-layer composition?
- How do you use incising, scraping, and relief building as compositional tools rather than just surface finishes?
- Complete a 5-layer color study: apply five distinct colors in sequence, fusing between each layer, then document how each layer reads when exposed through incising
- Practice incising and scraping on a single test panel: use different tools (stylus, scraper, wire brush) at different depths to understand mark-making vocabulary
- Build a relief surface study: create a small panel where you add wax strategically to build dimensional forms, then fuse and finish the surface
- Execute a guided composition from Seggebruch's *Encaustic Workshop*: follow one complete multi-layer project from the book, documenting fusing temperatures and timing
- Create a Womack-inspired abstract study: use incising and scraping as primary compositional elements, planning the design before you begin layering
- Experiment with heat-tool variation: create three identical base layers, then fuse them using three different heat sources (torch, hot plate, heat gun) and compare adhesion and surface quality
Next up: Mastery of layering, fusing, and surface building establishes the technical foundation needed to explore mixed media integration, sculptural encaustic forms, and advanced finishing techniques in the next stage.

Seggebruch's workshop-style format walks through layering sequences and fusing strategies with exceptional visual clarity, making it the ideal bridge from medium knowledge to hands-on surface building.
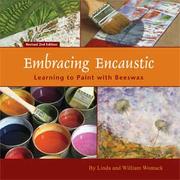
Focuses on building luminous depth through repeated thin layers and controlled fusing passes; read after Seggebruch to refine timing and temperature intuition developed in the previous stage.
Image Transfer, Collage & Mixed Media
IntermediateIntegrate photography, printmaking, tissue, and found materials into encaustic surfaces using transfer and collage methods — expanding the medium into contemporary mixed-media practice.
▸ Study plan for this stage
Pace: 4–5 weeks, ~20–25 pages/day with weekly studio practice sessions
- Image transfer fundamentals: solvent, heat, and pressure methods for moving photographic and printed imagery onto encaustic surfaces
- Collage composition strategies: layering, balance, and visual hierarchy when combining photographs, tissue, and found materials with wax
- Surface preparation and adhesion: how to prime encaustic grounds and ensure transferred images and collaged elements bond durably with hot wax
- Mixed-media material compatibility: understanding which papers, inks, adhesives, and found objects work safely and effectively with encaustic heat
- Conceptual integration: using altered imagery to create narrative, meaning, and contemporary artistic voice rather than purely decorative effects
- Archival and permanence considerations: selecting fade-resistant papers, lightfast inks, and stable materials for long-term artwork preservation
- What are the three primary image transfer methods Michel describes, and how do solvent, heat, and pressure differ in their application to encaustic work?
- How do you prepare an encaustic surface to receive transferred imagery or collaged materials, and why is surface preparation critical to adhesion?
- Which papers, inks, and found materials are safe to use with encaustic heat, and what materials should be avoided due to toxicity or degradation?
- How can you use collage and image transfer to develop a cohesive artistic concept or narrative across a series of encaustic works?
- What archival standards should guide your choice of photographs, tissue, and adhesives to ensure your finished pieces remain stable over time?
- How does layering transferred images and collaged elements create visual depth and complexity in encaustic mixed-media composition?
- Complete at least three small transfer studies (4×6 inches) using different methods (solvent, heat-gun, and pressure) on prepared encaustic panels to compare results and build muscle memory
- Create a mixed-media collage sketch using photocopies, tissue, and found paper before translating it into an encaustic piece to plan composition and material placement
- Conduct a material compatibility test: transfer images and adhere various papers, fabrics, and found objects to wax samples, then heat-test them to identify safe and unsafe combinations
- Execute a 12×12-inch encaustic panel that integrates at least two transferred photographic images with collaged tissue and one found material element, focusing on visual unity and narrative
- Photograph or source 5–10 images related to a personal theme or concept, then experiment with altering them (cropping, layering, fragmenting) before incorporating them into an encaustic work
- Document your process with photographs and notes for each exercise, recording transfer method, materials used, temperature, adhesion quality, and any unexpected results to build a personal reference library
Next up: This stage equips you with the technical and conceptual skills to layer imagery and materials into encaustic surfaces, preparing you to advance into more complex multi-panel installations, three-dimensional encaustic forms, or site-specific mixed-media projects that demand sophisticated material integration and conceptual depth.
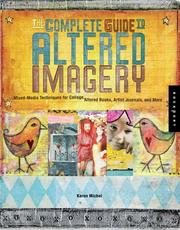
Broadens the transfer and collage toolkit beyond encaustic-specific texts, covering solvent transfers, gel-medium lifts, and layered image techniques that translate directly and powerfully into hot-wax surfaces.
Safe Studio Practice & Professional Hot-Wax Environment
ExpertDesign and operate a safe, well-ventilated encaustic studio — understanding fume management, fire safety, electrical load, tool maintenance, and sustainable long-term practice.
▸ Study plan for this stage
Pace: 4–5 weeks, ~25–30 pages/day. Week 1–2: "Making Art Safely" (prioritize encaustic-specific chapters); Week 3–5: "The Artist's Complete Health and Safety Guide" (focus on ventilation, toxicology, and studio design sections).
- Hazard identification in encaustic work: wax fumes, solvents, pigments, and heat-related risks
- Ventilation system design and effectiveness: local exhaust, dilution ventilation, and air quality monitoring
- Fire safety protocols specific to hot-wax studios: equipment placement, flammable material storage, and emergency procedures
- Electrical load calculation and safe power distribution for multiple heating tools operating simultaneously
- Personal protective equipment (PPE) selection and proper use for encaustic artists
- Tool maintenance schedules and protocols to prevent equipment failure and chemical exposure
- Sustainable studio practices: waste management, solvent recycling, and long-term health preservation
- Regulatory compliance: OSHA standards, building codes, and artist workspace requirements
- What are the primary health hazards associated with encaustic painting, and how do they differ by temperature and application method?
- How do you design a ventilation system that effectively captures wax fumes at the source, and what metrics indicate adequate air exchange?
- What fire safety measures are non-negotiable in a hot-wax studio, and how should you respond to a wax fire?
- How do you calculate electrical load for an encaustic studio, and what are the risks of overloading circuits?
- What PPE is required for different encaustic tasks, and why is each component necessary?
- How should you maintain and inspect encaustic tools to prevent both equipment failure and chemical exposure?
- What waste management and solvent recycling practices reduce environmental impact while maintaining studio safety?
- What building codes and OSHA regulations apply to artist studios, and how do you ensure compliance?
- Create a detailed studio layout diagram for your own (or hypothetical) encaustic workspace, marking hazard zones, ventilation placement, fire extinguishers, electrical outlets, and emergency exits.
- Conduct a hazard assessment of an existing encaustic studio (yours or a peer's) using checklists from both books; document findings and propose three specific improvements.
- Design a ventilation system specification sheet for a 200-square-foot encaustic studio, including ductwork, fan CFM requirements, and filter types based on Rossol's guidelines.
- Calculate the total electrical load for a typical encaustic setup (hot plate, heat gun, light table, ventilation fan, etc.) and verify it against your studio's circuit capacity.
- Develop a monthly tool maintenance checklist for encaustic equipment (hot plates, styluses, brushes, ventilation filters) with inspection criteria and replacement timelines.
- Write a one-page emergency response protocol for your studio covering wax fires, chemical spills, and electrical hazards, then review it with a studio partner or mentor.
- Research and document the waste disposal and solvent recycling options available in your region; create a sustainable waste management plan for your studio.
- Photograph or video-document your current studio setup, identify three safety violations or gaps, and implement corrections while documenting the process.
Next up: This stage equips you with the foundational knowledge and practical systems to operate a safe, compliant studio—preparing you to advance to specialized techniques, material experimentation, or teaching others, all of which depend on a secure, well-managed workspace as their prerequisite.
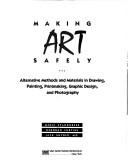
The most thorough artist-safety reference available; its chapters on heated wax, ventilation requirements, and fire hazards map directly onto encaustic studio planning and are essential reading before scaling up a hot-wax practice.
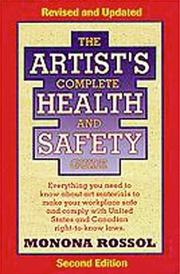
Rossol's authoritative guide covers OSHA standards, fume toxicology, and studio ventilation design in depth — the definitive resource for anyone building a permanent, professionally safe encaustic workspace.
Discussion
Keep reading
Paths that share books, cover the same subject, or open a related topic.