Chair Caning and Seat Weaving: The Best Books to Read, in Order
Seat weaving is a small craft with a surprisingly good literature, most of it out of print but easy to find secondhand. The path starts with the two general manuals that cover every seat type, moves to the older pattern books that teach the traditional hand-caning sequence properly, then covers the materials themselves — cane, rush, splint, willow — before turning to the chair the seat sits in, because most of the work in a reseating job is not weaving. The last stage is optional and is a different craft: making the chair rather than the seat.
The Manuals to Own
BeginnerGet one complete reference covering hand caning through drilled holes, pressed cane and spline, rush, splint and Danish cord.
▸ Study plan for this stage
Pace: 2–3 weeks of reading and one seat woven. The Caner's Handbook is only 143 pages but it is dense working instruction with step-by-step photographs, and it covers every seat material — read it once through, then again with a chair in front of you. The Complete Guide to Chair Caning is the more heavily
- The five distinct seat types you will meet — hand caning through drilled holes, pressed cane in a spline groove, rush, splint and Danish cord — and how to identify which one a chair has from the frame alone
- The six-step hand-caning sequence, and why steps are named rather than numbered in some books
- Pressed cane and spline as an entirely different job from hand caning, despite looking identical when finished
- Cane sizes and how the hole diameter and spacing on the frame determine which size you must use
- Soaking, tension and the fact that cane shrinks as it dries — the single most common beginner error
- Danish cord and its L-nails as the mid-century seat type that turns up constantly in secondhand furniture
- What a reseating job costs in time, so you can judge whether a chair is worth doing
- Given an unfamiliar chair, how do you tell hand-caned from pressed-cane before touching it?
- What determines the cane size for a given frame, and what happens if you go one size out?
- What are the six steps of hand caning in order, and what does each one do structurally?
- How wet should cane be when you work it, and how do Miller and Widess each describe the test?
- Which of the five seat types is the fastest to do, and which is most likely to defeat a first attempt?
- Weave one complete hand-caned seat on a small chair or a practice frame, following The Caner's Handbook step by step with The Complete Guide to Chair Caning open at the same step for the hand positions. Do not stop partway; cane behaves differently once it has dried.
- Before you start, measure your chair's hole diameter and spacing and use the handbook's table to select the cane size. Write the numbers down — you will use the same procedure on every chair after this.
- Find three chairs — in your house, in a junk shop, anywhere — and identify the seat type of each from the frame. Check yourself against the identification material in both books.
- Photograph your finished seat and compare the pattern against the handbook's photograph of the same step. Note every place your tension differs; that comparison is more useful than any verbal correction.
Next up: One seat woven from a modern manual is enough to make the older pattern books legible — they assume you have already held the cane.
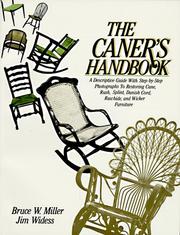
The standard text, written with Jim Widess, and the only book here that treats every seat material at a working level with step-by-step photographs. If you buy one book, buy this one.
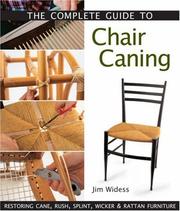
Widess's own later manual, more colour photography and a gentler ramp than the handbook he co-wrote. Read it second as the illustrated companion — where the handbook is terse, this one shows the hand position.
The Traditional Patterns
BeginnerLearn the six-step hand-caning sequence and the classic rush and splint patterns from the older books that lay them out one row at a time.
▸ Study plan for this stage
Pace: 3–4 weeks and two more seats. L. Day Perry's Seat Weaving is a 98-page pre-war manual-training text and reads in an evening, but its value is in working from it row by row; the language is dated and the instruction is not. Marion Burr Sober's Chair Seat Weaving for Antique Chairs is a 63-page patter
- The classic hand-caning pattern set out one row at a time, which is how Perry teaches and how it is easiest to learn
- Rush seating: the four-corner sequence, the twist, and stuffing the pockets as you go
- Splint seating and the over-under weave, and why hickory and ash behave differently
- Trapezoidal and irregular frames — adding short rows, and why a non-rectangular seat is the point at which most people get stuck
- Natural rush versus fibre rush, and what each is appropriate to
- Out-of-square frames, enlarged holes and worn rails as normal working conditions rather than exceptions
- How dated instructional prose is read: the vocabulary changes, the procedure does not
- How do you handle a seat frame that is wider at the front than the back, and what do Perry and Sober each recommend?
- What is the correct sequence for a rush seat, and where in it does the stuffing go?
- When a chair's cane holes have been enlarged by a previous repair, what are your options according to Sterns?
- What is the practical difference between natural and fibre rush for a seat you intend to sit on daily?
- Where does Perry's terminology differ from the modern manuals, and does anything in his method actually differ?
- Weave a rush seat following Perry, keeping the book open at the row you are on. Rush is the technique that most rewards working strictly to a written sequence.
- Weave a splint seat on a second chair. Compare the tension you needed against what you used for cane — they are not the same, and the difference is best learned by hand.
- Find or make a non-rectangular frame and work it with Sober's booklet beside Perry. Write down the point at which the two books diverge and which you followed.
- Read Sterns's problem sections and make a list of the specific faults he describes — out of square, enlarged holes, split rails — then inspect the chairs you have already woven for any of them.
Next up: You have now used cane, rush and splint without knowing much about any of them as materials, which is exactly what the next stage supplies.

A pre-war manual-training text and still one of the clearest accounts of splint, rush and cane pattern work in print. It assumes nothing and diagrams everything; the language is dated and the instruction is not.

A short, tightly focused pattern booklet aimed squarely at period chairs. Use it alongside Perry when you meet a seat frame that is not a simple rectangle.

Covers cane, rush, splint and Danish cord with a repair-shop sensibility — what to do when the frame is out of square or the old holes are enlarged. Read it once you have woven one seat and started meeting problems.
The Materials
IntermediateUnderstand what you are weaving with — rattan cane, natural and fibre rush, hickory splint, willow — and how to prepare and judge it.
▸ Study plan for this stage
Pace: 3 weeks of reading with continuous handling. Hilary Burns's Cane, Rush and Willow is 144 pages and is the materials book the seat manuals assume you already own — read it first and read it properly. Dorothy Wright's The Complete Book of Baskets and Basketry is 200 pages of basketry rather than chair
- Rattan and where chair cane comes from: the outer skin of the rattan palm, and how it is stripped and graded
- Cane grades and widths — carriage, superfine, fine, medium, common — and what each is for
- Natural rush as a harvested plant with a season and a curing process, against manufactured fibre rush
- Willow: varieties, buff, brown and white, and how soaking and mellowing change how it works
- Wet and dry behaviour: every one of these materials shrinks, and designing tension around that is the craft
- Basketry technique as the parent skill of rush and willow seat work — Burns and Wright teach the handling that the seat manuals skip
- Judging material quality on arrival, and what to reject
- How is chair cane produced, and what physically distinguishes one grade from the next?
- What is mellowing, and why does willow need it when cane does not in the same way?
- How would you tell good natural rush from poor at the point of buying it?
- Which basketry techniques in Wright transfer directly to a rush or willow seat, and which do not?
- Where does Burns disagree with, or simply know more than, the seat-weaving manuals about a material?
- Buy small quantities of two different cane grades and weave a few inches of each on a practice frame. The difference in handling is immediate and is not conveyed by any written description.
- Soak and work a length of willow following Burns's instructions on mellowing, and record how long it stayed workable. That number is specific to your material and your conditions.
- Work one basketry base from Wright — not a chair seat, an actual base — to feel rush or willow handling without a frame constraining it. Then return to a rush seat and note what improved.
- Go through The Basketmaker's Art and mark every pattern or weave you recognise from a seat you have woven. The overlap is larger than the seat books admit.
Next up: Materials and weaving are now covered — the next stage is a different craft, and it is where most of the hours in a real reseating job actually go.
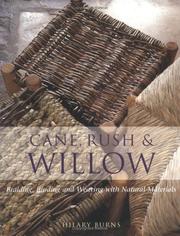
Burns is a working basketmaker and this is the materials book the seat-weaving manuals assume you already have: where the stuff comes from, how it is graded, how it behaves wet and dry.

A basketry text rather than a chair book, included deliberately: rush and willow seat work is basketry technique applied to a frame, and Wright teaches the underlying handling better than any seat manual.

A survey of contemporary basketmakers and their methods. Read it last in this stage and treat it as reference and inspiration rather than instruction — it is where the pattern vocabulary comes from.
The Chair Under the Seat
IntermediateStrip and reseat an old chair without wrecking the frame or the finish — which is most of the actual job.
▸ Study plan for this stage
Pace: 4 weeks, and note that this stage is furniture restoration rather than seat weaving — an adjacent craft that a reseating job forces on you. The Furniture Bible is 304 pages on finishes, glues, joint repair and when to leave a surface alone; read the finishing chapters before you strip anything. Rest
- Stripping an old seat without damaging the frame, the holes or the finish — the first and most destructive step in any reseating job
- Hide glue, its reversibility, and why that matters on an antique frame
- Regluing loose joints, replacing a rail, and dealing with worm and split — the repairs that must happen before a seat can be woven
- Finish identification and the decision about whether to refinish at all, which is largely a judgement about value
- Dating a piece and judging how much intervention is appropriate — the collector's question rather than the craftsman's
- Wicker and rattan furniture as the source of much caning work, and what distinguishes its repair
- Restoration as a separate craft from seat weaving, with its own literature and its own conventions about reversibility
- What is the correct order of operations when a chair needs both a structural repair and a new seat?
- How do you identify an existing finish, and what does each type imply about how you can clean or repair it?
- When is refinishing a piece the wrong decision, and on what grounds does Pourny argue it?
- How is a loose post-and-rung joint reglued properly, and what does Lyons say about the ones that cannot be?
- What does Saunders's book let you determine about a wicker piece before you decide how far to go with it?
- Strip an old seat off a chair using the method in The Furniture Bible, keeping the holes and the rails intact. Do this before any repair — the state of the frame is only visible once the seat is off.
- Reglue one loose joint following Lyons, using hide glue, and record the clamping arrangement you used. Then weave that chair's seat and see whether the frame held under tension.
- Take one chair through the whole sequence in order — assess, strip, repair, finish decision, weave — and time each phase. The proportion spent not weaving is the point of this stage.
- Date one wicker or rattan piece using Saunders and write down what that dating implies about how aggressively you should repair it.
Next up: The last stage crosses fully out of seat work into chairmaking, which is optional and is a different craft again — take it only if repairing frames has made you want to build them.

The best general restoration book for someone who came to it through one craft: finishes, glues, joint repair, and when to leave a surface alone. Read the finishing chapters before you strip anything.

More technical and more focused on structural repair — regluing loose joints, replacing a rail, dealing with worm and split. This is the book for the frame that will not hold a seat until it is fixed.

The collector's and restorer's reference for wicker and rattan furniture, which is where a lot of caning work actually arrives from. Useful for dating a piece and deciding how much intervention is appropriate.
Optional: Making the Chair Too
IntermediateCross into chairmaking proper, if the seat work has made you want to build the frame as well.
▸ Study plan for this stage
Pace: 6–8 weeks if you take it up, and it is optional and genuinely a separate craft from seat weaving. Make a Chair from a Tree is 129 pages and deliberately minimal — the shortest route from a log to a post-and-rung chair with a woven seat, and readable in a week. The Chairmaker's Workshop is 304 pages,
- Green woodworking: riving a log along the grain rather than sawing across it, and why the resulting parts are stronger
- The post-and-rung chair as the simplest complete chair, and the one that takes a woven seat by design
- Drying and shrinkage as the joint mechanism — a dry tenon into a green mortise, which is the trick the whole method turns on
- Steam bending and the jigs it needs, which is where Langsner goes beyond Alexander
- Windsor construction as a different structural logic from post-and-rung
- Why a chair is comfortable — angles, seat height, back rake — which is Jeff Miller's subject and nobody else's here
- Green-wood and machine-shop approaches as two legitimate routes to the same object
- How does the dry-tenon-into-green-mortise joint work, and why does it not need glue?
- What tools does Alexander's method actually require, and which of them can be improvised?
- What does Langsner add that Alexander deliberately leaves out, and why did Alexander leave it out?
- What dimensions make a chair comfortable, and how does Jeff Miller argue for them?
- Having woven seats for a stage and a half, what does building the frame change about how you weave one?
- Build one post-and-rung chair following Make a Chair from a Tree, from riving the log to the final assembly. Then weave its seat with the technique you learned in stage two — that is the whole path in one object.
- Compare Alexander's joint method with Langsner's on the same joint and write down where they differ and why. Langsner is explicit about being the fuller treatment; find the places he thinks Alexander was too spare.
- Measure the seat height, depth and back rake of the most comfortable chair you own, then check those numbers against Jeff Miller's recommendations. Explain any disagreement.
- Steam bend one part following Langsner, even if it is a test piece, and record the spring-back. It is the number that governs every jig you will ever make.
Next up: Seat weaving, the traditional patterns, the materials, the restoration work under the seat and the chairmaking beyond it — the whole craft and the two adjacent ones it opens onto.

The green-woodworking classic and the shortest route from a log to a post-and-rung chair with a woven seat. It is a different craft from seat weaving, and this is the book that makes the crossing easy.
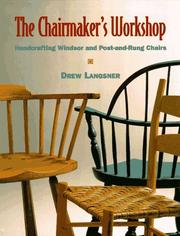
The fuller treatment — Windsor and post-and-rung chairs, steam bending, the jigs. Read it after Alexander, whose book is deliberately minimal.

A machine-shop rather than green-wood approach, and the best of the three on why a chair is comfortable. Last because the design chapters only pay off once you have built one.
Discussion
Keep reading
Paths that share books, cover the same subject, or open a related topic.