Banjo: beginner method books in the right learning order
This curriculum takes a complete beginner from their very first chord shapes and picks all the way through solid bluegrass and/or clawhammer technique. Each stage builds directly on the last — you'll establish right-hand mechanics and basic rolls before tackling songs, then deepen your repertoire and style, and finally push into advanced musicianship and improvisation.
Foundations: First Picks & Chords
BeginnerTune the banjo, hold proper right-hand position, execute the basic rolls (forward, backward, alternating thumb), form essential open chords (G, C, D7, Em), and play your first simple songs cleanly.
▸ Study plan for this stage
Pace: 4–5 weeks, ~15–20 pages/day plus 30–45 minutes of daily practice
- Proper banjo tuning (open G tuning) and how to use a tuner or tune by ear
- Right-hand position, finger placement, and pick/fingernail technique for clean tone
- The three fundamental rolls: forward roll, backward roll, and alternating thumb roll—their mechanics and when to use each
- Formation and fingering of open chords (G, C, D7, Em) on the fretboard
- Synchronizing right-hand rolls with left-hand chord changes
- Reading tablature and understanding the banjo's unique 5-string layout
- Building muscle memory through repetition and developing consistent rhythm
- Playing simple, recognizable songs cleanly and at a steady tempo
- How do you tune a banjo to open G tuning, and why is this the standard starting tuning?
- What is the correct right-hand position, and how should your fingers be angled to produce a clear tone?
- Describe the forward roll, backward roll, and alternating thumb roll—what finger sequence does each use?
- How do you form and finger the G, C, D7, and Em chords on the banjo?
- How do you smoothly transition between chords while maintaining a steady roll pattern?
- What does banjo tablature show, and how does it differ from standard musical notation?
- Tune your banjo to open G using a tuner, then practice tuning by ear until you can do it without an electronic aid
- Practice the forward roll on a single string (e.g., the 3rd string) for 5 minutes daily until it feels smooth and even
- Practice the backward roll on the same string, focusing on consistent finger motion and even tone
- Practice the alternating thumb roll, paying attention to the thumb's rhythm and the flow between fingers
- Form each of the four chords (G, C, D7, Em) slowly, checking finger placement against the book's diagrams, then practice switching between them
- Play a single roll pattern (e.g., forward roll) while holding a G chord, then switch to a C chord without breaking the roll
- Work through the tablature exercises in Scruggs' book, reading and playing each line slowly before increasing tempo
- Learn and play one simple song from the book (e.g., a folk tune or basic melody) at a comfortable tempo, focusing on clean chord changes
Next up: Mastering these foundational rolls, chords, and tuning techniques equips you to tackle more complex roll patterns, syncopation, and repertoire in the next stage, where you'll begin learning Scruggs-style picking and intermediate songs.
Bill Evans is one of the most respected banjo educators in the world; this book gives a clear, friendly on-ramp covering tuning, right-hand position, and the core rolls that underpin everything else in bluegrass banjo.
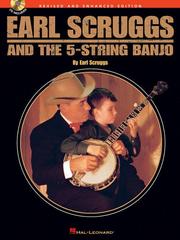
Written by the inventor of three-finger bluegrass style himself, this foundational method introduces rolls, licks, and songs straight from the source — reading it early plants the authentic vocabulary you will spend years expanding.
Building Technique: Rolls, Slides & Hammer-Ons
BeginnerInternalize all major roll patterns, add left-hand embellishments (slides, hammer-ons, pull-offs), play a repertoire of standard bluegrass tunes at a steady tempo, and begin reading banjo tablature fluently.
▸ Study plan for this stage
Pace: 6–8 weeks, ~15–20 pages/day with daily practice sessions (30–45 minutes of technique work)
- Forward roll, backward roll, and alternating roll patterns as the foundation for bluegrass banjo technique
- Left-hand embellishments: slides, hammer-ons, and pull-offs and how to execute them cleanly with proper timing
- Reading and interpreting banjo tablature fluently, including notation for rolls and left-hand techniques
- Applying roll patterns and embellishments to standard bluegrass repertoire (e.g., 'Cripple Creek,' 'Foggy Mountain Breakdown')
- Maintaining steady tempo and rhythmic precision while executing complex right-hand patterns
- Understanding the relationship between right-hand rolls and left-hand melody to create authentic bluegrass phrasing
- Transitioning between different roll patterns smoothly within a single tune
- Building finger strength and independence in both hands through deliberate, repetitive practice
- What are the three primary roll patterns in bluegrass banjo, and how do they differ in right-hand finger sequence?
- How do you execute a hammer-on and pull-off cleanly, and what role do they play in bluegrass ornamentation?
- How do you read banjo tablature, and what do the symbols for slides, hammer-ons, and pull-offs look like?
- Can you play a complete bluegrass tune (such as one from Wernick's book) at a steady tempo using rolls and left-hand embellishments?
- How do you choose which roll pattern to use in a given musical phrase, and when should you add slides or hammer-ons?
- What is the relationship between the right-hand roll pattern and the left-hand melody notes in creating authentic bluegrass phrasing?
- Practice the forward roll, backward roll, and alternating roll in isolation for 10 minutes daily, focusing on even tone and consistent tempo (start at 60 bpm, increase by 5 bpm weekly)
- Work through Wernick's tablature exercises, reading and playing each example slowly before increasing tempo
- Isolate hammer-ons and pull-offs on each string, practicing 5 minutes daily until they are clean and audible
- Learn one complete bluegrass tune from Wernick's repertoire section each week, applying the appropriate roll patterns and embellishments
- Record yourself playing a tune and listen back to identify timing inconsistencies, uneven rolls, or sloppy transitions between techniques
- Practice transitioning between different roll patterns within a single phrase (e.g., forward roll to backward roll) at a steady tempo
- Sight-read new tablature examples from Wernick's book daily, focusing on accuracy over speed initially
Next up: Mastery of rolls, slides, and hammer-ons equips you with the foundational techniques needed to explore more advanced ornamentation, improvisation strategies, and stylistic variations that define individual bluegrass players and regional traditions.

Pete Wernick ('Dr. Banjo') systematically covers every roll pattern and introduces backup playing and chord melody — essential for understanding how banjo fits into a band, not just solo picking.
Style Fork: Clawhammer or Bluegrass Deep Dive
IntermediateCommit to and develop fluency in either the clawhammer (frailing) style or three-finger Scruggs style, learning style-specific techniques, timing nuances, and a broader song repertoire.
▸ Study plan for this stage
Pace: 8–10 weeks, ~40–50 pages/week with 3–4 practice sessions per week (30–45 minutes each)
- Clawhammer (frailing) technique: hand position, downstroke mechanics, and the characteristic brush-and-pick motion that defines the style
- Right-hand finger independence and control: developing strength and precision in the thumb and fingers to execute clean, articulate notes
- Timing and rhythmic feel: understanding the swing and syncopation unique to clawhammer, including how to lock in with the beat
- Melodic approach to banjo: transitioning from simple strumming to playing melody-driven arrangements and understanding how to voice chords melodically
- Style-specific repertoire: learning traditional clawhammer tunes and modern melodic arrangements that showcase both styles
- Transition between styles: recognizing when clawhammer and three-finger techniques overlap and how to switch fluidly between them
- Ornamentation and phrasing: mastering rolls, slides, and hammer-ons/pull-offs that are idiomatic to each style
- What is the correct hand position and motion for clawhammer technique, and how does the brush-and-pick action differ from three-finger picking?
- How do you develop and maintain proper timing and feel when playing clawhammer tunes, and what role does swing play in the style?
- What are the key differences between playing chords and playing melody in banjo, and how does the melodic approach change your note selection?
- How can you apply melodic concepts from Tony Trischka's approach to both clawhammer and three-finger styles?
- What ornamentation techniques (rolls, slides, hammer-ons) are most essential to each style, and when should you use them?
- How do you choose a tune and arrange it to highlight either clawhammer or melodic three-finger playing?
- Practice the basic clawhammer stroke (brush-and-pick) for 10 minutes daily, focusing on consistent hand position and relaxed wrist motion, using open strings and simple single-note patterns
- Learn 2–3 traditional clawhammer tunes from Perlman's book (e.g., 'Cripple Creek,' 'Old Joe Clark') and play them slowly until the rhythm and feel become natural
- Record yourself playing a clawhammer tune and listen back to identify timing inconsistencies; re-record weekly to track improvement
- Work through Trischka's melodic exercises: take a simple tune and play it three ways—as a basic strum, as a melodic arrangement, and as a hybrid clawhammer-melodic version
- Transcribe or tab out one clawhammer tune by ear from a recording, paying attention to the exact timing and ornamentation used
- Practice switching between clawhammer and three-finger picking on the same tune, noting which passages feel natural in each style
- Learn one new melodic arrangement from Trischka's book each week, focusing on understanding the chord voicing and melody interaction
- Perform a 5–10 minute set of 3–4 tunes (mix of clawhammer and melodic) for a friend or record it, aiming for consistent feel and clean execution
Next up: Mastery of either clawhammer or melodic three-finger playing—with strong technique, timing, and a solid repertoire—prepares you to explore advanced topics such as improvisation, jazz-influenced banjo, or specialized techniques (e.g., two-finger styles, open tunings) in the next stage.
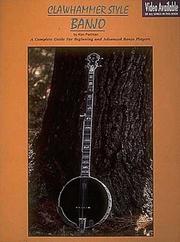
The definitive clawhammer method — Perlman breaks down the bum-ditty strum, drop-thumb, and double-thumbing with rigorous detail; choose this path if you are drawn to old-time and folk banjo.
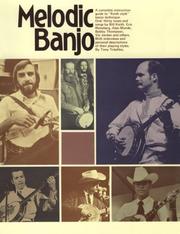
For the bluegrass path, Trischka's melodic (Keith-style) method opens up scale-based single-note runs that break beyond Scruggs rolls — a crucial expansion of your musical vocabulary at this stage.
Musicianship: Theory, Improvisation & Backup
IntermediateUnderstand the music theory behind banjo — scales, chord families, positions up the neck — and develop real improvisation skills and confident backup playing in a jam or band setting.
▸ Study plan for this stage
Pace: 4–5 weeks, ~20–25 pages/day with daily practice sessions (30–45 minutes)
- Scale patterns and their positions on the banjo neck, including major and minor scales across different starting positions
- Chord construction and chord families (I, IV, V progressions) and how to voice them in multiple positions
- The relationship between melody, harmony, and rhythm in traditional and contemporary banjo styles
- Improvisation fundamentals: targeting chord tones, using scale passages, and phrasing over backing chords
- Backup playing techniques: maintaining steady rhythm, comping patterns, and responding to lead players in ensemble settings
- Finger positioning and fretting-hand mechanics for clean position shifts and rapid scale runs
- Reading and understanding tablature notation as it applies to scales, chords, and melodic passages
- How do major and minor scales map across the banjo neck, and how can you play the same scale starting from different positions?
- What are the three primary chords in a key (I, IV, V), and how do you construct and voice them in at least two positions on the banjo?
- How do you improvise a solo over a 12-bar blues or simple folk progression while maintaining musicality and targeting chord tones?
- What are the key differences between playing backup (comping) and playing lead, and how do you adapt your playing to support other musicians?
- How can you use scale patterns and chord knowledge to create coherent, memorable improvisations rather than random note sequences?
- What role does rhythm and phrasing play in both improvisation and backup playing, and how do you develop a personal musical voice?
- Map out the major scale in three different positions on the neck (e.g., starting on the 1st fret, 5th fret, and 7th fret); play each position daily until smooth and automatic
- Learn to construct and play I, IV, and V chords in at least two positions in three different keys (e.g., G, D, and A); practice switching between them in a steady rhythm
- Record or play along with a simple backing track (e.g., a 12-bar blues in G); improvise a solo using only chord tones for the first chorus, then add scale passages in subsequent choruses
- Practice backup playing by recording yourself playing steady rhythm chords while singing or playing a melody line; focus on locking in with a steady pulse
- Transcribe a simple improvised solo or backup passage from a Pete Seeger recording or similar traditional banjo player; learn it note-for-note and analyze which chord tones and scales were used
- Create a 'lick library': write down or record 5–8 short melodic phrases (2–4 bars each) that fit over common chord progressions; practice inserting them into improvisations
Next up: Mastery of scales, chords, and improvisation fundamentals in this stage equips you to explore advanced techniques—such as modal playing, jazz harmony, and stylistic variations—and to apply these tools confidently in diverse musical contexts and genres.

Seeger's classic covers frailing, chord theory, and the folk tradition with a musicianship-first philosophy — its emphasis on listening, rhythm, and expression rounds out the more technical methods studied so far.
Advanced Playing: Mastery & Personal Voice
ExpertStudy the playing of master banjoists, tackle complex arrangements and original material, and develop a personal style by synthesizing everything learned across all previous stages.
▸ Study plan for this stage
Pace: 6–8 weeks, ~40–50 pages/week with daily practice; allocate 3–4 hours/week to reading/study and 5–7 hours/week to hands-on playing and arrangement work
- Clawhammer (frailing) technique as a foundational approach to authentic banjo voice and tone production
- Developing muscle memory and hand independence through systematic clawhammer mechanics and finger patterns
- Analyzing and transcribing the playing styles embedded in Levenson's examples to extract personal stylistic elements
- Translating traditional and folk material into your own arrangements by understanding harmonic and melodic structure
- Building confidence in improvisation and variation within clawhammer framework to establish personal voice
- Integrating clawhammer vocabulary with previous stage knowledge to create hybrid approaches and original compositions
- Understanding the historical and cultural context of clawhammer playing to inform authentic personal expression
- What are the core mechanical differences between clawhammer and other banjo techniques, and how do these differences shape tone and musical expression?
- How do you execute the fundamental clawhammer stroke (downstroke, upstroke, and thumb motion) with consistency and control?
- What are 3–4 signature stylistic traits you can identify in Levenson's playing examples, and how can you adapt them to your own playing?
- How would you transcribe and arrange a traditional folk tune using clawhammer technique, and what harmonic/melodic choices define your interpretation?
- What is your personal banjo voice—what combination of techniques, timing, and musical choices makes your playing distinctly yours?
- How do you use clawhammer as a bridge between traditional folk idioms and contemporary or original material?
- Daily clawhammer technique drills: 15–20 minutes of isolated downstroke, upstroke, and thumb exercises from Levenson's foundational sections, focusing on evenness and tone quality
- Transcribe 3–4 complete tunes from the book by ear and notation, paying attention to Levenson's phrasing, dynamics, and ornamentation choices
- Learn and master 5–6 tunes from the book in their presented form, then create 2–3 variations or alternate arrangements of each using different clawhammer patterns
- Record yourself playing the same tune three different ways (e.g., slow/meditative, driving/rhythmic, sparse/ornamented) and compare to identify which approach resonates with your voice
- Compose or arrange one original short piece (8–16 bars) using clawhammer technique, incorporating harmonic and melodic concepts from the book
- Perform a 10–15 minute set of material from the book for a peer or mentor, then solicit feedback on tone, phrasing, and personal expression; refine based on input
Next up: Mastery of clawhammer technique and the ability to extract and synthesize personal stylistic choices from Levenson's material positions you to explore advanced repertoire, cross-genre fusion, and the creation of fully original compositions that reflect your unique voice.

Levenson's advanced old-time approach introduces modal tunings, complex ornamentation, and regional stylistic variations — the ideal capstone for players who want to push beyond standard technique into expressive, nuanced playing.
Discussion
Keep reading
Paths that share books, cover the same subject, or open a related topic.