Wooden Toy Making: The Best Books to Read, in Order
A wooden toy has to survive being thrown, chewed and dropped down stairs, and it has to do that without a finish or a small part that can hurt the child holding it. This path starts with simple push-along toys made from offcuts, moves to joinery good enough that the toy outlives the childhood, then adds movement — cams, linkages, wind-driven whirligigs — and ends with the mechanical models that are really automata wearing a toy's clothes.
First toys from offcuts
BeginnerMake a handful of solid push-along toys — a truck, a train, a pull-toy animal — with wheels that run true, edges a child cannot cut themselves on, and a finish safe to put in a mouth
▸ Study plan for this stage
Pace: Six to eight weeks, measured in finished toys rather than pages — four or five of them, one every ten days or so. Tools and space this stage assumes: a bench or a solid table, a handsaw or jigsaw, a drill, a coping or scroll saw for curves, sandpaper in three grits, clamps, and somewhere you are all
- Wheels and axles: drilling true, sizing the hole for a free-running fit, and retaining the wheel safely
- Edge treatment — rounding over every edge and corner a child will handle
- Choking-hazard sizing as a rule you apply before design, not after
- Non-toxic finishes and food-safe oils, and why an ordinary varnish is the wrong answer
- Marking out and cutting to a line, which is the whole difference between the first toy and the fourth
- Tolerance as a design decision, which is what Neufeld's sorting and posting toys really teach
- What makes a wheel run true, and what are the three ways a hand-drilled axle hole goes wrong?
- Which finishes are genuinely safe for a toy that will go in a mouth, and how do you tell?
- What size and shape of part is a choking risk, and how does that change what you can design?
- Why does a shape sorter need a different standard of accuracy from a pull-along truck?
- What in Loader's process — marking, cutting, cleaning up — were you skipping on your first toy?
- Make the same simple pull-along toy three times in a row and measure how much the wheel run and the edge finish improved.
- Cut and fit one Neufeld shape sorter and record how many attempts each shape took to drop cleanly.
- Apply three different safe finishes to offcuts of the same wood, let them cure, and compare feel, smell and durability.
- Take one of your finished toys and try deliberately to break a part off it; redesign whatever came away.
Next up: Toys made from offcuts wear out; the next stage builds them to a standard that outlasts the childhood.
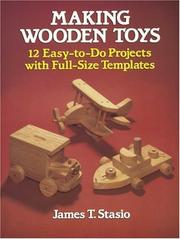
The plainest starting point on the list: simple plans, ordinary tools, and toys you can finish in an evening from scrap. Start here because the point of the first few toys is repetition on wheels, axles and sanding, not design.

Published as Making Wooden Toys & Games. Loader is the best of the beginner authors on process — marking out, cutting, cleaning up — and mixes toys with simple games so the projects stay varied while the skills repeat.

Shape sorters, stacking puzzles and posting boxes: toys where the accuracy of the joint is the point, because a shape that does not drop through is a broken toy. Read third, when your cuts are clean enough for tolerance to matter.
Joinery-grade toys
IntermediateBuild toys assembled with real joinery rather than glue and screws, sized and detailed so nothing can be swallowed or broken off, and finished to survive a decade of handling
▸ Study plan for this stage
Pace: Three to four months, and it is the stage where the shop requirement steps up. Jim Makowicki's Making heirloom toys (151 pages) and Jeff Loader's Making board, peg & dice games (152 pages) come to only 303 pages between them, and that is entirely misleading — a single doll's house or rocking toy fro
- Mortise-and-tenon and other real joints in a toy, and why glue and screws eventually fail under a child
- Hardwood selection and grain direction for parts that will be gripped, dropped and levered
- Sizing and detailing so nothing can be broken off and swallowed, at furniture scale
- Drilling accurate repeated holes for a peg grid, which is a jig problem rather than a skill problem
- Turning or sourcing pegs to a consistent diameter
- Finishing to survive a decade of handling and washing
- Which joints in a Makowicki project are structural and which are cosmetic?
- What fails first in a glued-and-screwed toy, and what does the joinery version do differently?
- How would you jig a peg grid so the fortieth hole is as accurate as the first?
- Which hardwoods are appropriate for a toy, and which should be avoided and why?
- What does building at furniture standard change about how you size small parts?
- Cut six mortise-and-tenon joints in scrap before cutting the first one on the project, and keep them as a reference.
- Build one Makowicki project to completion, recording the hours; compare that with the hours in stage one.
- Make a drilling jig for a peg board and measure the variation across the finished grid.
- Take a toy from stage one and rebuild the same design with real joinery, then compare the two side by side.
Next up: A toy built to last is still a static object; the next stage makes it move, which introduces a whole class of problems joinery cannot solve.
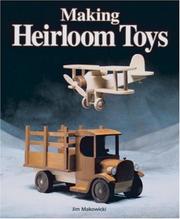
The step up in ambition: doll's houses, rocking toys and vehicles built to furniture standards with mortise-and-tenon and hardwood stock. Placed here because it assumes the beginner skills and spends its pages on structure instead.

Published as Making Board, Peg & Dice Games. Turned pegs, drilled grids and inlaid boards are the fussiest accuracy work in the whole path, and games are the natural place to practise it. A useful sideways move before mechanisms.
Making it move
IntermediateAdd motion to a toy — cams, cranks, cam followers and linkages driven by hand or by wind — and be able to work out for yourself why a mechanism binds
▸ Study plan for this stage
Pace: Three to four months for 535 pages and three or four mechanisms. David Wakefield's How to make animated toys (309 pages) opens the stage and is the longest read here: work through its explanation of cams, cranks and followers before building, then make one hand-cranked toy — expect the first mechani
- Cam profile as the thing that determines the motion, and how to read a profile off a drawing
- Followers, linkages and connecting rods, and where a linkage locks
- Friction and clearance: why a mechanism that is too tight binds and one too loose rattles out of time
- Bearings and pivots in wood, and what actually wears
- Balance and drag on a wind-driven toy, which is a different force problem from a cranked one
- Diagnosing a binding mechanism by isolating one joint at a time
- Given a desired motion, how do you work backwards to a cam profile?
- What are the common reasons a wooden linkage binds, in order of likelihood?
- What does a whirligig need in order to start turning in light wind, and what does it need to keep turning in strong wind?
- How is Lunde's second book harder than his first — what specifically has been added?
- Where does clearance have to be generous in wood where it could be tight in metal?
- Build one Wakefield cam toy and, when it binds, take it apart one joint at a time and record which one was responsible.
- Make two whirligigs with different blade areas and test them in the same wind on the same day.
- Draw a cam profile for a motion Wakefield does not cover, cut it, and see whether the toy does what you drew.
- Build one multi-figure whirligig from Lunde's later book and log every adjustment made after the first assembly.
Next up: Mechanisms you can make work are the entry requirement for the last stage, where you design them rather than copy them.
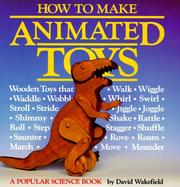
The classic on cam-and-linkage toys: turn a handle, something walks or pecks or rows. The first book here that asks you to think in mechanisms rather than shapes, which is why it opens the stage.

Lunde is the authority on wind-driven toys, and whirligigs are the cheapest possible way to learn about balance, bearings and drag. Read it second because it applies the same motion thinking with the handle replaced by weather.
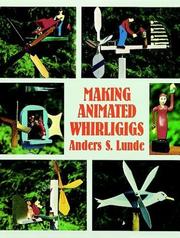
Lunde's later and more ambitious volume — multi-figure whirligigs with connecting rods and crankshafts. It is the natural sequel to the previous book and the bridge to the full mechanical models in the last stage.
Mechanisms and marvels
BeginnerDesign and build working wooden mechanisms from scratch — gear trains, escapements, cam banks — and understand a toy as a machine with a tolerance budget
▸ Study plan for this stage
Pace: Six months and up, and honestly open-ended — 330 pages across the two books and a single wooden gear train can absorb all of it. Do not start here. Raymond Levy's Making Mechanical Marvels in Wood (192 pages) is the most demanding book on the path: wooden clocks, gear trains and moving models made w
- Gear ratios and tooth profile in wood, and the tolerance a wooden tooth can actually hold
- Escapements and how a timing mechanism differs from a motion mechanism
- Cam banks: several motions driven from one shaft, and phasing them
- A tolerance budget — where error accumulates across a train and where it can be absorbed
- Drawing a mechanism full size before cutting, which is Bridgewater's discipline
- Wood movement with humidity as a design problem in a precision assembly
- What limits how fine a gear tooth can be cut in wood, and what wood choice changes it?
- How does an escapement regulate, and what makes a wooden one stop?
- Where in a gear train does accumulated error matter most, and how would you design it out?
- What does Bridgewater's drawing method catch that building straight from a plan does not?
- How would you phase three cams on one shaft to produce a sequence rather than a jumble?
- Draw one mechanism full size from Bridgewater before cutting anything, then build it and mark every place the drawing was wrong.
- Cut a pair of wooden gears, mesh them, and measure how much backlash you actually achieved.
- Build one Levy project across the stage, keeping a log of every adjustment and what it fixed.
- Design a small mechanism of your own from a motion you want — write the tolerance budget before you cut.
Next up: This is the end of the path: from here the progression is your own designs and a longer project, with these two books kept as references rather than instructions.

Wooden clocks, gear trains and moving models made without metal parts. The most demanding book on the list and the one that turns toy making into machine making; do not start it before the whirligig stage.
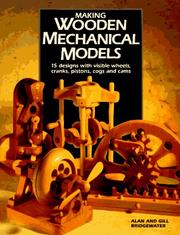
Bridgewater's set of working models — engines, pumps, mechanisms — with the drawings you need to understand rather than copy. Read it alongside Levy: it is stronger on how a mechanism is drawn out before it is cut.