Become a radiologic technologist: the best books to enter the field
This curriculum takes a beginner from zero knowledge of radiology all the way to clinical readiness and ARRT certification prep. Each stage builds on the last: first understanding the profession and its science, then mastering imaging modalities and patient care, and finally drilling the registry-level knowledge needed to enter practice as a credentialed radiologic technologist.
Foundations: The Profession & the Science
BeginnerUnderstand what radiologic technologists do, the healthcare environment they work in, and the fundamental physics behind X-ray production and radiation.
▸ Study plan for this stage
Pace: 4–5 weeks, ~40–50 pages/day (approximately 200–250 pages total for the foundational chapters covering profession overview, healthcare systems, and physics fundamentals)
- The role and responsibilities of radiologic technologists across different imaging modalities (radiography, fluoroscopy, CT, MRI, ultrasound, nuclear medicine)
- Healthcare delivery systems, professional standards, and the radiologic technologist's place within the interdisciplinary healthcare team
- Radiation safety principles, including ALARA (As Low As Reasonably Achievable) and the biological effects of radiation exposure
- Fundamental physics of X-ray production: electron acceleration, target interaction, and the generation of both Bremsstrahlung and characteristic radiation
- The electromagnetic spectrum and how X-rays fit within it; photon energy and wavelength relationships
- Image formation basics: how X-rays interact with matter (photoelectric effect, Compton scattering) and create radiographic images
- Patient care fundamentals: communication, infection control, and ethical responsibilities of the technologist
- Professional credentialing, continuing education requirements, and career pathways in radiologic technology
- What are the primary responsibilities of a radiologic technologist, and how do they differ across imaging modalities?
- How does the radiologic technologist contribute to the healthcare team, and what is their relationship to radiologists and other medical professionals?
- Explain the process of X-ray production, including the role of the cathode, anode, and the two mechanisms by which X-rays are generated.
- What is ALARA, and why is it a cornerstone of radiation safety practice?
- How do X-rays interact with human tissue, and what determines whether an X-ray is absorbed or transmitted through the body?
- What are the biological effects of radiation exposure, and how do dose and dose rate influence these effects?
- Create a visual diagram or flowchart showing the structure of an X-ray tube and label the key components (filament, cathode, anode, target); then write a paragraph explaining the path of electrons and the production of X-rays.
- Research and write a one-page summary of the healthcare facility where you plan to work or have observed; identify the imaging modalities available and describe the radiologic technologist's role in that specific setting.
- Solve 10–15 practice problems on photon energy calculations (E = hf) and wavelength-frequency relationships to build fluency with the physics fundamentals.
- Develop a personal radiation safety protocol: list five specific actions you will take to minimize your own exposure and that of patients and colleagues, with justification for each based on ALARA principles.
- Interview a practicing radiologic technologist (in person, by phone, or via email) about their daily responsibilities, career path, and the most important skills for success; summarize the conversation in 500 words.
- Create a comparison table of at least four imaging modalities (radiography, fluoroscopy, CT, MRI) showing the physics involved, typical clinical uses, and the technologist's role in each.
Next up: This foundation stage establishes the professional context and core physics principles necessary to understand advanced imaging techniques and clinical applications, preparing you to dive into the technical details of specific modalities and image quality optimization in the next stage.

The single most widely used entry-level textbook for rad tech programs; it introduces the profession, the healthcare system, ethics, and basic imaging concepts in plain language — the perfect starting point.
Image Production & Equipment
BeginnerMaster how X-ray images are produced, how exposure factors are selected, and how digital and computed radiography systems work.
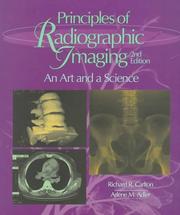
Bridges physics theory to practical image production, covering exposure factors, image quality, and digital systems — the natural next step after Bushong's science foundation.
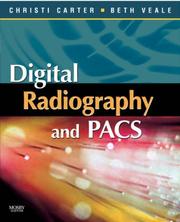
Modern radiology departments are entirely digital; this focused text explains CR, DR, PACS, and image management so students understand the real-world equipment they will operate daily.
Positioning, Procedures & Patient Care
IntermediateLearn standard radiographic positioning for every major body region, procedural protocols, and the patient care skills required for safe, effective imaging.
▸ Study plan for this stage
Pace: 8–10 weeks, ~40–50 pages/day (mix of workbook exercises and textbook reading)
- Standard anatomical positioning terminology (PA, AP, lateral, oblique, decubitus) and how to achieve reproducible radiographs
- Positioning techniques for all major body regions: chest, abdomen, spine, pelvis, extremities, and skull
- Central ray placement, collimation, and technical factors (kVp, mAs) specific to each anatomical region
- Patient communication, comfort measures, and radiation safety during positioning
- Procedural protocols for common radiographic examinations and how to modify positioning for patient limitations
- Infection control, aseptic technique, and maintaining patient dignity throughout imaging procedures
- Documentation standards and how to record positioning variations and patient responses
- Adapting standard positions for pediatric, geriatric, and immobilized patients
- What are the key anatomical landmarks and positioning landmarks for a PA chest radiograph, and how would you modify positioning if a patient cannot stand?
- Describe the central ray placement, patient positioning, and collimation for a lateral lumbar spine radiograph
- How do you communicate positioning instructions to a patient with hearing loss or language barriers, and what comfort measures can you offer?
- What infection control procedures must you follow before, during, and after patient positioning, and when should you change gloves?
- How would you adapt standard positioning for a pediatric patient versus a geriatric patient with limited mobility?
- What documentation should you record if a patient cannot achieve a standard position, and how does this affect image interpretation?
- Complete all positioning exercises in the Merrill's Atlas Workbook for at least 5 major body regions (chest, abdomen, spine, pelvis, extremities), including labeling anatomical landmarks and identifying correct vs. incorrect positioning
- Practice positioning a peer or mannequin for 10 different radiographic examinations, verbally explaining central ray placement, collimation, and technical rationale for each
- Role-play patient interactions: demonstrate how to position a patient with limited mobility, explain the procedure clearly, and document any positioning modifications
- Create a positioning reference card for 8–10 common examinations, including anatomical landmarks, central ray, collimation, and patient instructions
- Review case studies from the Patient Care in Radiography textbook and write brief summaries of how patient care principles influenced positioning success
- Observe or video-record yourself performing positioning and critique your technique against the Merrill's Atlas standard images, noting alignment, collimation, and patient communication
Next up: Mastery of positioning and patient care protocols establishes the technical and interpersonal foundation needed to advance to specialized imaging modalities (fluoroscopy, CT, ultrasound) where dynamic positioning and real-time patient management become critical.
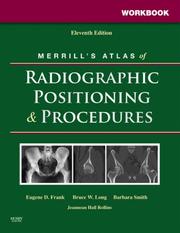
The industry-standard positioning reference used in virtually every accredited program; its step-by-step projections with anatomy overlays are essential before entering the clinical environment.
Covers vital signs, infection control, contrast media, pharmacology basics, and communication — the patient-facing skills that complement positioning knowledge and are tested on the ARRT exam.
Anatomy, Pathology & Cross-Sectional Imaging
IntermediateDevelop the anatomical and pathological literacy needed to recognize normal versus abnormal findings and understand CT and MRI as extensions of radiographic practice.
▸ Study plan for this stage
Pace: 8–10 weeks, ~40–50 pages/day (alternating between pathology fundamentals and sectional anatomy, with overlap weeks for integration)
- Disease processes and pathological mechanisms: how acute and chronic conditions alter tissue density, signal, and appearance on radiographs, CT, and MRI
- Radiographic signs and patterns: recognizing pathognomonic findings (e.g., air bronchograms, silhouette sign, cavitation) as indicators of underlying pathology
- Normal sectional anatomy in axial, coronal, and sagittal planes: precise identification of organs, vessels, and structures at each anatomical level from head to pelvis
- Cross-sectional correlation: translating 2D radiographic knowledge into 3D CT and MRI interpretation by understanding how structures appear in multiple planes
- Density and signal characteristics: how pathology alters Hounsfield units on CT and T1/T2 signal on MRI relative to normal tissue
- Anatomical variants and normal findings: distinguishing benign anatomical variations from true pathology to avoid false-positive interpretations
- System-based pathology: applying pathological concepts systematically across respiratory, cardiovascular, gastrointestinal, genitourinary, and musculoskeletal systems
- What are the key radiographic signs that distinguish pneumonia from pulmonary edema, and how do these appear differently on CT?
- Describe the normal anatomy of the liver, pancreas, and spleen in axial CT at the level of the portal vein confluence, and identify one common anatomical variant in each.
- How does understanding the pathophysiology of osteoporosis inform recognition of compression fractures on radiographs and cross-sectional imaging?
- What is the silhouette sign, when does it occur, and what does its presence tell you about the location of pathology in the thorax?
- Compare the appearance of a simple renal cyst versus a complex renal mass on CT in terms of density, enhancement, and wall characteristics.
- Explain how sectional anatomy in the abdomen changes from the diaphragm to the pelvis, and identify at least three key anatomical landmarks used for orientation.
- Complete Mace's case studies and review questions at the end of each pathology chapter; create a pathology summary sheet for each organ system with key findings and differential diagnoses
- Using Kelley's sectional anatomy atlas, trace through a complete axial CT scan of the abdomen and pelvis, labeling all major structures at each level and noting anatomical variants
- Compare radiographs and corresponding CT images for 10–15 cases (pneumonia, fractures, abdominal pathology) to identify how pathology manifests in 2D versus 3D imaging
- Create cross-sectional anatomy flashcards: one side shows an axial/coronal/sagittal image from Kelley; reverse side lists all structures visible at that level
- Perform a 'blind read' exercise: review 5–10 sectional images without labels, identify all structures, then compare to Kelley's labeled anatomy to assess accuracy
- Develop a pathology-anatomy integration table for each major system (e.g., thorax, abdomen, pelvis) linking normal anatomy from Kelley to common pathological findings from Mace
Next up: Mastery of normal anatomy and recognition of pathological patterns prepares you to advance to advanced cross-sectional imaging interpretation, where you will learn systematic protocols, image quality assessment, and clinical decision-making in CT and MRI reporting.
Teaches technologists to recognize common diseases and trauma on images, building the clinical judgment needed to produce diagnostic-quality radiographs and communicate with radiologists.
CT and MRI are now core to most imaging departments; this text translates 2-D radiographic anatomy into the cross-sectional views that dominate modern clinical practice.
ARRT Certification Prep & Clinical Mastery
ExpertConsolidate all prior knowledge into exam-ready competency, identify weak areas through practice testing, and develop the professional mindset for independent clinical practice.
▸ Study plan for this stage
Pace: 8–10 weeks, ~40–50 pages/day with 2–3 full-length practice exams interspersed
- ARRT exam format, question types, and time management strategies to maximize scoring efficiency
- Comprehensive radiographic positioning and anatomy—standard projections, alternative positions, and pathology recognition across all body systems
- Radiation protection principles (ALARA, dose limits, shielding) and their clinical application in real-world scenarios
- Image quality factors (exposure, contrast, distortion, blur) and troubleshooting technique errors to produce diagnostic images
- Patient care, communication, and professional ethics—legal standards, informed consent, and scope of practice boundaries
- Equipment operation, maintenance, and safety protocols for fluoroscopy, mobile radiography, and specialty modalities
- Contrast media selection, administration routes, and adverse reaction management across different patient populations
- Integrated clinical decision-making: selecting appropriate techniques, modifying for pathology, and recognizing when images are non-diagnostic
- What are the ARRT exam's structure, number of questions, time limit, and passing score, and how should you allocate time per question?
- How do you modify standard radiographic positioning and technique for common pathologies (e.g., trauma, obesity, ascites) while maintaining diagnostic quality?
- What are the ALARA principle's three pillars, and how do you apply time, distance, and shielding in fluoroscopy and mobile radiography?
- How do you identify and correct image quality defects (overexposure, underexposure, motion blur, geometric distortion) by adjusting technique factors?
- What are your professional and legal responsibilities regarding patient consent, confidentiality, scope of practice, and adverse event reporting?
- How do you recognize contraindications for contrast media, manage allergic reactions, and select appropriate administration routes for different examinations?
- Complete all full-length practice exams in Radiography PREP sequentially (typically 3–4 exams); review each answer with the rationale and identify patterns in weak content areas
- Create a positioning quick-reference guide for 20 high-yield projections (chest, abdomen, spine, extremities) with anatomy landmarks, central ray, and SID; use it during timed drills
- Perform 10 timed mini-quizzes (25–30 questions each) on single topics (e.g., radiation protection, image quality, patient care) to build speed and accuracy
- Simulate clinical scenarios: given a patient presentation (age, pathology, mobility), select technique, positioning, and shielding; compare your decisions against Saia's recommendations
- Review and annotate all exam-style questions you missed, categorizing errors as knowledge gaps, careless mistakes, or time-management issues; create a targeted review list
- Conduct peer or self-teaching: explain three complex topics (e.g., contrast reactions, geometric unsharpness, fluoroscopy safety) aloud to solidify understanding and identify gaps
Next up: This stage transforms you from a knowledgeable student into an ARRT-certified, independent clinician ready to apply integrated decision-making in real clinical environments, setting the foundation for specialization or advanced modality training in subsequent career stages.
A comprehensive registry review with full-length simulated exams and detailed rationales; reading it last — after all content knowledge is built — maximizes score gains and builds test-day confidence.
Discussion
Keep reading
Paths that share books, cover the same subject, or open a related topic.