Best Books on Paper Marbling, in Reading Order
This curriculum takes a beginner from zero knowledge of paper marbling through the full craft — covering both the Japanese suminagashi and Turkish ebru traditions, bath preparation, paint chemistry, classic pattern-making, and extension onto fabric. Each stage builds directly on the last: you first absorb the history and overview, then master core technique, then explore the two great traditions in depth, and finally push into advanced pattern work and fabric application.
Core Technique — Bath, Paints & Classic Patterns
BeginnerPrepare a proper size bath (carrageenan and ox-gall), mix and test paints, and successfully execute the foundational Western marbled patterns: stone, get-gel, nonpareil, and bouquet.
▸ Study plan for this stage
Pace: 4–5 weeks, ~20–25 pages/day, with 2–3 dedicated practice days per week for hands-on marbling
- Carrageenan bath preparation: achieving the correct viscosity and consistency for paint suspension
- Ox-gall's role as a wetting agent and how it affects paint adhesion and flow on the bath surface
- Paint mixing and testing protocols: pigment-to-medium ratios and identifying when paints are properly thinned
- Stone pattern execution: creating the foundational comb-dragged texture that forms the basis of Western marbling
- Get-gel (or gel) pattern: understanding how to layer and manipulate the stone base into more complex designs
- Nonpareil pattern: mastering the technique of creating concentric circles and radial symmetry
- Bouquet pattern: combining multiple techniques to produce the classic multi-petal floral effect
- Paper selection and sizing: understanding how different substrates interact with the bath and paints
- What is the correct ratio of carrageenan to water, and how do you test whether your bath has reached the proper viscosity?
- How does ox-gall function in the marbling process, and what happens if you use too much or too little?
- What are the signs that your paints are properly mixed and ready to apply to the bath?
- Can you describe the step-by-step process for creating a stone pattern, including comb angles and spacing?
- What is the difference between a get-gel pattern and a stone pattern, and how do you transition from one to the other?
- How do you create a nonpareil pattern, and what tools or techniques ensure the circles remain concentric?
- What makes a bouquet pattern distinct from other foundational patterns, and what prior patterns does it build upon?
- How does paper preparation (sizing, dampening) affect the success of your print, and what papers work best for beginners?
- Prepare a carrageenan bath from scratch using Taylor's instructions; test viscosity with a comb and adjust until you achieve the correct 'float' for paints
- Mix at least three different paint colors using the pigment-to-medium ratios specified in both books; document the ratios and test each on the bath surface
- Execute five consecutive stone patterns on practice paper, focusing on consistent comb angles and spacing; keep samples to track improvement
- Create three get-gel variations by layering different comb directions on top of a stone base; photograph or preserve each attempt
- Practice the nonpareil pattern at least four times, adjusting your circle-making tool (stylus or pin) to achieve concentric rings; aim for symmetry
- Complete two full bouquet patterns, combining the stone, get-gel, and nonpareil techniques in sequence; compare results to reference images in both books
- Experiment with three different paper types (cotton rag, Japanese, standard watercolor) on the same bath to observe how substrate affects ink adhesion and color vibrancy
Next up: This stage establishes mastery of the bath fundamentals and four essential patterns that serve as building blocks for advanced Western techniques (such as Turkish, Persian, and freestyle variations), allowing you to move into more complex pattern combinations and specialized effects.

A practical, step-by-step manual focused squarely on sizing the bath and preparing acrylic and watercolor paints, making it the best hands-on companion for a first session at the trough.

Miura's authoritative guide introduces the classic European pattern vocabulary with clear diagrams, building directly on bath preparation knowledge to show how comb and stylus movements create each named pattern.
Advanced Patterns & Marbling on Fabric
ExpertExecute complex, multi-rake patterns (peacock, Spanish wave, chevron) with precision, and successfully transfer marbled designs onto natural-fiber fabrics using mordants and heat-setting.
▸ Study plan for this stage
Pace: 4–5 weeks, ~25–30 pages/day, with 2–3 dedicated marbling lab sessions per week
- Fabric preparation and mordant chemistry: selecting natural fibers, applying alum and tannin mordants, and understanding how mordants bond dyes to fabric
- Multi-rake pattern mechanics: mastering the peacock (curved rakes), Spanish wave (rhythmic undulation), and chevron (angular precision) patterns with consistent pressure and timing
- Dye behavior on fabric vs. paper: how fabric absorbs and sets color differently, requiring adjusted paint consistency, temperature control, and curing times
- Heat-setting and curing protocols: using steam, dry heat, or chemical fixatives to permanently bond marbled designs to fabric without color bleeding or fading
- Transfer techniques and troubleshooting: laying fabric onto marbled surfaces with proper tension, avoiding wrinkles, and recovering from failed transfers
- Scaling patterns for larger fabric formats: adapting rake techniques and paint quantities for scarves, yardage, and garment pieces
- Quality control and repeatability: documenting pattern variables (rake angle, paint viscosity, water temperature) to achieve consistent, professional results
- What is the role of mordants in fabric marbling, and how do alum and tannin differ in their application and effect on dye absorption?
- Describe the mechanical execution of a peacock pattern and a Spanish wave pattern—what are the key differences in rake movement, timing, and pressure?
- Why does marbled paint behave differently on fabric than on paper, and what adjustments must you make to paint consistency and water temperature?
- What are the primary heat-setting methods for marbled fabric, and how do you choose between them based on fiber type and dye chemistry?
- How do you troubleshoot a failed fabric transfer (e.g., incomplete color pickup, wrinkles, or bleeding), and what preventive steps can you take?
- What variables must you document and control to reliably repeat a complex marbling pattern on multiple fabric pieces?
- Prepare three fabric swatches (cotton, silk, linen) with alum mordant following Cohen's protocols; cure and document absorption differences
- Execute a peacock pattern on paper 5 times, refining rake angle and pressure until you achieve symmetry and consistent petal formation
- Execute a Spanish wave pattern on paper 5 times, focusing on rhythmic, even undulation without hesitation or jerking
- Execute a chevron pattern on paper 5 times, emphasizing angular precision and consistent rake spacing
- Transfer a successfully marbled peacock pattern onto pre-mordanted cotton fabric; document the process and compare color pickup to the paper original
- Transfer a Spanish wave pattern onto silk fabric and heat-set it using the method recommended in Cohen; evaluate color permanence after washing
- Marble a full scarf-length piece (or yardage) using a chevron pattern, managing paint consistency and water temperature across the extended surface
- Create a documented test series: marble the same pattern on paper, then transfer to cotton, silk, and linen; heat-set each using different methods and compare final results
Next up: This stage equips you with the technical mastery and troubleshooting skills to produce gallery-quality, wearable marbled textiles, preparing you to explore specialized applications—such as marbling leather, creating multi-color layered effects, or developing a sustainable small-batch production practice.
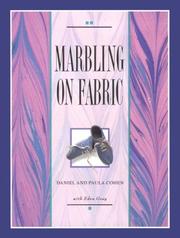
Focuses entirely on the differences between paper and fabric as a substrate — mordanting with alum, paint adhesion, and heat-setting — giving the advanced student a reliable technical foundation for fabric work.

Chambers' second, more advanced manual goes deep on complex comb patterns and troubleshooting, making it the ideal capstone that ties together everything learned across all prior stages.
Discussion
Keep reading
Paths that share books, cover the same subject, or open a related topic.