Carve wood with hand tools
This curriculum takes a complete beginner from safe knife handling and wood grain fundamentals all the way through complex relief and figure carving. Each stage builds directly on the last — you'll establish muscle memory and vocabulary first, then tackle progressively demanding projects that demand a deeper understanding of wood behavior and tool control.
Foundations: Knife, Grain & First Cuts
BeginnerUnderstand wood grain direction, master the core knife grips (push, pull, pare, chest-lever), stay safe, and complete a first simple project like a pointed stick or spatula.
▸ Study plan for this stage
Pace: 4–5 weeks total. Week 1–2: Read "Whittling Twigs and Branches" cover to cover (~15–20 pages/sitting, 3–4 sittings per week), pausing to practice each grip and cut demonstrated before moving on. Week 3–5: Read "The Little Book of Whittling" at the same relaxed pace, using it to reinforce and expand o
- Wood grain direction — cutting with vs. against the grain and how it affects control, surface quality, and safety
- The four core knife grips taught by Lubkemann: push (thumb-push), pull (paring), chest-lever (braced pull), and the reinforced grip for tight detail work
- Choosing the right twig or branch: green vs. dry wood, bark-on vs. peeled, and how diameter affects project difficulty
- Safe knife handling: the 'blood circle,' controlled stroke direction, thumb placement, and always cutting away from the body
- Reading the wood — knots, pith, and irregular grain as obstacles and opportunities
- The pointed stick and simple spatula as foundational forms that encode all basic cuts in one project
- Tool maintenance basics: keeping a pocket knife or carving knife sharp enough for clean, safe cuts (stropping and honing)
- Simplicity as a design principle: Lubkemann's philosophy that beautiful objects emerge from minimal, purposeful cuts
- Looking at a twig or branch, how do you identify which direction the grain runs, and what happens to the wood surface if you cut against it?
- Describe each of the four core knife grips from Lubkemann's instruction — when would you choose one over another?
- What is the 'blood circle' safety rule, and why does it matter before you make a single cut?
- Why does Lubkemann favor green (freshly cut) twigs and branches for beginners, and what species does he recommend starting with?
- Walk through the step-by-step cuts needed to whittle a simple pointed stick or spatula as demonstrated in either book — what is the sequence and why?
- How do you know your knife is sharp enough to carve safely, and what is the basic stropping technique Lubkemann references?
- Grain-direction test: collect 4–6 twigs of different species, make a short paring cut in both directions on each, and record in a notebook which direction tears vs. slices cleanly — label each twig with the result.
- Grip drill: without any cutting, practice transitioning through all four grips on an unsharpened dowel for 5 minutes daily until each feels natural and your hand doesn't fatigue.
- Safety circle walk-through: before every single carving session this stage, stand up, extend your knife arm fully, rotate 360°, and verbally confirm your workspace is clear — build the habit now.
- Project 1 — Pointed stick (from 'Whittling Twigs and Branches'): complete at least two pointed sticks, the first following Lubkemann's instructions exactly, the second experimenting with a different twig species or diameter.
- Project 2 — Simple spatula or spreader (from 'The Little Book of Whittling'): carve one spatula, focusing on keeping strokes even and the flat face smooth; compare the surface quality on the with-grain vs. against-grain sides.
- Knife maintenance session: using only a leather strop (or a piece of denim), strop your knife 20 passes per side after every carving session this stage, then perform the 'paper-slice test' to verify edge improvement over the weeks.
Next up: Mastering grain reading, the four grips, and safe stroke control on simple cylindrical forms gives you the muscle memory and material intuition needed to tackle three-dimensional shaping, stop cuts, and relief work that characterize intermediate figure and relief carving projects in the next stage.

The ideal first book — it uses freely available material (branches), teaches grain awareness immediately, and keeps early projects achievable so beginners build confidence without expensive lumber or tools.
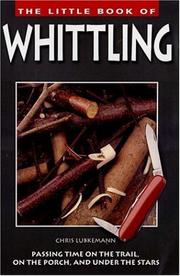
A compact, project-driven follow-up by the same author that reinforces knife grips and introduces slightly more refined shaping, bridging the gap between rough branch work and intentional carving.
Expanding the Toolkit: Gouges, Chisels & Relief
IntermediateTransition from knife-only work to a small set of gouges and chisels, understand sweep numbers and tool geometry, and complete a basic relief carving panel.
▸ Study plan for this stage
Pace: 6–8 weeks total. Week 1–3: Read "The Complete Book of Woodcarving" by Ellenwood at ~20–25 pages/day, focusing on tool chapters and technique fundamentals before moving to project sections. Week 4–8: Read "Relief Carving Workshop" by Lora S. Irish at ~15–20 pages/day, pausing frequently to study the
- Sweep numbers and tool geometry: understanding how the U- and V-shaped profiles of gouges are classified by sweep number (1–11 scale), and how blade width interacts with sweep to determine the cut a tool makes — as introduced in Ellenwood's tool reference sections
- Grain direction in relief carving: Ellenwood establishes the foundational rule that cuts made with the grain produce clean slices while cross-grain and against-grain cuts tear fibers, a principle Irish then reinforces through every project in her workshop
- Setting in and grounding: the two-phase relief technique — first 'setting in' the outline with a vertical stop-cut using a chisel or veiner, then 'grounding' (lowering the background) with shallow gouges — forms the structural backbone of Irish's beginner projects
- Wood selection for relief panels: both authors address how basswood and butternut behave differently under gouges versus knives, and why a stable, fine-grained blank matters more in relief work than in whittling
- Mallet vs. hand pressure: Ellenwood explains when to drive gouges with a mallet (hardwoods, deep grounding, large sweeps) versus pushing by hand (detail work, soft woods, tight curves), a decision Irish's step-by-step photos illustrate in practice
- Transferring and scaling patterns: Irish dedicates significant attention to grid-scaling, graphite transfer paper, and how to orient a pattern relative to grain before the first cut is made
- Sharpening gouges and chisels: the inside-bevel (slip stone) technique for gouges differs fundamentally from flat-chisel honing, and Ellenwood covers both; maintaining a burr-free edge is treated as a prerequisite to every project in Irish's book
- Levels and depth planning: Irish introduces the concept of mapping a relief panel into foreground, mid-ground, and background planes before carving begins, preventing the common beginner mistake of carving too deep too soon
- After reading Ellenwood, can you explain what sweep number 3 versus sweep number 9 means, and describe the shape of cut each would leave in the wood?
- What is the correct sequence of steps — as described in Irish's workshop — for completing a relief panel from blank to finished piece, and why must setting-in precede grounding?
- Both Ellenwood and Irish address sharpening. What is the specific difference between honing the bevel of a flat chisel and honing the inside curve of a gouge, and what tool is required for the latter?
- According to Irish's pattern and depth-planning guidance, how do you determine how many distinct depth levels a relief design requires before making the first cut?
- How does grain direction change your choice of which gouge sweep to use and which direction to push it, based on the principles Ellenwood establishes?
- What wood species do Ellenwood and Irish recommend as most forgiving for a carver transitioning from knife-only work to gouges, and what physical properties make it suitable?
- Tool identification drill: Before carving, lay out every gouge and chisel you own and write its sweep number and width on a piece of tape. Then make a single test cut with each tool in a scrap of basswood and label the resulting impression — build a personal 'tool print' reference card you can consult during projects.
- Sharpening practice session: Following Ellenwood's sharpening chapter, sharpen one flat chisel on a bench stone and one #5 or #7 gouge using a slip stone on the inside bevel. Perform the fingernail-drag test and the end-grain shaving test on each; repeat until both pass cleanly.
- Grain-direction sampler board: Take a 6"×6" basswood scrap and make deliberate cuts with a #5 gouge in four orientations relative to the grain (with, against, across each way). Label each cut and note which tore, which sliced cleanly, and which required the most force — keep this board as a reference.
- Setting-in and grounding exercise: Using one of Irish's simpler patterns (a leaf or basic geometric border), transfer it to a basswood blank and practice only the first two stages — setting in the outline and grounding the background to a uniform 3mm depth — without proceeding to modeling. Focus on keeping the background level and the walls of the design vertical.
- Complete Irish's first full beginner project end-to-end: Follow her step-by-step photos and instructions for the introductory relief panel, pausing at each stage to re-read the relevant technique note before cutting. Photograph your panel at each major stage (set-in, grounded, modeled, finished) to create a personal progress record.
- Depth-level planning sketch: Before starting Irish's second project, draw the pattern on paper and use colored pencils to map out foreground, mid-ground, and background zones. Write a target depth in millimeters next to each zone, then carve to those planned depths — compare your finished result to your plan and note where you deviated and why.
Next up: Mastering gouge geometry, relief panel structure, and depth planning in this stage gives the carver the tool vocabulary and spatial thinking needed to tackle more complex multi-figure compositions, undercutting, and decorative chip carving patterns that typically define the next intermediate-to-advanced stage.

A comprehensive single-volume reference that covers every major carving discipline and tool type; reading it now gives the learner a clear map of where they are and where the craft can go.
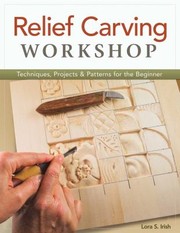
Lora Irish's structured workshop format walks through pattern transfer, setting-in, grounding, and modeling in relief — exactly the skills needed once the learner moves beyond knife-only work.
Figure & Caricature Carving: Anatomy in Wood
IntermediateCarve expressive human and animal figures with correct proportions, understand how to plan a carving in three dimensions, and develop a personal finishing and painting workflow.
▸ Study plan for this stage
Pace: 6–8 weeks total: Weeks 1–4 on "Carving Folk Art Figures" by Shawn Cipa (~15–20 pages/day, including re-reading project chapters before carving each figure); Weeks 5–8 on "How to Carve Faces in Driftwood" by Harold L. Enlow (~10–15 pages/day, slower pace to accommodate the irregular-surface problem-s
- Folk-art proportion conventions: Cipa's stylized, blocky figure proportions deliberately depart from realism to create charm and expressiveness — understanding *why* these ratios work is as important as copying them.
- Three-dimensional planning: Blocking out a figure from all four sides before making detail cuts; using Cipa's step-by-step roughing sequences to internalize the 'big shapes first' discipline.
- Anatomy as suggestion, not accuracy: How simplified planes of the face and body (cheekbones, brow ridge, jaw) read as convincingly human even when exaggerated or reduced.
- Grain direction and figure carving: Anticipating how grain runs through thin limbs, necks, and noses to avoid catastrophic splits — a recurring practical lesson in both Cipa's projects and Enlow's driftwood work.
- Working with found/irregular wood: Enlow's core teaching — reading the natural contours of driftwood and letting the existing shape suggest or constrain the face, turning a limitation into a design asset.
- Caricature logic: Identifying the one or two dominant features of a face or figure and amplifying them while subordinating the rest, as demonstrated in Enlow's expressive driftwood portraits.
- Finishing and painting workflow: Cipa's folk-art painting techniques (base coats, dry-brushing, antiquing washes) as a complete, repeatable system that unifies a finished piece.
- Tool control for detail work: The specific knife and gouge cuts used for eyes, noses, mouths, and ears in both books — stop cuts, V-cuts, and relieving cuts that define small forms without undercutting fragile wood.
- After studying Cipa's blocking-out process, can you describe the sequence of cuts used to establish the major masses of a folk-art figure before any detail work begins?
- How does Cipa's approach to proportion differ from anatomically correct figure carving, and what visual effect do those differences create in the finished piece?
- What specific challenges does driftwood present that basswood or butternut does not, and how does Enlow recommend assessing a piece of driftwood before committing to a design?
- Using Enlow's method, how do you locate and establish the eye line, nose base, and mouth line on an irregular, non-flat surface?
- What is Cipa's step-by-step painting workflow for a folk-art figure, and what role does an antiquing wash play in the final appearance?
- How do the grain-direction strategies discussed in both books differ when carving a protruding nose versus carving a thin arm or leg?
- **Cipa Block Figure**: Carve all the way through at least one complete Cipa project figure from start to finish — do not skip the painting stage. The goal is to experience the full workflow, not just the carving.
- **Four-View Sketch Before You Cut**: For your next blank, draw the front, back, left, and right profiles on paper (or directly on the wood with pencil) before making a single cut. Compare your drawing to the finished piece and note where your 3-D planning broke down.
- **Proportion Study**: Carve a simple standing figure twice — once following Cipa's folk-art proportions exactly, and once with 'realistic' 7-head proportions. Place them side by side and write three observations about how each reads visually.
- **Driftwood Face Hunt**: Collect 3–5 pieces of driftwood (or irregular scrap). Following Enlow's assessment method, sketch a face onto each piece that works *with* the existing contours. Carve the most promising one to completion.
- **Eye & Mouth Drill**: On a flat basswood scrap, carve a row of five pairs of eyes and five mouths using only the stop-cut and relieving-cut sequence from Enlow's face chapters. Focus on consistent depth and clean corners, not variety.
- **Finish Comparison Panel**: On a single flat piece of wood painted with a base coat, test Cipa's dry-brush highlight, a raw antiquing wash, and a wash-plus-wax finish in three separate sections. Label each and keep it as a permanent reference card.
Next up: Mastering stylized human proportions, three-dimensional planning, and a repeatable finishing workflow in this stage gives the carver the structural and aesthetic vocabulary needed to tackle more complex, multi-element relief or sculptural compositions in the next stage.

Bridges the gap between simple shapes and full figures by focusing on folk-art proportions that are forgiving yet expressive, teaching the learner to think sculpturally around the whole piece.

Faces are the hardest part of figure carving; Enlow's focused treatment of facial planes, eye sockets, and mouth structure gives the learner a repeatable method for the most challenging element.
Mastery Projects: Complex Forms & Personal Style
ExpertTackle multi-element compositions, deep relief, and stylized figures; sharpen tools to a professional standard; and develop the judgment to design original projects from scratch.
▸ Study plan for this stage
Pace: 4–6 weeks, ~15–20 pages/day; linger on project chapters — re-read each project section before and after attempting it at the bench
- Multi-element composition: planning how separate carved figures or motifs relate spatially and visually within a single piece
- Deep relief carving: understanding how to stage multiple depth planes and undercut safely to create shadow and dimension
- Stylized figure work: Faurot's approach to simplifying human and animal anatomy into clean, expressive whittled forms
- Tool-edge geometry at a professional standard: honing, stropping, and testing for a wire-edge-free, hair-shaving finish
- Design-from-scratch methodology: using thumbnail sketches, grain analysis, and wood selection before the first cut
- Judgment in wood selection: matching species hardness, grain direction, and blank size to the demands of a complex project
- Finishing and detailing: Faurot's techniques for refining surfaces, adding texture, and applying appropriate finishes to showcase form
- Personal style development: recognizing recurring artistic decisions (silhouette, proportion, texture treatment) and making them intentional
- According to Faurot, how should a carver approach planning a multi-element composition before touching the wood — what preparatory steps does he recommend?
- What specific techniques does Faurot describe for achieving deep relief without splitting or losing structural integrity in the piece?
- How does Faurot simplify anatomical forms (human or animal) into stylized whittled figures, and what proportional rules or shortcuts does he rely on?
- What is Faurot's recommended sharpening and stropping progression, and how does he test that a tool has reached a professional-grade edge?
- How does Faurot advise selecting the right wood species and blank orientation for a complex, multi-plane project?
- What finishing methods does Faurot present for advanced pieces, and how does the choice of finish interact with the carved surface texture?
- Complete every step-by-step project in The Art of Whittling in sequence, but before starting each one, produce a pencil thumbnail sketch and a written grain-direction plan — compare your plan to Faurot's instructions and note discrepancies
- Sharpening audit: bring every knife and gouge you own through Faurot's full honing-and-stropping sequence, then perform his recommended sharpness tests (arm-hair shave, end-grain pine slice); log the before/after difference in carving feel on scrap wood
- Select one of Faurot's animal or figure projects and carve it twice — once following his template exactly, and once with deliberate stylistic changes (altered proportions, added texture, different silhouette); photograph both and write a one-page reflection on the artistic choices made
- Design an original multi-element composition (e.g., two interacting figures or a figure with a scenic base) entirely from scratch: sketch three thumbnail options, choose one, mark grain direction on the blank, and carve it using only techniques drawn from Faurot's book
- Practice deep-relief staging on a 2"×4" basswood scrap: carve at least three distinct depth planes with clean undercuts, focusing on Faurot's guidance on removing waste wood safely and refining shadow lines
- Apply at least two different finishing approaches Faurot describes (e.g., oil vs. wax, painted detail vs. natural wood) to identical carved test tiles, then display them side by side to evaluate how finish choice affects the perception of carved texture and form
Next up: Mastering Faurot's complex projects and original design process builds the creative confidence and technical precision needed to move into teaching, exhibiting, or exploring specialized traditions (e.g., caricature, chip carving, or sculptural relief) at a professional or instructional level.

A classic text that emphasizes design thinking and artistic judgment over technique alone, pushing the advanced carver to move from executing patterns to creating original work with a personal voice.
Discussion
Keep reading
Paths that share books, cover the same subject, or open a related topic.