Roll sushi at home
This curriculum builds from Japanese kitchen fundamentals up to confident homemade sushi, with each stage unlocking the next. You start by understanding Japanese ingredients and rice, move into knife skills and fish handling, then graduate to sushi-specific technique and finally the refined details that separate good sushi from great sushi.
Japanese Kitchen Foundations
BeginnerUnderstand core Japanese ingredients, pantry staples, and the logic of Japanese home cooking before touching a sushi mat.
▸ Study plan for this stage
Pace: 6–8 weeks total: Weeks 1–3 cover "Japanese Farm Food" (~25–30 pages/day, reading chapters alongside grocery/pantry exploration); Weeks 4–8 cover "Japanese Cooking" by Tsuji (~30–35 pages/day, focusing on technique chapters before recipe deep-dives). Allow extra days after each book to review notes a
- The 'satoyama' philosophy in Japanese Farm Food — how rural Japanese home cooking is driven by seasonality, locality, and minimal waste, setting the mindset for all Japanese food preparation
- Core pantry staples introduced across both books: dashi (kombu and katsuobushi), soy sauce (koikuchi vs. usukuchi), mirin, sake, rice vinegar, and miso — understanding their flavor roles, not just their names
- Dashi as the flavor backbone of Japanese cuisine — how Hachisu Singleton contextualizes it in farm-kitchen simplicity and how Tsuji systematically breaks down its preparation and variations (kombu dashi, ichiban dashi, niban dashi)
- The logic of Japanese seasoning ratios — Tsuji's structured approach to balancing salt, sweet, acid, and umami across different dish categories
- Rice as a cultural and culinary centerpiece — proper washing, soaking, and cooking methods for Japanese short-grain rice as described in both books
- The concept of umami and how fermented/aged ingredients (miso, soy sauce, dried fish, kombu) generate it naturally in everyday Japanese cooking
- Japanese knife skills and kitchen tool philosophy — Tsuji's guidance on the santoku and yanagiba, and the broader Japanese principle of respecting ingredients through precise preparation
- Reading a Japanese recipe's structure — understanding the role of mise en place, the sequence of seasoning additions, and why timing matters in Japanese home cooking
- After reading Japanese Farm Food, can you describe the seasonal and regional logic Hachisu Singleton uses to organize her kitchen — and why that mindset matters before making sushi?
- What are the two main types of dashi, how are they made according to Tsuji, and what dishes in Japanese Farm Food rely on dashi as a base?
- What is the functional difference between mirin and sake in a recipe, and how does Tsuji explain their roles in seasoning and finishing dishes?
- How does Japanese Farm Food illustrate the importance of short-grain rice preparation, and what specific steps (washing, resting, water ratio) does it emphasize?
- According to Tsuji's Japanese Cooking, what distinguishes Japanese knife technique and tool selection from Western approaches, and why does it matter for delicate ingredients like fish?
- How do both books collectively define 'umami' in practical kitchen terms — which specific ingredients are identified as umami sources, and how are they used together?
- Build your pantry from the books: use the ingredient lists in Japanese Farm Food and Tsuji's pantry overview to source and label your own Japanese staples (kombu, katsuobushi, usukuchi soy sauce, mirin, sake, rice vinegar, short-grain rice). Taste each one individually and write two tasting notes per ingredient.
- Make ichiban dashi and niban dashi from scratch following Tsuji's method, then taste them side by side. Note the difference in intensity and clarity — record how you would use each one differently.
- Cook Japanese short-grain rice three times using the method described in Japanese Farm Food, adjusting water ratios and resting times each round. Document which result produces the ideal sticky-but-distinct grain texture needed for sushi rice.
- Choose one 'farm food' recipe from Hachisu Singleton (ideally a simmered or dressed vegetable dish) and cook it twice: once following the recipe exactly, and once adjusting the soy/mirin/dashi balance by taste. Reflect on what the seasoning logic taught you.
- Practice the seasoning ratio exercise inspired by Tsuji: make a simple clear soup (osuimono) and a dipping sauce (tsuyu), calculating and adjusting the dashi-to-soy-to-mirin ratios yourself. Compare your results to Tsuji's reference ratios.
- Knife and prep drill: using Tsuji's guidance on knife care and technique, practice breaking down a daikon, a cucumber, and a block of firm tofu into uniform cuts (julienne, rounds, cubes). Focus on consistency and minimal waste — photograph your results to track improvement.
Next up: Mastering the pantry logic, dashi foundation, rice technique, and seasoning ratios from these two books gives you the flavor vocabulary and kitchen discipline needed to approach sushi-specific skills — seasoning sushi rice (shari), selecting fish, and understanding balance — with genuine understanding rather than guesswork.

Written for Western beginners, it demystifies Japanese ingredients, rice varieties, and fermented condiments — the essential vocabulary before any sushi study.
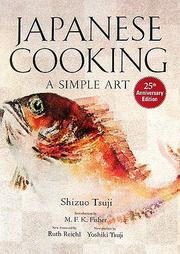
The canonical English-language reference for Japanese technique; its thorough treatment of dashi, rice, and seasoning ratios gives you the conceptual backbone everything else builds on.
Rice Mastery
BeginnerCook perfect sushi rice consistently — the single most important skill in homemade sushi.
▸ Study plan for this stage
Pace: 2–3 weeks, ~20–25 pages/day; focus reading time on Shimbo's rice and foundational technique chapters before attempting any hands-on sessions
- Selecting the right short-grain Japanese rice (uruchimai) and understanding why grain starch structure matters for sushi
- The washing and soaking ritual: removing excess surface starch through repeated rinsing and allowing the grain to hydrate fully before cooking
- Water ratios: Shimbo's precise rice-to-water measurements and how factors like rice age, season, and brand require small adjustments
- The covered-pot or rice-cooker method: heat stages (high → steam → rest) and why lifting the lid too early ruins the texture
- Preparing sushi-zu (sushi vinegar): balancing rice vinegar, sugar, and salt to create the seasoning mixture that defines sushi rice flavor
- The folding technique: using a hangiri (wooden tub) or wide bowl, a fan, and a shamoji (paddle) to fold — never stir — the vinegar dressing into hot rice while simultaneously evaporating excess moisture
- Achieving the correct final texture: glossy, slightly sticky, body-temperature rice grains that hold together without being mushy or dry
- Resting and holding: how to keep seasoned rice at the right temperature and humidity (covered with a damp cloth) until ready to use
- According to Hiroko Shimbo, what specific type of Japanese rice should be used for sushi, and what makes its starch profile different from long-grain varieties?
- What is the purpose of washing the rice multiple times, and how do you know when the rinse water is clear enough to stop?
- How does Shimbo describe the correct water-to-rice ratio, and what variables might lead you to use slightly more or less water?
- What are the three heat stages Shimbo outlines for stovetop rice cooking, and what happens to the rice if you skip the resting phase?
- What are the three components of sushi-zu, and how should they be dissolved and cooled before being added to the rice?
- Why must the vinegar dressing be folded into the rice using a cutting motion rather than stirred, and what role does fanning play in the process?
- Rinse drill: Wash a cup of Japanese short-grain rice until the water runs clear, counting the number of rinses needed and noting the color change each time to build muscle memory for the process.
- Ratio experiment: Cook three small batches of rice using slightly different water ratios (e.g., 1:1.1, 1:1.15, 1:1.2 rice-to-water) and compare the texture side by side to internalize how sensitive the grain is to water volume.
- Stovetop heat-stage practice: Cook a batch entirely on the stovetop following Shimbo's heat progression, setting a timer for each phase and resisting the urge to lift the lid — journal what you observe when you finally open it.
- Sushi-zu preparation: Make the vinegar seasoning from scratch three times in one week, adjusting the sugar-to-salt ratio slightly each time and tasting the results to develop your palate for the correct sweet-tart-savory balance.
- Full sushi rice assembly: Combine a freshly cooked batch with your prepared sushi-zu in a wide bowl, practice the folding-and-fanning technique, and evaluate the final rice against Shimbo's descriptors (glossy, body-temperature, non-mushy).
- Holding test: After seasoning a batch of rice, cover it with a damp cloth and check its texture and temperature at 15-minute intervals over one hour, noting how it changes — this teaches you the usable window before rice deteriorates.
Next up: Consistently perfect sushi rice is the non-negotiable foundation upon which every subsequent topping, roll, and presentation technique depends — once the rice is reliable, the reader is ready to explore the fish, fillings, and assembly methods that transform it into finished sushi.
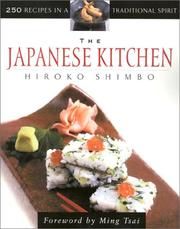
Shimbo dedicates detailed chapters to selecting, washing, and cooking short-grain rice and preparing sushi-su (seasoned vinegar), giving you the precise ratios and troubleshooting a beginner needs.
Knife Skills & Fish Handling
IntermediateSelect, butcher, and safely handle sushi-grade fish, and develop the knife control required for clean, even cuts.
▸ Study plan for this stage
Pace: 3–4 weeks, ~20–25 pages/day — read Shimbo's fish and knife chapters actively, with a cutting board nearby for immediate practice
- Sushi-grade fish: what the term means legally and practically, how to evaluate freshness by smell, color, texture, and eye clarity
- Sourcing channels: Japanese fish markets, trusted fishmongers, and what questions to ask a supplier to verify sushi-grade quality
- Whole-fish butchery: Shimbo's step-by-step breakdown of round fish (e.g., yellowtail, sea bass) and flat fish (e.g., flounder/hirame) into usable fillets
- Skin removal and pin-boning: techniques for clean, waste-minimizing cuts that preserve the integrity of the flesh
- Knife anatomy and selection: the yanagiba (sashimi knife), deba (heavy fish knife), and usuba, and why each shape serves a specific sushi task
- Knife grip and blade angle: the single-bevel pull-cut (hiki-zukuri) versus push-cut, and how blade angle determines slice thickness and surface texture
- Safe cold-chain handling: temperature control from purchase to plate, wrapping, and how long different fish can be held
- Cutting styles for nigiri and sashimi: hira-zukuri (flat cut), sogi-zukuri (diagonal slice), and ito-zukuri (thread cut) as described by Shimbo
- According to Shimbo, what visual and olfactory signs distinguish truly fresh sushi-grade fish from fish that is merely 'fresh' for cooking?
- What is the correct sequence of cuts Shimbo describes for breaking down a whole round fish into nigiri-ready fillets, and why does she recommend a deba for the initial butchery?
- How does the angle and direction of the yanagiba blade change between hira-zukuri and sogi-zukuri cuts, and what does each cut do to the texture of the fish on the palate?
- What cold-chain practices does Shimbo specify for storing raw fish at home between purchase and service, and what is the maximum safe holding time she recommends?
- Why does Shimbo emphasize a single, long drawing stroke rather than a sawing motion, and how does that technique affect the appearance and quality of the slice?
- How should pin bones be located and removed without tearing the flesh, and which tool does Shimbo recommend for this task?
- Fishmonger visit drill: Visit a fish counter with Shimbo's freshness checklist in hand. Evaluate at least three species for color, smell, and texture before buying; write a one-paragraph assessment of each.
- Whole-fish breakdown: Purchase one whole round fish (e.g., sea bass or yellowtail) and one flat fish (e.g., flounder). Following Shimbo's butchery sequences, break each down into fillets, remove skin, and pull all pin bones. Photograph each stage.
- Knife pull-cut practice on daikon: Before cutting expensive fish, practice the long drawing stroke on a large daikon radish. Aim for 10 uniform slices of exactly 5 mm, then 10 at 3 mm. Measure with a ruler and adjust until variance is under 1 mm.
- Three-cut style comparison: Using a single salmon fillet, produce a plate of hira-zukuri, sogi-zukuri, and ito-zukuri slices as Shimbo describes. Taste each side-by-side and write tasting notes on how the cut affects texture and mouthfeel.
- Cold-chain log: Over one week, practice the full purchase-to-plate workflow for two different fish. Log purchase time, wrapping method, refrigerator temperature, and the time and quality at service to internalize Shimbo's safety guidelines.
- Knife maintenance session: Sharpen or strop your yanagiba (or chef's knife) using the method Shimbo describes, then perform a paper-slice test and a tomato-skin test before and after to observe the difference in edge quality.
Next up: Mastering clean butchery and precise knife cuts produces the perfectly portioned, visually consistent fish pieces that are the essential raw material for the next stage's focus on rice preparation, seasoning, and the actual assembly of nigiri and rolls.
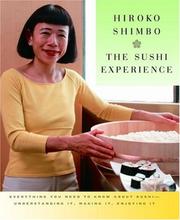
Shimbo's dedicated sushi book walks through sourcing sushi-grade fish, breaking down fillets, and the safety rules around raw fish handling, bridging knife theory into sushi practice.
Core Sushi Technique
IntermediateExecute nigiri, maki, temaki, and inside-out rolls at home with correct form, proportion, and presentation.
▸ Study plan for this stage
Pace: 6–8 weeks total: Weeks 1–3 cover "Sushi Taste and Technique" by Kimiko Barber (~20–25 pages/day, reading each technique chapter alongside one practice session); Weeks 4–7 cover "The Complete Book of Sushi" by Hideo Dekura (~25–30 pages/day, using its step-by-step photography as a visual checklist);
- Sushi rice (shari) mastery: correct rice variety, washing, water ratio, vinegar seasoning, and the folding-not-stirring cooling technique as detailed in Barber's foundational chapters
- Knife skills and fish fabrication: how Barber breaks down selecting, filleting, and slicing fish (hirazukuri, sogizukuri) to the precise thickness required for nigiri toppings
- Nigiri shaping: the two-handed honetsuki grip and the three-press method Barber demonstrates, achieving a finger-width rice pillow that is airy inside yet holds its form
- Maki rolling technique: using the bamboo mat (makisu) with consistent pressure, the correct rice-to-filling ratio, and the sealing and cutting steps shown in both Barber and Dekura
- Temaki (hand roll) construction: the cone-fold sequence, the importance of immediate consumption before nori softens, and portioning guidance from Dekura's hand-roll chapter
- Uramaki (inside-out rolls): the plastic-wrap mat method, toasted sesame or tobiko coating, and structural integrity tips covered in Dekura's advanced roll section
- Proportion and balance: the 60/40 rice-to-topping ratio principle and visual symmetry standards both authors use as benchmarks for well-formed pieces
- Presentation and plating: Barber's guidance on negative space, garnish (shiso, pickled ginger, wasabi placement), and Dekura's plating photography as a reference standard
- After reading Barber's rice chapter, can you explain why the vinegar mixture must be folded into warm (not hot) rice, and what textural defect results from over-mixing?
- What are the three tactile checkpoints Barber describes for knowing a nigiri piece has been correctly pressed — and what does an under-pressed vs. over-pressed piece feel and look like?
- How does Dekura differentiate the amount of rice and the mat pressure used for a hosomaki (thin roll) versus a futomaki (thick roll), and why does the distinction matter for the final cross-section?
- What specific steps in Dekura's uramaki chapter prevent the rice from sticking to the bamboo mat, and how does the plastic-wrap method solve this problem?
- Using both books as reference, how would you describe the ideal nori sheet — its grade, toasting state, and storage condition — and how does nori quality affect the structural integrity of a temaki cone?
- How do Barber and Dekura each approach plating differently, and what two or three principles from their combined guidance would you apply when presenting a mixed platter of nigiri and maki?
- Rice calibration drill (Week 1): Cook three consecutive batches of shari using Barber's recipe, adjusting vinegar seasoning incrementally each time; taste and journal the differences in acidity, sweetness, and texture until you hit the target profile.
- Nigiri repetition block (Weeks 2–3): Following Barber's shaping sequence, hand-form 20 nigiri pieces per session using only cucumber or tamagoyaki (no raw fish yet) to isolate technique; photograph each piece from above and in profile, then compare against Barber's reference images for size and arch.
- Maki cross-section test (Week 4): Roll five hosomaki and five futomaki using Dekura's ratios, then slice and lay the cross-sections side by side; measure the rice wall thickness with a ruler and adjust rolling pressure until the wall is consistently 5–7 mm.
- Temaki speed drill (Week 5): Set a 90-second timer per cone using Dekura's hand-roll chapter as your guide; practice until the cone is sealed and plated before the timer ends, then immediately bite-test for nori crispness — if the nori is already soft, your prep or assembly workflow is too slow.
- Uramaki challenge session (Week 6): Execute Dekura's plastic-wrap uramaki method with two different coatings (sesame and tobiko); slice and evaluate structural integrity (does the roll hold its round shape?), even coating distribution, and clean cut edges.
- Full mixed-platter presentation (Week 8): Prepare a composed platter of 6 nigiri, 2 maki rolls (sliced), and 2 temaki cones using both books' plating guidance; photograph it, then critique it against Dekura's plating photography and Barber's negative-space and garnish principles, noting at least three specific improvements for your next session.
Next up: Mastering the core four roll forms and their underlying rice, knife, and shaping fundamentals gives the reader the technical vocabulary and muscle memory needed to confidently explore regional Japanese sushi styles, creative ingredient substitutions, and advanced decorative techniques in the next stage.

Step-by-step photography of every hand motion makes this the clearest practical guide for building nigiri and rolls; it directly applies the rice and knife skills you have already developed.
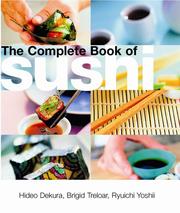
Broader in scope, it introduces regional Japanese sushi styles (oshizushi, chirashi, temari) so you understand the full landscape and can expand beyond basic rolls.
Discussion
Keep reading
Paths that share books, cover the same subject, or open a related topic.