Discover / Reading path

Craft stained glass at home

@craftsherpaSome background
2
Books
~4
Hours
2
Stages
Not yet rated

This curriculum takes a complete beginner from zero knowledge of stained glass all the way through confident, independent home studio work in both copper-foil and lead came techniques. Each stage builds directly on the last — first establishing safety, tools, and glass literacy, then mastering the two core joining methods, and finally developing the design and pattern skills needed to plan and execute original projects.

1

Lead Came Mastery

Some background

Cut, fit, and solder traditional H-came and U-came lead panels; understand glazing compound, panel reinforcement, and the structural differences between lead and foil construction.

Study plan for this stage

Pace: 4–5 weeks, ~20–25 pages/day; treat Divine's text as both a reading and a workshop manual — read a section, then immediately apply it at the bench before moving on

Key concepts
  • H-came vs. U-came profiles: understanding the structural role of each came type, when to use each, and how Divine distinguishes their application in panel construction
  • Lead cutting and mitering: using the lead knife and dykes correctly to achieve clean, tight joints at corners and intersections as demonstrated in Divine's step-by-step instructions
  • Glass cutting for lead work: the slightly different tolerances required when cutting glass for lead came (versus copper foil), accounting for the came heart width in pattern sizing
  • Panel assembly sequence: Divine's method of building up a panel against a wooden frame — establishing the border came first, fitting pieces in logical order, and maintaining alignment throughout
  • Soldering lead came: flux selection, iron temperature, and the technique of tacking then fully soldering joints so they are smooth, strong, and flush with the came face
  • Glazing compound (putty/whiting): mixing, working under the came flanges for weatherproofing and rigidity, and the cleaning/whiting process Divine describes to remove excess and harden the panel
  • Panel reinforcement: understanding when and how to add steel re-bars or zinc borders for larger panels, and how Divine addresses the structural limits of lead alone
  • Structural comparison — lead vs. copper foil: recognizing that lead came is a self-supporting skeleton while copper foil relies on solder seams for strength, and how this affects design choices
You should be able to answer
  • According to Divine, what is the functional difference between H-came and U-came, and in which parts of a panel is each type typically used?
  • How does the pattern (cartoon) need to be adjusted to account for the heart width of the lead came, and why does Divine stress this tolerance in glass cutting?
  • What is the correct sequence for assembling a lead panel against a frame as described in Divine's method, and why does the order of piece insertion matter structurally?
  • What role does glazing compound play after soldering is complete, and what steps does Divine outline for applying, working in, and cleaning off the compound?
  • At what point and by what criteria does Divine recommend adding reinforcing bars to a panel, and how are they attached without compromising the design?
  • How does the structural logic of a lead came panel differ from a copper-foil panel, and what design or size constraints does this place on each method?
Practice
  • Pattern drafting drill: Take a simple 12-piece geometric design, draw the full-size cartoon, then re-draw the cut lines inset by the exact heart width of your chosen came — compare the two and verify every piece fits with came in place before cutting any glass.
  • Came cutting practice: Cut a set of H-came lengths and miter a series of 45° and 90° corner joints using only a lead knife and a straightedge; aim for zero visible gap when pieces are butted together under a loupe.
  • Mini panel build (6"×6"): Following Divine's assembly sequence exactly — border came first, wooden frame stop, pieces inserted in order — build a small geometric panel in H-came, solder all joints on both faces, and photograph each stage for self-review.
  • Glazing compound session: Mix and apply glazing compound to your completed mini panel, work it fully under the flanges with a stiff brush, apply whiting, scrub, and buff; note how panel rigidity changes before and after this step.
  • Structural stress test comparison: Build two identical small panels — one in lead came, one in copper foil — then gently flex each by hand and observe where flex and stress concentrate; write a one-page reflection on how this informs design decisions for each method.
  • Reinforcement exercise: Design a hypothetical 24"×36" panel on paper, identify which lead lines would need re-bar support using Divine's guidelines, mark re-bar positions on the cartoon, and explain in writing why each bar is placed where it is.

Next up: Mastering the structural and material logic of lead came — its tolerances, compound finishing, and reinforcement needs — gives the reader a solid benchmark of traditional panel construction against which more advanced techniques (such as complex curved cutting, three-dimensional forms, or restoration of antique windows) can be meaningfully understood and contrasted.

📕
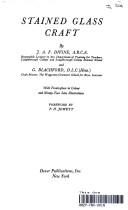
J.A.F Divine · 1940 · 115 pp

A classic, widely-used manual that treats lead came as the primary method; its methodical approach to cutting leads, fitting corners, and applying putty/glazing compound is the clearest introduction available.

2

Design & Pattern Making

Some background

Create original cartoons and patterns suited to both techniques, apply color theory specific to transmitted light, and plan structurally sound panels before cutting a single piece of glass.

Study plan for this stage

Pace: 2–3 weeks; spend the first 2–3 days doing a full visual survey of all patterns in the book, then revisit each pattern family (birds, then butterflies) at a pace of 8–12 patterns per sitting, ~30–45 minutes daily — sketching, annotating, and color-planning as you go.

Key concepts
  • Cartoon drafting: understanding how Sibbett's line drawings function as full-scale templates (cartoons) ready for tracing onto glass
  • Lead line as design element: recognizing how the bold outlines in each pattern define lead came paths and must be planned for structural integrity, not just aesthetics
  • Transmitted vs. reflected light: analyzing how Sibbett's color suggestions and the shapes themselves are optimized for light shining through, not bouncing off, the glass surface
  • Symmetry and repetition: identifying bilateral, radial, and tessellating symmetry in the bird and butterfly patterns and understanding why these structures simplify cutting and assembly
  • Shape complexity vs. cuttability: distinguishing patterns with gentle curves and obtuse angles (beginner-friendly) from those with tight inside curves, acute points, and isolated islands that demand advanced cutting skill
  • Organic form simplification: studying how naturalistic bird and butterfly anatomy is abstracted into a minimal number of glass pieces without losing visual identity
  • Color value and contrast in transmitted light: learning how light/dark value relationships and warm/cool color pairings create depth and focal points when backlit
  • Pattern scaling: understanding how to enlarge or reduce Sibbett's patterns using a grid method or photocopier to fit a specific panel size while preserving proportion
You should be able to answer
  • Looking at any pattern in the book, can you identify which lead lines are structural (load-bearing) and which are purely decorative, and explain why that distinction matters before you cut?
  • How does Sibbett's use of thick, unbroken outlines serve a different purpose in a stained glass cartoon than it would in an illustration meant for print or screen?
  • Choose one bird pattern and one butterfly pattern from the book — how would your color choices differ if the panel were front-lit (reflected light) versus back-lit (transmitted light), and why?
  • Which three patterns in the book would you rate as most beginner-friendly for cutting, and which three are most advanced? Justify your ratings using specific shape and angle criteria.
  • How would you scale a pattern from the book to fill a 12" × 16" panel, and what steps ensure the lead line widths remain proportionally correct after scaling?
  • How does the bilateral symmetry common in butterfly patterns affect the cutting plan — specifically, how many unique glass shapes do you actually need to cut versus the total piece count?
Practice
  • Full-book pattern audit: Go through every pattern and tag each one with three ratings — (1) cutting difficulty (1–5), (2) dominant symmetry type, and (3) a proposed 3-color palette optimized for transmitted light. Record these in a dedicated design notebook.
  • Cartoon tracing drill: Select five patterns of varying complexity, trace them at full book size onto tracing paper, then number every individual piece. Write the proposed glass color and a note about cutting challenge directly on each piece — this mimics real cartoon preparation.
  • Grid scaling exercise: Choose one bird and one butterfly pattern and scale each up to a target panel size of your choice using the grid method (draw a grid over the original, then redraw each cell larger). Check that your scaled lead lines are between 3/16" and 1/4" wide to suit standard came.
  • Transmitted-light color mockup: Using colored markers or transparent watercolor on tracing paper laid over three chosen patterns, test at least two different color schemes per pattern. Hold each mockup up to a window and photograph it — compare how the schemes read in transmitted light vs. on a flat surface.
  • Structural integrity review: Pick two patterns with large, unsupported expanses of a single color. Sketch in hypothetical reinforcement lead lines (or copper foil seams) that break up those expanses without destroying the design, then justify each addition in a short written note.
  • Original cartoon inspired by Sibbett: Using the abstraction principles observed in the book, draw your own original bird or butterfly cartoon from scratch at a target size of 8" × 10". Apply all planning steps: number the pieces, note colors, flag difficult cuts, and confirm no single piece exceeds a manageable size for your current skill level.

Next up: Mastering how to read, adapt, and originate structurally sound, color-planned cartoons from Sibbett's patterns gives you a complete paper blueprint in hand, so the next stage — selecting, scoring, and cutting actual glass — begins with confidence rather than guesswork.

Birds and Butterflies Stained Glass Pattern Book
Ed Sibbett Jr. · 1984 · 64 pp

An extensive library of ready-to-use patterns that also teaches how patterns are constructed — line weight, lead lines as design elements, and symmetry — giving the learner a practical design vocabulary.

Discussion