Ship Model Building: The Best Books to Read, in Order
Ship modelling splits cleanly into three problems — building a hull, getting the ship historically right, and rigging it — and most beginners fail at the third having never seriously attempted the second. This path follows that order: a first plank-on-bulkhead kit, then the reference works that tell you what a ship of a given period actually carried, then rigging as its own discipline, and finally scratch-building from draughts, where you are no longer following anyone's instructions.
Your first kit
BeginnerFinish a plank-on-bulkhead kit without abandoning it — fair the bulkheads, plank a hull that does not need filler, and set up a bench and a small tool kit that will still serve you at model ten
▸ Study plan for this stage
Pace: Four to six months, because the schedule here is one kit and not 507 pages. Bench and tools this stage assumes: a permanent working surface you can leave a hull on, good light, a modelling knife and spare blades, needle files, sanding sticks, a pin vice and small drills, several small clamps and rub
- Ship vocabulary — hull, keel, bulkhead, deck, spar, standing and running rigging — as the prerequisite for every other book
- Fairing the bulkheads before any plank goes on, which is where most first hulls are lost
- Two-layer planking: the first layer as structure, the second as the surface
- Plank tapering and spiling, and why a plank forced into place will lift later
- Bench setup and jigs that hold work square while glue cures
- Finishing a first model rather than starting a better one
- What are you actually doing when you fair a set of bulkheads, and how do you know when it is right?
- Why does a hull need two planking layers, and what is each one for?
- What causes a plank to spring off a bulkhead a week after it was glued?
- Which of Roth's jigs would have saved you time on the part of the build you found hardest?
- What does Campbell's primer let you understand in the kit instructions that you could not before?
- Plank a scrap section of hull before touching the kit, and taper the planks properly; keep it as a reference for what your work looks like.
- Fair the bulkheads, then run a batten along them and mark every place it does not sit flat, before gluing anything.
- Photograph the build at every session and keep a log of what you would do differently.
- Finish the kit. Abandoning it and starting a better one is the failure mode this stage exists to prevent.
Next up: One finished hull earns the right to ask whether it is a model of a particular ship, which is the next stage's question.

The book every ship modeller is handed first, and rightly: Mastini assumes nothing, works through one kit build end to end, and is honest that the first planking layer will look bad. Start here even if you have woodworking experience — the vocabulary alone is worth it.

Covers the same ground as Mastini with more on tools, jigs and workshop method, and goes further into fittings and finishing. Read it second as the practical complement; between the two, almost every beginner question is answered.

A short 1962 primer from a naval architect, and the fastest cure for the commonest beginner problem: not knowing what the parts of a ship are called or what they are for. Sixty pages that make the two books above readable.
Getting the ship right
IntermediateJudge whether a kit's fittings, colours and deck furniture are plausible for the ship's period and nation, and correct them from reference rather than trusting the box
▸ Study plan for this stage
Pace: Two to three months of reading and reference work alongside a second build — 827 pages, and most of it is looked at rather than read. Wolfram zu Mondfeld's Historic Ship Models (352 pages) is the permanent reference on the shelf: period-by-period and nation-by-nation drawings of hulls, fittings, dec
- Period and nation as constraints: what a ship of a given date and navy actually carried
- Judging a kit's fittings and deck furniture as plausible or wrong, using drawings rather than instinct
- Colour schemes as documented practice, not decoration
- Scale fidelity: what should be represented at 1:96 and what should be omitted
- Museum standard as a definable target rather than a compliment
- When to correct a kit and when the correction is not worth the hours
- How would you check whether a kit's guns, boats and deck fittings suit the ship's period and nation?
- What did Longridge do to reach museum standard that a kit builder normally skips?
- Why should a 1:96 model not carry 1:48 detail, and what happens visually when it does?
- Where is a kit manufacturer most likely to be wrong, on the evidence of Mondfeld?
- Which corrections on your current model would a knowledgeable viewer actually notice?
- Audit your finished first model against Mondfeld and list every part that is wrong for its period, without fixing anything.
- Pick one fitting on your current build and research it properly in Mondfeld and Longridge before making it.
- Take a photograph of your model at eye level from two metres and decide, using Bowen's argument, which details are actually contributing.
- Choose a specific historical ship and write a one-page specification of what it carried, before choosing your next kit.
Next up: A correct hull with no rigging is where most modellers stop; the next stage is the discipline that defeats them.

The single most useful reference on the shelf: period-by-period, nation-by-nation drawings of hulls, fittings, decoration, guns and rigging from the Middle Ages to the nineteenth century. This is the book that turns a kit into a model of a particular ship.
A detailed account of building HMS Victory to museum standard, and by far the best worked example of what serious accuracy demands. Placed here because it shows you what following the references all the way through looks like.

An edited collection on scale fidelity — fittings, sails, colour schemes, deck detail — and stronger than the two above on how scale itself changes what you should represent. Read it for the argument that a 1:96 model should not carry 1:48 detail.
Rigging as its own discipline
IntermediateRig a square-rigged model from a rigging plan you understand — standing rigging, running rigging, blocks, belaying — and be able to work out where a line goes when the plan is silent
▸ Study plan for this stage
Pace: Four to six months, and the reading is short — 551 pages — while the work is not. Tools this stage really does require, and which stage one did not: magnification you can wear or clamp, very fine tweezers and a rigging hook, sharp small scissors, beeswax for the thread, and light from more than one
- Standing rigging as structure and running rigging as control, and why the order of work follows from that
- Blocks, deadeyes and their sizing by scale
- Belaying points, and working out where a line goes when the plan is silent
- Thread choice, laying and waxing so a line hangs correctly at scale
- Tension: enough to look taut, not enough to bow the masts
- Access — planning the rigging sequence so you can still reach the last line
- What is the difference between standing and running rigging, and why is one rigged first?
- How do you determine the belaying point for a line the plan does not show?
- How does Petersson's drawing method solve a problem that a written rigging description cannot?
- Where does Underhill cover a vessel type Petersson does not, and how do the conventions differ?
- What are the symptoms of a mast pulled out of true by rigging tension, and how do you prevent it?
- Rig one mast completely on a test jig before touching the model, following a single Petersson drawing from origin to belay.
- Write your own rigging sequence for the whole model before starting, and mark which lines must be fitted before which.
- Make up a set of blocks or deadeyes at your scale and compare them against Mondfeld's drawings.
- Rig a small fore-and-aft subject from Petersson's second volume alongside the square rigger, and note every convention that changed.
Next up: Having rigged somebody else's hull, the next stage removes the kit entirely and starts from draughts.
Almost entirely line drawings, one rope at a time, following each from its origin to its belaying point. It solves the problem no text can: seeing which of forty ropes on the plan is the one in front of you. Start the stage here.

The companion volume covering cutters, schooners and other fore-and-aft rigs, which behave nothing like a square rigger. Worth owning even if your current model is square-rigged, because most small subjects are not.

The authority for nineteenth-century merchant sail, written by a draughtsman who measured the ships. Denser than Petersson and used as a reference against it — this is where you go when the drawings do not cover your vessel.
Scratch-building the hull
IntermediateBuild a hull from draughts rather than a kit — lofting frames, plank-on-frame construction, deck framing — and understand the ship's structure well enough to leave part of it exposed
▸ Study plan for this stage
Pace: A year and upward, and 646 pages that are consulted rather than read. This is the stage that assumes a workshop: sheet and strip hardwood stock rather than kit parts, a razor saw and ideally a small table saw or scroll saw, a drill press or a very steady pin vice, a flat reference surface for loftin
- Lofting: taking frame shapes off a set of lines and turning them into cut patterns
- Plank-on-frame construction, and what it lets you leave exposed that plank-on-bulkhead cannot
- Deck framing — beams, carlings, ledges — as a structure with its own logic
- Reading a set of draughts: sheer, body and half-breadth plans and how they relate
- Building jigs that hold frames square and true over months
- Wood selection and stability for parts cut thin and left visible
- How do you get a frame pattern from a body plan, step by step?
- What does exposing part of the structure commit you to that a fully planked hull does not?
- Where does Davis cover subjects Underhill does not, and how do the two draughtsmen's conventions differ?
- Which parts of a deck framing plan are structural at model scale and which are representational?
- What in your kit-building habits will actively hurt you when there are no pre-cut parts?
- Loft one frame from a set of draughts, cut it, and check it against the plan before cutting a second.
- Build a frame jig and set three frames in it, then measure them for square and for spacing.
- Work through Davis's built-up model as a paper exercise first — plan the whole sequence before cutting.
- Plank half a scratch hull and leave the other half open; the comparison is the point of the stage.
Next up: The last stage keeps everything you have learned and takes away the size, which forces every technique to be re-solved.
Catalogued as Plank-On-Frame Models & Scale Masting & Rigging, and the classic two-volume work on building from the frames outward. The point at which you stop assembling somebody else's parts; expect to read it twice before cutting anything.
A 1926 draughtsman's handbook of hull lines, deck fittings and rigging details taken off real vessels. Old, unpolished and still the reference for American merchant and naval subjects that Underhill does not cover.
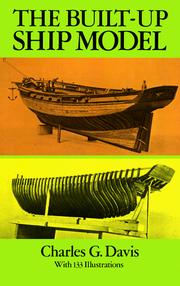
Davis's project book: one plank-on-frame model taken from draughts to completion. Read it after the Assistant, as the worked example against that book's reference material.
Miniature and museum-grade work
IntermediateWork at small scale and to exhibition standard, where every technique has to be re-solved because at 1:192 nothing can be bought and everything is made
▸ Study plan for this stage
Pace: Open-ended, and 320 pages between two books that are demonstrations rather than manuals. Philip Reed's Period Ship Modelmaking (128 pages) is a full illustrated build of a period warship at small scale; Modelling Sailing Men-of-War (192 pages) is his companion on warship subjects — carving, copperin
- Re-solving every technique at reduced scale, where kit and aftermarket parts do not exist
- Making rather than buying fittings — guns, boats, blocks, anchors
- Coppering and other surface treatments at a scale where thickness itself is visible
- Exhibition standard: what a judge or a curator actually looks at
- Carving small components, and tool choice for work under magnification
- Deciding what to represent when the detail is smaller than the material you can cut
- Which techniques from earlier stages simply stop working below a certain scale, and what replaces them?
- How does Reed make fittings that cannot be bought, and which of his methods could you adopt now?
- What is visible on a miniature that is invisible on a larger model, and vice versa?
- What separates an exhibition-standard model from a very good one?
- At what scale does your own eyesight and toolkit stop being the limit?
- Make one fitting — a ship's boat, a gun, an anchor — entirely from raw material at a smaller scale than you have worked before.
- Copper a test hull section following Reed and judge the result from arm's length rather than under magnification.
- Rebuild one component you previously bought as a kit part, and compare the two side by side.
- Set a single miniature model as a multi-year project and write its specification before starting.
Next up: The path ends here: what follows is a subject of your own choosing, researched from primary draughts, with these books as references rather than instructions.

Reed builds in miniature to a standard almost nobody matches, and this is a full illustrated build of a period warship at small scale. The best demonstration that fidelity and size are independent problems.
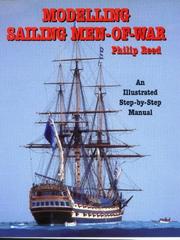
Catalogued as Modelling Sailing Men-of-War. Reed's companion volume on warship subjects — carving, coppering, guns, boats — and the natural close to the path: a working method rather than a set of instructions.