Start rock climbing
This curriculum takes a complete beginner from their first gym session all the way to confident outdoor climbing, covering movement literacy, anchor building, lead climbing safety, and structured training. Each stage builds directly on the last — you must understand how to move before you can train movement, and you must be safe before you can push performance.
Foundations: Movement & the Gym
BeginnerUnderstand how climbing movement works, develop core technique on the wall, and build the vocabulary needed to talk about climbing intelligently.
▸ Study plan for this stage
Pace: 8–10 weeks total. Week 1–4: Read "Climbing from Gym to Crag" by S. Peter Lewis (~20–25 pages/day, 3–4 sessions/week), pausing after each chapter to practice the described techniques at the gym. Week 5–10: Read "The Self-Coached Climber" by Dan Hague (~15–20 pages/day, 3–4 sessions/week), which is de
- The gym-to-crag mindset: understanding that indoor climbing is a training tool, not an end goal, and that habits formed in the gym directly shape outdoor performance (Lewis)
- Fundamental movement vocabulary: holds (jugs, crimps, slopers, pinches), wall angles (slab, vertical, overhang), and route-reading terminology introduced in Lewis
- The climbing movement cycle: silent feet, weight transfer, hip positioning, and center-of-gravity management as the foundation of efficient movement (Hague)
- Footwork precision: deliberate, quiet foot placements on footholds — the single most emphasized beginner skill across both books
- Body positioning and flagging: using the outside and inside flag to maintain balance and prevent barn-dooring, as detailed by Hague
- The concept of 'climbing with your eyes': previewing a route from the ground, identifying rest positions, and planning sequences before leaving the floor (Lewis & Hague)
- Tension and relaxation: knowing when to engage core tension versus when to shake out and recover, and how unnecessary gripping accelerates fatigue (Hague)
- Self-coaching feedback loops: using deliberate practice, video review, and structured drills rather than just logging mileage on the wall (Hague)
- After reading Lewis, can you explain in your own words why technique habits formed in a gym setting are so consequential for a climber's long-term development?
- What are the main hold types and wall angles described in 'Climbing from Gym to Crag,' and how does each one demand a different body response?
- According to Hague, what distinguishes a deliberate practice session from simply climbing routes repeatedly, and why does the distinction matter for skill acquisition?
- How does Hague describe the role of footwork in overall climbing efficiency, and what specific drills does he recommend to improve it?
- What is flagging, when should you use an inside flag versus an outside flag, and how does it relate to the concept of keeping your hips close to the wall?
- How would you use the route-reading process described across both books to approach an unfamiliar gym route at your current limit?
- Silent feet drill (from Hague): Climb three routes per session focusing exclusively on placing your feet without any sound. If your shoe scrapes or taps, downclimate and restart that move. Log how many 'quiet' ascents you achieve each week.
- Route-reading ritual (from Lewis): Before every single climb this stage, stand at the base for 60–90 seconds, identify every hold, choose your feet sequence, locate the rest positions, and visualize the full sequence — then climb. Debrief afterward on what matched and what surprised you.
- Flagging isolation drill (from Hague): On a vertical or slightly overhung wall, identify three moves per session where you feel yourself barn-dooring. Deliberately practice both inside and outside flags on those moves until the balance feels automatic.
- Straight-arm hangboard awareness: After reading Hague's sections on tension and grip fatigue, climb one easy route (two grades below your limit) with a rule of keeping arms as straight as possible on every hold. Notice where you instinctively over-grip and journal those positions.
- Video self-review session (Hague's self-coaching framework): Once per week, film yourself on a project route. Watch it back with the book's movement checklist in mind — feet, hips, arm bend, sequencing. Write two specific things to fix before the next session.
- Vocabulary sparring: After finishing Lewis, find a climbing partner (or use a mirror) and narrate a route out loud using the full technical vocabulary from the book — hold types, body positions, movement cues. If you can't name it, you haven't internalized it yet.
Next up: Mastering the movement language and self-coaching habits from Lewis and Hague gives you the technical eye and body awareness needed to meaningfully engage with more advanced topics — such as training periodization, strength development, and outdoor rock craft — without mistaking fitness gains for skill gains.

Written explicitly for the gym-to-outdoor transition, this is the ideal first book — it covers gym basics, gear literacy, and introduces outdoor context without overwhelming a beginner.
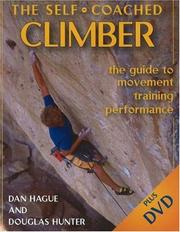
Introduces a systematic framework for understanding movement and footwork early, giving beginners a mental model for deliberate practice that pays dividends throughout the entire curriculum.
Outdoor Safety & Rope Systems
BeginnerUnderstand knots, belay systems, anchor building, and the safety protocols required to climb outdoors at a crag.
▸ Study plan for this stage
Pace: 6–8 weeks total: Weeks 1–4 on "Climbing Anchors" by John Long (~20–25 pages/day, including re-reading technical diagrams); Weeks 5–8 on "Rock Climbing" by Topher Donahue (~25–30 pages/day, with field sessions woven in on weekends).
- The SERENE-A / ERNEST anchor-building principles (Solid, Efficient, Redundant, Equalized, No Extension) as laid out in Climbing Anchors by John Long
- Foundational knots and their specific use cases: figure-eight follow-through, clove hitch, bowline, munter hitch, and the cordelette loop, all detailed in Climbing Anchors
- Natural and fixed protection: understanding how to evaluate trees, boulders, bolts, and pitons as anchor components per Long's criteria
- Load distribution and force multiplication: how angles between anchor legs dramatically increase forces on individual pieces, a core physics lesson in Climbing Anchors
- Belay device mechanics and belay technique: tube-style vs. assisted-braking devices, proper hand position, and the golden rule of never removing the brake hand, as covered in Rock Climbing by Donahue
- Crag safety protocols and outdoor ethics: site assessment, rockfall hazard management, communication commands, and Leave No Trace principles from Donahue's outdoor context chapters
- The fall-factor concept and dynamic rope behavior: understanding how rope stretch absorbs energy and why fall factor matters more than fall distance, bridged across both books
- Risk management and the 'system check' mindset: pre-climb partner checks, gear racking, and the habit of redundancy reinforced throughout both books
- After reading Climbing Anchors, can you explain why a 60° angle between two anchor legs is considered a safe threshold, and what happens to the load on each piece as that angle widens toward 120°?
- What makes a 'bomber' piece of natural protection according to John Long, and what visual and physical tests should you apply before trusting a tree or boulder as an anchor?
- Using the vocabulary from Climbing Anchors, walk through building a two-bolt sport anchor with a cordelette — what are the steps, and how does the finished system satisfy each element of SERENE-A?
- According to Donahue's Rock Climbing, what are the standard verbal commands between climber and belayer, and why is precise communication especially critical at a busy outdoor crag where you may not see your partner?
- How does Donahue describe the correct procedure for a top-rope belay using a tube-style device, and what are the most common beginner errors that compromise the brake-hand principle?
- Combining both books, describe a complete pre-climb safety routine: from parking at the crag to the moment the climber leaves the ground — what checks, in what order, must be completed?
- Knot flashcard drill: Tie each knot covered in Climbing Anchors (figure-eight follow-through, clove hitch, bowline, munter hitch, overhand on a bight) 10 times in a row, then practice tying them behind your back or with eyes closed to build muscle memory before going outdoors.
- Anchor angle force lab: Using two spring scales (or a simple rope-and-weight setup), build a two-point anchor and measure the force on each strand at 30°, 60°, 90°, and 120° angles — observe firsthand the load multiplication Long describes in Climbing Anchors.
- Simulated anchor builds at home: Using a door frame anchor trainer or a set of bolts at a climbing gym, build at least five different anchor configurations from Climbing Anchors (two-bolt cordelette, sliding-X, equalized three-piece trad anchor) and have an experienced climber critique each one against SERENE-A.
- Belay certification practice: At an indoor gym, log a minimum of 10 supervised belay sessions using a tube-style device, consciously applying the brake-hand technique and catch positions described in Donahue's Rock Climbing, then repeat with an assisted-braking device to compare.
- Crag simulation walk-through: Visit a local crag (or watch a detailed crag-approach video) and narrate aloud a full site assessment using Donahue's outdoor safety checklist — identify rockfall zones, locate anchor stations, plan an escape route, and note any environmental concerns.
- Partner safety-check role play: With a climbing partner, take turns acting as the 'safety auditor' before every simulated climb — verbally run through the ABCDE check (Anchor, Buckle/harness, Carabiners, Device/belay, Everything else) and deliberately introduce one error for the other person to catch, reinforcing the system-check mindset from both books.
Next up: Mastering knots, anchor systems, and crag safety protocols gives the reader a reliable safety foundation, making them ready to focus on movement quality and route-reading skills — the technical climbing performance topics that naturally follow in the next stage of the curriculum.
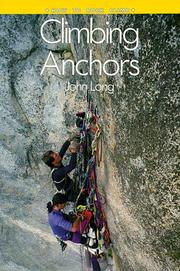
The canonical reference on anchor building — read this before going outside so you understand the 'why' behind every piece of gear placement and anchor configuration.

A thorough, well-illustrated guide to outdoor rope work, lead climbing protocol, and crag etiquette that consolidates anchor knowledge into real-world scenarios.
Lead Climbing & Trad Fundamentals
IntermediateDevelop the skills and judgment to lead sport routes confidently and understand the basics of placing traditional protection.
▸ Study plan for this stage
Pace: 4–5 weeks, ~20–25 pages/day; Long's book is dense with technique and safety detail, so budget extra time to re-read anchor and protection chapters before moving to hands-on practice sessions at the crag or gym.
- Lead climbing movement and mental game: managing fear, reading routes, and committing to clips
- Sport lead protocol: proper clipping technique (back-clip and z-clip avoidance), rope management, and calling commands
- Fall dynamics and fall practice: understanding how dynamic falls work, when it is safe to fall, and building a fall-taking habit
- Protection principles from Long's gear chapters: how passive (nuts, hexes) and active (cams) protection works, placement mechanics, and load direction
- Building anchors: Long's SERENE-A (or equivalent) framework — equalized, redundant, no-extension anchor systems at the top of a route
- Belay device mastery for leading: giving a dynamic belay, managing slack, and catching lead falls safely
- Route assessment and risk management: reading a route for runout, identifying good vs. poor protection placements, and making go/no-go decisions
- Fundamental knots and their applications: figure-eight follow-through, clove hitch, munter hitch, and double-fisherman's as covered by Long
- According to Long, what is a back-clip and a z-clip, and why is each dangerous when lead climbing?
- How does Long describe the proper body position and hand sequence for clipping a bolt while on lead, and why does timing matter?
- What criteria does Long outline for evaluating whether a nut or cam placement is trustworthy — what does 'seated' protection look like, and what forces must it resist?
- How does Long explain the physics of a lead fall (fall factor, impact force) and what responsibilities does this place on the belayer?
- What are the key attributes of a sound top-rope or lead anchor according to Long, and how do you achieve equalization with a cordelette or slings?
- What mental strategies does Long recommend for managing fear and hesitation on a lead, and how do these connect to safe decision-making about runout?
- Clip practice at home: hang a quickdraw from a doorframe at shoulder, hip, and knee height; practice clipping with both hands from each side 20 times per session until the motion is automatic and you can identify back-clip and z-clip errors instantly.
- Controlled fall sessions: at an indoor lead wall with a trusted belayer, intentionally take progressively longer falls (starting 1 foot above a bolt, working to 3–4 feet) to build comfort with fall dynamics and calibrate your belayer's catch technique.
- Gear identification and placement simulation: obtain a small rack (a few nuts and one or two cams); practice placing and cleaning each piece in a crack feature or brick mortar joint, checking for full contact, correct orientation, and outward-pull resistance before removing.
- Anchor building drill: using Long's anchor criteria as a checklist, build at least three different anchors at a top-rope station (cordelette, sliding-X, and clove-hitch-to-bolts) and have a more experienced partner critique each for equalization, redundancy, and extension.
- On-route lead simulation: on a familiar sport route graded well within your ability (two full grades below your top-rope max), focus entirely on process — pre-planned clip stances, rope management, and verbal commands — rather than difficulty, completing it at least three times in one session.
- Knot proficiency test: time yourself tying a figure-eight follow-through, clove hitch on a biner, and munter hitch; aim to tie each correctly in under 30 seconds with eyes open, then practice the figure-eight with eyes closed to simulate low-light or high-stress conditions.
Next up: Mastering sport lead protocol and the foundational gear-placement logic in Long's book gives you the technical vocabulary and safety baseline needed to progress into multi-pitch climbing and more complex trad rack management, where route-finding, longer runouts, and self-rescue judgment become the central challenges.
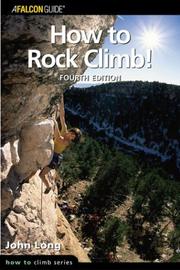
A long-standing industry standard that bridges sport and trad leading — its coverage of fall mechanics, clipping technique, and gear placement is essential before committing to leading outdoors.
Performance Training
IntermediateBuild a structured, evidence-based training plan to improve strength, endurance, and technique for climbing harder routes indoors and out.
▸ Study plan for this stage
Pace: 6–8 weeks, ~20–25 pages/day, 5 days/week — read chapters actively with a training journal alongside; revisit key protocols on rest days
- The Four Pillars of Climbing Performance: strength, technique, mental fitness, and nutrition/recovery — and how Horst integrates all four into a unified training model
- Periodization and training cycles: understanding macrocycles, mesocycles, and microcycles to structure progressive overload without overtraining
- Finger and contact strength development: the science behind hangboard protocols (max hangs, repeaters) and how tendon adaptation differs from muscular adaptation
- Antagonist muscle training: the critical role of push muscles (shoulders, chest, triceps) and injury prevention routines to balance the pull-dominant demands of climbing
- Energy systems in climbing: aerobic base vs. anaerobic power, and how to train each system with targeted board climbing, ARC (Aerobic Restoration and Capillarization) training, and interval protocols
- Technique refinement through deliberate practice: footwork precision, body positioning, hip engagement, and reading routes — and why technique work must accompany physical training
- Mental training and self-coaching: visualization, process-focus, managing fear of falling, and building a growth mindset on the wall
- Nutrition, sleep, and recovery protocols: macronutrient timing, hydration, active recovery, and the role of rest days in adaptation
- According to Horst, what are the primary limiters for intermediate climbers, and how do you identify your own personal limiting factor?
- How does periodization prevent plateaus and overuse injuries, and what does a sample 12-week mesocycle look like based on the book's framework?
- What is the physiological rationale behind hangboard repeaters vs. max hangs, and when should each be prioritized in a training cycle?
- Why does Horst emphasize antagonist training, and which specific exercises does he recommend to reduce the risk of finger, elbow, and shoulder injuries?
- How do ARC training and interval-based climbing sessions differ in their goals, and how are they scheduled within a weekly training plan?
- What mental strategies does Horst prescribe for performing at your limit on a redpoint attempt, and how does visualization fit into pre-climb preparation?
- Build your personal training log: After reading the assessment chapter, complete Horst's self-evaluation tests (pull-up max, lock-off endurance, footwork drills) and record your baseline scores to track progress across the 8 weeks
- Design a 4-week mesocycle: Using the periodization framework from the book, write out a week-by-week plan specifying climbing days, hangboard sessions, antagonist work, and rest — then execute it and journal how your body responds
- Run a 3-week hangboard protocol: Choose either the repeater or max-hang protocol Horst outlines, log every session (grip position, weight added/subtracted, perceived exertion), and compare finger strength before and after
- Dedicated ARC sessions: Perform 2 ARC sessions per week for 3 weeks on easy terrain (20–45 minutes of continuous movement), focusing on relaxed movement and forearm pump management, and note how your recovery between hard moves improves
- Technique video review: Film yourself on 3 different routes (slab, vertical, overhang), then rewatch with Horst's technique checklist in mind — identify one recurring flaw per session and set a deliberate drill to fix it over the following week
- Mental rehearsal practice: Before each project attempt, spend 5 minutes doing a full eyes-closed visualization of the route sequence as Horst describes; journal afterward on how closely the actual climb matched your mental map and where anxiety arose
Next up: Mastering Horst's structured training principles gives you the physical and mental foundation to safely pursue higher-stakes climbing environments — setting the stage for outdoor-specific skills, route reading, and risk management covered in advanced outdoor and trad climbing curricula.

A practical companion to Anderson's manual, with accessible drills and mental training chapters that round out a complete performance program for the gym-to-crag climber.
Discussion
Keep reading
Paths that share books, cover the same subject, or open a related topic.