Become a massage therapist: licensed human touch
This curriculum takes a beginner from zero knowledge to a licensed, practice-ready massage therapist across four progressive stages. It begins with the body literacy every therapist must have, moves through hands-on technique and clinical reasoning, prepares you for the licensing exam, and finally equips you to build a sustainable, human-centered career that no machine can replace.
Body Literacy — Anatomy & Physiology Foundations
BeginnerUnderstand how the human body is structured and how its systems work together, giving you the anatomical vocabulary and spatial intuition that all massage technique depends on.
▸ Study plan for this stage
Pace: 12–16 weeks total. Week 1–4: The Anatomy Coloring Book (~8–10 plates/day, coloring actively rather than just reading). Week 5–10: Trail Guide to the Body (~15–20 pages/day, pausing to palpate on yourself or a partner after each region). Week 11–16: Anatomy of Movement Exercises (~10–12 pages/day, pe
- Anatomical terminology and directional language (superior/inferior, proximal/distal, medial/lateral, planes of the body) as introduced in The Anatomy Coloring Book — the shared vocabulary for all clinical communication
- The major body systems (skeletal, muscular, nervous, circulatory, lymphatic, integumentary) and how they interact, built through the active coloring process in Kapit's plates
- Bone landmarks — processes, fossae, tubercles, condyles — as mapped in Trail Guide to the Body, which are the GPS coordinates massage therapists use to locate muscles and nerves
- Muscle origin, insertion, and action: understanding that every muscle has an attachment story and a movement story, the central framework of Trail Guide to the Body
- Palpation as a skill: Trail Guide to the Body's systematic region-by-region approach teaches you to feel bony landmarks and muscle bellies through skin, translating visual anatomy into tactile knowledge
- Joint structure and range of motion: how bones articulate, what limits movement, and why this matters for both assessment and safe technique application
- Functional movement patterns — how muscles work in coordinated groups (agonist, antagonist, synergist, stabilizer) — the core insight of Anatomy of Movement Exercises
- Kinesthetic self-awareness: using the exercises in Anatomy of Movement Exercises to feel anatomy from the inside, linking the coloring-book images and palpation skills into lived body experience
- Looking at any plate in The Anatomy Coloring Book, can you name the structure, state which body system it belongs to, and use correct directional terminology to describe its position relative to two neighboring structures?
- Using Trail Guide to the Body as your reference, can you locate and palpate at least three bony landmarks in each major region (head/neck, shoulder/arm, trunk, hip/leg) on yourself or a partner, and name the muscles that attach nearby?
- For any major muscle covered in Trail Guide to the Body, can you state its origin, insertion, primary action, and which everyday movement or massage stroke would engage it?
- After working through Anatomy of Movement Exercises, can you perform a movement (e.g., shoulder flexion, hip abduction) and simultaneously name the prime mover, the antagonist being lengthened, and the joints involved?
- Can you trace the basic pathway of blood through the cardiovascular circuit and explain why a massage therapist needs to understand venous return and lymphatic flow?
- How do the three planes of the body (sagittal, frontal, transverse) described in The Anatomy Coloring Book map onto the movement analyses in Anatomy of Movement Exercises — and why does plane-of-motion awareness matter when designing a massage session?
- Active coloring with intention (The Anatomy Coloring Book): Before coloring each plate, cover the labels and try to name every structure from memory. After coloring, write a two-sentence clinical note describing what a massage therapist needs to know about that structure.
- Landmark scavenger hunt (Trail Guide to the Body): After reading each regional chapter, set a timer for 15 minutes and locate every bony landmark listed on your own body using only your fingertips. Check accuracy against the book's palpation photos.
- Muscle card drill (Trail Guide to the Body): Create a flashcard for every muscle — one side shows the body region illustration, the other lists origin, insertion, action, and one massage consideration. Review 20 cards daily using spaced repetition.
- Movement journaling (Anatomy of Movement Exercises): After completing each exercise sequence in the book, write 3–5 sentences describing what you felt — which muscles fatigued, where you felt stretch, what joints were moving. Compare your felt sense to the anatomical diagrams.
- Partner palpation lab (Trail Guide to the Body + Anatomy of Movement Exercises): Once per week, work with a study partner. One person performs a movement from Anatomy of Movement Exercises while the other palpates the contracting muscle identified in Trail Guide to the Body, then swap roles and discuss findings.
- Systems integration map: At the end of each week, draw a one-page diagram (no copying — from memory) showing how the week's anatomical content connects across at least two body systems (e.g., how a muscle's blood supply relates to its nerve innervation and its bony attachments).
Next up: ">By the end of this stage you will have built a precise anatomical map — visual from Kapit, tactile from Biel, and kinesthetic from Calais-Germain — that gives you the structural and functional language needed to understand why specific massage techniques are applied where and how they are, which is exactly what the next stage on massage theory and technique will demand.
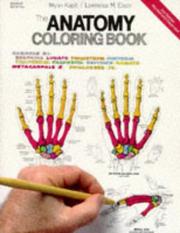
Active coloring encodes anatomical structures into muscle memory before any other study — ideal first contact with the body for a complete beginner.
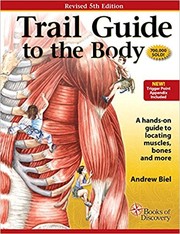
The single most-used palpation and surface anatomy reference in massage school; read it second so the coloring book's vocabulary makes every landmark immediately meaningful.
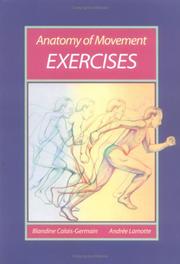
Bridges static anatomy into how the body actually moves, preparing you to think about muscles in action rather than on a diagram — essential before learning technique.
Core Technique — The Art & Science of Touch
BeginnerLearn the foundational strokes, draping, body mechanics, and session structure of Swedish and therapeutic massage so you can give a safe, effective, professional treatment.
▸ Study plan for this stage
Pace: 10–12 weeks total. Weeks 1–8: Mosby's Fundamentals of Therapeutic Massage (Fritz) — aim for ~25–35 pages/day, 5 days/week, reading chapters on anatomy, strokes, draping, and session structure in sequence. Weeks 9–12: The Trigger Point Therapy Workbook (Davies) — ~20–25 pages/day, 5 days/week, workin
- The five classical Swedish strokes (effleurage, petrissage, tapotement, friction, vibration) — their purpose, pressure depth, direction, and physiological effects as detailed in Fritz's technique chapters
- Draping principles and protocols — how Fritz frames client modesty, safety, and professional boundaries through proper sheet and bolster use
- Body mechanics for the therapist — Fritz's guidance on stance, table height, use of body weight vs. arm strength, and injury prevention for the practitioner
- Anatomy in context — how Fritz integrates musculoskeletal anatomy (muscles, fascia, joints) directly with stroke selection and contraindications
- Session structure — intake/health history, goal-setting, the arc of a 60-minute treatment (opening, working phase, closing), and SOAP note documentation as taught by Fritz
- Contraindications and endangerment sites — Fritz's framework for recognizing when massage is unsafe or must be modified
- The trigger point model — Davies's explanation of how myofascial trigger points form, refer pain to distant sites, and perpetuate musculoskeletal dysfunction
- Self-treatment and palpation skills — Davies's step-by-step method of locating a taut band, confirming a trigger point by its referral pattern, and applying ischemic compression to release it
- According to Fritz, what are the specific physiological effects of effleurage on the circulatory and nervous systems, and when would you choose it over petrissage?
- How does Fritz define an endangerment site, and can you name at least five with the anatomical reason each is contraindicated for deep pressure?
- Walk through the full structure of a professional 60-minute session as Fritz describes it — what happens in the first five minutes, the working phase, and the closing?
- According to Davies, what is a trigger point, how does it differ from general muscle soreness, and why does it cause referred pain in a predictable pattern?
- Using Davies's body-region chapters, if a client reports pain at the base of the skull and behind the eye, which muscles would you investigate first and why?
- How do Fritz's draping standards and Davies's self-treatment instructions together reinforce the idea that client comfort and informed consent are non-negotiable throughout a session?
- Stroke lab on a willing partner or practice bolster: perform each of Fritz's five Swedish strokes for 5 minutes each, narrating aloud the intended depth, direction, and effect — record yourself to review form
- Draping drill: practice uncovering and re-draping each body region (back, leg, arm, shoulder, face) using only a flat sheet and bolster, timing yourself to keep transitions under 10 seconds without exposing the client
- Body mechanics check: set your massage table to Fritz's recommended height formula (fist at your side), then practice effleurage on a bolster for 10 minutes using only body-weight lean — have a partner watch or video your posture for sway-back or locked knees
- SOAP note practice: after every practice session (even on a bolster), write a brief SOAP note using Fritz's format — do this for at least six sessions to build the habit before it feels natural
- Trigger point mapping journal (Davies): each week, choose one body region from Davies, palpate the listed muscles on yourself, mark any taut bands or referral sensations on a body diagram, and compare your findings to Davies's pain-pattern illustrations
- Integrated mini-session: by week 11, give a 30-minute practice session that combines Fritz's session structure and Swedish strokes with at least one trigger point release from Davies — debrief with your practice partner using the questions: Was the draping secure? Did body mechanics hold up? Did the TP release reduce the referral sensation?
Next up: Mastering Fritz's foundational strokes and session structure alongside Davies's trigger point model gives you a complete beginner toolkit — the next stage can now build on this safe, structured base to introduce deeper modalities (such as deep tissue, myofascial release, or sports massage) where precise anatomy knowledge and advanced palpation skills become the central focus.
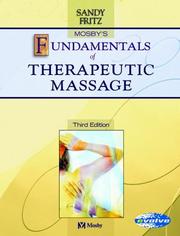
The dominant textbook used in accredited massage programs nationwide; covers strokes, contraindications, ethics, and session flow in a logical, school-tested sequence.
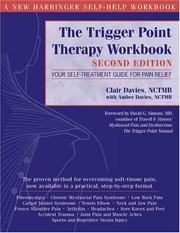
Introduces myofascial trigger points — the most common source of client pain — with clear self-treatment maps that sharpen your palpation skills and clinical thinking.
Clinical Depth — Pathology, Assessment & Specialized Work
IntermediateRecognize common pathologies, adapt your work safely for special populations, and begin integrating deeper modalities so your sessions address real clinical complaints.
▸ Study plan for this stage
Pace: 10–12 weeks total. Weeks 1–6: Mosby's Pathology for Massage Therapists (Salvo) — read ~25–30 pages/day, covering one body-system chapter per sitting; use the built-in review questions at the end of each chapter before moving on. Weeks 7–12: Clinical Massage Therapy (Waslaski) — read ~20–25 pages/day
- Pathology literacy: understanding etiology, signs/symptoms, contraindications, and cautions for each condition covered in Salvo — organized by body system (integumentary, musculoskeletal, nervous, cardiovascular, etc.)
- Contraindication categories: distinguishing absolute contraindications (do not treat) from local/regional and relative contraindications (modify treatment), as Salvo systematically frames them for massage practice
- Special populations adaptation: pregnancy, oncology, elderly, and post-surgical clients — recognizing how pathology alters tissue behavior and session design
- Postural and movement assessment: Waslaski's intake and visual/palpatory assessment framework for identifying the primary pain generator before selecting any technique
- Myofascial release and cross-fiber friction within a clinical context: Waslaski's layered soft-tissue protocol for addressing chronic pain patterns and scar tissue
- Neuromuscular therapy (NMT) principles: trigger point identification, referral patterns, and systematic release sequences as presented in Waslaski's clinical protocols
- Stretching and movement re-education: Waslaski's post-technique active and passive stretching sequences that reinforce tissue changes and restore range of motion
- Outcome-based session design: building a session arc — assessment → targeted intervention → reassessment — rather than a routine full-body sequence
- Given a client presenting with a specific condition from Salvo (e.g., fibromyalgia, DVT, diabetes, or a recent fracture), can you correctly classify the contraindication level and articulate the physiological reason for your decision?
- How does Salvo's body-systems organization help you anticipate cascading effects — for example, how cardiovascular pathology might affect your pressure choices and positioning?
- Using Waslaski's assessment model, what visual, postural, and palpatory findings would lead you to suspect a myofascial pain pattern versus a joint restriction, and how would that change your session plan?
- Walk through Waslaski's layered soft-tissue protocol for one region (e.g., the shoulder or lumbar spine): what is the rationale for the sequence of techniques, and how do you know when to progress to the next layer?
- How do you modify a clinical protocol from Waslaski for a special-population client (e.g., an oncology patient or a pregnant client in the third trimester) using the safety framework established in Salvo?
- What does 'reassessment' look like in practice after applying a Waslaski protocol — which client feedback and observable changes confirm that the intervention was appropriate and effective?
- Pathology flash-card system: After each Salvo body-system chapter, create index cards with Condition / Etiology / Key Signs & Symptoms / Contraindication Level / Your Modification on each card. Drill them weekly and sort into 'confident' and 'review' piles.
- Contraindication decision tree: Draw a branching flowchart for five common conditions from Salvo (e.g., hypertension, varicose veins, osteoporosis, recent surgery, skin infection). Practice talking through the tree aloud as if explaining your reasoning to a supervising therapist.
- Intake simulation: Role-play a client intake using Waslaski's assessment framework with a study partner or in front of a mirror. Practice postural observation, range-of-motion screening, and palpatory assessment, then write a one-paragraph 'clinical impression' identifying the likely primary pain generator.
- Protocol mapping: For two regional protocols in Waslaski (e.g., cervical/shoulder and lumbar/hip), draw a step-by-step flowchart of the technique sequence. Annotate each step with its physiological goal (e.g., 'reduce ischemia in trigger point,' 'break cross-fiber adhesion'). Use this map as a reference during practice sessions.
- Supervised practice sessions with documentation: Perform at least four practice sessions on peers or volunteer clients, each targeting a complaint addressed in Waslaski. Write a SOAP note for each session that explicitly references a pathology consideration from Salvo and a technique rationale from Waslaski.
- Comparative case study: Choose one chronic pain condition that appears in both books (e.g., thoracic outlet syndrome or rotator cuff tendinopathy). Write a one-page case study that synthesizes Salvo's pathology profile with Waslaski's clinical protocol, including contraindication flags, assessment findings, technique choices, and a home-care recommendation.
Next up: Mastering pathology screening from Salvo and outcome-based clinical protocols from Waslaski gives you the safety framework and hands-on precision needed to confidently pursue advanced specializations — such as sports massage, rehabilitation-focused work, or modality certifications — where complex presentations and higher-stakes client populations are the norm.

Covers the diseases and conditions you will encounter in practice, with clear massage indications and contraindications — must-read before working with any clinical population.

Teaches orthopedic assessment and injury-specific protocols, elevating your work from relaxation to targeted therapeutic outcomes for musculoskeletal complaints.
Discussion
Keep reading
Paths that share books, cover the same subject, or open a related topic.