Work leather by hand
This curriculum takes a complete beginner from understanding leather as a material all the way to executing refined, hand-crafted leather goods with professional finishing. Each stage builds directly on the last — first establishing material knowledge and safe tool use, then developing core hand-stitching and cutting technique, and finally tackling complex projects and the refined aesthetic judgment of a skilled craftsperson.
Foundations: Materials, Tools & First Cuts
BeginnerUnderstand leather types, tannages, and grain; identify and safely use essential hand tools; make clean straight and curved cuts; and complete a first simple project.
▸ Study plan for this stage
Pace: 3–4 weeks, ~20–25 pages/day; read each chapter once for overview, then re-read tool and technique sections at the workbench with tools in hand
- Leather types and their sources: cowhide, pigskin, goatskin, and exotic leathers covered in The Leatherworking Handbook, and how animal origin affects working properties
- Tannage methods: vegetable-tanned vs. chrome-tanned leather — differences in firmness, toolability, moisture response, and best use cases
- Grain structure: full-grain, top-grain, corrected-grain, and suede/split — how to identify each by sight and touch and why grain side vs. flesh side matters for every project
- Leather weight and thickness: understanding ounce measurements (e.g., 2–3 oz, 4–5 oz) and matching weight to project requirements such as belts, wallets, or bags
- Essential hand tools introduced in The Leatherworking Handbook: swivel knife, skiver, stitching chisels/pricking irons, edge beveler, wing divider, and cutting mat — their anatomy and correct grip
- Cutting safely and cleanly: using a steel rule, rotary cutter, and head knife to produce straight cuts; using scissors and curved knives for curved cuts; consistent pressure and single-stroke technique
- Leather preparation basics: dampening vegetable-tanned leather for tooling, casing leather evenly, and understanding how moisture affects workability
- First simple project construction: transferring a pattern, cutting all pieces accurately, and assembling a beginner item (such as a key fob or bookmark) as demonstrated in The Leatherworking Handbook
- What are the key differences between vegetable-tanned and chrome-tanned leather, and which is more appropriate for hand-tooling and why?
- How do you determine the correct leather weight for a given project, and what does '4–5 oz' mean in practical thickness terms?
- What is the difference between full-grain and top-grain leather, and how can you identify each by examining the hide?
- Name five essential cutting and marking tools from The Leatherworking Handbook, describe the safe handling technique for each, and explain when you would choose one over another.
- Why must vegetable-tanned leather be 'cased' before tooling, and what happens if the leather is too wet or too dry?
- Walk through every step of completing the first simple project in The Leatherworking Handbook — from pattern transfer to final cut — identifying where errors most commonly occur.
- Tool identification drill: lay out every tool mentioned in The Leatherworking Handbook, name each one aloud, state its purpose, and practice the correct grip before making a single cut
- Leather sample library: obtain small swatches of vegetable-tanned, chrome-tanned, full-grain, and split leather; label each and record observations about texture, flexibility, smell, and cut edge behavior in a dedicated craft notebook
- Straight-cut practice sheet: using a steel rule, head knife or rotary cutter, and cutting mat, cut 20 straight lines of varying lengths on a scrap piece of vegetable-tanned leather, aiming for clean single-stroke cuts with no ragged edges — inspect each under good light
- Curved-cut practice: draw a series of S-curves and circles on scrap leather and cut along them with scissors and a curved knife, comparing edge quality; repeat until curves are smooth and consistent
- Leather casing experiment: take two identical scrap pieces of veg-tan leather, case one correctly and leave one dry; attempt a simple stamped impression on each and document the difference in result in your craft notebook
- Complete the beginner project from The Leatherworking Handbook (key fob, bookmark, or equivalent): transfer the pattern accurately, cut all pieces, finish the edges with an edge beveler, and critically evaluate your cuts against the book's photographs before moving on
Next up: Mastering leather identification, tool handling, and clean cutting in this stage gives you the confident material knowledge and muscle memory needed to tackle the more demanding techniques of the next stage — such as saddle stitching, edge finishing, and decorative tooling — without being slowed down by foundational uncertainty.
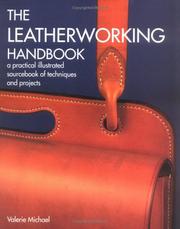
A true beginner's bible that introduces leather types, tannages, tools, and basic techniques with clear photography. Reading this first gives you the vocabulary and material intuition every subsequent book assumes you already have.
Core Technique: Hand-Stitching & Construction
BeginnerMaster the saddle stitch and other hand-stitching methods, understand thread and needle selection, and construct clean seams, edges, and closures on small goods.
▸ Study plan for this stage
Pace: 3–4 weeks, ~15–20 pages/day; Al Stohlman's book is concise and technique-dense, so read slowly, re-reading each demonstrated technique before moving on — plan to revisit illustrated sections multiple times alongside hands-on practice sessions
- The saddle stitch: two-needle technique, correct thread tension, and why it is stronger and more durable than machine stitching
- Thread selection: waxed linen vs. synthetic thread, appropriate thread weight relative to leather thickness and project type
- Needle selection: harness needles, blunt vs. sharp tips, correct needle size relative to thread and stitch hole diameter
- Pricking/stitching irons and awls: how to mark, space, and punch consistent stitch holes at uniform angles
- Stitch length and spacing: how to calibrate for aesthetics, strength, and leather weight
- Starting and finishing a stitch run: locking off thread ends securely without knots showing on the surface
- Edge finishing as part of construction: beveling, burnishing, and how clean edges relate to seam integrity
- Constructing small goods: aligning pieces, holding work (stitching clam/pony), and maintaining consistent seam allowances
- What makes the saddle stitch mechanically superior to a single-thread lock stitch, and how does Stohlman demonstrate the correct two-needle method?
- How do you select the right thread weight and needle size for a given leather thickness, according to the guidelines in the book?
- What is the correct procedure for starting and ending a stitch run so the thread is locked off cleanly and securely?
- How should stitch holes be spaced and angled, and what tools does Stohlman recommend for achieving consistent results?
- What steps does Stohlman outline for finishing edges in conjunction with stitched seams on small constructed goods?
- What common stitching mistakes does the book identify, and what techniques correct them?
- Saddle stitch sampler: Cut 4–6 scrap leather strips of varying weights (2–4 oz, 4–6 oz) and practice the full saddle stitch workflow on each — mark, punch, stitch, and lock off — until tension and spacing are visually uniform across the entire run
- Thread & needle comparison drill: Stitch identical sample panels using at least two thread types (waxed linen and a synthetic) and two needle sizes; compare durability, appearance, and ease of use, and write a one-paragraph reflection on which combination you prefer and why
- Stitch hole consistency exercise: Use a stitching iron or pricking iron to punch a 6-inch line of holes on vegetable-tanned leather, then hold it up to light and evaluate uniformity of spacing and angle before stitching a single run
- Start/finish lock-off practice: Isolate just the beginning and ending technique — practice locking off thread ends on scrap at least 10 times until no tail shows and the lock holds under firm hand tension
- Small constructed project: Following Stohlman's construction sequence, build one simple small good (a card sleeve, key fob, or coin pouch) from scratch — cut, skive if needed, punch, saddle stitch all seams, and finish all edges by burnishing
- Self-critique session: Photograph your finished small project alongside a ruler, then annotate the photo identifying at least three areas where stitch spacing, tension, or edge finish could improve, and note the corrective action for your next piece
Next up: Mastering Stohlman's hand-stitching and construction fundamentals gives you the precise, repeatable joinery skills needed to confidently tackle more complex leather goods — such as wallets, bags, and belts — where pattern layout, hardware setting, and multi-panel construction build directly on the clean seams and edges you have practiced here.
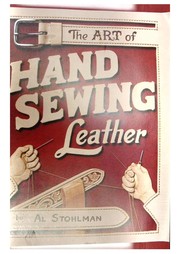
Al Stohlman is the undisputed authority on hand-stitched leatherwork, and this slim volume is entirely devoted to the saddle stitch — the single most important skill in hand leathercraft. Read it before any project book so the technique is correct from day one.
Intermediate Projects: Bags, Belts & Wallets
IntermediateApply cutting and stitching skills to functional, wearable goods; learn pattern drafting, skiving, edge finishing, and hardware setting for everyday leather items.
▸ Study plan for this stage
Pace: 4–5 weeks, ~20–25 pages/day; spend extra time on project chapters by re-reading hardware and pattern sections before attempting each build
- Pattern drafting and transferring designs onto leather using Groneman's project templates for bags, belts, and wallets
- Skiving techniques — thinning leather edges with a skiver or knife so seams and folds lie flat without bulk
- Edge finishing methods covered by Groneman: beveling, burnishing, dyeing, and edge coating to produce clean, professional borders
- Hardware setting: installing rivets, snaps, buckles, D-rings, and Chicago screws as demonstrated in the belt and bag projects
- Stitching for functional goods: consistent saddle-stitch tension, stitch length selection, and corner/curve stitching on thicker, multi-layer assemblies
- Leather selection for wearable items — matching hide weight (oz) and temper to the demands of belts (stiffness), wallets (flexibility), and bags (structure)
- Gusset and panel construction: cutting, aligning, and joining multiple leather pieces to create three-dimensional forms like bag bodies and wallet pockets
- Finishing and conditioning: applying dye, antique finish, and leather conditioner to completed projects for durability and aesthetics
- According to Groneman, what leather weight (in ounces) is recommended for belt blanks, and why does temper matter for this application?
- What is skiving, at what stage of construction should it be performed, and which tools does Groneman describe for achieving a consistent taper?
- How does Groneman instruct the reader to set a roller buckle versus a center-bar buckle, and what spacing considerations apply to belt holes?
- What steps does Groneman outline for constructing a gusset on a bag project, and how is the gusset attached to the main panel?
- Which edge-finishing sequence does Groneman recommend — and in what order should beveling, sanding, burnishing, and dyeing be applied?
- How should a wallet's card-pocket panels be prepared and stitched to prevent excessive bulk at the fold, based on Groneman's instructions?
- Draft a full-size paper pattern for a bifold wallet using Groneman's dimensions, then transfer it to a scrap hide and do a dry-fit assembly before cutting your final leather
- Cut a belt blank from 8–9 oz vegetable-tanned leather, practice skiving both ends to a consistent taper, set a center-bar buckle with a Chicago screw or rivet, punch evenly spaced holes, and apply a burnished edge finish end-to-end
- Build the bag project from Groneman step-by-step: cut all panels and gusset, skive seam allowances, saddle-stitch the gusset to the body, and install at least one D-ring or snap closure
- Practice edge finishing on a set of scrap strips: bevel all four edges, sand through two grits, burnish with water and a wood slicker, then apply edge dye — compare results across different leather weights
- Set a complete hardware sampler board: install a line-24 snap, a solid brass rivet, a Chicago screw, and an O-ring attachment on scrap leather, testing each for pull strength before using them on a finished project
- Complete a trifold wallet, focusing on reducing bulk — skive all interior panels, use a wing divider to mark a uniform stitch line, saddle-stitch the pockets, and finish with leather conditioner; photograph each stage to build a reference log
Next up: Mastering pattern drafting, hardware setting, and multi-panel construction on bags, belts, and wallets builds the structural and finishing vocabulary needed to tackle more complex, sculptural, or tooled leather goods in the advanced stage.

Groneman's more project-focused follow-up expands into belts, wallets, and bags, introducing skiving, gussets, and hardware — the construction details that separate beginner from intermediate work.
Advanced Craft: Carving, Tooling & Surface Finishing
ExpertExecute decorative leather carving and tooling, apply professional dye and finish schedules, and understand the design principles that make a hand-crafted piece visually coherent.
▸ Study plan for this stage
Pace: 8–10 weeks total. Week 1–3: "Leather Braiding" by Bruce Grant (~20–25 pages/day), focusing on pattern structure and lace preparation before attempting any braiding. Week 4–10: "How to Carve Leather" by Al Stohlman (~15–20 pages/day), moving slowly and deliberately — pause after each new tool techniq
- Lace cutting, sizing, and preparation as the foundation of quality braiding (Grant) — understanding that surface finish begins before the braid is even started
- Round, flat, and square braid structures and how strand count and tension determine the final texture and visual rhythm of a piece (Grant)
- The importance of leather selection for carving — vegetable-tanned tooling leather, correct moisture level (casing), and grain-side preparation (Stohlman)
- The swivel knife: correct grip, blade angle, and controlled cutting depth as the single most critical carving skill (Stohlman)
- Stamping tool families — bevelers, camouflage, pear shaders, veiners, and backgrounders — and how each shapes the three-dimensional relief of a carved design (Stohlman)
- Design layout principles: transferring patterns, maintaining symmetry, and using flowing line work (e.g., Sheridan-style floral) to create visual coherence (Stohlman)
- Dye and finish sequencing: applying antique finish, resolene, or wax to protect carved and tooled surfaces without flattening the relief (Stohlman)
- Integration of braided elements and carved panels into a single coherent piece — balancing decorative density and negative space (Grant + Stohlman combined)
- According to Grant's 'Leather Braiding,' what are the critical steps in preparing leather lace before braiding begins, and how does lace width affect the final braid's appearance and structural integrity?
- How does Bruce Grant distinguish between the structural logic of round braids versus flat braids, and what practical decisions (strand count, lace thickness) does each require?
- Following Stohlman's instruction in 'How to Carve Leather,' what does it mean to properly 'case' leather, and what happens to the carving quality if the leather is too wet or too dry?
- What is the correct technique for holding and guiding the swivel knife as described by Stohlman, and which common beginner errors does he identify that result in ragged or inconsistent cut lines?
- How does Stohlman recommend sequencing the use of stamping tools (e.g., beveler before shader before backgrounder) to build convincing three-dimensional relief in a floral motif?
- How do the finishing steps described by Stohlman — antique staining, top-coat sealing — interact with the carved surface, and why must finish be applied in a specific order to preserve detail?
- Lace preparation drill (Grant): Cut a consistent set of leather laces in three widths from a single hide scrap, then braid a 6-inch sample of each braid type covered in the book — compare tension, texture, and visual rhythm side by side.
- Swivel knife control sheet (Stohlman): On a cased scrap of vegetable-tanned tooling leather, practice continuous curved lines, tight S-curves, and sharp corner turns for 15–20 minutes per session until lines are clean, consistent in depth, and unbroken.
- Stamp vocabulary sampler (Stohlman): Create a labeled 'stamp map' — a piece of scrap leather where every stamping tool in your kit is struck in a grid, labeled by name and family, so you can see each tool's impression and build muscle memory for selection.
- Full floral panel project (Stohlman): Transfer one of Stohlman's floral patterns onto a 4×6-inch piece of tooling leather, execute the full carving sequence (swivel knife → beveling → shading → backgrounding), then apply a complete antique finish and top coat.
- Integrated design challenge (Grant + Stohlman): Design and execute a small piece (e.g., a bookmark or key fob) that combines a carved and tooled center panel with a braided border or edge lace, requiring you to plan how both decorative systems share the same visual space.
- Finish comparison test (Stohlman): On identically carved scrap pieces, apply three different finish schedules (e.g., antique only; antique + resolene; dye + wax) and document the visual and tactile differences — use this as a personal reference card for future projects.
Next up: Mastering decorative carving, tooling, and surface finishing gives the reader a complete vocabulary of leather surface treatment, setting the stage for the next level of study — construction and structural leatherwork — where these decorative skills must be integrated into functional, assembled objects like bags, holsters, or saddlery.
Grant's encyclopedic treatment of braiding and lacing introduces advanced surface and edge decoration that elevates finished goods beyond plain construction — a canonical advanced reference.

Stohlman's carving manual is the standard text for floral and geometric leather carving, covering casing, swivel-knife technique, and stamp sequencing. Reading it last means you already have the construction skills to put carved panels into finished goods.
Discussion
Keep reading
Paths that share books, cover the same subject, or open a related topic.