Brew your first great beer
This curriculum takes a complete beginner from their very first batch all the way to confident all-grain brewing with disciplined quality control. Each stage builds directly on the last — first establishing core concepts and extract brewing, then transitioning to all-grain, then mastering the science and sensory skills needed to brew with real consistency and quality.
Foundations: How Beer Is Made
BeginnerUnderstand the full brewing process, key ingredients, and successfully complete your first extract batches with confidence.
▸ Study plan for this stage
Pace: 8–10 weeks total: Weeks 1–5 cover "How to Brew" by John J. Palmer (~25–30 pages/day, focusing on Part 1 extract brewing before optionally continuing to all-grain); Weeks 6–10 cover "The Complete Joy of Homebrewing" by Charlie Papazian (~20–25 pages/day, reading recipes and narrative sections alongsi
- The four core ingredients — malt (extract and grain), hops, yeast, and water — and how each shapes flavor, aroma, bitterness, and fermentation (foundational in Palmer Ch. 1–4)
- The end-to-end extract brewing process: steeping specialty grains, boiling wort, hop additions, chilling, pitching yeast, fermenting, and packaging (Palmer Part 1 walkthrough)
- Sanitation as the single most critical variable in homebrewing — why every piece of equipment that touches post-boil wort must be sanitized, and how to use no-rinse sanitizers like Star San (Palmer Ch. 3)
- Hop chemistry basics: alpha acids, IBUs, and the difference between bittering additions (60 min), flavor additions (15–20 min), and aroma/dry-hop additions (0 min or post-fermentation) (Palmer Ch. 5)
- Yeast biology and fermentation: the difference between ale and lager yeasts, fermentation temperature control, lag phase vs. active fermentation vs. conditioning, and signs of healthy vs. stressed yeast (Palmer Ch. 6–7)
- Reading and understanding a recipe: original gravity (OG), final gravity (FG), ABV estimation, SRM color, and IBU targets — and how to use a hydrometer (Palmer Ch. 4 & Papazian throughout)
- Papazian's 'Relax, Don't Worry, Have a Homebrew' philosophy: building confidence, embracing imperfection, and learning iteratively through hands-on brewing rather than over-analysis (Papazian Introduction & throughout)
- Packaging fundamentals: bottle conditioning with priming sugar vs. force carbonation, proper bottle sanitation, and how to recognize over- or under-carbonation (Palmer Ch. 10 & Papazian Ch. 6)
- After reading Palmer Part 1, can you describe every step of an extract brew day in sequence — from equipment prep through pitching yeast — and explain the purpose of each step?
- What role does each of the four ingredients (malt extract, hops, yeast, water) play in the final beer, and how would changing one (e.g., swapping hop variety or yeast strain) affect the outcome?
- Why is sanitation so critical after the boil but less so before it, and what is the correct procedure for using a no-rinse sanitizer according to Palmer?
- How do you take a hydrometer reading, and what do OG and FG tell you about fermentation progress and estimated ABV?
- Looking at any recipe in Papazian's book, can you identify the bittering, flavor, and aroma hop additions and explain the timing logic behind each?
- What are the signs that fermentation is proceeding normally, and what common off-flavors (e.g., acetaldehyde, DMS, oxidation) can result from beginner mistakes — and how does Palmer suggest avoiding them?
- Brew Batch #1 (Weeks 3–4, during Palmer): Follow Palmer's basic extract ale recipe from Part 1 step-by-step. Document every step, time, temperature, and observation in a brew log. Take OG and FG readings with a hydrometer.
- Brew Batch #2 (Weeks 8–9, during Papazian): Choose one of Papazian's beginner recipes (e.g., 'Toad Spit Stout' or 'Goat Scrotum Ale') and brew it using what you've learned. Compare the experience and result to Batch #1 in your brew log.
- Ingredient deep-dive exercise: Visit a homebrew shop (or online retailer) and physically handle/smell at least 3 different hop varieties and 3 different specialty malts. Record your tasting notes and match them to the flavor descriptors in Palmer's ingredient chapters.
- Sanitation drill: Before Batch #1, practice your full sanitation routine on all equipment without actually brewing — time yourself, identify any gaps, and re-read Palmer's sanitation chapter to verify your process.
- Recipe analysis worksheet: Pick any two recipes from Papazian's book and, using Palmer's formulas, calculate the estimated OG, IBUs, and ABV. Compare your estimates to Papazian's stated targets to check your understanding.
- Tasting & off-flavor log: After packaging each batch, taste the beer at 1 week, 2 weeks, and 4 weeks post-packaging. Using Palmer's off-flavor guide, identify any flaws, hypothesize their cause, and write down one process change to address each in your next batch.
Next up: Completing two extract batches and mastering the full process end-to-end builds the practical intuition and ingredient vocabulary needed to confidently step up to all-grain brewing, recipe formulation, and style-specific techniques in the next stage.
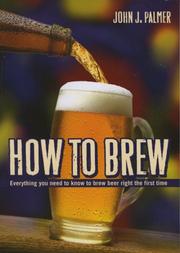
The single best starting point in homebrewing — covers ingredients, process, and equipment from scratch. Reading this first gives you the complete mental map every later book assumes you already have.
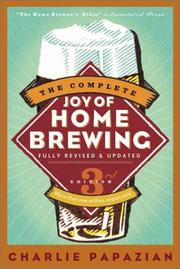
The classic that launched the modern homebrewing movement. Read after Palmer to reinforce concepts with a more relaxed, encouraging tone and a wide range of beginner-friendly recipes that build practical intuition.
The Transition: Extract to All-Grain
BeginnerUnderstand mashing, lautering, and water chemistry well enough to brew your first all-grain batches and troubleshoot them.
▸ Study plan for this stage
Pace: 4–5 weeks, ~20–25 pages/day; read recipe chapters alongside the introductory chapters on process so technique and application are always paired together
- The mash: converting starches to fermentable sugars via enzymatic activity (alpha- and beta-amylase), and how mash temperature (148–158 °F) controls body and fermentability
- Lautering fundamentals: the vorlauf (recirculation) step, sparging methods (batch vs. fly sparge), and how to achieve a clear, efficient runoff without a stuck sparge
- Mash efficiency: understanding pre-boil gravity, calculating and hitting your target efficiency (typically 70–75%), and diagnosing low-efficiency batches
- Water chemistry basics as presented in Brewing Classic Styles: how pH, mineral additions (gypsum, calcium chloride), and water profile affect mash performance and finished beer flavor
- All-grain recipe formulation: reading Zainasheff's recipes to back-calculate grain bills, understand base-to-specialty malt ratios, and scale recipes to your system
- The full all-grain brew day workflow: mash-in, rest, vorlauf, lauter/sparge, pre-boil volume and gravity checks, and how these steps connect to the extract process you already know
- Troubleshooting common all-grain problems: stuck sparge, low pre-boil gravity, astringency from over-sparging, and off-flavors tied to mash pH
- Style-driven process decisions: how Zainasheff tailors mash temperature, water profile, and grain bill to hit specific style targets (e.g., a drier mash for an American Lager vs. a fuller mash for an English Mild)
- What happens chemically during the mash, and why does mash temperature have such a large impact on the body and attenuation of the finished beer?
- Walk through the lautering process step by step — what is the purpose of the vorlauf, and how do you know when it is complete?
- How do you calculate your expected pre-boil volume and gravity, and what adjustments can you make on brew day if you fall short of your targets?
- According to the process guidance in Brewing Classic Styles, what water chemistry adjustments does Zainasheff recommend for a hop-forward style versus a malt-forward style, and why?
- Pick any two recipes from Brewing Classic Styles from different style families — how does the grain bill and mash temperature differ between them, and what does that tell you about the brewer's intent for each beer?
- What are three common all-grain problems you might encounter on your first brew day, and what is the likely cause and fix for each?
- Before brew day, use Zainasheff's grain bills to build a recipe in a free brewing calculator (Brewfather or BrewUnited) — dial in your system's efficiency and confirm your pre-boil and original gravity targets match his numbers.
- Brew one of the simpler all-grain recipes from Brewing Classic Styles (an American Wheat or English Bitter works well) and record mash temperature every 15 minutes, pre-boil gravity, post-boil gravity, and final volume — compare every number to the recipe's targets and write a one-page debrief.
- Perform a iodine (iodophor) starch conversion test at the 30- and 60-minute marks of your mash to visually confirm full conversion, then note how the result correlates with your efficiency.
- Map your tap water against the water profiles implied by two contrasting recipes in the book (e.g., a Bohemian Pilsner and an American IPA) — calculate what mineral additions (gypsum, calcium chloride, lactic acid) would be needed to hit each profile and practice making those additions on your next brew.
- After your first all-grain batch, intentionally brew a second batch of the same recipe but change only the mash temperature by 4–5 °F — taste both side by side and document the difference in body, sweetness, and finish to internalize the mash-temperature lever.
- Build a personal 'brew day checklist' grounded in the all-grain workflow described in Brewing Classic Styles, covering every step from strike water calculation through post-boil chilling, so you have a repeatable process document for future batches.
Next up: Mastering the all-grain process and style-driven recipe reading in Brewing Classic Styles gives you the hands-on foundation and vocabulary needed to tackle more advanced topics — such as yeast management, fermentation control, and ingredient deep-dives — that characterize the next stage of the curriculum.

Bridges extract and all-grain by presenting award-winning recipes in both formats. Working through these recipes teaches you what a well-designed grain bill looks like before you start building your own.
Going Deeper: Ingredients & Recipe Design
IntermediateUnderstand malts, hops, yeast, and water at a level that lets you design original all-grain recipes from scratch with predictable results.
▸ Study plan for this stage
Pace: 10–12 weeks total: Weeks 1–4 on "Designing Great Beers" (~25–30 pages/day, including re-reading data tables and style chapters); Weeks 5–7 on "Yeast" (~20–25 pages/day, pausing to take notes on fermentation science sections); Weeks 8–10 on "Water" (~20 pages/day, working through chemistry chapters s
- Malt bill construction: base malts vs. specialty malts, Lovibond/SRM color contributions, and how grain percentages drive flavor, body, and fermentability (Designing Great Beers)
- Style-based recipe formulation: using historical and statistical style data from Designing Great Beers as a scaffold, then deliberately deviating from it intentionally
- Hop chemistry and usage: alpha acids, IBUs, utilization rates, and the interplay of bittering, flavor, and aroma additions across boil timing and dry-hopping (Designing Great Beers)
- Yeast biology fundamentals: cell structure, reproduction, and the metabolic pathways that produce ethanol, CO₂, esters, fusel alcohols, and other flavor-active compounds (Yeast)
- Yeast health management: pitching rate calculations, starter construction, fermentation temperature control, and how each variable shifts the final flavor profile (Yeast)
- Water chemistry essentials: the six major ions (calcium, magnesium, sodium, chloride, sulfate, bicarbonate), their individual flavor and process effects, and how to read a water report (Water)
- Mash pH and alkalinity: how bicarbonate and residual alkalinity interact with grain bill acidity, and how to adjust pH with acids or salts to hit the 5.2–5.4 target range (Water)
- Brewing liquor profiles: replicating classic regional water profiles (Burton, Pilsen, Dublin) and building a custom profile matched to a target beer style using mineral additions (Water)
- Given a target style from Designing Great Beers, how would you construct a grain bill — selecting base malt(s), choosing appropriate specialty malts, and estimating the resulting OG, color, and body?
- Using the IBU formulas and hop utilization data in Designing Great Beers, how do you calculate a hopping schedule that achieves a target BU:GU ratio for a chosen style?
- According to Yeast, what are the key differences between ale and lager yeast metabolism, and how do pitching rate, temperature, and oxygen level each influence ester and fusel production?
- How do you build a yeast starter using the cell-count and growth models described in Yeast, and how does the starter size change based on original gravity and batch volume?
- What roles do sulfate and chloride play in finished beer flavor according to Water, and how would you adjust their ratio to emphasize hop bitterness versus malt softness?
- Using the residual alkalinity concept from Water, how would you treat a high-bicarbonate tap water source to brew a pale lager, and what mineral additions or acid treatments would you use?
- Style dissection drill (Designing Great Beers): Pick three styles from different families (e.g., an English bitter, an American stout, a German Hefeweizen). For each, use the book's statistical tables to define your target OG, FG, IBU, SRM, and ABV ranges, then write a complete grain bill and hop schedule on paper before brewing anything.
- Recipe clone-then-twist (Designing Great Beers): Find a commercial beer you know well, reverse-engineer a plausible recipe using the book's style data and ingredient chapters, brew it, then deliberately change one variable (e.g., swap base malt, shift hop timing) and brew it again — compare tasting notes.
- Yeast starter lab (Yeast): For your next three brew sessions, calculate the required pitch rate using the formulas in Yeast, build appropriately sized starters, and log cell counts (via a hemocytometer or estimation), fermentation temperature, and the resulting flavor profile to build a personal reference table.
- Fermentation temperature experiment (Yeast): Brew a single neutral base beer (e.g., American Pale Ale) and split it into two fermenters pitched with the same yeast and rate, but ferment one 4–5 °F higher than the other. Taste side-by-side and document ester/fusel differences as predicted by Yeast.
- Water report analysis (Water): Obtain your local tap water report and your homebrew shop's RO/distilled water spec. Using the ion math from Water, calculate the mineral additions needed to hit three different classic profiles from the book (e.g., Pilsen-like, Burton-like, balanced Dublin-like) for a 5-gallon batch.
- Full from-scratch recipe design brew (all three books): Design a completely original all-grain recipe — define the style target (Designing Great Beers), calculate and build a yeast starter (Yeast), and formulate a water profile with mineral additions (Water). Brew it, record every measurable variable, and write a one-page post-brew analysis comparing predicted vs. actual OG, FG, IBU, SRM, pH, and
Next up: Mastering ingredients and recipe design here gives you a stable, repeatable base recipe as a control, which is the essential foundation for the next stage's focus on process refinement, troubleshooting off-flavors, and advanced techniques — because you can only isolate process variables once your ingredient decisions are deliberate and consistent.
A data-driven deep dive into how commercial and competition-winning beers are actually built. Reading this after your first all-grain batches lets you apply real numbers and style analysis to your own recipe design.

Yeast health is the single biggest variable in beer quality. This book gives you the science of fermentation, pitching rates, starters, and strain selection — essential knowledge before moving into quality control.

Water chemistry is the last major ingredient most brewers tackle. Read here, after mastering grain and yeast, to understand how to profile and adjust your water to match any beer style.
Quality Control & Brewing Science
ExpertApply professional-level process control, sensory analysis, and troubleshooting to consistently produce high-quality beer at home.
▸ Study plan for this stage
Pace: 8–10 weeks total: Weeks 1–5 cover "Brewing Better Beer" by Gordon Strong (~25–30 pages/day, reading actively with brew-session notes); Weeks 6–10 cover "Tasting Beer" by Randy Mosher (~20–25 pages/day, pairing each chapter with deliberate tasting sessions). Overlap the two books in Week 5 to connect
- Process control and recipe formulation discipline: Strong's framework for treating every variable — water chemistry, mash parameters, yeast health, fermentation temperature — as a lever to pull deliberately rather than accidentally
- Systematic recipe development and iteration: Strong's method of brewing to a mental model, documenting deviations, and making single-variable changes between batches to isolate cause and effect
- Yeast management at an advanced level: pitching rate calculation, starter preparation, harvesting and repitching, and recognizing when a yeast culture has drifted or become contaminated
- Water chemistry mastery: understanding residual alkalinity, sulfate-to-chloride ratio, and how to build water profiles from scratch using Strong's practical mineral-addition approach
- Sensory vocabulary and the language of beer: Mosher's structured flavor wheel framework, the distinction between aroma, flavor, mouthfeel, and finish, and how to articulate perceptions precisely
- Off-flavor identification and root-cause analysis: using Mosher's sensory descriptions alongside Strong's process knowledge to trace defects (DMS, diacetyl, acetaldehyde, oxidation, phenolics) back to specific process failures
- Structured tasting methodology: Mosher's approach to blind triangle tests, flight organization, and building an unbiased palate through repeated, deliberate practice
- Style mastery and judge-level evaluation: integrating Strong's brewing precision with Mosher's style-history context to brew beers that are both technically correct and sensorially compelling
- After reading Strong, can you describe your complete process-control checklist — from water build to packaging — and identify the three variables you currently control least reliably, and why?
- Strong emphasizes brewing to a 'mental model' before touching ingredients. How would you articulate your mental model for a style you brew regularly, and how does each ingredient decision serve that model?
- Using Strong's troubleshooting logic, trace a batch with persistent diacetyl through every possible process cause (underpitching, cold crash timing, yeast health) and propose a corrective action for each.
- Mosher describes flavor perception as layered and time-dependent. How do aroma, initial taste, mid-palate, and finish differ in the evaluation of a malt-forward amber ale versus a dry-hopped IPA?
- Can you name and describe at least eight common off-flavors from Mosher's sensory framework, state their threshold concentrations (low/medium/high impact), and link each to at least one specific process failure Strong addresses?
- How would you design a three-beer blind tasting flight to evaluate whether a process change (e.g., switching yeast strains) produced a perceptible and desirable difference, using Mosher's triangle-test principles?
- 'Single-variable brew series' (Strong-inspired): Brew the same base recipe three times back-to-back, changing only one variable per batch (e.g., mash temperature: 149°F / 154°F / 158°F). Document gravity, attenuation, and flavor outcomes in a dedicated log, then write a one-page analysis of what changed and why.
- Water chemistry rebuild exercise: Take a recipe you have brewed before, pull your municipal water report, and use Strong's mineral-addition framework to build three distinct water profiles for it (malt-forward, balanced, hop-forward). Brew one version and compare it against your previous batch tasting notes.
- Yeast health audit: On your next brew day, calculate your required pitching rate using Strong's guidelines, make a starter, measure and record actual cell counts (via krausen timing or a hemocytometer if available), and write a post-fermentation report on attenuation and flavor cleanliness versus your prediction.
- Off-flavor calibration tasting: Purchase a commercial off-flavor kit (e.g., FlavorActiV or Siebel) or spike known compounds (diacetyl from butter extract, DMS from cooked corn, acetaldehyde from green apple flavoring) into a neutral lager at threshold and supra-threshold levels. Use Mosher's descriptors to document what you perceive, then compare to the reference descriptions.
- Structured style evaluation journal: Over four weeks, taste one commercial example of four different BJCP styles per week (16 beers total). For each, write a Mosher-style tasting note covering appearance, aroma, flavor, mouthfeel, and overall impression — then score it as a BJCP judge would and compare your notes to published style guidelines.
- Blind triangle test with a brewing partner: Prepare two kegs or bottles of the same style — one your own brew, one a respected commercial example. Have a partner pour three blind samples (two of one, one of the other). Identify the odd sample, then write a full comparative sensory analysis using Mosher's vocabulary to articulate exactly where and how they differ.
Next up: Mastering process control through Strong and building a calibrated sensory vocabulary through Mosher equips the brewer to move beyond correcting mistakes into intentional innovation — the precise foundation needed to explore advanced ingredient science, experimental adjuncts, and style-boundary pushing in any subsequent stage focused on creative recipe design or specialty brewing.

Written by a Grand Master BJCP judge, this book focuses entirely on refining process and palate to close the gap between good and great. It synthesizes everything from prior stages into a quality-first mindset.
Formal sensory evaluation is the feedback loop that makes quality control real. This book trains your palate to identify off-flavors, assess balance, and judge your own beer with the same rigor used in professional settings.
Discussion
Keep reading
Paths that share books, cover the same subject, or open a related topic.